


























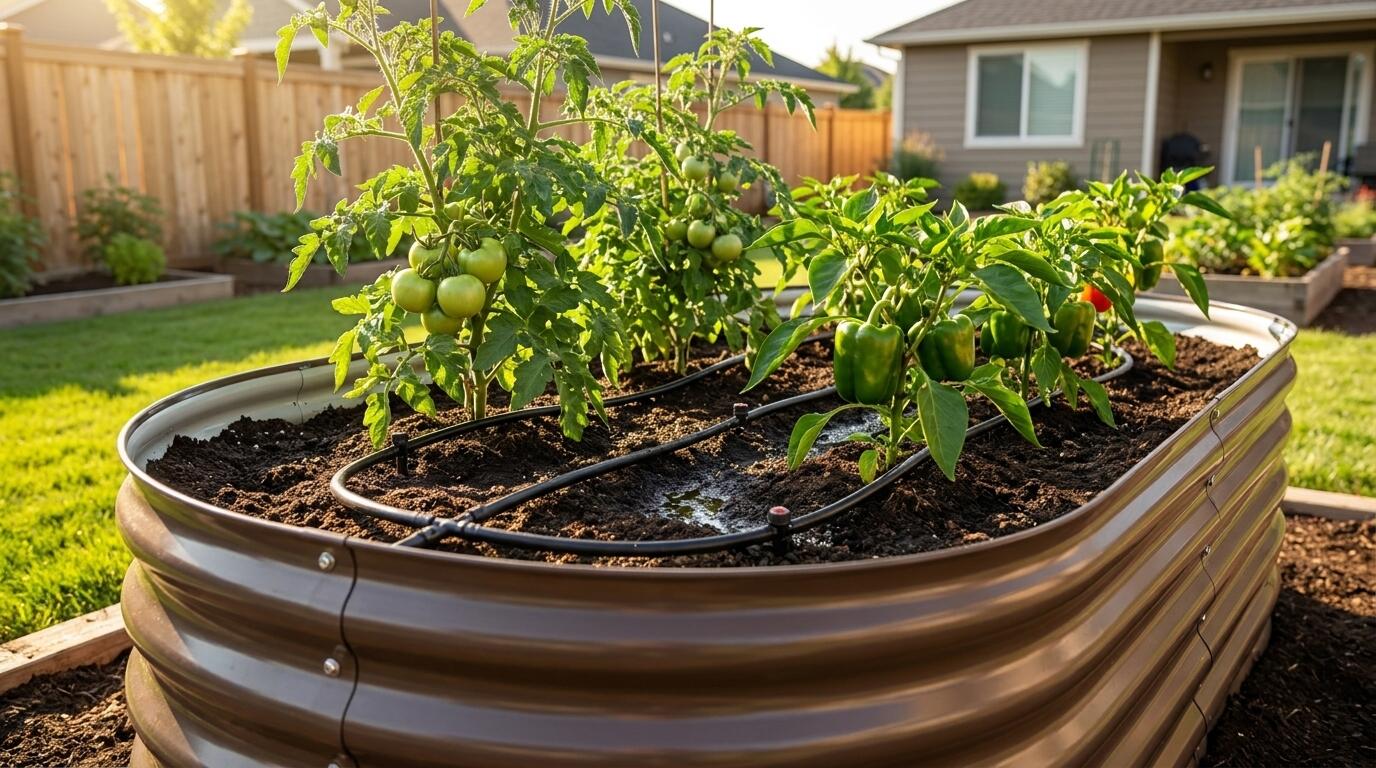
ALT: Drip irrigation system installed in a galvanized steel raised garden bed for efficient watering
Choose the Best Drip Irrigation System for Your Raised Garden Beds
A well-chosen drip irrigation system is the difference between a thriving raised bed garden and one that demands constant attention. Drip irrigation — a method that delivers water slowly and directly to plant root zones through a network of tubing and emitters — has become the go-to watering approach for home gardeners who want consistent results without wasted effort or wasted water. Whether you are fine-tuning a raised bed planting layout for the first time or expanding an established raised bed garden layout across your backyard, selecting the right system this season will save you time, conserve water, and give your plants a measurable advantage.
This guide is written for home gardeners at every experience level: the weekend grower setting up their first bed, the eco-conscious household looking to reduce water waste, the retiree who wants a low-maintenance garden that keeps producing, and the urban micro-gardener working with limited space but high ambitions. By the end, you will know exactly what to look for, how to set a system up step by step, and how to avoid the mistakes that trip up even experienced growers.
Before You Start: Prerequisites and Preparation for Your Raised Bed Irrigation Setup
Before purchasing a single length of tubing, take stock of what your raised bed garden layout actually requires. Rushing into a purchase without this groundwork is the single most common reason growers end up with systems that under-water one bed and flood another.
The preparation phase covers four areas: understanding your garden footprint, assessing your water source, choosing compatible materials, and gathering basic tools.
Understanding your garden footprint
Map out your raised bed layout on paper or a simple phone note. Record the number of beds, their dimensions, the spacing between them, and which crops will grow in each. Different plants have very different water needs — tomatoes and squash are thirsty, while herbs and root vegetables prefer drier conditions. A clear raised bed planting layout map lets you plan separate irrigation zones rather than running one uniform system across incompatible crops.
Assessing your water source
Know your household water pressure before buying anything. Most home drip systems are designed for standard residential pressure, but very high pressure can blow emitters off tubing, and very low pressure will starve drip lines. A basic pressure gauge (available at any hardware store) attached to your outdoor spigot gives you a reliable reading in minutes.
Choosing compatible materials
Not all drip components are universal. Confirm that the tubing diameter, emitter type, and fittings you select are from the same system family, or are explicitly rated as compatible. Mixing brands carelessly is a common source of leaks.
Gathering tools and materials
- A pressure gauge for your outdoor spigot
- Measuring tape to map tubing runs accurately
- A hole punch tool specific to your tubing diameter (typically included in starter kits)
- Garden stakes or clips to secure tubing inside the bed
- A timer or smart controller (strongly recommended for hands-free operation)
- A filter/pressure regulator assembly to protect emitters
- Your completed raised bed layout map
Time investment: expect to spend a focused afternoon on planning and purchasing, and another half-day on installation. The setup is straightforward once your layout is clear.
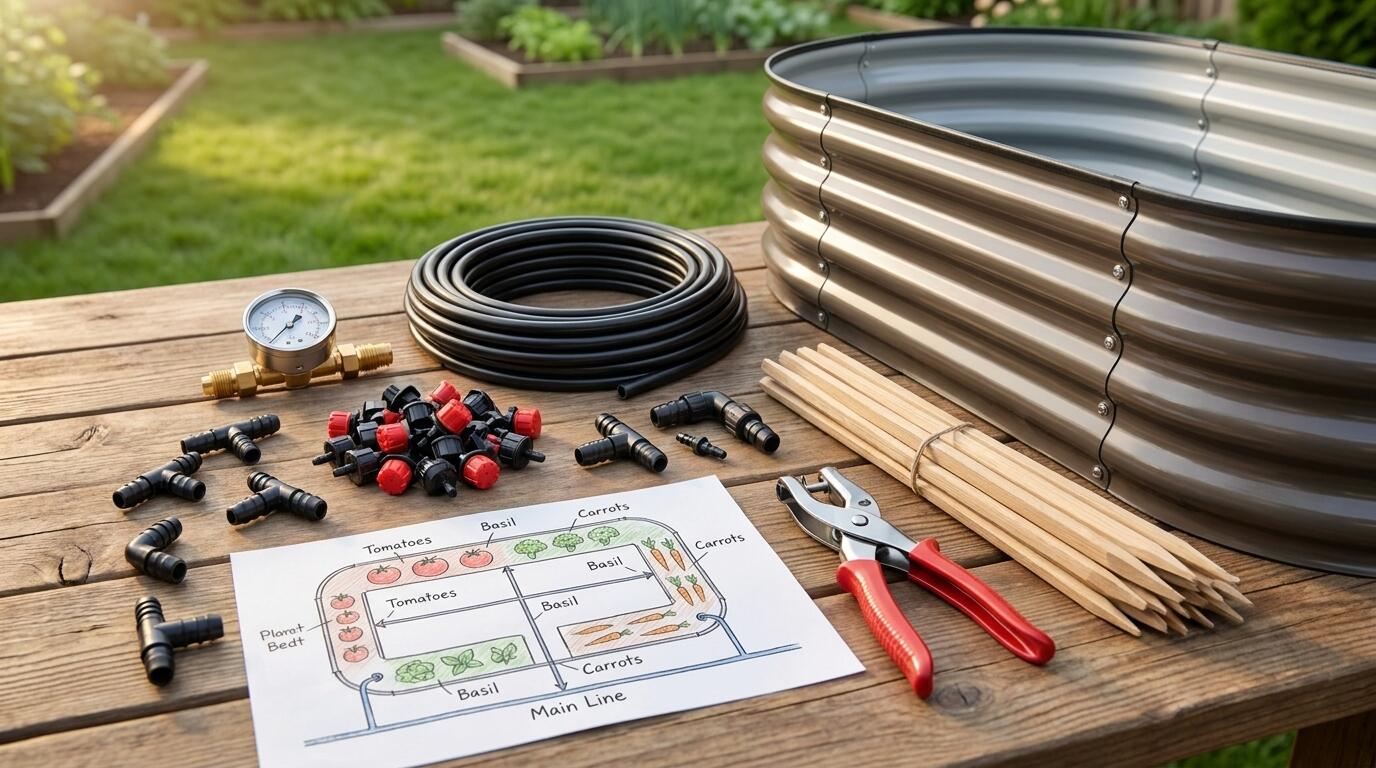
ALT: Pressure gauge, tubing, emitters, and layout map ready for raised bed garden irrigation planning and installation
Step-by-Step Guide to Choosing and Installing a Drip Irrigation System for Raised Beds
Step 1: Map Your Raised Bed Garden Layout and Define Irrigation Zones
Start by drawing a scaled map of your raised bed garden layout — mark every bed's length, width, and what you plan to grow in it. Group beds by water need: high-demand crops (tomatoes, peppers, cucumbers) in one zone, moderate-demand crops (lettuce, chard, beans) in another, and low-demand herbs or root vegetables in a third. This zoning approach is the foundation of an efficient drip system and prevents the chronic problem of overwatering drought-tolerant plants while underwatering thirsty ones.
This step also determines how many independent lines or valves you need. If all your beds have similar crops, a single zone may suffice. Mixed raised bed planting layouts almost always benefit from at least two zones.
Tip: Mark your map with estimated watering frequency per zone (e.g., daily in summer heat, every other day in spring). This information directly informs your timer settings later.
Step 2: Choose the Right Drip System Type for Your Bed Style and Soil System
Three drip system types suit raised bed gardening most reliably: inline drip tape, point-source emitter tubing, and soaker hose. Each has a different delivery pattern, and matching the system to your raised bed layout and soil system matters enormously.
Inline drip tape features pre-installed emitters at fixed intervals along flat, collapsible tubing. It is ideal for row crops in rectangular beds and works well with a dense raised bed planting layout where plants are spaced regularly. It lies flat, is easy to remove at season's end, and resists clogging.
Point-source emitter tubing uses half-inch main line tubing with quarter-inch spaghetti lines and individual drip emitters placed exactly where each plant sits. This is the most flexible option for irregular raised bed layouts with mixed plantings or containers — you can route an emitter directly to the base of each tomato plant, pepper, or squash without wetting the surrounding soil.
Soaker hose is a porous rubber or recycled-material hose that weeps water along its entire length. It works well in densely planted beds but is less precise than the other two options and can be harder to manage over distance.
For most home growers with a standard raised bed garden layout, point-source emitter systems offer the best balance of precision, flexibility, and ease of adjustment.
Tip: Match your emitter flow rate to your soil composition. Sandy soils drain quickly and benefit from higher-flow emitters or more frequent short cycles; clay-heavy soils need slower flow to prevent surface puddling. According to the U.S. Department of Agriculture's Natural Resources Conservation Service, matching irrigation delivery rate to soil infiltration rate is a key principle of efficient drip design.
Step 3: Calculate Flow Requirements Based on Bed Dimensions and Plant Density
Before purchasing tubing and emitters, calculate how much water each zone actually needs. Overbuying emitter capacity wastes water and can leach nutrients out of your soil system; underbuying leads to dry spots and stressed plants.
A practical method: count the number of plants per bed, estimate their daily water need by category (deep-rooted fruiting crops need more; shallow leafy greens need less), and work backward to the total flow your system must deliver per watering session.
Most residential drip emitters are rated in gallons per hour (GPH). Common options are 0.5 GPH, 1 GPH, and 2 GPH. A single tomato plant in a well-draining soil system typically does well with a 1 GPH emitter running for 30 to 60 minutes daily in peak summer — but always adjust based on observation, not assumption.
Also account for the total length of your tubing runs. Longer runs lose pressure along their length; if your raised bed layout spans a significant distance from the water source, you may need a larger-diameter main line or a pressure booster.
Tip: Keep each drip zone under the maximum flow rating printed on your pressure regulator. Running over capacity degrades emitter performance across the entire line.
Step 4: Select a Pressure Regulator and Filter Assembly
A pressure regulator is a small inline device that reduces your household water pressure to the range drip systems operate in — typically 20 to 30 PSI. A filter (usually 150-mesh or finer) removes sediment that would clog emitters over time. Both pieces are non-negotiable for a drip system that lasts more than a season.
Skip the regulator and you risk blowing emitters off their fittings or cracking micro-tubing. Skip the filter and your emitters will clog within weeks, especially if your water supply has any mineral content. Most starter kits bundle a regulator and filter together at the head of the system — this is a good sign that the kit is designed by people who understand how drip irrigation actually behaves in the field.
Install the filter and regulator at the point where your main line connects to the spigot or timer. This protects the entire downstream system with a single assembly.
Tip: Check and clean your filter at the start of each growing season. A partially blocked filter mimics low water pressure and causes puzzling dry spots in otherwise well-designed raised bed layouts.
Step 5: Install the Main Line and Lay Out Tubing in Your Raised Beds
With your zone map finalized and components selected, begin physical installation. Run your half-inch main supply line from the water source to each bed along the most direct path, securing it with ground stakes every few feet to prevent movement.
At each bed, transition from the main line to the distribution tubing appropriate for your system type. For point-source emitter setups, punch holes in the main line at the entry points for each quarter-inch feeder line, insert the barbed connectors firmly, and route a spaghetti line to each planting spot. Press emitters into the line ends and stake them at the base of each plant.
For inline drip tape, run parallel strips along each planting row, spacing them according to your raised bed planting layout — typically one strip per row or one strip between every two close rows.
Keep all tubing inside the bed's walls rather than routing it over the side, which creates stress points that crack over time. A bed with tall sidewalls — like the range of extra-tall options in the Anleolife lineup — actually makes tubing management easier because there is ample interior depth to secure lines out of the way.
Tip: Leave a small service loop of extra tubing at each emitter connection point. This slack prevents tension from pulling emitters loose when you move plants or work the soil.
Step 6: Connect a Timer and Test the System
A timer is the element that transforms a drip system from a useful tool into a truly hands-free watering solution. A basic mechanical timer costs very little and handles simple daily schedules. A programmable digital timer allows multiple watering windows per day — useful in hot climates where one long session can stress shallow roots. Smart Wi-Fi controllers integrate with weather data and adjust schedules automatically based on rainfall and temperature forecasts.
Connect the timer between the spigot and your regulator/filter assembly. Program it based on the zone requirements from your Step 1 map. Then run the system for a full cycle while you walk the beds, checking each emitter for flow and looking for unexpected puddles or dry spots.
According to the U.S. Environmental Protection Agency's WaterSense program, drip irrigation combined with a timer can use significantly less water than conventional overhead sprinklers for the same garden size — making this upgrade one of the highest-impact water conservation steps a home gardener can take.
Tip: Run your first test cycle in the morning so any slow leaks dry by afternoon, making them easy to spot as damp patches during an evening walkthrough.
Step 7: Pair Your Irrigation System with a Compatible Raised Bed
The irrigation system and the raised bed it serves are interdependent — bed material, wall height, and drainage characteristics all affect how a drip system performs. In our work guiding home gardeners toward long-lasting setups, a pattern we consistently see is that growers who invest in a well-built metal raised bed get far more consistent watering results than those using degrading wood frames, because the stable wall geometry keeps tubing secured season after season.
Galvanized steel raised garden beds from Anleolife are built to last up to 20 years, which means any drip infrastructure you run inside them — tubing clips, emitter stakes, and supply line entry points — can be treated as semi-permanent installations rather than temporary season setups. The range spans practical everyday heights through waist-high options, including the 35-inch waist-high 4x1.5 ft model and the 24-inch extra-tall and 30-inch extra-tall series, giving growers the sidewall depth to route and secure tubing cleanly.
For growers managing multiple beds across a larger raised bed garden layout, the modular raised garden bed line makes expansion straightforward — you can add beds and extend drip lines on the same main supply without replanning from scratch.
Tip: When installing drip infrastructure in a new bed, do it before filling the bed with soil. Routing lines through an empty frame is far easier, and you can stake emitters at precise plant spacing before any plants are in the ground.
Common Mistakes and Troubleshooting in Raised Bed Drip Irrigation
| Symptom | Likely Cause | How to Fix |
|---|---|---|
| Dry spots in parts of the bed despite system running | Clogged emitters or inadequate emitter placement for that zone's raised bed planting layout | Flush or replace clogged emitters; add additional emitters to dry zones |
| Puddles forming at the surface | Emitter flow rate exceeds soil infiltration speed | Switch to lower-flow emitters or shorten session duration while increasing frequency |
| Pressure loss across the line — distant emitters drip very slowly | Main line too narrow for total run length, or filter is partially clogged | Upgrade to a larger diameter main line or clean/replace the filter |
| Tubing keeps pulling loose from fittings | Household pressure is above the regulator's rated input; or barbed fittings were not fully seated | Verify and replace the pressure regulator; re-seat fittings with a firm push-and-twist |
| System runs but no water reaches plants | Timer battery dead or timer not programmed correctly | Replace battery; recheck timer programming; run a manual override to confirm flow |
| Emitters drip unevenly after winter storage | Mineral deposits from hard water have partially blocked emitter heads | Soak emitters in diluted white vinegar overnight; flush before reinstalling |
Pro Tips for Better Results with Drip Irrigation and Raised Bed Gardening
Zone by plant family, not by bed location. A common beginner mistake is designing one irrigation zone per physical bed. A more effective approach is to zone by crop water need across all beds — grouping all your fruiting crops on one valve and all your greens on another, regardless of which beds they occupy. This requires a bit more tubing planning but results in dramatically more efficient watering.
Mulch the soil surface inside every bed. A two- to three-inch layer of straw, wood chips, or compost mulch over your drip lines dramatically reduces evaporation from the soil surface. This means your drip system's work lasts longer between cycles, and the soil system beneath stays consistently moist without overwatering. According to the University of California Cooperative Extension, mulching in combination with drip irrigation is among the most effective techniques for reducing garden water use.
Flush your main lines at the start and end of every season. Sediment, algae, and mineral deposits accumulate over a season inside even filtered systems. Disconnecting your end caps and running the system for 30 to 60 seconds before reconnecting is a quick practice that extends component life and keeps flow rates consistent.
Plan for seasonal removal in cold climates. If your garden experiences hard freezes, drip tape and micro-tubing should be drained, removed, and stored indoors over winter. Water left in lines freezes, expands, and cracks fittings. Metal raised beds, including galvanized steel options from Anleolife, handle freeze-thaw cycles well — but plastic drip components do not.
A common misconception to address: Many growers believe drip irrigation eliminates the need to monitor plants for stress. In reality, drip systems require seasonal recalibration. As plants grow from seedlings to mature specimens, their water demand changes substantially. A timer setting that was ideal in early spring will underperform by midsummer. Regular observation and schedule adjustment are just as important as the initial setup.
Frequently Asked Questions FAQ
Q1: How do I know how many emitters to use for my raised bed garden layout?
The number of emitters depends on the number of plants, their spacing, and their individual water needs. A practical rule is to place one emitter per plant for large-fruiting crops like tomatoes and peppers, and one emitter per every two to three plants for densely spaced greens or herbs. Refer to your raised bed planting layout map and the emitter's GPH rating against your estimated daily water need per plant — then test and adjust during the first week of operation.
Q2: Is drip irrigation better than overhead watering for raised bed gardening?
Drip irrigation is generally superior for raised bed gardening for several reasons. It delivers water directly to the root zone, minimizing evaporation and keeping foliage dry — wet leaves invite fungal diseases like powdery mildew. It also allows precise control per zone, which matters when a single raised bed layout includes plants with different water needs. The U.S. EPA's WaterSense program recognizes drip systems as significantly more efficient than overhead sprinklers for targeted garden applications.
Q3: How long does a drip irrigation system last in a raised bed setup?
With proper seasonal maintenance — including filter cleaning, end-of-season flushing, and cold-climate winter storage of plastic components — a quality drip system can perform reliably for many growing seasons. The longevity of the system also depends on the bed it serves: a durable galvanized steel raised bed engineered for a 20-year lifespan gives your drip infrastructure a stable, permanent home rather than requiring reinstallation as a wooden frame degrades.
The Bottom Line
Choosing and installing the right drip irrigation system for your raised bed garden layout is one of the highest-return investments you can make in your garden this season. Here are the core takeaways:
- Map your raised bed layout and group plants by water need before purchasing any components — zoning is the foundation of efficiency.
- Match your system type (inline tape, point-source emitters, or soaker hose) to your raised bed planting layout and crop mix for best results.
- Always install a pressure regulator and filter at the head of the system to protect emitters and extend system life.
- Pair your drip system with a timer — even a basic mechanical model dramatically reduces maintenance time and improves consistency.
- A durable, long-lived raised bed is the best platform for a permanent drip setup; beds built to last give your irrigation infrastructure a stable home season after season.
The next step is simple: draw your raised bed layout map today, note the crops and their water needs, and use that map as your shopping guide. Once you have a clear plan in hand, selecting compatible drip components is straightforward.
Ready to build the raised bed foundation your drip system deserves? Explore the full range of galvanized steel and rust-resistant raised garden beds at Anleolife — available on Amazon, Walmart, Home Depot, Lowe's, and Wayfair, with delivery in 3–8 business days from warehouse locations across California, Texas, Florida, New York, Illinois, and Washington. Whether you are starting with a single bed or building out a complete planting-and-raising ecosystem, Anleolife grows with you every step of the way.
Sources & Further Reading
- U.S. Environmental Protection Agency. "WaterSense: Drip Irrigation."
https://www.epa.gov - U.S. Department of Agriculture, Natural Resources Conservation Service. "Irrigation Water Management."
https://www.nrcs.usda.gov - University of California Agriculture and Natural Resources (UC ANR). "Drip Irrigation for Home Gardens."
https://ucanr.edu
Note: Standards and guidelines may be updated; please check the latest official documents or consult professional advisors.








