


























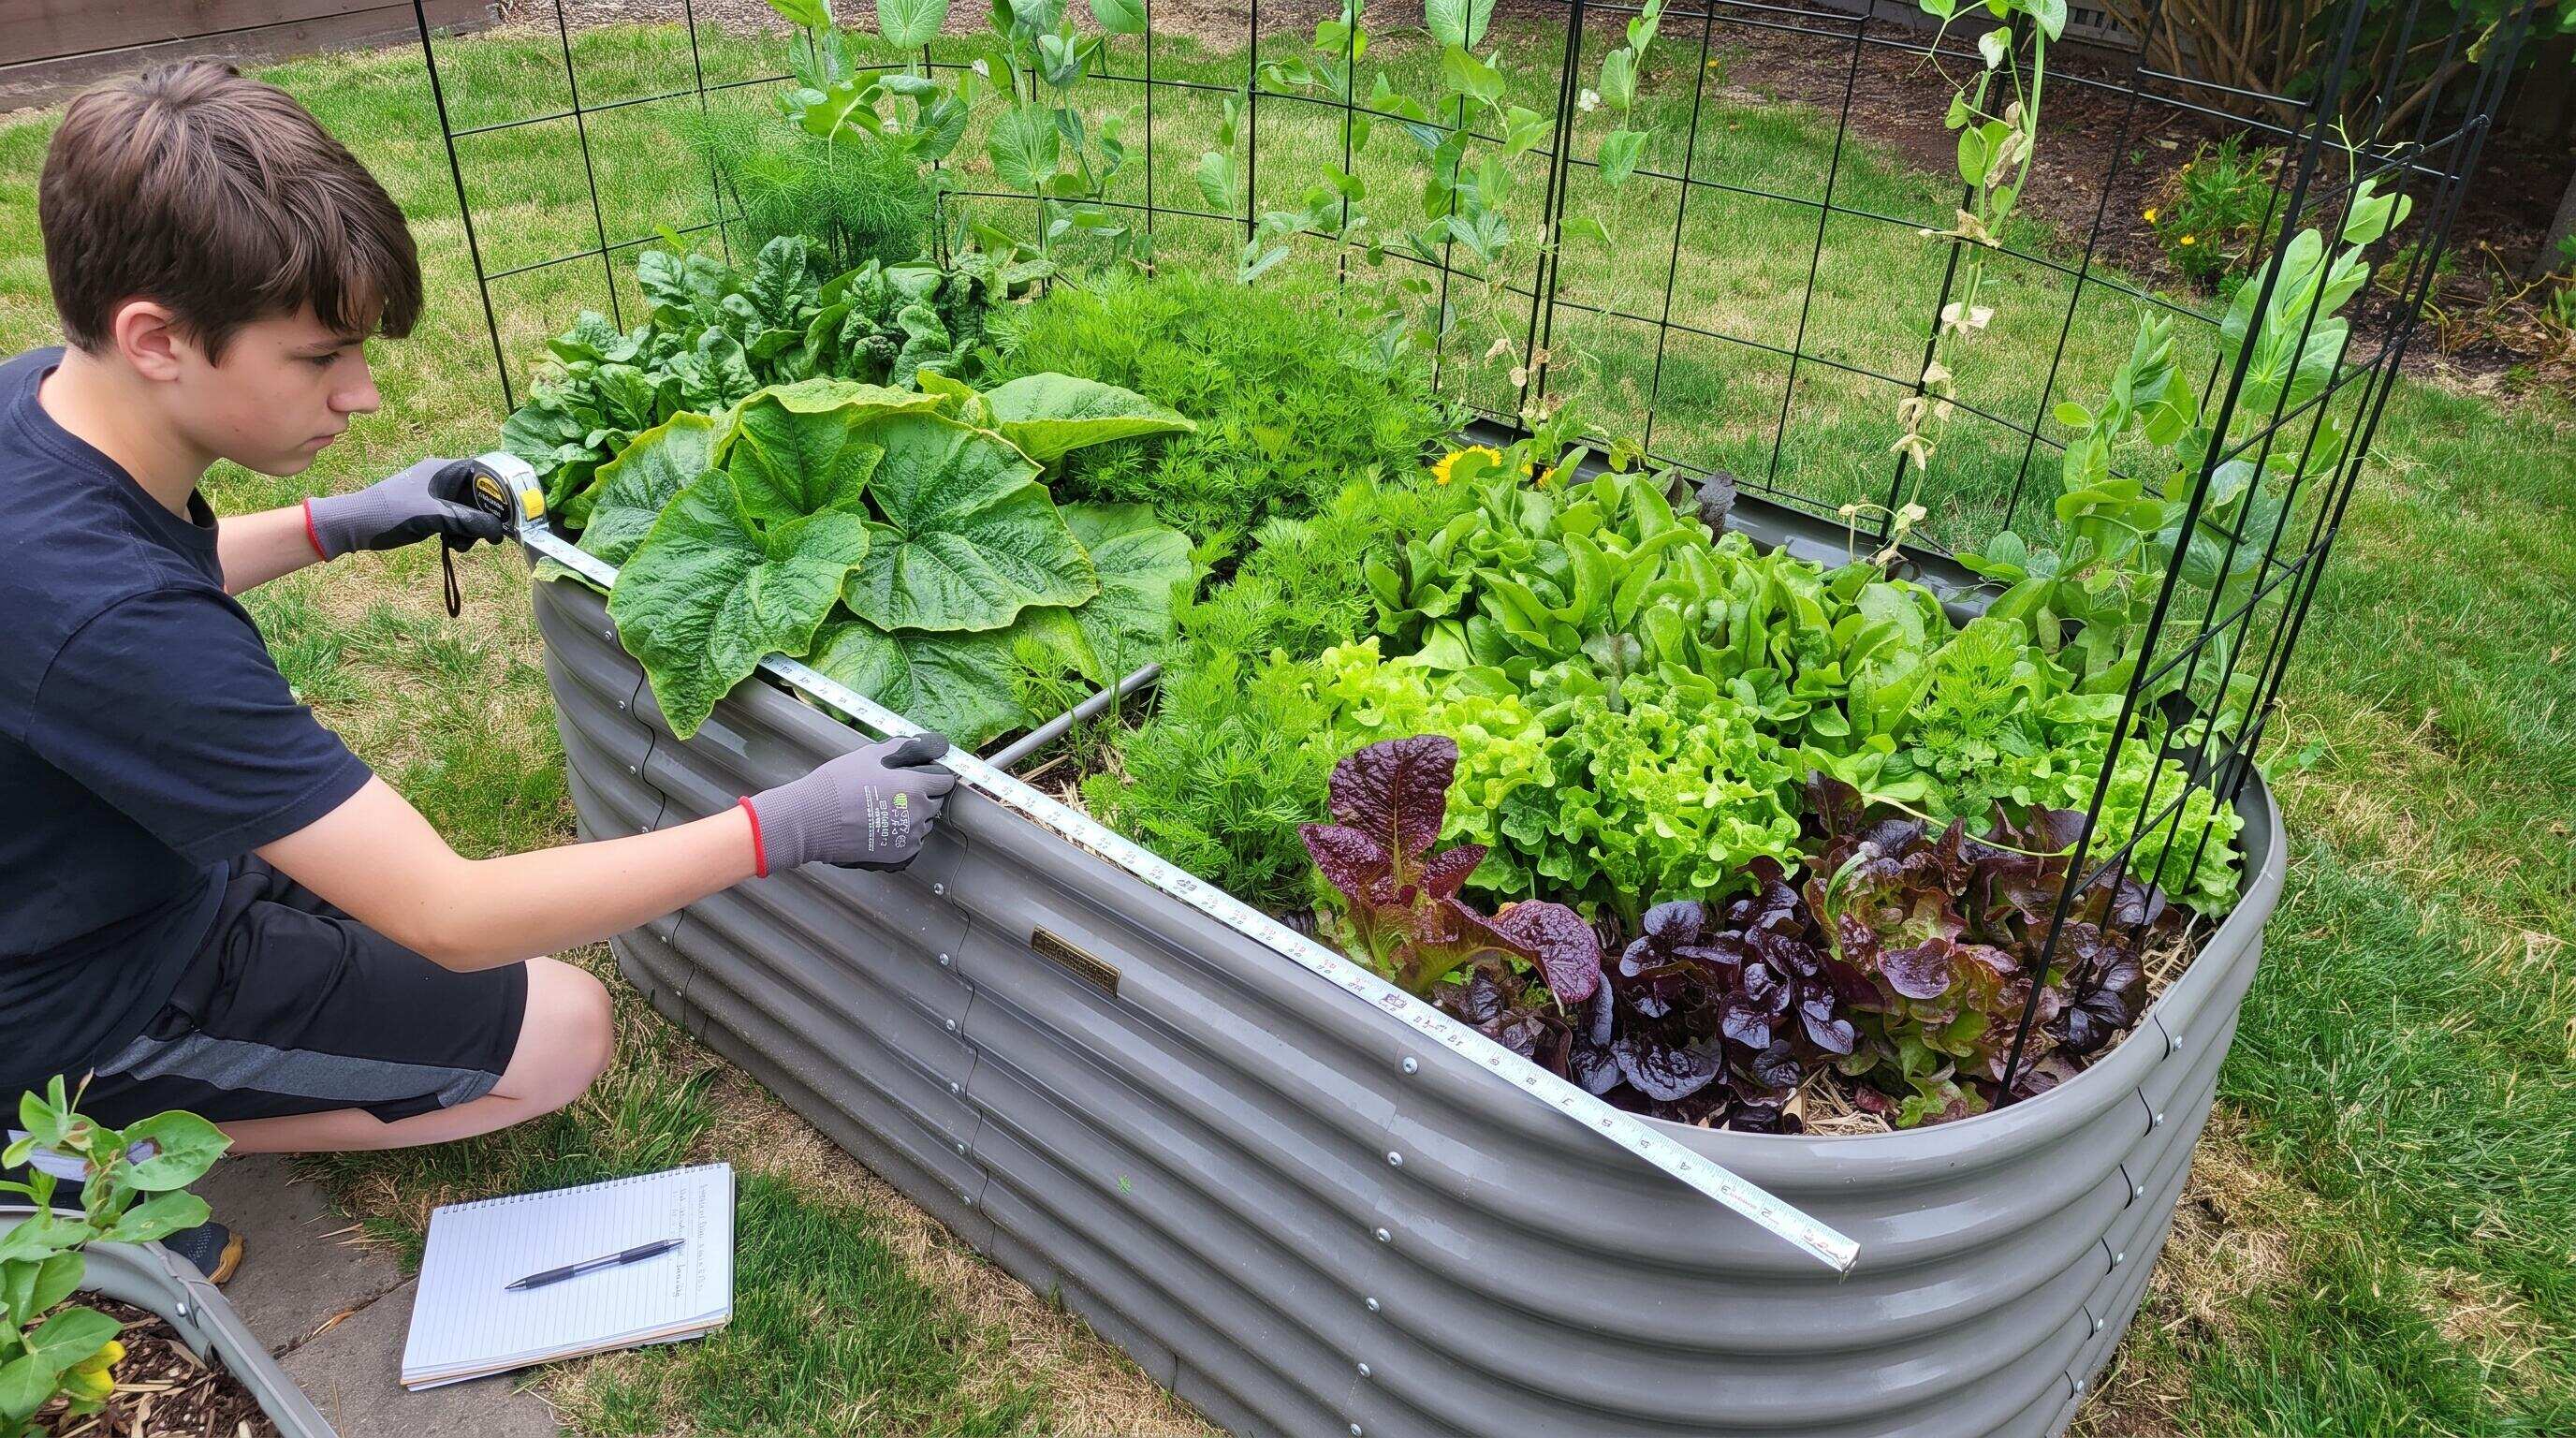
ALT: First-time buyer measuring raised garden bed kit size for optimal raised bed garden layout
How to Choose the Right Raised Garden Bed Size: Your Complete Raised Bed Layout Guide
Getting the sizing right the first time is one of the most consequential decisions a new raised bed gardener can make — and it's also one of the most frequently misjudged. Whether you're planning a compact patio setup or mapping out a full backyard kitchen garden, your raised bed planting layout will determine not just what you can grow, but how comfortably and successfully you can manage it season after season.
This guide is written specifically for first-time buyers who want to avoid costly sizing mistakes before they place a single order. If you've been scrolling through product pages feeling overwhelmed by all the dimensions, depths, and configuration options, this is the resource that will bring clarity. We'll walk you through how to assess your space, match bed dimensions to your goals, and build a raised bed layout that works with you rather than against you.
Before You Start: What to Prepare Before Sizing Your Raised Bed Garden Layout
Sizing a raised garden bed kit is not something you should do from your couch with a rough mental estimate. Proper preparation before you measure, plan, and purchase will save you from expensive mistakes — including beds that don't fit, configurations that block sunlight, or depths that are too shallow for what you want to grow.
Here's what to have ready before you begin.
Know your outdoor space. Walk your intended garden area and take measurements. Note the total square footage available, but also observe the shape — is it a rectangle, an irregular patch along a fence, or a small corner nook? Account for permanent fixtures like water spigots, pathways you need to keep clear, and any structures that might cast shade.
Assess your sunlight. A raised bed garden layout that's perfectly sized but positioned in the wrong spot will underperform regardless of your soil system. Most vegetables need a minimum of six hours of direct sun daily. Identify the sunniest zones in your yard before deciding where beds will go.
Think about water access. How close is your nearest outdoor spigot or hose bib? Beds placed far from a water source become a maintenance burden quickly, especially in summer.
Understand your physical reach. A raised bed is only ergonomically practical if you can reach its center from either side without stepping in. This is not a minor point — in our work advising home gardeners, awkward reach distances are among the most common reasons people stop enjoying their beds after the first season.
Decide on your primary growing goals. Are you growing salad greens for two people, or trying to produce enough tomatoes and squash to stock a pantry? Your goals directly influence how many beds you need and how deep they should be.
Checklist before you start:
- Outdoor area measurements taken (length, width)
- Sunlight hours per zone identified (minimum 6 hours for most vegetables)
- Water source location noted
- Physical mobility and reach comfort assessed
- Growing goals defined (culinary herbs, vegetables, cut flowers, or a mix)
- Budget range for initial setup established
- Local soil quality or amendment needs considered
Time and effort to complete preparation: expect to spend at least one dedicated hour outdoors walking, measuring, and observing before you move into the planning phase.
Step-by-Step Instructions: How to Size Your Raised Bed Planting Layout
Step 1: Measure Your Available Space and Map It to Scale
Raised bed sizing begins with the ground beneath you, not the catalog in your hands. Measure your planting area precisely using a tape measure, and sketch the space on graph paper or in a simple digital tool. Mark any fixed obstacles — trees, fences, utility covers, or structures. Note which compass direction each wall or fence faces, as this will affect your sun exposure planning.
Once your space is mapped, identify the zones that receive the most consistent sunlight. These are your priority locations for food-producing beds. Shadier spots can still support ferns, mint, or other shade-tolerant plants, but if vegetables are your main goal, sunlight must drive placement decisions.
Tip: Leave at least 24–36 inches of walking space between beds and between beds and fences. This clearance allows for wheelbarrow access, comfortable kneeling, and airflow — all of which matter far more than maximizing bed coverage.
Step 2: Match Bed Width to Your Ergonomic Reach
The width of a raised bed is the single most important ergonomic dimension, and it's often underestimated by first-time buyers. A raised bed should never be wider than twice the comfortable reach of the person tending it. For most adults, that means a maximum width of around 4 feet when accessed from both sides, or around 2 feet when placed against a wall or fence where you can only reach from one side.
At Anleolife, we see a consistent pattern: buyers who choose beds that are too wide end up compacting their soil by stepping into the bed, which defeats much of the benefit of raised bed gardening. Compacted soil restricts root development, reduces drainage, and creates long-term soil health problems that no amendment can fully correct.
For most first-time gardeners in a typical suburban or semi-urban backyard, a 4-foot-wide bed is the practical standard. Beds available in 8x4, 6x3, and similar configurations hit this width correctly. If you have a particularly small space or limited mobility, a narrower option — such as a 6x2 or 4x2 footprint — may be the smarter starting point.
Tip: If you're older or managing joint discomfort, prioritize bed width over bed length. A shorter, narrower bed you can easily tend beats a larger bed that becomes a strain to manage.
Step 3: Choose Your Bed Depth Based on What You're Growing
Depth is the dimension that most first-time buyers treat as an afterthought — and it's the one that most directly determines what you can actually grow. Different plants have radically different root depth requirements, and putting deep-rooting crops into a shallow bed leads to poor yields, stressed plants, and disappointment.
Here is a practical depth guide based on plant type:
- Shallow-rooted crops (lettuce, radishes, herbs, spinach): a bed in the 12–18 inch height range is generally sufficient
- Mid-depth crops (bush beans, peppers, most annual flowers): 18–24 inches supports healthy root development
- Deep-rooting crops (tomatoes, carrots, squash, cucumbers): 24–30 inches or more provides the best results
Anleolife offers beds across a range of heights — from 18-inch standard heights through 24-inch extra-tall options up to 30-inch and 35-inch waist-high configurations — precisely because different gardeners have different needs. For first-time buyers who plan to grow a diverse mix, a 24-inch depth is often the most versatile starting point. If you're focused primarily on salad crops and herbs, an 18-inch bed serves well without the added cost of filling a deeper profile.
Waist-high beds (around 30–35 inches) deserve special mention for gardeners with limited mobility or those who prefer to garden standing up. These configurations eliminate the need to bend or kneel entirely, which makes sustained gardening far more comfortable.
Tip: When in doubt about depth, go deeper rather than shallower. Overfilling a deep bed with soil is far easier than trying to force root vegetables into a bed that isn't tall enough.
Step 4: Determine Your Raised Bed Planting Layout — Configuration and Spacing
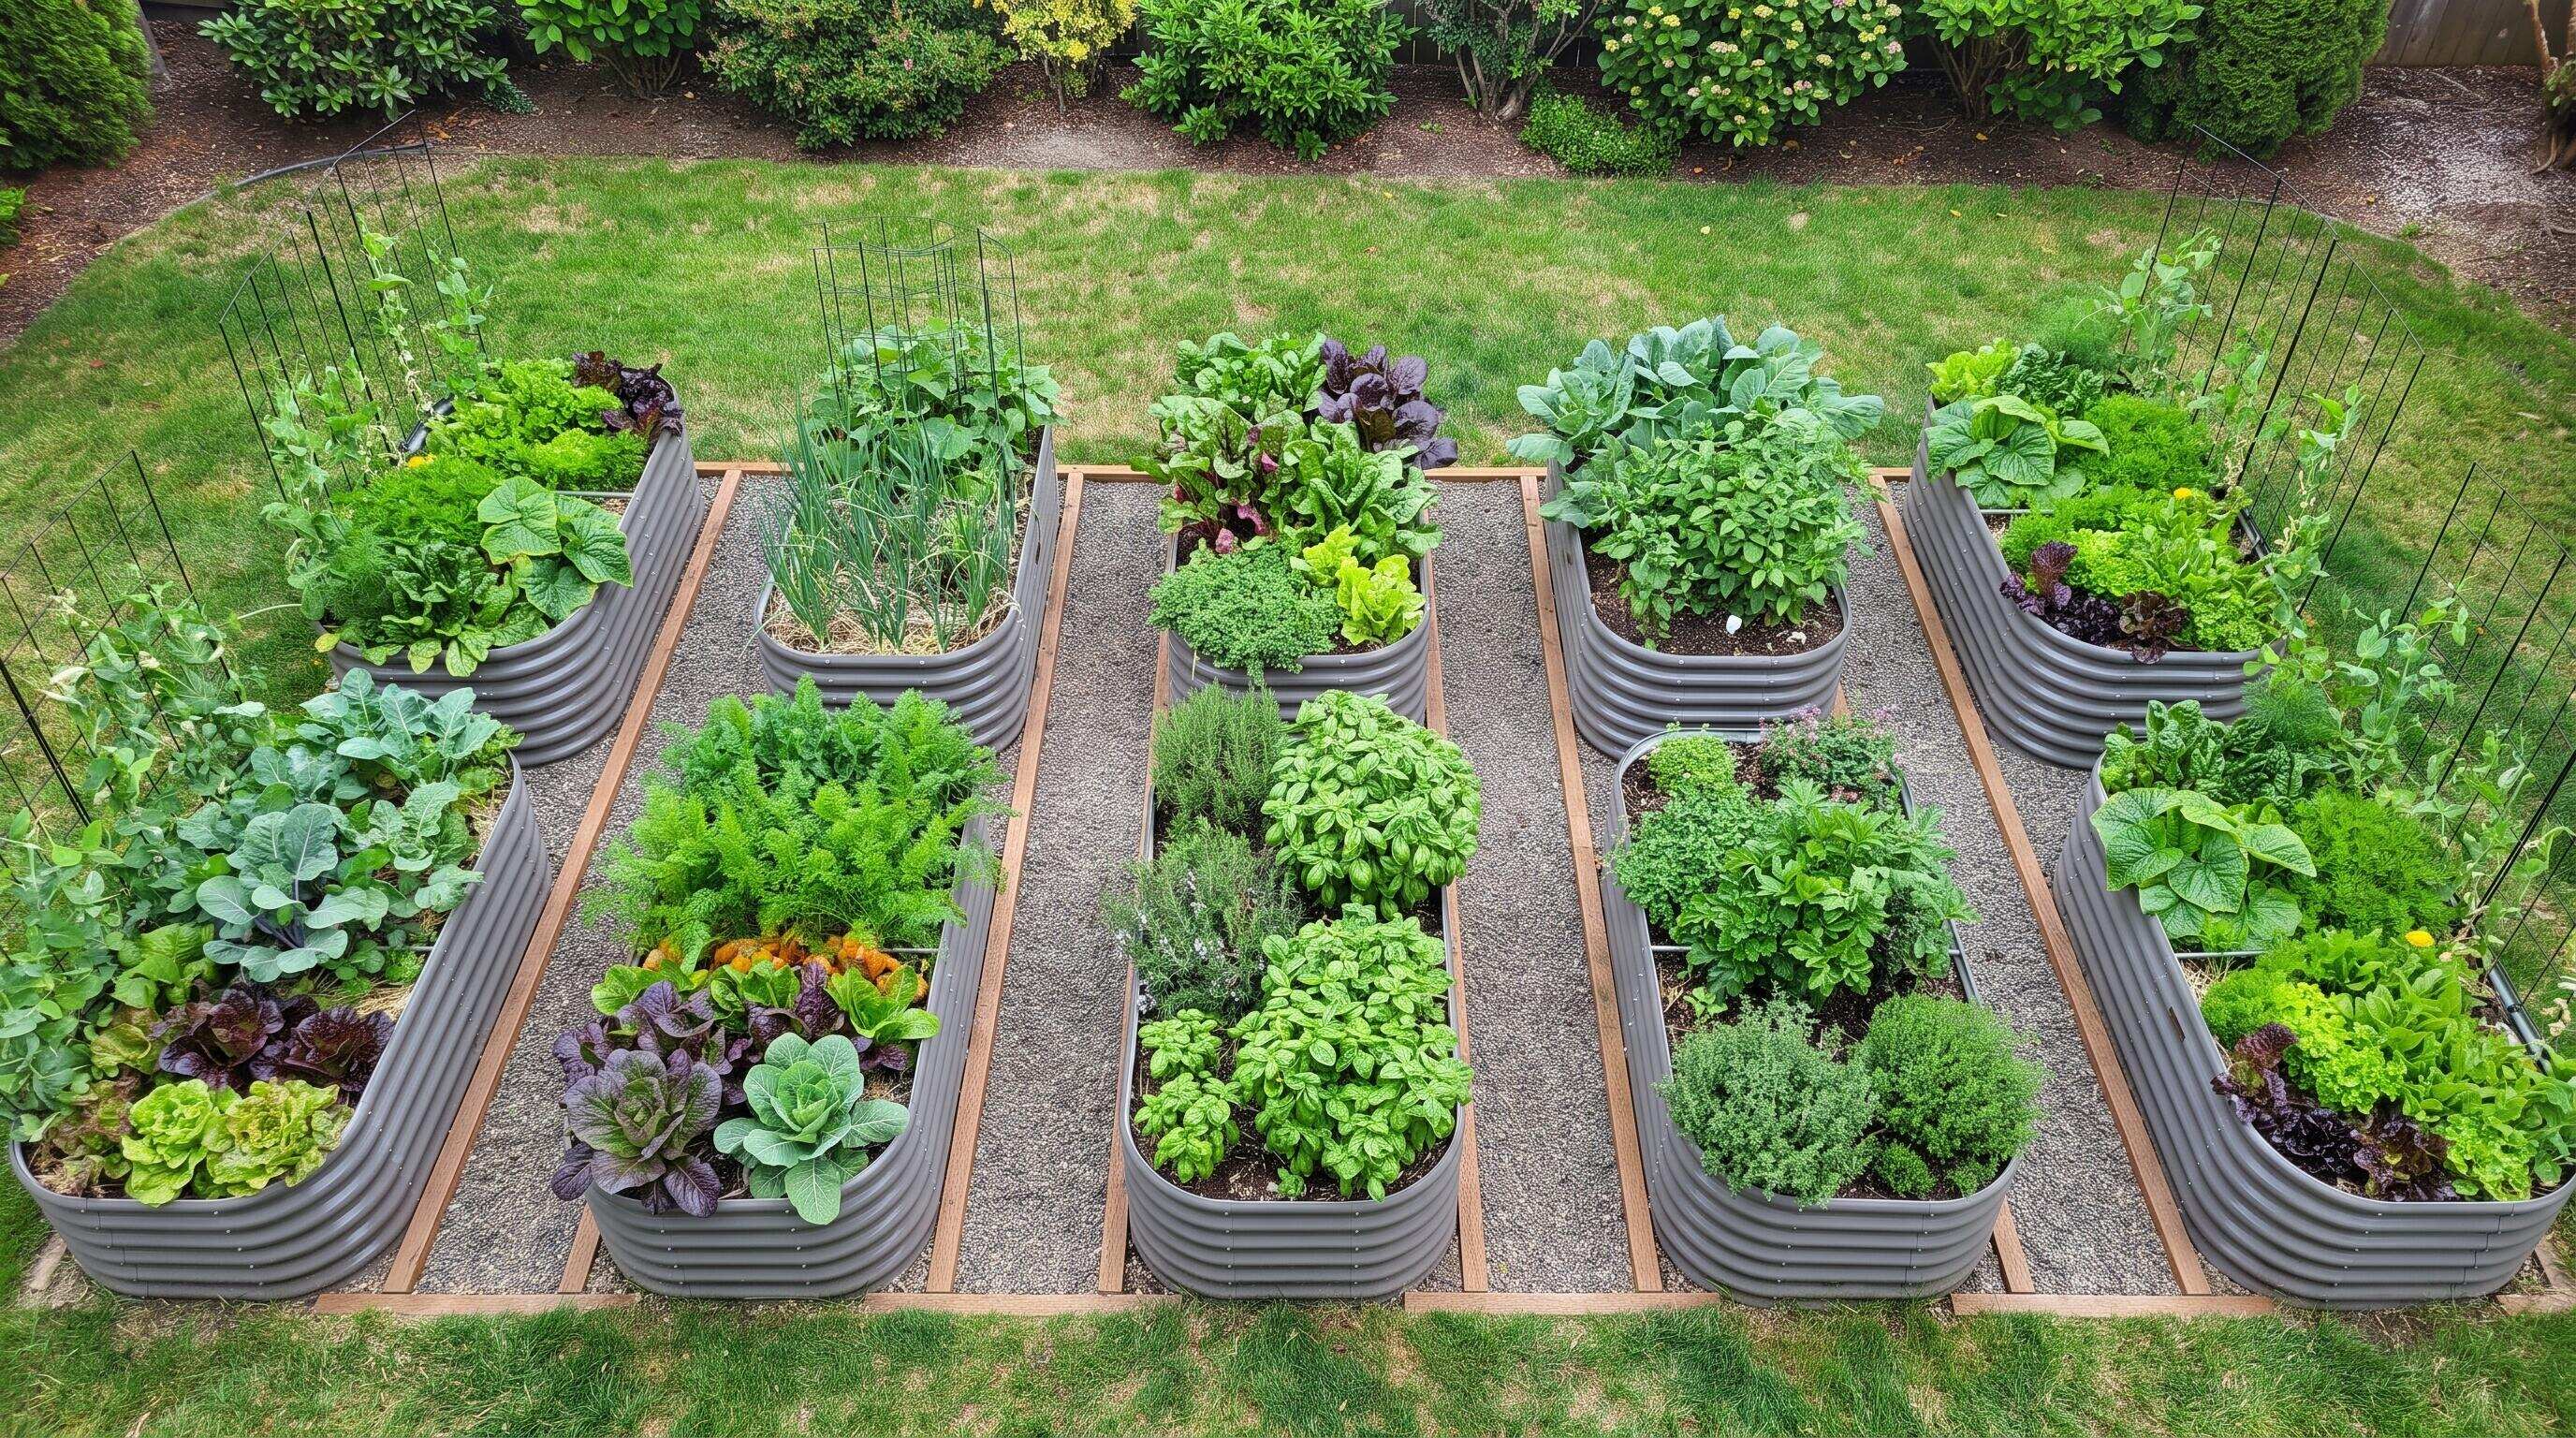
Once you know individual bed dimensions, the next step is arranging multiple beds — or planning the internal layout of a single larger bed — in a way that maximizes both growing space and practical access.
The most time-tested raised bed garden layout is the grid system, sometimes called square-foot gardening. According to the cooperative extension programs at many U.S. land-grant universities, dividing a bed into one-foot squares and assigning crops by their spacing requirements is one of the most efficient methods for high-yield home vegetable production. This approach prevents overcrowding, simplifies succession planting, and makes it easy to rotate crops between seasons.
For a standard 8x4 bed, this gives you 32 square-foot sections to work with. The internet is full of pre-planned layout templates — resources like Pre-Planned Gardens from Gardeners.com can give you a visual head start on arranging crops within a defined bed footprint.
When planning multiple beds, orient the long axis north to south where possible. This orientation allows the sun to reach both sides of the bed throughout the day. Planting taller crops (like staked tomatoes or trellised cucumbers) on the north end of a bed prevents them from shading shorter crops.
Tip: Use string or lightweight stakes to mock up your planned layout on the ground before purchasing. What looks spacious on paper sometimes feels cramped in real life — or surprisingly roomy.
ALT: Overhead view of a raised bed garden layout plan showing multiple beds arranged with pathways and grid-based raised bed planting layout for vegetables and herbs
Step 5: Factor in Material and Construction Quality — Not Just Dimensions
A raised bed's dimensions only matter as much as the structure holding them. First-time buyers frequently focus entirely on size and overlook material quality, which affects how long the bed will last, whether it will hold its shape, and whether it's safe for food growing.
Galvanized steel is currently the leading material choice for residential raised garden beds in North America, and for good reason. Steel beds maintain their shape under the lateral pressure of dense soil, resist warping through freeze-thaw cycles, and — when properly galvanized — offer significantly longer service life than wood. Anleolife's galvanized steel raised garden beds are engineered to last up to 20 years, which means a one-time investment that pays dividends across two full decades of growing seasons.
When evaluating any raised bed kit, look specifically for:
- Thick-gauge steel panels that resist bowing under soil pressure
- Corner connections that are secure and don't rely solely on friction
- A rust-resistant finish suitable for outdoor exposure across multiple climate zones
- A material profile that is food-safe for growing edibles
The quality of the soil system you fill the bed with is equally critical. A premium galvanized bed filled with poor soil will still underperform. A well-composed raised bed soil — typically a blend of topsoil, compost, and a coarse amendment like perlite or aged wood chips — provides the drainage, aeration, and nutrients that productive gardening requires.
Tip: Avoid the temptation to fill raised beds with native ground soil only. Most native soils are too dense for raised bed gardening and will compact over time, restricting drainage and root growth.
Step 6: Plan for Expansion From the Beginning
One pattern we consistently see in our work with home gardeners is that first-time buyers underestimate how quickly the hobby grows on them. A single bed often becomes three or four within a couple of seasons. Planning for this from the start — even if you begin small — prevents logistical headaches later.
Modular raised garden beds are particularly well-suited to gradual expansion. Anleolife's modular garden bed systems allow you to start with a compact footprint and add sections over time without replacing existing hardware. This design philosophy reflects a broader principle: your raised bed layout should grow with you, not trap you.
When placing your first bed, leave enough open space nearby to accommodate a second or third bed in future seasons. Resist the urge to fill every available square foot immediately. A thoughtfully spaced initial layout allows for natural expansion without requiring you to relocate existing beds or overhaul your pathway system.
Tip: Sketch a "Phase 2" expansion plan alongside your initial layout before installing anything. Knowing where future beds could go will influence where you place your first ones.
Step 7: Verify Logistics — Delivery, Assembly, and Site Access
The final step before purchasing is a practical one that first-time buyers routinely overlook: ensuring that your chosen beds can actually be delivered, moved through your property, and assembled in their intended location.
Check the dimensions of any gates, side yards, or passageways through which you'll need to move large bed panels. Steel panels for longer beds can be unwieldy for one person and may require two people during assembly.
Consider where you'll source and transport soil. A large 8x4x24-inch bed requires a substantial volume of fill material. Ordering soil delivery at the same time as your bed — or planning in advance for multiple trips — avoids the frustrating situation of having a beautiful new bed sitting empty because you underestimated the fill requirement.
On the logistics side, Anleolife ships from a strategic warehouse network across California, Texas, Florida, New York, Illinois, and Washington, with delivery in 3–8 business days. This predictable lead time makes it straightforward to coordinate bed arrival with soil delivery and your weekend assembly plans.
Tip: Once you have your bed dimensions confirmed, calculate soil volume needed (length x width x depth in feet) and order slightly more than the calculation suggests. Soil settles after watering, and topping up your bed in the first season is standard practice.
Common Mistakes and Troubleshooting in Raised Bed Sizing and Layout
| Symptom | Likely Cause | How to Fix |
|---|---|---|
| Plants consistently underperform despite regular watering | Bed depth is too shallow for the crops being grown; roots are restricted | Transition those crops to deeper beds (24–30 inches); use shallower beds for herbs and lettuce only |
| Soil at the center of the bed is compacted and hard | Bed width is too wide; gardener is stepping into the bed to reach the center | Limit future bed widths to 4 feet maximum; loosen existing soil with a broadfork and avoid entry |
| Beds look cramped and pathways feel too narrow | Beds were placed without adequate clearance during layout planning | Plan for at least 24–30 inches between beds; in high-use areas, 36 inches is more comfortable |
| Bed panels bow outward under soil pressure | Low-gauge or inadequate steel; insufficient panel support | Replace with heavy-duty or thicker-gauge panels; add center support stakes for longer beds |
| Bed rusts or degrades faster than expected | Material was low-quality galvanized or coated rather than true galvanized steel | Invest in properly galvanized steel beds rated for extended outdoor use; Anleolife beds are rated for up to 20 years of service |
| First harvest was disappointing despite healthy-looking plants | Poor soil composition — native ground soil was used without amendment | Remove and replace with a quality raised bed soil mix: blend topsoil, compost, and drainage amendment |
| Bed positioned in wrong location after installation | Sunlight assessment was skipped during planning | For steel beds that haven't been filled, relocation is possible; use this as a lesson to map sun before future placements |
Pro Tips for a More Productive Raised Bed Garden Layout
Use vertical growing to multiply your planting layout. One of the most underused strategies in raised bed gardening is growing upward rather than outward. Trellises, cages, and simple bamboo teepees positioned at the north end of a bed allow you to grow vining crops like cucumbers, pole beans, and peas without consuming horizontal space. According to guidance from university extension services, vertical growing can effectively double the productive surface area of a standard raised bed.
Incorporate a soil watering system before you fill the bed. Installing a simple drip irrigation line or soaker hose at the base of your bed before filling it with soil is vastly easier than retrofitting one later. Even if you plan to hand-water initially, having the infrastructure in place means you can upgrade without disruption.
Stagger planting dates, not just plant types. A common misconception among new gardeners is that a well-designed raised bed planting layout means filling every section at once. In practice, succession planting — sowing small amounts of the same crop every two to three weeks — extends your harvest across the full growing season rather than creating a single glut. This approach applies especially well to fast-growing crops like lettuce, radishes, and bush beans.
Plan your layout around crop families, not just individual plants. Crop rotation — moving plant families to different bed sections each season — is one of the most effective ways to prevent soil-borne disease buildup and maintain long-term productivity. Designing your raised bed garden layout with rotation in mind from year one (even just mentally labeling sections by plant family) sets you up for healthier harvests over the life of the bed.
Consider a perennial anchor in one bed. Perennial herbs like rosemary, thyme, and chives can occupy a corner of a bed semi-permanently, reducing the replanting workload each season while contributing year-round interest and flavor. Just ensure that the perennial section is positioned so it doesn't shade the rest of the bed as the plants mature.
A common misconception worth addressing directly: bigger beds do not automatically mean better yields. A compact, well-managed 4x4 bed with optimal soil depth, proper sunlight, consistent watering, and a smart raised bed planting layout will consistently outperform a sprawling 12x3 bed that's poorly positioned, inadequately filled, or difficult to tend. Size is a tool — not a guarantee.
People Also Ask
Q1: How wide should a raised garden bed be for comfortable access?
A raised garden bed should be no wider than 4 feet when accessible from both sides, or no wider than 2 feet when placed against a wall where only one-side access is possible. This width allows most adults to reach the center of the bed without stepping inside and compacting the soil. For gardeners with limited reach, narrower configurations — such as 3-foot-wide beds — may be more practical. The ergonomic quality of your raised bed layout affects daily comfort as much as productivity.
Q2: Is galvanized steel safe for growing vegetables in raised garden beds?
Galvanized steel is widely considered safe for food gardening by horticultural researchers and cooperative extension programs. Modern galvanization uses a zinc coating that is resistant to leaching under normal soil pH conditions. The U.S. Environmental Protection Agency has not flagged properly galvanized steel as a material of concern for residential vegetable gardening applications. Anleolife's galvanized steel raised garden beds are designed for long-term food production and are rated to last up to 20 years, making them a durable and food-safe choice for home growers.
Q3: How much soil does a standard raised bed require to fill completely?
The soil volume needed for a raised bed is calculated by multiplying length x width x depth (all in feet) to get cubic feet, then converting to cubic yards or bags as needed. A deeper bed naturally requires significantly more fill material than a shallower one. Plan to slightly overfill on the first fill, as soil settles after the first few watering cycles and typically needs topping up. Ordering soil at the same time as your bed kit — or having it delivered before your beds arrive — is a logistical best practice that first-time buyers frequently wish they had followed.
Summary
Sizing a raised garden bed kit correctly comes down to three core principles: matching bed dimensions to your physical space and ergonomic comfort, selecting depth based on what you want to grow, and planning your raised bed planting layout with expansion and rotation in mind from the start.
The most consistent mistakes first-time buyers make — beds that are too wide to tend comfortably, too shallow for the crops they chose, or placed without enough clearance for practical pathways — are all entirely avoidable with the preparation and step-by-step thinking outlined in this guide.
Key takeaways to carry into your purchase decision:
- Width drives ergonomics: 4 feet is the practical maximum for most adults reaching from both sides
- Depth drives crop compatibility: deeper beds open up a wider range of what you can grow
- Layout drives long-term productivity: leave room for pathways, expansion, and crop rotation from day one
Your next step is to take your prepared measurements, sketch your initial raised bed layout, and identify the bed dimensions that match both your space and your growing ambitions. From there, choosing a kit becomes straightforward rather than overwhelming.
Ready to build the garden you've been planning? Anleolife offers a full range of galvanized steel raised garden beds — from compact 18-inch-tall beds to 35-inch waist-high configurations — shipped from our nationwide warehouse network across California, Texas, Florida, New York, Illinois, and Washington, with delivery in 3–8 business days. Browse the complete selection at the Anleolife website, or find Anleolife products on Amazon, Walmart, Home Depot, Lowe's, and Wayfair. Whether you're starting with a single bed or building out a full planting-and-raising ecosystem, our modular designs grow alongside your garden — season by season, year by year.
References & Further Reading
- Gardeners.com. "Pre-Planned Gardens — Kitchen Garden Planner."
https://www.gardeners.com/pages/kitchen-garden-planner-preplanned-gardens - Savvy Gardening. "4x8 Raised Bed Vegetable Garden Layout Ideas."
https://savvygardening.com/4x8-raised-bed-vegetable-garden-layout/ - U.S. Environmental Protection Agency — Official EPA Homepage.
https://www.epa.gov/ - National Gardening Association — Official Homepage.
https://garden.org/
Note: Standards and guidelines may be updated; please check the latest official documents or consult professional advisors.








