


























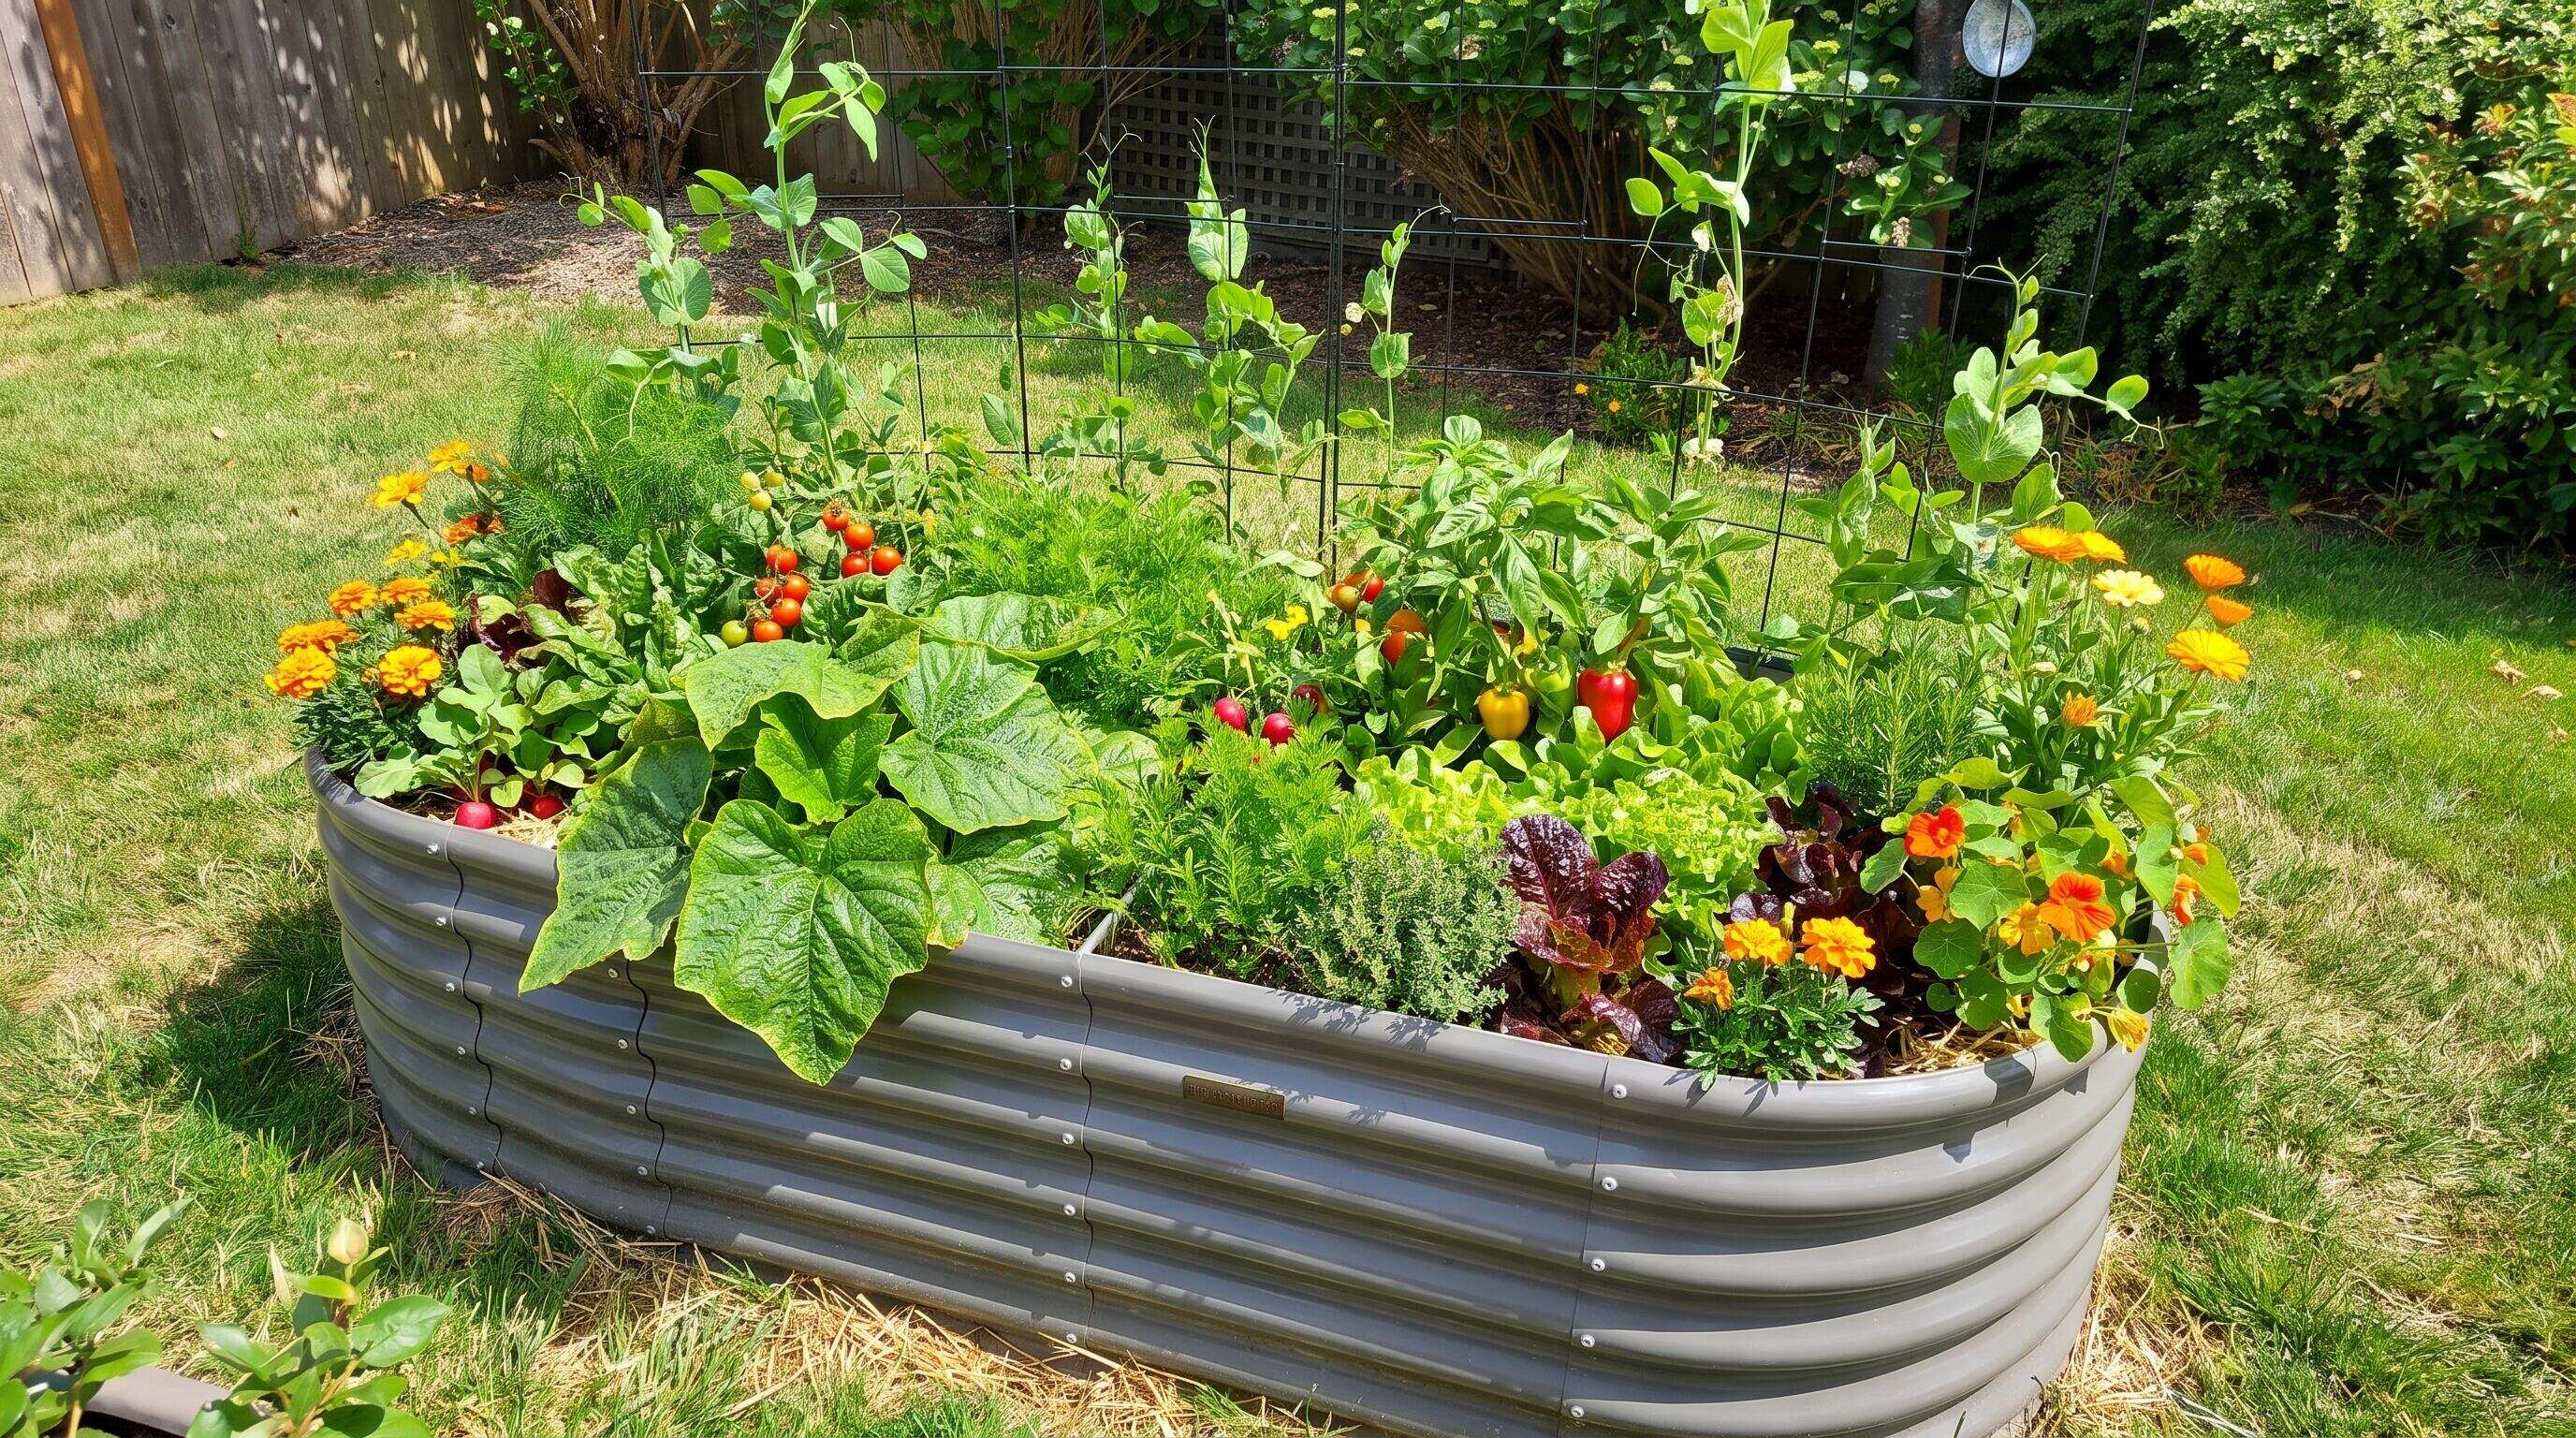
ALT: A 4x8 raised bed garden layout planted with vegetables, herbs, and flowers in a sunny backyard
Plan Your Perfect 4x8 Raised Bed Garden Layout for Vegetables, Herbs, and Flowers
A well-designed raised bed garden layout transforms a modest 4x8 footprint into a highly productive growing space — one that yields vegetables, culinary herbs, and pollinator-friendly flowers all in the same season. The raised bed planting layout you choose from the very beginning determines how efficiently you use every square inch, how easily you can reach the center of the bed without stepping on soil, and how naturally different plant families support one another's growth.
This guide is written for home growers who want to move beyond simply filling a bed with random transplants and instead build a deliberate, repeatable raised bed layout that performs season after season. Whether you are starting your first bed or refining an established kitchen garden, the step-by-step process here will help you avoid the most common configuration mistakes and set up a planting plan you can be genuinely proud of.
Before You Start: Prerequisites and Preparation for Your Raised Bed Layout
Before you map out a single planting zone, a few fundamentals need to be in place. In our work helping home gardeners configure productive raised beds, we consistently see that skipping the preparation stage is the single biggest predictor of a frustrating first season. Taking an hour to gather the right information and materials before you plant pays dividends for years afterward.
What you need to have ready:
- A confirmed bed location with at least six hours of direct sunlight daily — most vegetables and herbs require full sun to thrive
- A physical or digital graph of your bed (a simple 4x8 grid drawn on paper works perfectly)
- A plant list organized by growth habit: tall, medium, low-growing, and sprawling
- Knowledge of your USDA Hardiness Zone and average last frost date, available through the U.S. Department of Agriculture's Plant Hardiness Zone Map
- Quality raised bed soil — a blend of compost, topsoil, and a porous amendment such as perlite or vermiculite delivers the drainage and fertility a mixed bed demands. For a deeper look at what the ideal soil profile looks like, our guide on best soil composition for thriving organic vegetable raised beds walks through the ratios and amendment choices in detail
- Basic tools: a tape measure, hand trowel, plant markers, and a watering can or drip-line setup
- Your chosen bed — ideally a galvanized or rust-resistant metal raised garden bed built to last. Anleolife's galvanized steel raised garden beds are engineered for a 20-year lifespan, meaning the structure you configure today will support your evolving garden plans for decades
Time and effort estimate: Initial planning and layout mapping is a light task you can complete in an afternoon. The physical planting, once your bed is filled and your plants are ready, typically spans a weekend morning. Ongoing maintenance is moderate — a few minutes of observation daily and a deeper tending session once or twice a week during the growing season.
Checklist before starting:
- Bed is assembled, level, and filled with quality growing medium
- Sun exposure confirmed for the chosen site
- Plant list drafted with sun, water, and spacing requirements noted
- Last frost date known so timing of tender transplants is accurate
- All tools and amendments are within reach before planting day
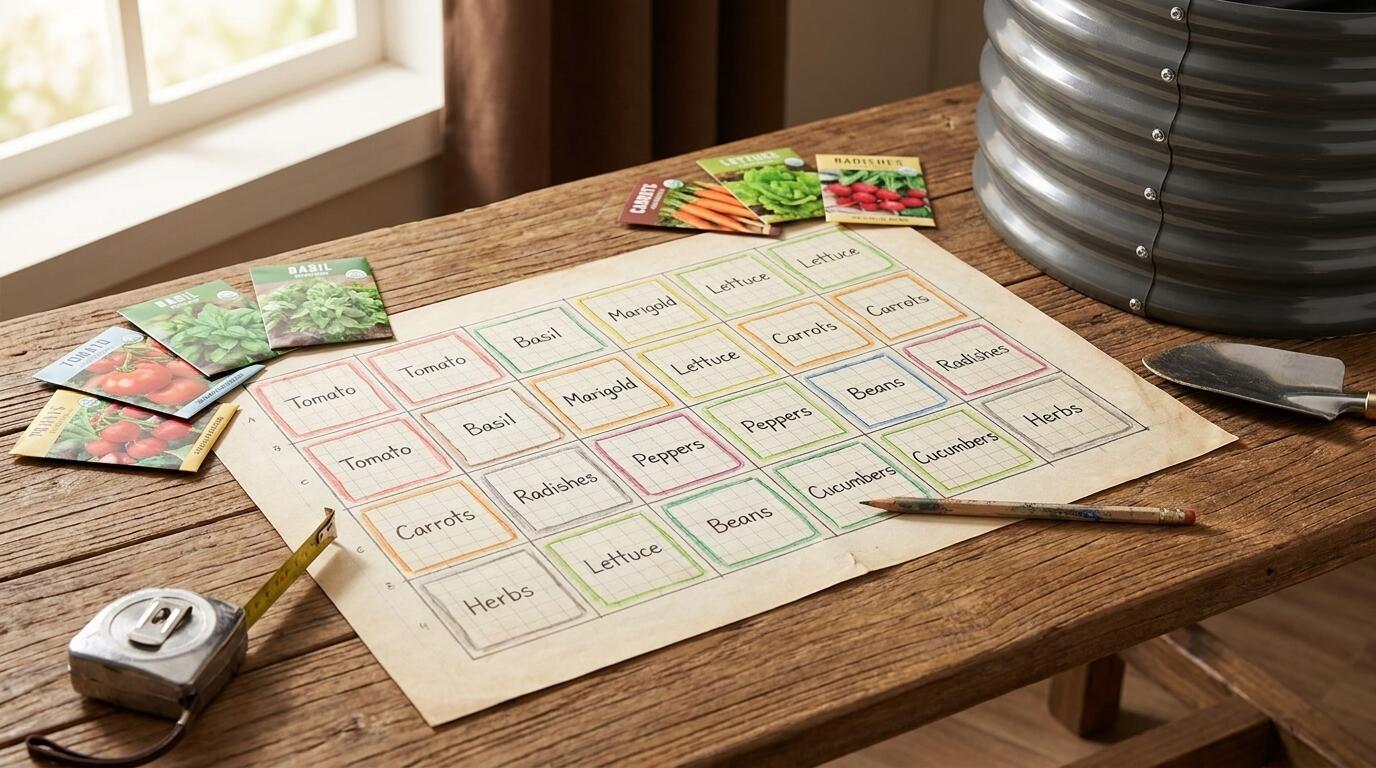
ALT: Planning a raised bed garden layout on graph paper with seed packets and plant spacing notes for a 4x8 bed
Step-by-Step: How to Configure a 4x8 Raised Bed for Vegetables, Herbs, and Flowers
A 4x8 raised bed layout works best when it is organized around three principles: sun orientation, plant height sequencing, and companion planting groupings. The steps below walk you through each decision in the order that matters most.
Step 1: Orient the Bed and Map the Sun Path
The foundation of any productive raised bed planting layout is understanding how sunlight travels across your specific site throughout the day. Position the long axis of your 4x8 bed on a north-to-south line whenever possible. This orientation means both the east and west sides of the bed receive morning and afternoon sun in roughly equal measure, and it minimizes the risk of taller plants casting long shadows over shorter neighbors.
Before you draw a single planting zone, stand at your site at morning, midday, and late afternoon and note where shade falls. Nearby fences, structures, or established trees can create shadow corridors that shift your planting strategy significantly.
Tip: Mark the "north end" of your bed with a physical stake during planning. This single habit prevents the very common mistake of planting tall crops on the south side, where they will shade everything else for most of the day.
Step 2: Divide the Bed into Planting Zones by Height
Once orientation is confirmed, divide your 4x8 footprint into three horizontal bands running the width of the bed (each 4 feet wide) and progressing from north to south in height order.
- North zone (tallest plants): Assign this band to crops that will grow tall — indeterminate tomatoes, trellised cucumbers, pole beans, or tall flowering plants like zinnias and sunflowers. Because they sit at the north end, they cast their shade northward and away from the rest of the bed.
- Middle zone (medium-height plants): This band suits peppers, bush beans, compact herb varieties like basil and parsley, and mid-height flowers such as marigolds or nasturtiums. These plants stay accessible from both the long sides of the bed without you ever needing to lean more than two feet in.
- South zone (low-growing plants): Reserve the southernmost band for low-profile crops — lettuce, spinach, radishes, strawberries, and creeping herbs like thyme or oregano. These plants benefit from the unobstructed sun at the south end, and their low profile keeps the entire bed open and easy to harvest.
Tip: A consistent pattern we observe in productive beds is that growers who plan height zones before choosing specific varieties end up with far fewer "hidden harvest" problems — where ripe produce is concealed under a canopy of neighboring foliage.
Step 3: Apply the Square-Foot Gardening Grid
With your height zones established, overlay a square-foot grid onto your 4x8 plan. Your bed contains 32 individual square-foot cells. Assign each square a planting density based on the mature size of the plant it will hold, following the spacing guidance on seed packets or transplant tags — these figures are field-tested and specific to the variety.
As a general framework for mixed beds:
- Large plants (tomatoes, peppers, eggplant) occupy 1 or more square feet per plant
- Medium plants (bush beans, compact herbs, dwarf marigolds) typically share a square at a few plants per cell
- Small plants (lettuce, radishes, beets) can be sown more densely within a single square
According to Savvy Gardening's resource on 4x8 raised bed vegetable garden layout ideas, organizing plants by their square-foot needs prevents the two most common spacing errors in mixed beds: overcrowding low-growing crops under taller neighbors, and under-planting open space that could otherwise yield a second succession crop.
Tip: Write the plant name and its cell count directly on your paper grid before purchasing transplants. Knowing exactly how many of each variety fits your plan prevents impulsive overbuying at the garden center — a very common and costly mistake.
Step 4: Integrate Companion Planting Relationships
A raised bed layout becomes significantly more productive when the plants within it actively support one another. Companion planting is the practice of placing plant species in physical proximity based on mutually beneficial relationships — pest deterrence, pollinator attraction, nitrogen contribution, or soil improvement.
Several pairings work reliably in a 4x8 mixed bed:
- Tomatoes and basil: Classic companions. Basil is widely noted by growers and horticultural organizations to discourage certain common tomato pests and improve the flavor profile of nearby fruit. Plant basil directly alongside tomatoes in the middle zone.
- Marigolds and most vegetables: French marigolds (Tagetes patula) are among the most well-documented pest-deterrent companions in home vegetable gardens. Plant them along the south edge of the bed and intersperse a few throughout the middle zone as a border.
- Beans and most brassicas: Beans fix atmospheric nitrogen in the soil, which benefits nitrogen-hungry neighbors like kale or broccoli placed in an adjacent square.
- Nasturtiums and pest-prone crops: Nasturtiums attract aphids away from vegetables, functioning as a trap crop. Tuck them at corners or edges where they can do their protective work without competing for central space.
Tip: Avoid placing fennel in a mixed raised bed. Fennel is allelopathic — it suppresses the growth of most neighboring plants — and belongs in a dedicated container or a separate bed entirely.
Step 5: Plan for Succession Planting Within the Layout
A single raised bed planting layout configured for one season is only half as productive as it could be. Succession planting — sowing a new crop in a cell immediately after the previous one is harvested — can nearly double the output of your 4x8 footprint over a single growing year.
Map your succession strategy at the planning stage, not after gaps appear:
- Mark cool-season cells (lettuce, spinach, radishes) that will be cleared by early summer, and note what warm-season crops (beans, basil, a second marigold round) will follow
- Mark cells where a fall brassica (kale, chard, or arugula) will replace spent summer crops in late summer
- Keep a small packet of fast-germinating seeds on hand throughout the season so no cleared cell sits vacant for more than a week
The Gardeners Supply Company's kitchen garden planning resource emphasizes that pre-planned succession schedules — mapped before the season starts — are the most reliable way to maximize yield from a fixed footprint. According to their pre-planned gardens resource, growers who commit a succession plan to paper before their first transplant consistently harvest more total food from the same square footage than those who plan informally.
Tip: Use a simple color-coding system on your grid — one color for spring planting, a second for summer replacement crops, and a third for fall succession. A two-minute look at the grid each week makes the timing of successions obvious without requiring you to keep it all in memory.
Step 6: Assign Specific Varieties and Finalize the Plant List
With zones, spacing, companion relationships, and succession cycles all mapped, you can now assign specific named varieties to each cell with confidence. This step is where your plan transitions from a general framework into a precise shopping list.
A productive example layout for a 4x8 bed might include:
- North zone: two indeterminate tomatoes on a central trellis, flanked by pole beans on the outermost corners
- Middle zone: two pepper plants, a cluster of basil cells, a parsley grouping, and a band of French marigolds along the long edge
- South zone: a four-cell block of cut-and-come-again lettuce, a row of radishes for early harvest, a creeping thyme cell at the corner, and nasturtium at the opposite corner
When selecting varieties, look for compact or bush types over standard types wherever possible in a 4x8 footprint — they are bred to perform well in contained spaces. Variety descriptions on seed packets and nursery tags will specify "determinate," "compact," or "patio" types that suit raised bed gardening.
Tip: Finalize your plant list before you visit a nursery. An unplanned nursery visit with a pre-mapped bed is one of the fastest paths to impulse purchases that disrupt a carefully built layout.
Step 7: Install Support Structures Before You Plant
Trellises, tomato cages, and bean poles are significantly easier to install in an empty or freshly planted bed than after your plants have established. Installing them last — a mistake we see constantly — invariably damages root systems and compacts the soil in cells that were carefully prepared.
For a 4x8 bed, a single sturdy trellis along the north wall serves tomatoes, cucumbers, and pole beans simultaneously. Wire panel trellises anchored to the inner walls of a galvanized steel bed are stable, weather-resistant, and allow you to train multiple vine crops on the same structure.
If your bed is tall enough — Anleolife's 24-inch Extra Tall and 30-inch Extra Tall raised garden beds in the 8x4 configuration, for instance — the added depth accommodates root crops and deep-rooted tomatoes without any additional soil amendment. For gardeners interested in how bed dimensions affect plant choice and layout flexibility, A First-Time Buyer's Guide to Sizing a Raised Garden Bed Kit covers the trade-offs in practical detail.
Tip: Anchor your trellis to the outside of the north wall of the bed rather than driving stakes through the growing medium. This approach keeps the soil undisturbed and allows you to remove or reposition the trellis between seasons.
Common Mistakes and Troubleshooting in a 4x8 Raised Bed Layout
Even a well-planned raised bed layout can run into predictable problems. The table below maps the most common symptoms to their root causes and practical solutions.
| Symptom | Likely Cause | How to Fix |
|---|---|---|
| South-side plants receive insufficient sun | Tall crops placed on the south end block light across the rest of the bed | Relocate tall plants to the north zone; use the height-zone framework in Step 2 during next season's planning |
| Overcrowded center cells with reduced yield | Plants assigned too many cells relative to their mature spread, or spacing from packet instructions ignored | Thin aggressively at seedling stage; in future plans, map cell counts from the square-foot grid before purchasing |
| Pest pressure concentrated in one zone | Lack of companion plant diversity; monoculture blocks within the bed | Integrate marigolds, nasturtiums, and aromatic herbs as border plants and interspersed companions throughout the layout |
| Soil compaction in the middle of the bed | Stepping into the bed to reach center cells | Restrict all foot traffic to the perimeter paths; use a long-handled trowel or kneeler plank laid across the frame to access center cells without compressing soil |
| Succession gaps — empty cells for weeks | Succession crops not planned before the season; no transplants or seeds ready | Map succession cycles on paper in Step 5; keep a small inventory of fast-germinating seeds at hand throughout the growing season |
| Vine crops sprawling over shorter neighbors | No trellis installed, or trellis added after plants established | Install trellises before planting (Step 7); train vines upward weekly once they begin to run |
| Nutrient depletion mid-season | Heavy feeders planted without companion nitrogen-fixers or mid-season amendments | Add compost as a side dressing around heavy feeders in midsummer; incorporate bean or pea successions into nitrogen-depleted zones |
Pro Tips for Better Results with Your Raised Bed Layout
Use vertical space as a planning dimension, not an afterthought. The square-foot grid you draw on paper is two-dimensional, but a productive raised bed operates in three. When you account for the vertical reach of trellised plants in the north zone, you effectively add productive growing area beyond your 4x8 footprint — without expanding the bed itself. Plan which crops will climb and factor the shade footprint of that vertical canopy into your horizontal layout decisions.
Rotate plant families between seasons, not just between beds. Even within a single 4x8 bed, rotating the position of plant families from one season to the next reduces the buildup of soil-borne disease and pest populations specific to those families. Keep a simple record of what grew in each zone each season so you can shift plant families systematically rather than relying on memory.
Treat the edges of your bed as prime real estate. The perimeter cells of a 4x8 bed receive the best air circulation and light penetration. Reserving these cells for compact, high-value crops — herbs, cut-and-come-again greens, or high-yield flowers — consistently outperforms leaving them for sprawling or low-priority plants.
Choose your bed material with the long view in mind. A raised bed that rusts, warps, or degrades within a few years forces you to rebuild and reconfigure your entire layout, losing the soil conditioning and bed-specific knowledge you have accumulated. Galvanized steel beds engineered for durability — like the Anleolife 18-inch Tall 8x4 ft Galvanized Steel Raised Garden Bed and the 24-inch Extra Tall 8x4 ft models — are built to last 20 years, meaning your investment in planning and soil development compounds rather than restarting on a recurring basis.
A common misconception worth addressing: Many new raised bed growers assume that a 4x8 bed is "small" and therefore can only support a few plant types. In practice, a well-configured 4x8 raised bed layout following square-foot spacing principles can support upward of a dozen different plant varieties simultaneously, with succession cycles extending the season's productive output considerably beyond what a traditional in-ground row garden of comparable area would yield.
Questions & Answers
Q1: How do I keep tall plants from shading the rest of my 4x8 raised bed garden layout?
The most reliable solution is to orient your bed north-to-south and always position your tallest plants — tomatoes, trellised cucumbers, pole beans — at the north end of the bed. Because the sun travels from east to west at a southerly angle (in the Northern Hemisphere), tall plants at the north end cast their shadow northward, away from shorter neighbors. Consistently applying this height-zone principle in Step 2 of your layout planning prevents the most common light-blocking problem in mixed raised beds.
Q2: Is it safe to grow vegetables in a galvanized steel raised garden bed?
Galvanized steel raised garden beds are widely used and broadly accepted for food production by home growers across North America. The zinc coating that gives galvanized steel its corrosion resistance is the same element found naturally in soil and required in trace amounts by the human body. Major gardening organizations and university extension programs generally consider galvanized steel beds appropriate for vegetable production. If you want to explore the material science behind coating durability in more depth, the comparison of galvanized versus powder-coated options in our article Do Galvanized Beds Really Resist Rust Better Than Powder-Coated Steel? covers the evidence clearly.
Q3: How long does it take to plan and plant a complete 4x8 raised bed layout?
Planning — drawing the grid, assigning plant families, mapping companion relationships, and finalizing a variety list — typically takes one to two hours for a first-time planner and less as you repeat the process in subsequent seasons. Physical planting, once the bed is filled and transplants are in hand, is usually a morning's work. The bed itself, if built from a quality galvanized steel raised garden bed system rated for a 20-year lifespan, requires no rebuilding — only seasonal soil refreshing and layout updates as your growing preferences evolve.
Summary
A thoughtfully configured 4x8 raised bed layout is one of the most productive and manageable home growing systems available to home gardeners at any experience level. The process is methodical, but every step builds directly on the one before it, and the cumulative result — a diverse, high-yielding bed that combines vegetables, herbs, and flowers in a mutually supportive arrangement — justifies the planning investment many times over.
Key Takeaways:
- Orient your bed north-to-south and stack plants by height from north (tallest) to south (shortest) to maximize sunlight across the entire footprint
- Use a square-foot grid to assign specific planting densities before purchasing transplants — this single habit prevents overcrowding and wasted spending
- Integrate companion plants — particularly marigolds, basil, and nasturtiums — throughout the layout to manage pests and support pollinators without chemical intervention
- Plan succession cycles at the same time you plan your initial planting, so cleared cells are immediately replaced and no productive space is wasted
- Install all support structures before planting, not after, to protect root systems and soil structure
- Choose a bed built from durable materials — a 20-year lifespan means your soil investment and layout knowledge compound rather than reset
The next step is to draw your grid, confirm your sun orientation, and commit your plant list to paper before your next nursery visit. A plan in hand makes every planting decision that follows faster, cheaper, and more productive.
Ready to build the foundation your layout deserves? Browse the full range of Anleolife galvanized steel and rust-resistant raised garden beds at the Anleolife website, or find them on Amazon, Walmart, Home Depot, Lowe's, and Wayfair. With a nationwide U.S. warehouse network spanning California, Texas, Florida, New York, Illinois, and Washington, your order arrives in 3–8 business days — so your growing season starts on your schedule, not a waiting list. From a single 8x4 starter bed to a fully integrated planting-and-raising ecosystem, Anleolife grows with you at every stage.
Sources & Citations
- Savvy Gardening. "4x8 Raised Bed Vegetable Garden Layout Ideas".
https://savvygardening.com/4x8-raised-bed-vegetable-garden-layout/ - Gardeners Supply Company. "Pre-Planned Gardens — Kitchen Garden Planner".
https://www.gardeners.com/pages/kitchen-garden-planner-preplanned-gardens - U.S. Department of Agriculture. "USDA Plant Hardiness Zone Map".
https://www.usda.gov/
Note: Standards and guidelines may be updated; please check the latest official documents or consult professional advisors for current recommendations.








