


























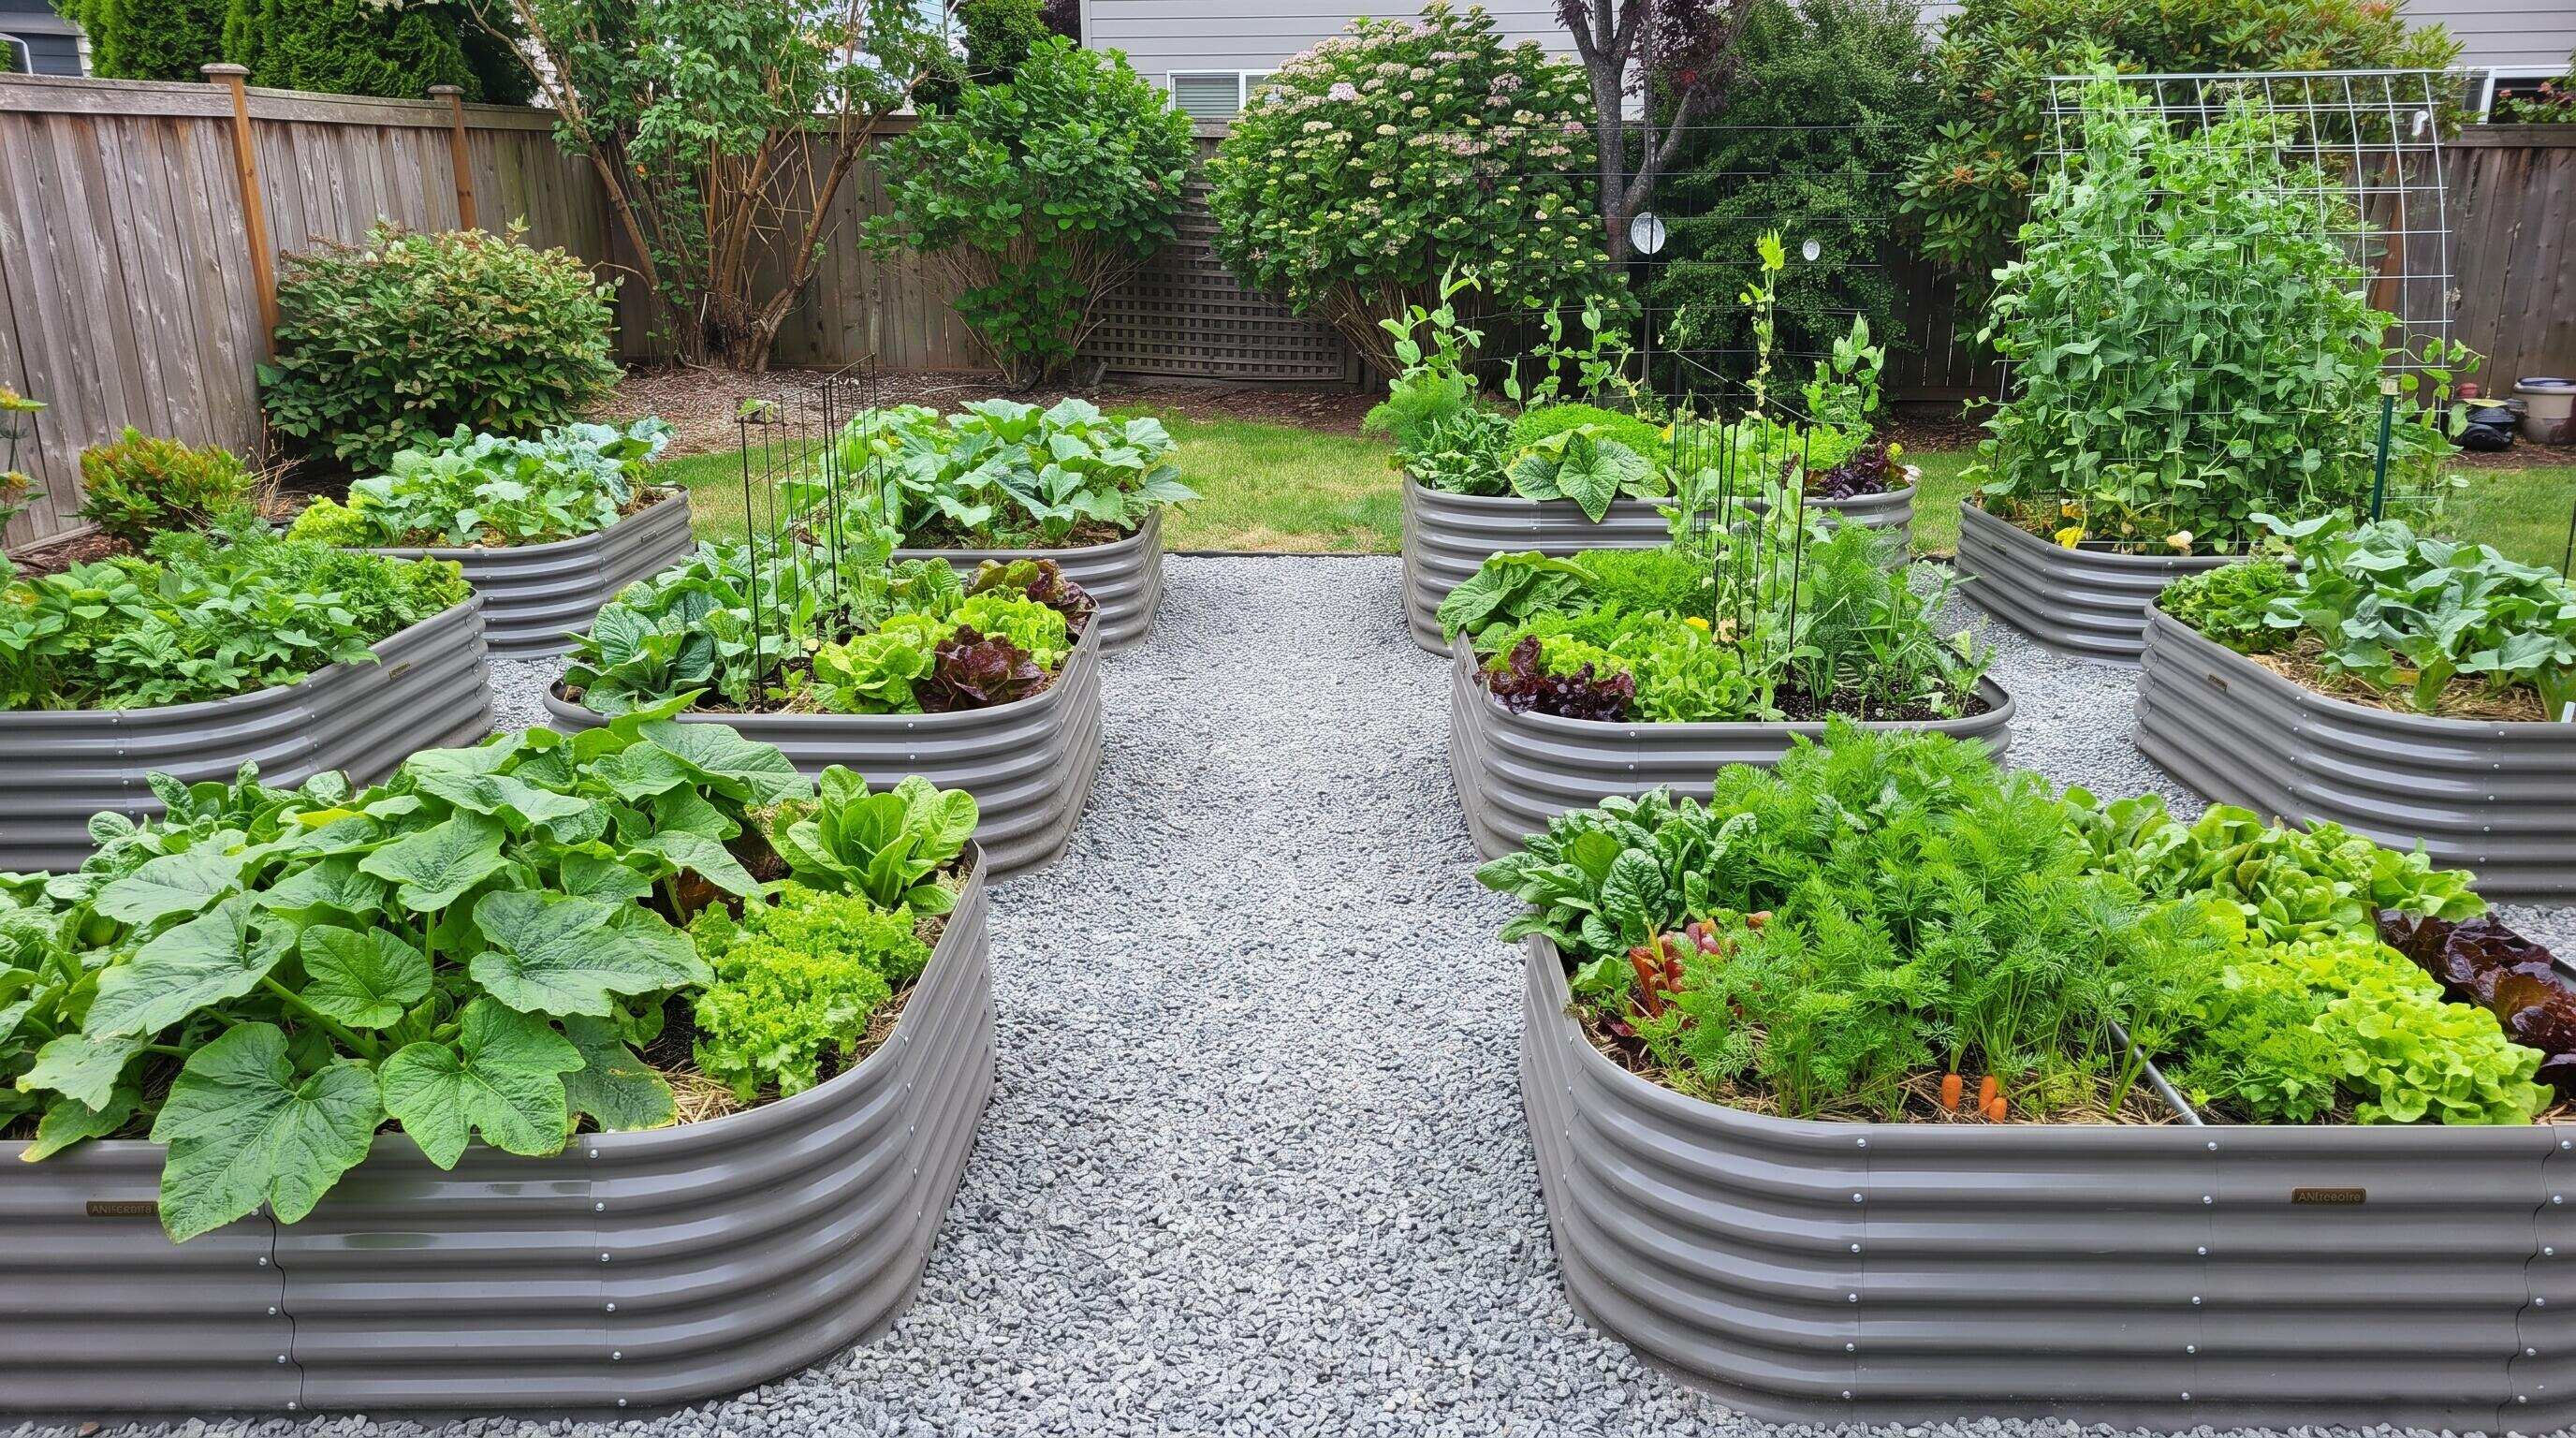
ALT: Expanding a modular raised bed garden layout step by step without starting from scratch
Grow Your Raised Bed Garden Layout Intelligently — Without Tearing Everything Down
A well-planned raised bed garden layout is one of the most satisfying investments a home grower can make — but what happens when your garden outgrows its original design? The good news is that a thoughtfully chosen modular system lets you expand your raised bed planting layout incrementally, adding beds, reconfiguring pathways, and scaling up your soil system without dismantling what already works.
This guide is written for gardeners who started small and are ready for more — whether you've been growing herbs on a patio, running a compact vegetable plot in a suburban backyard, or managing a few beds as a retiree who wants to do more without doing it all at once. In our work with home gardening clients across North America, one pattern we consistently see is that the gardeners who expand most successfully aren't the ones who planned the biggest layout on day one. They're the ones who chose a system flexible enough to grow with them.
Before You Start: Setting Up for a Smooth Raised Bed Layout Expansion
Expanding a modular raised bed layout is far simpler than building from scratch — but "simpler" doesn't mean "spontaneous." The groundwork you lay before adding a single new panel or bed will determine whether your expanded layout feels cohesive or cobbled together.
The first thing to clarify is your goal. Are you adding growing space for more vegetables? Extending into a new crop category like perennial herbs or cut flowers? Or are you integrating a companion element like a chicken coop or rabbit hutch into the garden ecosystem? Knowing the outcome shapes every decision that follows — from bed orientation to pathway width to soil volume.
Next, assess your existing setup honestly. Walk the space and note where sunlight lands at different times of day, where water tends to pool after rain, and which areas are genuinely accessible without stepping on soil. These physical realities constrain your expansion options more than any design preference. According to guidance from the University of Maryland Extension's home gardening resources, sun exposure and drainage are the two site factors that most consistently determine raised bed productivity — so map them before you map your new beds.
Finally, check your materials compatibility. If you're expanding a galvanized steel modular system, confirm that new panels and connectors will integrate with your existing hardware. Mixing bed generations or brands often creates alignment headaches that are entirely avoidable.
Checklist before starting:
- Photograph and sketch your current raised bed layout, including dimensions, orientation, and pathway locations
- Identify sun exposure patterns across the intended expansion area (full sun, partial shade, seasonal shifts)
- Check soil levels and amendment needs in existing beds before adding new ones
- Confirm that new modular components are compatible with your current bed system
- Measure pathway widths — a minimum of 18 to 24 inches is generally recommended for comfortable access; wider if you use a wheelbarrow
- Decide whether you're expanding the planting area, adding a new function (raising, beautification), or both
- Estimate your soil volume needs for new beds before ordering materials
The effort required varies considerably depending on the size of your expansion. A single additional bed can be set up in a few hours on a weekend. A full layout reconfiguration — moving existing beds, adding four or more new units, and reworking pathways — is realistically a multi-day project.
Step-by-Step Instructions for Expanding Your Modular Raised Bed Layout
Step 1: Audit Your Current Raised Bed Planting Layout Before Adding Anything
Before you order a single new component, spend time critically evaluating what you already have. Walk through your existing raised bed layout and ask: what's working, what's underperforming, and why? Are any beds receiving too much shade now that nearby plants have matured? Are pathways wide enough for comfortable harvesting? Has the soil in older beds compacted or settled significantly?
This audit is where experienced gardeners gain an edge. In our work with clients, we've seen expansions stall because growers added new beds adjacent to poorly functioning old ones — essentially compounding the original problem at larger scale. If an existing bed has persistent drainage issues or receives insufficient light, fix those conditions first. An expansion built on a flawed foundation will underperform regardless of how well the new sections are designed.
Document everything: photograph your current layout from above if possible, and note the dimensions and orientation of existing beds. This becomes your baseline reference for all subsequent planning decisions.
Tip: Use stakes and string to mock up potential new bed placements before committing. Physically walking the "future" pathways will reveal clearance issues that don't show up on paper.
Step 2: Map Your Expanded Raised Bed Garden Layout on Paper First
Resist the urge to jump straight to physical assembly. A raised bed garden layout planned on paper — even a simple hand-drawn sketch — saves significant time and prevents costly misalignments. Draw your existing beds to scale, then sketch candidate positions for new additions.
Consider the primary axes of your layout. Parallel rows with consistent spacing are easiest to manage and irrigate. A grid layout with uniform pathway widths creates a clean, professional aesthetic and makes seasonal rotation more intuitive. For irregularly shaped yards, an L-shaped or staggered arrangement can maximize usable growing space while accommodating obstacles like trees, fences, or structures.
Pay attention to how new beds will interact with water flow. Raised beds shed water laterally, so placing a new bed directly downhill from an existing one without accounting for runoff can create soggy pathways or waterlogged edges. Mark drainage directions on your sketch.
Also plan your soil system alongside the layout map. Each new bed will need a substantial volume of quality growing medium — a blend of topsoil, compost, and amendments appropriate to your intended crops. According to the USDA's home gardening guidance, a well-structured soil mix with adequate organic matter is one of the most impactful variables in raised bed productivity.
Tip: Plan for the layout you want in two to three years, not just the one you're building today. Leave access points and pathway widths that can accommodate future beds without requiring redesign.
Step 3: Choose the Right Modular Components for Your Expansion
Modular raised beds — metal raised garden beds that use interlocking panels, connectors, and compatible accessories — are designed specifically for this kind of incremental growth. The key is selecting components that integrate with your existing system and serve the specific function of each new bed.
Anleolife's modular raised garden bed line is engineered for exactly this scenario. Whether you're extending a ground-level layout or stepping up to taller beds for improved ergonomics and deeper root zones, the system offers configurations spanning from compact 6x2 ft units suitable for narrow spaces to expansive 30-inch extra-tall 8x4 ft structures that bring the growing surface to a comfortable working height. Beds are available in varying heights from standard 18-inch configurations to 30-inch and even 35-inch waist-high models, making it straightforward to match new additions to your existing aesthetic while introducing ergonomic improvements where needed. For gardeners who want to better understand how height choices affect day-to-day comfort, ergonomic garden bed design principles offer useful guidance on matching bed height to your physical needs.
When selecting materials for expansion beds, galvanized steel deserves serious consideration. It resists rust, handles temperature extremes reliably, and is built to last. Anleolife's galvanized steel raised garden beds are rated for a 20-year lifespan — meaning beds you add during an expansion today are genuinely long-term infrastructure, not a short-term purchase you'll replace in a few seasons. For a detailed comparison of material trade-offs, galvanized steel versus recycled plastic covers the key sustainability and durability considerations in depth.
Tip: When mixing bed depths across a layout — for instance, standard 18-inch beds alongside 24-inch extra-tall units — group deeper beds toward the north end of the layout so they don't shade shallower beds during the growing season.
Step 4: Prepare the Ground for New Bed Placements
Site preparation for expansion beds follows the same logic as your original installation, with one additional consideration: minimizing disruption to the plants and soil infrastructure already in place nearby.
Begin by clearing the area designated for new beds — remove sod, weeds, and debris. If you're placing beds over lawn, layering cardboard beneath the bed before filling suppresses weeds effectively without chemicals. Dampen the cardboard so it breaks down gradually and integrates with the soil below, improving the biological connectivity between the raised bed and the native ground.
Check the levelness of the ground. Modular beds perform best on reasonably level surfaces; significant slope causes soil to shift, beds to rack over time, and irrigation to distribute unevenly. For sloped sites, modest terracing or grading before installation pays dividends in long-term stability.
If you're expanding into an area that was previously lawn or unused ground, consider the soil quality beneath. Even though raised beds bring their own growing medium, the native soil below influences drainage and can harbor weed seeds or soil-borne pathogens. A shallow cultivation pass and a layer of weed barrier or cardboard beneath the new beds addresses both concerns without major disruption.
Tip: Lay out your pathway material (wood chips, gravel, stepping stones, or pavers) at the same time as you install new beds. Retrofitting pathways after beds are filled and planted is awkward and often results in compacted, muddy access routes.
Step 5: Fill New Beds with a Structured Soil System
The soil system inside your raised beds is as consequential as the bed structure itself. Expanding your raised bed planting layout is an ideal moment to evaluate whether your soil approach is working and refine it for new additions.
A standard high-performance raised bed mix typically combines quality topsoil, aged compost, and a perlite or coarse material for drainage. The proportions vary based on what you intend to grow: leafy greens and shallow-rooted crops tolerate a lighter, compost-rich mix, while root vegetables and fruiting plants benefit from a deeper, more structured medium. According to guidance from Cooperative Extension services across the U.S., incorporating a minimum of 25–30% quality compost by volume into a new raised bed mix gives plants a strong nutritional start and supports soil biology from the first season.
For gardeners sourcing inspiration for soil blends and planting sequences, the resource on best soil composition for thriving organic vegetable raised beds provides a practical framework worth bookmarking.
Don't overlook the soil in your existing beds during this phase. As you're filling new beds, amend existing ones with fresh compost and any targeted fertilizers they need. Expanding the layout is a natural moment to reset soil health across the entire garden.
Tip: Fill new beds to slightly above the rim at installation — galvanized steel beds allow for a modest mound — because the growing medium will settle by 10–15% over the first season. Overfilling slightly at the start means you won't need to top up as soon.
Step 6: Redesign Pathways and Access Points for Your Expanded Layout
Pathways are the infrastructure that make a large raised bed layout functional rather than merely impressive. As you add beds, your original pathway design may no longer serve the expanded space efficiently — and this is worth addressing deliberately rather than letting it evolve by accident.
The most important pathway metric is clearance: can you move comfortably with a basket, a watering can, or a small wheelbarrow? Primary access pathways between main bed rows should be generously wide. Secondary pathways between tightly clustered beds can be narrower, but should still allow you to kneel comfortably for planting and weeding.
Material matters too. Loose materials like wood chips and gravel are easy to install but require periodic topping up. Stepping stones or pavers offer permanence and a cleaner aesthetic, which suits gardeners who want the layout to look as good as it performs. Whatever material you choose, consistency across the expanded layout creates visual coherence that ties old and new sections together.
Consider adding one or two defined entry points to the garden — a simple arbor, a gate, or a defined threshold marker. These design elements frame the space, improve its visual logic, and are especially valuable if you're integrating beautification elements like decorative accessories or pathway systems alongside the growing beds.
Tip: Avoid creating dead ends. Every pathway in an expanded layout should connect to another pathway or exit point, so movement through the garden is fluid. Dead ends force backtracking and make the space feel more cramped than it is.
Step 7: Integrate Companion Functions Into the Expanded Layout
One of the underappreciated advantages of a modular approach is that expansion doesn't have to mean "more of the same." A growing garden layout is an opportunity to integrate companion functions — raising, beautification, or specialty growing — that transform a simple planting area into a full home ecosystem.
In our experience guiding home gardening projects, the gardeners who report the highest satisfaction with their expanded setups are almost always the ones who integrated at least one non-planting element. A chicken coop positioned adjacent to the garden beds creates a practical closed-loop system: chickens produce organic matter that feeds the soil, and garden scraps feed the chickens. A rabbit hutch serves a similar function on a smaller scale. Decorative pathway elements, trellises, and garden borders turn a productive space into one that's visually rewarding year-round.
When integrating these elements, plan for their spatial footprint during the layout design phase rather than retrofitting them afterward. A chicken coop needs appropriate setback from edible beds; a rabbit hutch needs a stable, level surface and protection from predators. These are solvable logistical problems — but much easier to solve on paper than after beds are in place.
Tip: Treat the expanded layout as a living system, not just a collection of individual beds. The goal is an interconnected environment where each element — beds, pathways, companion structures, beautification — supports the others.
Common Mistakes and Troubleshooting for Raised Bed Layout Expansion
| Symptom | Likely Cause | How to Fix |
|---|---|---|
| New beds are misaligned with existing ones, creating uneven pathways | Expansion beds were positioned by eye rather than measured against reference points | Use a long tape measure and string lines to establish alignment before installation; photograph from above to confirm |
| Soil settles dramatically in new beds within weeks | Beds were filled with loose, uncomposted material that compresses significantly | Overfill beds by a modest margin at installation; top up with compost after initial settling; improve mix quality with a denser base layer |
| Persistent waterlogging in pathways after rain | Expansion area has poor native drainage that wasn't assessed before installation | Add gravel or a French drain beneath pathway material; regrade slightly to direct water away from high-traffic zones |
| Existing beds receive noticeably less sun after expansion | New beds or companion structures shade earlier sections of the layout | Reposition taller structures to the north side; prune or train any overhead vegetation causing shading; reassign crop types to match new light conditions |
| Modular panels from new beds don't align cleanly with existing hardware | Different product generations or brands were mixed without checking compatibility | Source expansion components from the same product line; use connector hardware specifically designed for your bed system |
| Pathways become muddy and compacted quickly | Pathway material is insufficient or too fine for foot traffic load | Replace with coarser gravel, wood chip mulch, or stepping stones; add landscape fabric beneath loose materials to improve stability |
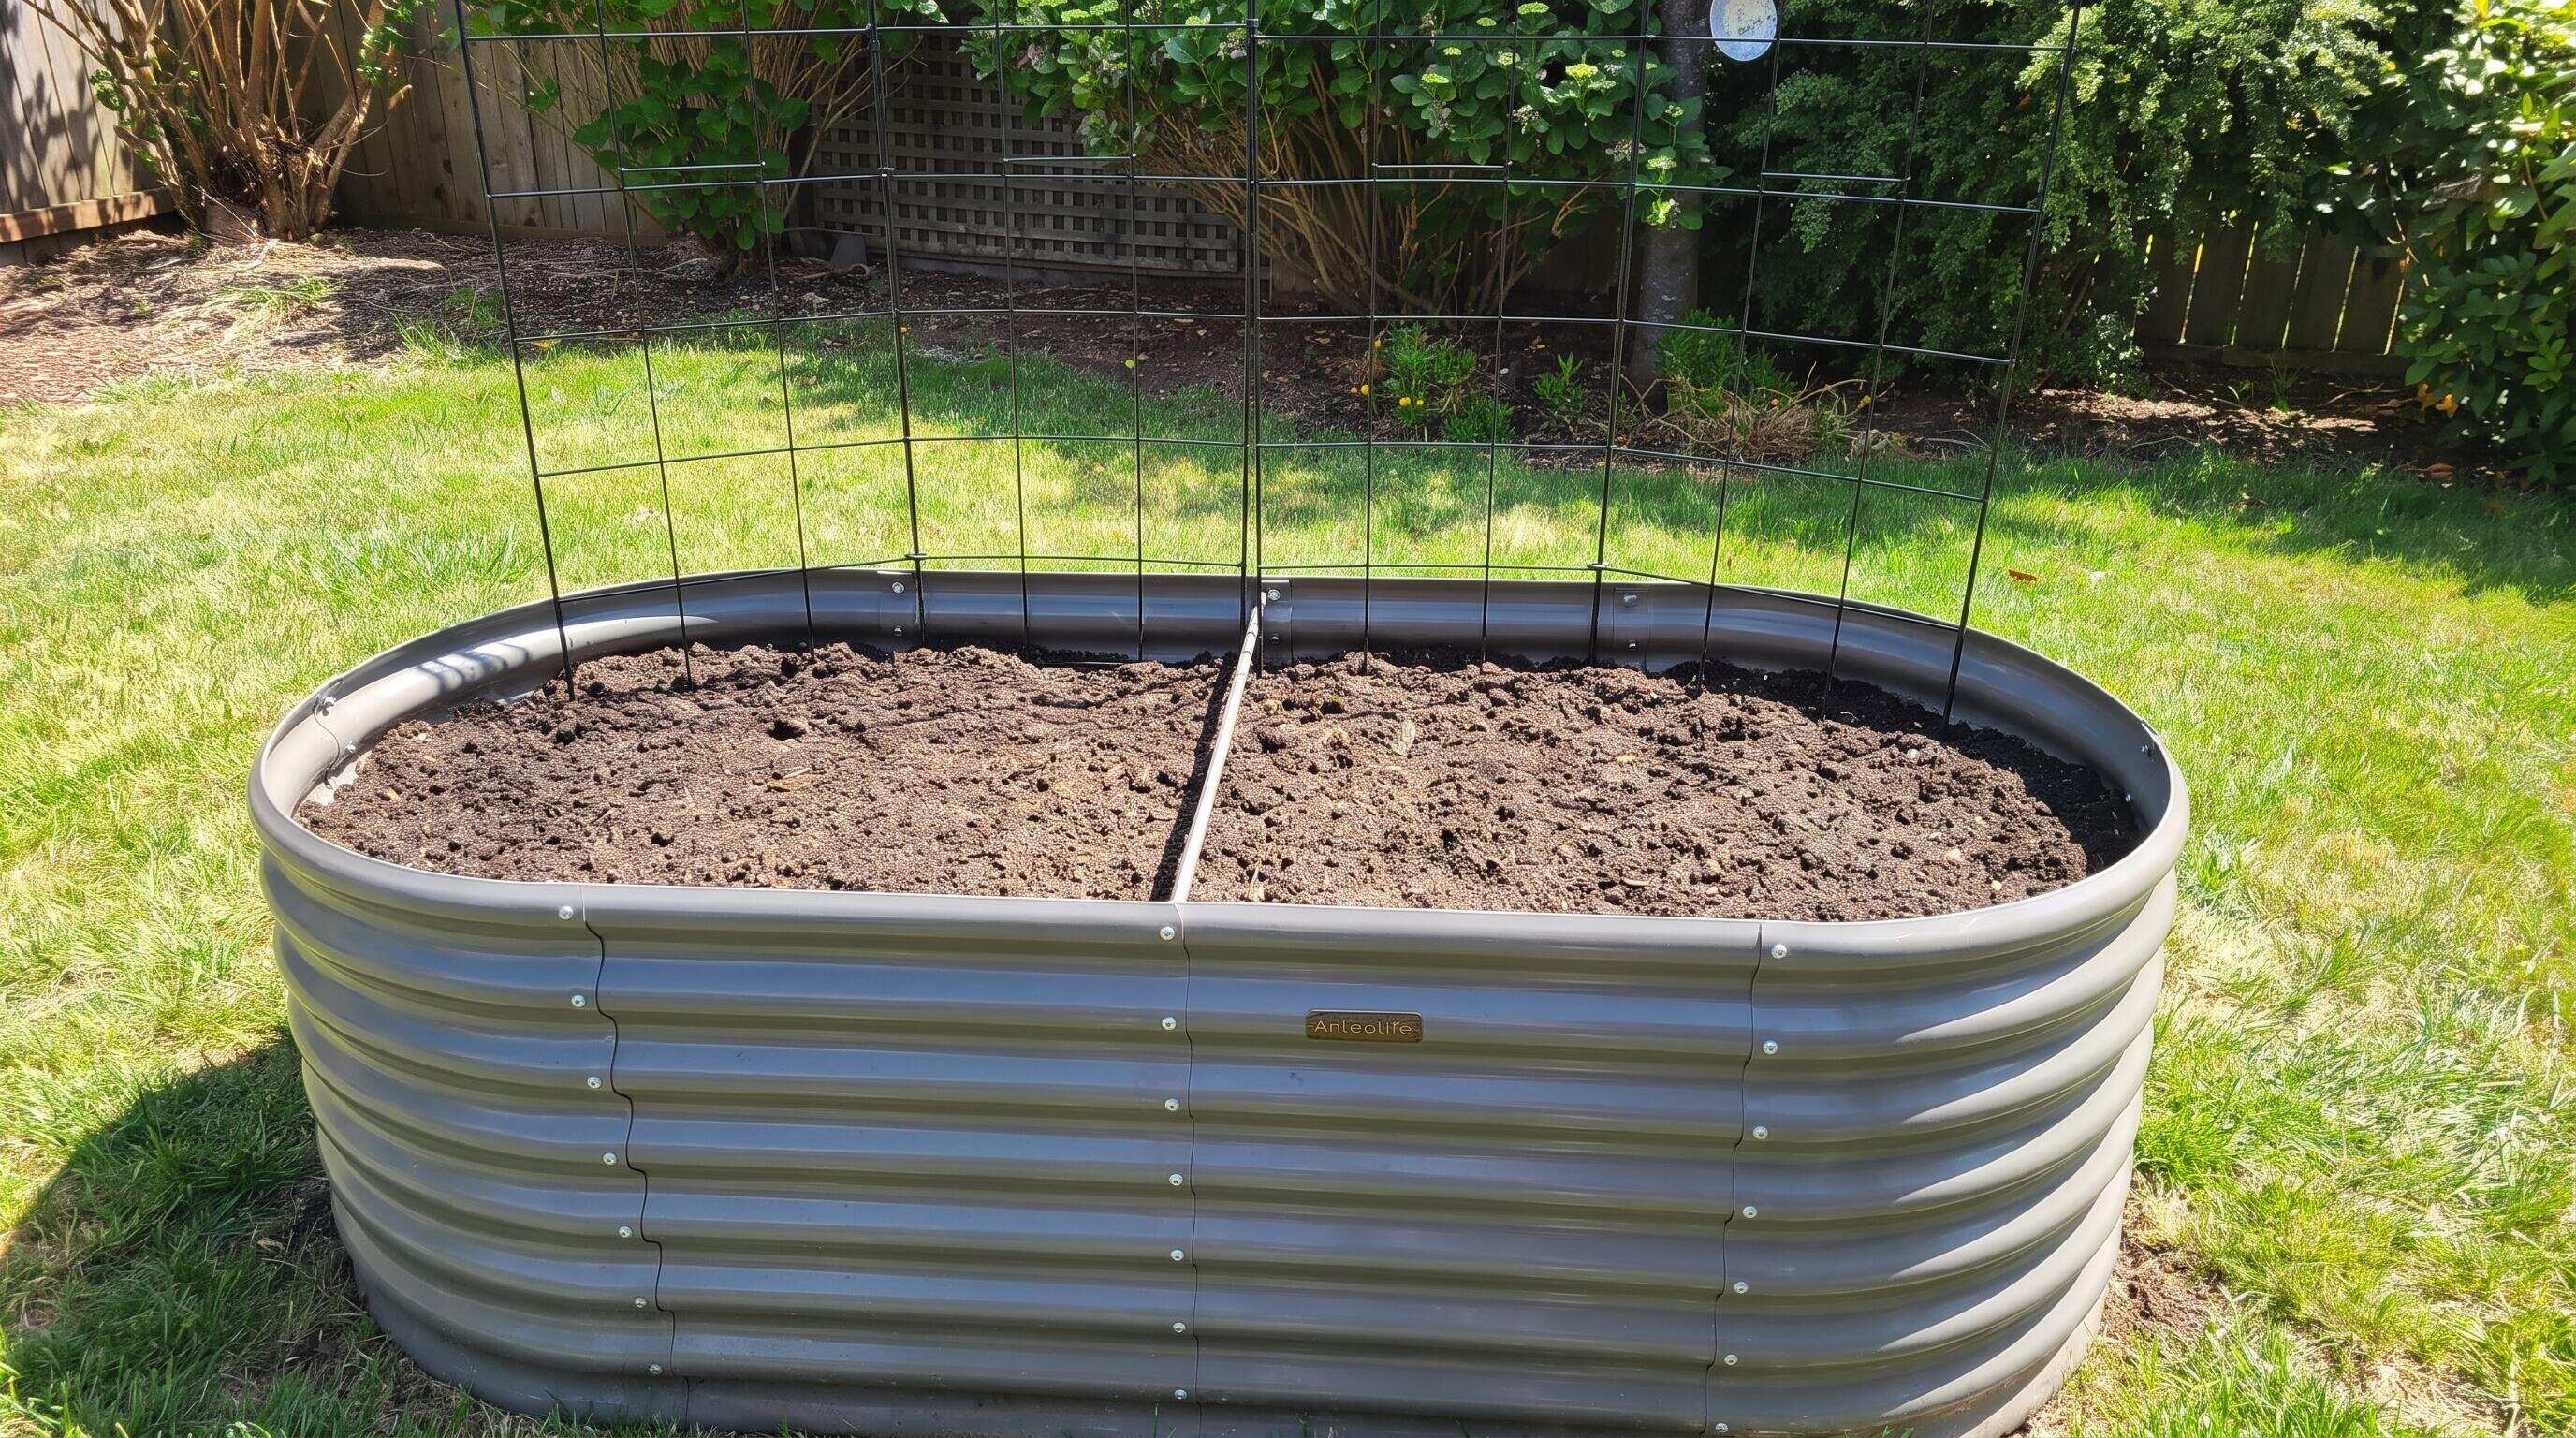
ALT: Troubleshooting a modular raised bed garden layout expansion with aligned panels, clear pathways, and integrated soil system
Pro Tips for a More Cohesive and Productive Expanded Layout
Plan the layout vertically, not just horizontally. Most gardeners map their raised bed layout as a two-dimensional top-down drawing, which is useful — but incomplete. Consider the vertical dimension: taller beds cast shade, trellised crops on one bed can shade adjacent ones, and varying bed heights create a visual layering effect that is either an asset or a problem depending on how it's managed. When Anleolife's 30-inch extra-tall beds are placed adjacent to standard 18-inch units, the height contrast can be a design feature — but it needs to account for sun angles during peak growing season.
Rotate crops across the expanded layout, not just within a single bed. Adding new beds is the ideal moment to establish or reset a multi-year crop rotation plan. According to the National Sustainable Agriculture Information Service, rotating plant families across different bed positions in successive seasons significantly reduces the buildup of soil-borne diseases and pests. Map your rotation plan alongside your spatial layout so that the two evolve together.
Don't neglect irrigation design during expansion. A layout that was manageable to hand-water at three beds becomes genuinely time-consuming at seven or eight. Before or during expansion, consider whether drip irrigation lines or soaker hoses should be integrated into the new bed sections. Retrofitting irrigation through an established, planted layout is considerably more disruptive than installing it at bed-filling time.
Use the expansion as an opportunity to standardize bed dimensions. Mixing several non-standard bed sizes across a layout creates a crop rotation puzzle that grows more complicated each season. Where possible, use consistent dimensions for the majority of your beds and treat specialty sizes (round beds, compact units, extra-tall waist-high models) as deliberate accent pieces with specific functions rather than interchangeable units.
A common misconception worth addressing: many gardeners assume that modular means unlimited flexibility — that any module can connect to any other in any configuration. In practice, modular systems have design logic built in, and the most functional layouts follow that logic rather than fighting it. Read your system's documentation, understand the panel lengths and connector types available, and design within those parameters. Creativity within a system's actual capabilities produces far better results than forcing configurations the hardware wasn't designed to accommodate.
Common Questions
Q1: How do I know which bed size to add when expanding my raised bed layout?
Choosing the right bed size for an expansion depends on three variables: the available space, the crops you intend to grow, and how the new bed will interact with existing infrastructure. Wider beds — such as 8x4 configurations — maximize growing area but require that all points be reachable from the sides without stepping on soil, which means a maximum reach distance of about two feet from each edge. Longer, narrower beds suit row crops and tight spaces. Matching new dimensions to those already in place creates a more coherent layout and simplifies crop rotation planning across seasons.
Q2: Are galvanized steel modular beds safe to use for growing vegetables?
Galvanized steel raised garden beds are widely used for vegetable growing and are generally considered safe for food production. The galvanization process coats steel with zinc, which provides corrosion resistance and structural durability. Zinc is a naturally occurring mineral nutrient, and at the trace levels that might migrate from bed walls into soil, it is not considered a health concern by mainstream horticultural and food safety guidance. Anleolife's galvanized steel beds are rated for a 20-year lifespan, making them a long-term investment in both safety and durability. If you want a deeper look at material comparisons, the analysis of galvanized steel versus recycled plastic options covers both sustainability and safety considerations.
Q3: How long does it take to expand an existing raised bed layout, and when should I do it?
The time required to expand a raised bed layout varies considerably based on scope — a single additional bed can be assembled and filled in a few hours, while a full multi-bed reconfiguration may take a full weekend or spread across several days. The best timing is late winter or early spring, before the main planting season begins, so that new beds have time to settle and soil biology can establish before crops go in. Avoid expanding mid-season when existing beds are in active production, as disruption to established root systems and soil structure can set back your harvest.
Summary
Expanding a modular raised bed garden layout is one of the most rewarding investments a home gardener can make — and with the right system, it doesn't require starting from scratch.
Key Takeaways:
- Audit your existing raised bed planting layout critically before adding anything; fix what's underperforming rather than expanding around it.
- Plan new bed placements on paper first, mapping sun exposure, drainage, and pathway flow before any physical work begins.
- Choose modular components — particularly galvanized steel beds rated for a 20-year lifespan — that are explicitly compatible with your existing system.
- Prepare the ground for new beds with the same care as your original installation, including leveling, weed suppression, and pathway material placement.
- Fill new beds with a structured, compost-rich soil system and amend existing beds at the same time.
- Integrate pathways, access points, and companion functions (raising, beautification) as deliberate design decisions, not afterthoughts.
- Think of the expanded layout as a living system where every element supports the others — not simply a larger version of what you already have.
The gardeners who build the most productive and visually satisfying spaces are the ones who expand incrementally, with intention. Your next step is to walk your existing space today, sketch what's possible, and identify the one or two beds that would deliver the most immediate impact.
Ready to take the next step? Anleolife's modular raised garden bed line is available through the official Anleolife website, as well as major platforms including Amazon, Walmart, Home Depot, Lowe's, and Wayfair — wherever you prefer to shop. With a nationwide U.S. warehouse network spanning California, Texas, Florida, New York, Illinois, and Washington, delivery arrives within 3–8 business days, so your expansion plans move at the pace you set. Whether you're adding one new bed this season or reconfiguring your entire backyard into a planting-and-raising ecosystem, Anleolife grows with you every step of the way.
References & Further Reading
- Savvy Gardening. "4x8 Raised Bed Vegetable Garden Layout Ideas".
https://savvygardening.com/4x8-raised-bed-vegetable-garden-layout/ - Gardeners.com. "Pre-Planned Gardens".
https://www.gardeners.com/pages/kitchen-garden-planner-preplanned-gardens - United States Department of Agriculture (USDA) — National Agricultural Library. Home Gardening and Soil Health Resources.
https://www.nal.usda.gov/ - National Sustainable Agriculture Information Service (ATTRA) — Sustainable Agriculture Program.
https://attra.ncat.org/
Note: Standards and guidance documents may be updated; please check the latest official documents or consult professional advisors for current recommendations.








