


























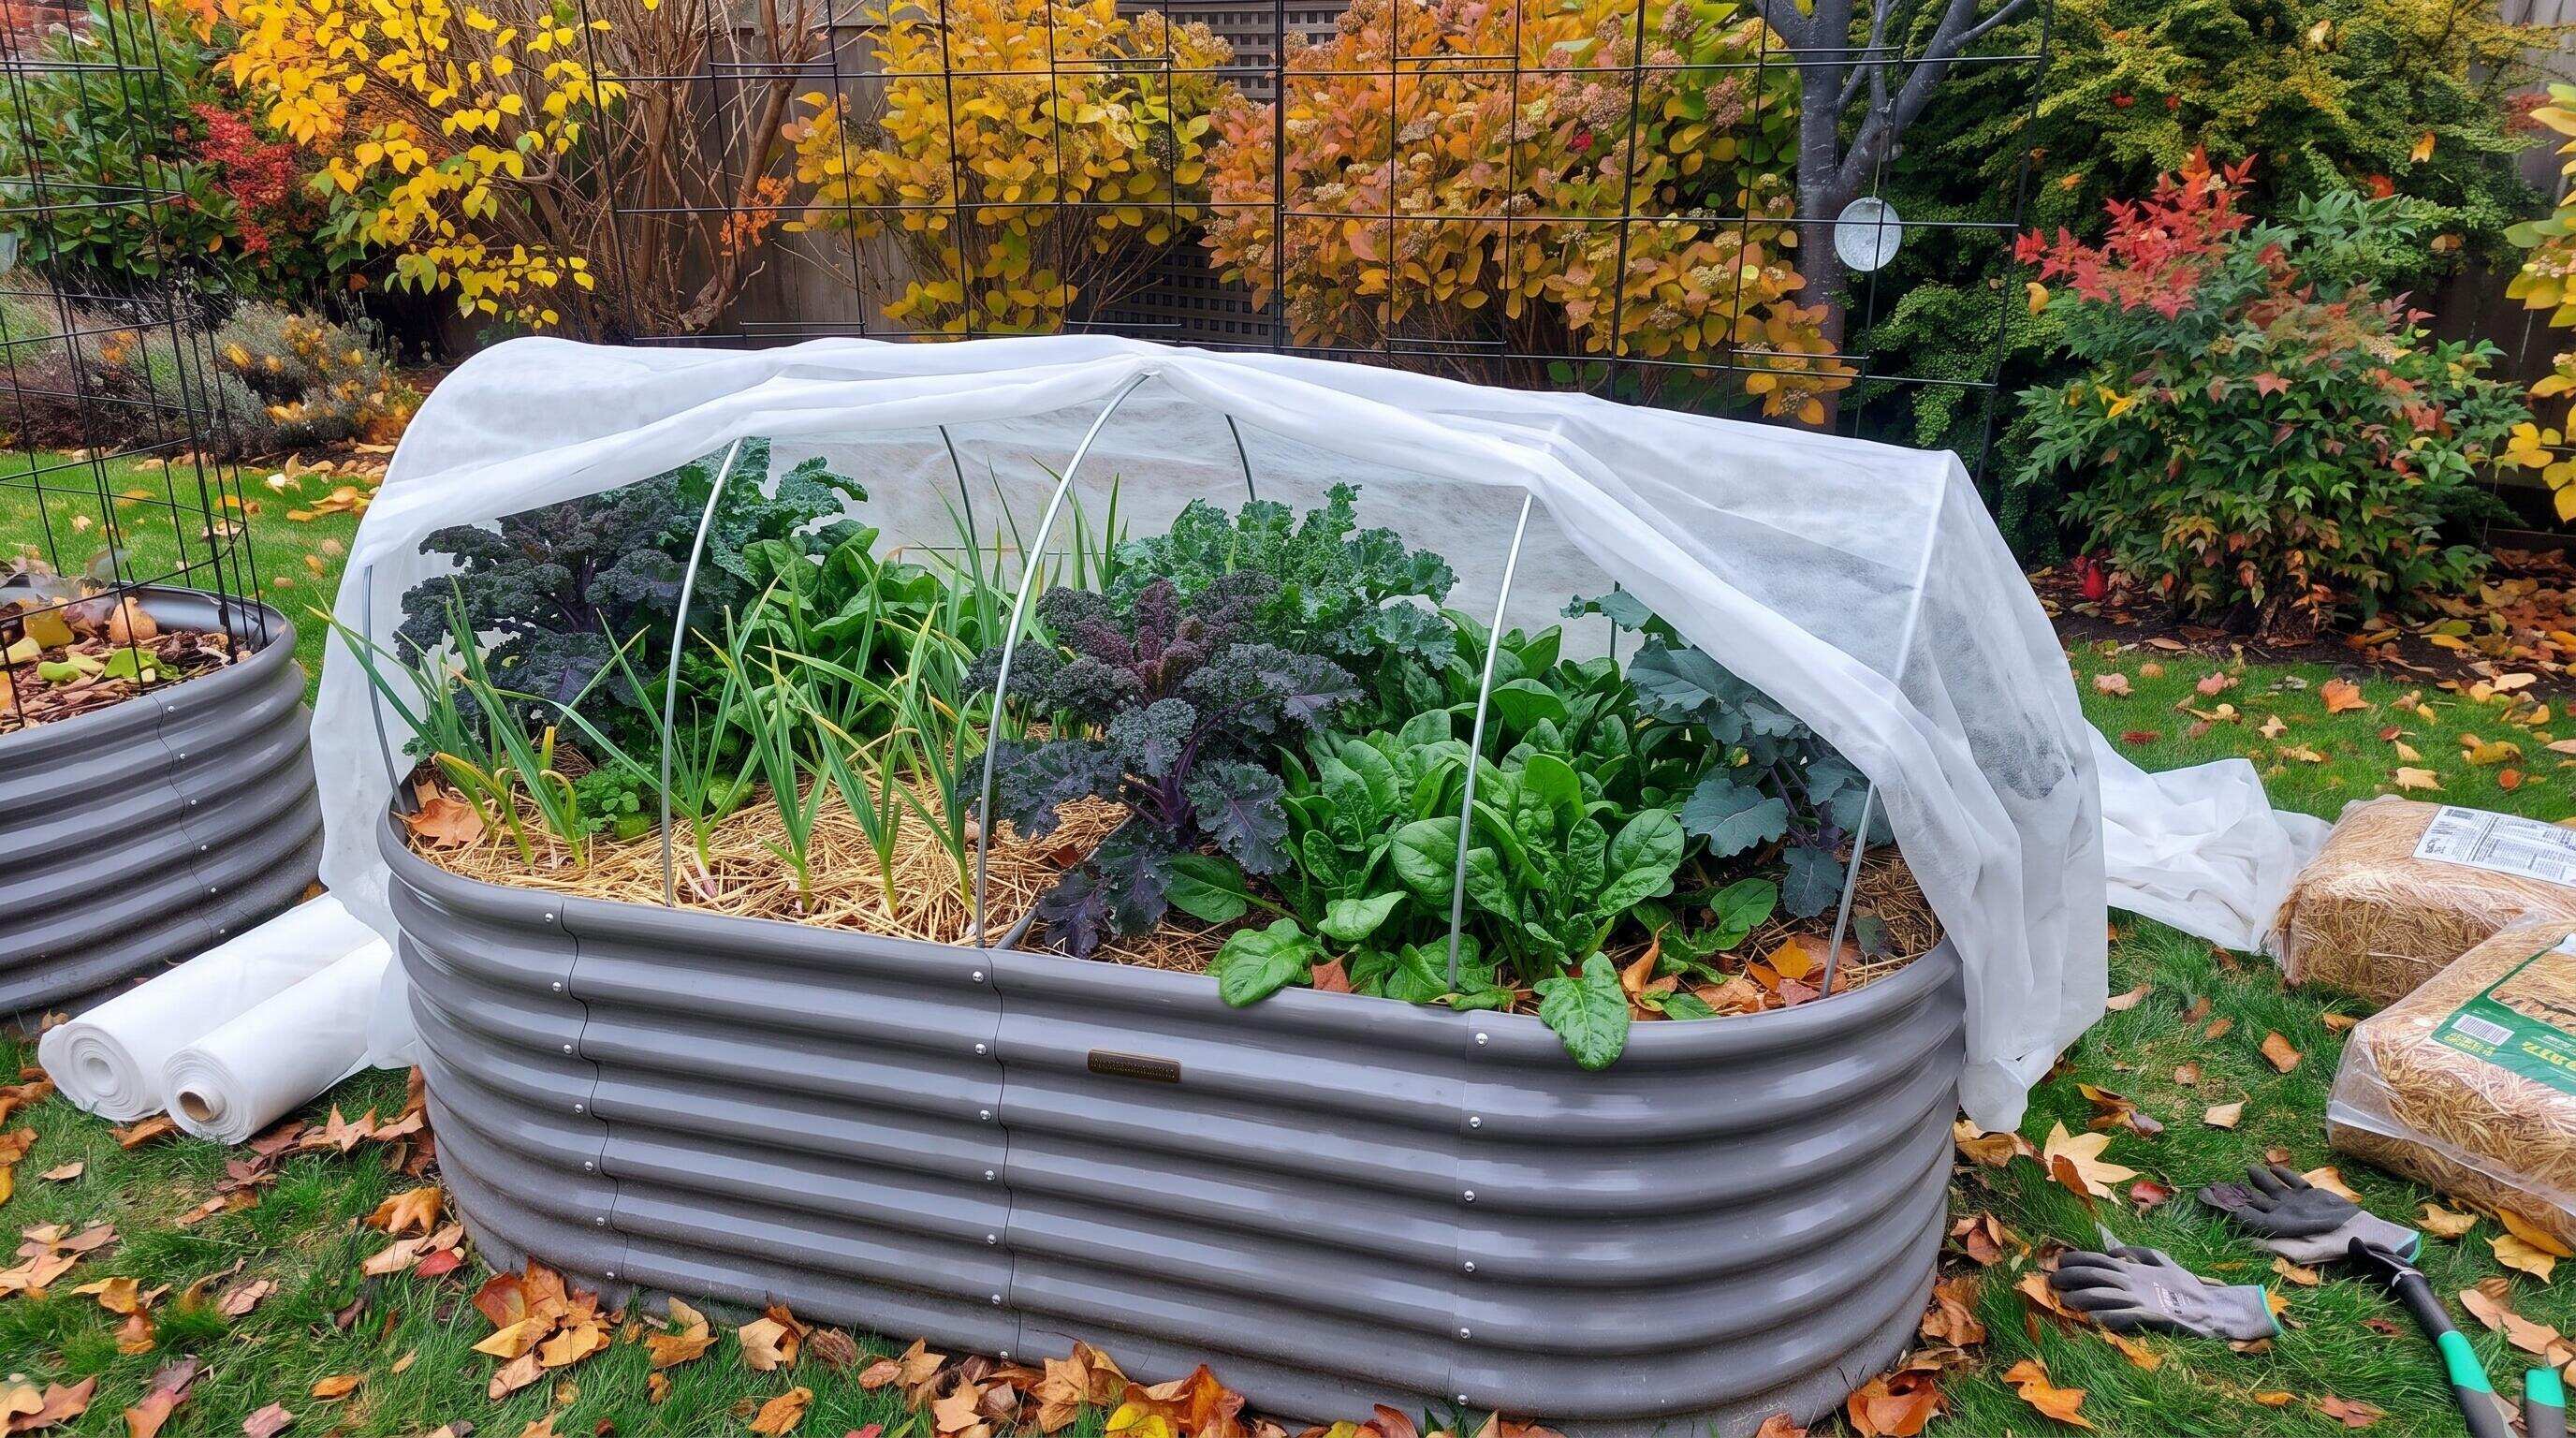
ALT: Galvanized steel raised garden bed being prepared for cooler fall temperatures with mulch and protective cover
Get Your Raised Garden Bed Ready Before the Cold Arrives
What should you actually do to your raised bed garden layout before cooler temperatures roll in — and does it really matter if you skip it? The short answer is yes, it absolutely matters. A well-prepared raised bed planting layout not only protects the plants you're overwintering, but it also preserves the soil structure, the bed hardware, and the biological life underground that makes your next growing season possible without starting from scratch.
This guide is written for home growers who have already made the investment in a quality raised bed setup — whether you're tending a single 8x4 bed on a suburban patio or managing a multi-bed layout across a larger backyard. If you're approaching autumn and wondering whether your work from the growing season will carry forward into spring, this step-by-step walkthrough will help you protect that investment, maximize your soil's long-term health, and set yourself up for an easier, more productive spring.
Before You Start: Prerequisites and Preparation for Cold-Season Bed Care
Preparing a raised garden bed for cooler temperatures is not a weekend emergency project — it's a deliberate, methodical process best started before the first hard frost arrives in your region. Understanding your local frost dates is the first prerequisite. According to the U.S. Department of Agriculture's Plant Hardiness Zone guidelines, frost timing varies significantly across North America, and the window for fall bed prep can be as early as late September in northern zones or as late as mid-November in warmer southern regions.
Before you begin, take stock of what's in and around your beds. Are you growing anything that can be overwintered in place, such as garlic, kale, or certain root vegetables? Are there summer crops that are finished but haven't been cleared yet? Is your raised bed layout made from a durable material that can weather seasonal shifts without corrosion or structural degradation?
If your beds are galvanized steel — a choice we consistently recommend to clients looking for long-term value — you're in a good position. Galvanized steel raised garden beds from Anleolife are engineered to last up to 20 years, which means the preparation work you do this fall will compound in value over many seasons, not just one.
Checklist before starting:
- Know your local average first frost date
- Identify which plants will stay, which will be harvested, and which will be pulled
- Gather tools: garden fork, pruning shears, soil amendments (compost, aged manure), mulch material, trowel, and row cover or frost cloth
- Inspect your raised bed structure for any signs of physical damage, loose panels, or compromised fasteners
- Source organic matter or compost to replenish soil nutrients stripped by the growing season
- Have a plan for your garden debris — compost what's clean, bag and remove anything showing signs of disease or pest pressure
Time and effort will vary depending on the size of your raised bed layout. A single small bed can be prepped in an afternoon. A multi-bed layout with four or more beds may take a full weekend. Either way, the work you put in now directly reduces the labor and cost required to get beds producing again in spring.
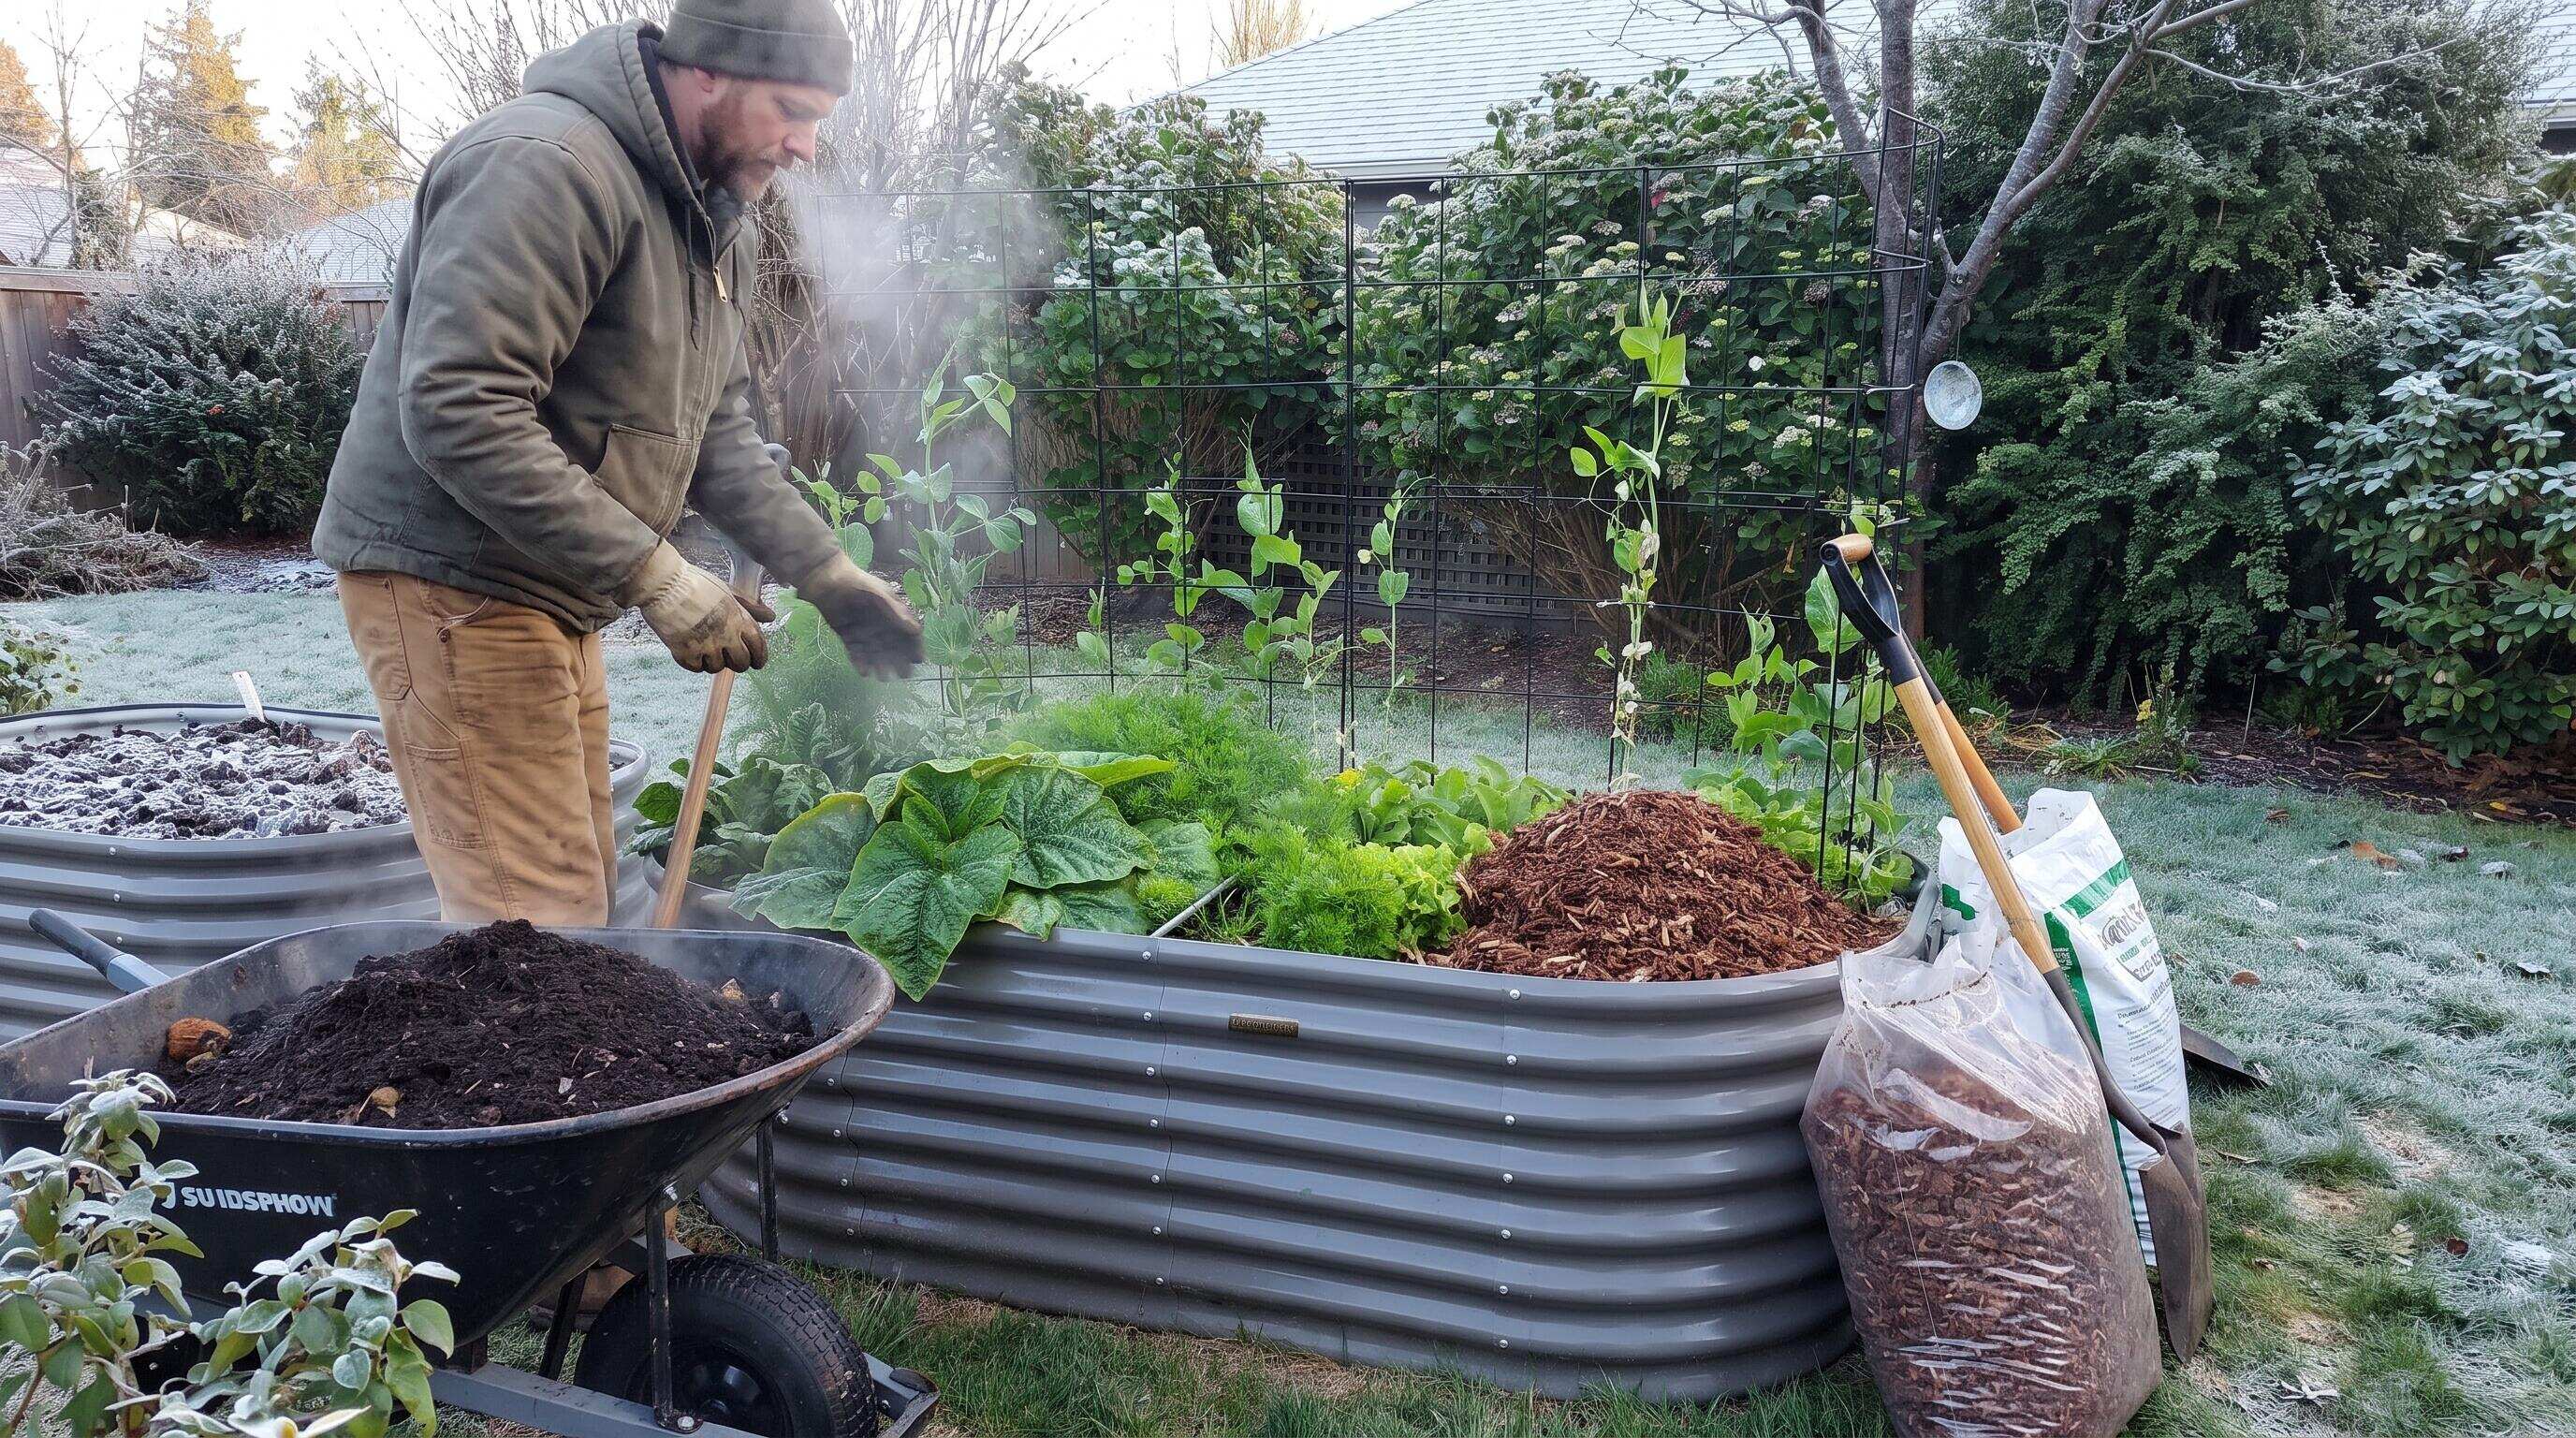
ALT: Gardener adding compost and mulch to a galvanized raised garden bed to protect soil health through cooler winter temperatures
Step-by-Step: How to Prepare Your Raised Garden Bed Layout for Cooler Temperatures
Step 1: Harvest Everything That's Ready and Remove Spent Plants
Walk every bed in your raised bed garden layout and make deliberate decisions about each plant. Harvest any remaining vegetables that are mature or close to mature — cold can damage many summer crops overnight. Tomatoes that are still green can ripen indoors on a countertop; peppers, eggplant, and beans should be picked before frost.
Once you've harvested, pull spent annuals by the root. Don't just cut them at the base and leave the root system in the soil — decaying roots can create pathways for fungal disease the following season. Clear the beds thoroughly, and separate debris into two categories: healthy plant material for composting, and anything diseased or pest-affected that should go directly into the trash or municipal yard waste.
Tip: Leaving one or two frost-tolerant plants in place — such as kale, Swiss chard, or arugula — gives you fresh greens well into cold weather and keeps the soil covered with living roots, which supports soil microbial health.
Step 2: Assess and Amend Your Raised Bed Soil System
Your raised bed soil system is the foundation of everything that grows in it, and fall is one of the best times of year to improve it. Over a growing season, plants strip nutrients from the soil, organic matter breaks down, and compaction can set in even in well-structured raised beds. A quality soil composition that was balanced in spring will likely need replenishment by fall.
Add 2 to 4 inches of finished compost to each bed and work it gently into the top several inches of existing soil with a garden fork. If you have access to aged manure, worm castings, or other organic amendments, this is the time to layer them in. Per guidance from the National Sustainable Agriculture Information Service (ATTRA), fall soil amendment allows organic matter to break down slowly over winter, becoming fully integrated and biologically active by the time spring planting begins — so the nutrients are available exactly when seedlings need them most.
Check your soil's drainage capacity as well. In a well-designed raised bed planting layout, water should percolate through evenly. If you notice pooling or compaction, loosen the soil bed and add perlite or coarse compost to improve aeration before the ground freezes.
Tip: Avoid working soil that is already frozen or waterlogged, as this destroys soil structure. Aim to complete soil amendment before overnight temperatures consistently drop below freezing in your area.
Step 3: Plant a Cover Crop or Apply a Protective Mulch Layer
One of the most cost-effective things you can do for a raised bed garden layout during the off-season is to either plant a cover crop or apply a generous mulch layer — or both. Cover crops such as winter rye, crimson clover, or hairy vetch protect bare soil from erosion, suppress weeds, fix nitrogen, and feed soil biology through their root systems.
If your growing season ends too late to establish a cover crop before frost, a 3 to 4-inch layer of organic mulch — straw, shredded leaves, or wood chip fines — achieves similar soil-protection goals. Mulch insulates the soil, moderates temperature fluctuations, retains moisture, and reduces the impact of freeze-thaw cycles that can disrupt soil structure over winter.
In our work supporting gardeners across different climate zones, we consistently see a clear difference in spring productivity between beds that were mulched or cover-cropped versus beds left bare through winter. The protected beds start warmer, drain better, and require less amendment work to get to a plantable state.
Tip: If you're planting garlic for a spring harvest — a very popular choice among raised bed growers — do it now. Plant cloves 2 to 3 inches deep in amended soil, then mulch heavily. Garlic establishes roots over winter and produces robust bulbs the following summer.
Step 4: Protect Perennials and Cold-Sensitive Plantings
If your raised bed layout includes perennial herbs like rosemary, thyme, lavender, or chives, these plants need different treatment than annuals. Most hardy perennial herbs can survive light frost, but in colder zones they benefit from a light mulch blanket around their base and — in severe climates — a frost cloth draped loosely over them.
Strawberry plants overwintering in raised beds should be mulched with 4 to 6 inches of straw after the first hard freeze. This is a deliberate sequence: you want the plants to harden off naturally with light frosts before you insulate them, because premature mulching can trap warmth and delay dormancy.
For any cold-sensitive ornamental or edible plants you want to carry through winter in your raised bed planting layout, row covers and frost blankets are among the most practical and reusable tools available. They trap radiant heat from the soil, raising the microclimate within the bed by several degrees — enough to make a meaningful difference in plant survival.
Tip: Anchor frost cloth securely at the edges. Loose covers can blow off overnight, defeating their purpose exactly when temperatures are lowest.
Step 5: Inspect and Maintain Your Raised Bed Structure
Fall is also the right time to evaluate the physical condition of your raised bed structure. Run your hands along panel seams, check corner fasteners, and look for any signs of stress on the frame. For gardeners with galvanized steel beds, the news is generally good — galvanization creates a zinc-oxide barrier that resists corrosion in all but the most aggressive soil and moisture conditions. If you want to go deeper on what makes certain materials outperform others over time, our guide on rust-resistant garden bed materials breaks down the comparison in detail.
Anleolife's galvanized steel raised garden beds — available in a wide range of heights from 18" standard to 35" waist-high models — are built with longevity in mind, rated to last up to 20 years under normal use. A quick fall inspection to confirm all panels are seated correctly and all fasteners are snug keeps the structure in peak condition for another season.
If you have wooden beds that are showing signs of rot at the joints or base boards, fall is the time to make a realistic decision about whether to repair or replace. The cost of repairing a deteriorating wooden bed each year often exceeds the long-term value it provides — a consideration that tends to shift growers toward metal alternatives over time.
Tip: Rinse the exterior surfaces of metal beds with clean water to remove accumulated soil, fertilizer salts, or organic debris that can trap moisture against the metal if left sitting through winter.
Step 6: Drain and Store Irrigation Equipment
If your raised bed layout includes a drip irrigation system or soaker hoses, winterizing that equipment is a necessary step in cold-climate regions. Water left in lines and emitters can freeze, expand, and crack plastic components — turning functional irrigation infrastructure into a spring replacement expense.
Disconnect hose lines, drain them fully, and store flexible tubing coiled indoors or in a garage where temperatures stay above freezing. Timers and battery-powered controllers should also come inside for the winter, as repeated freeze-thaw cycles can shorten battery life and damage electronic components.
For raised beds in milder climates where hard freezes are rare, you may be able to leave drip systems in place — but still disconnect from the water source and flush lines at season's end as a best practice.
Tip: Label and coil irrigation components as a matched set so spring reinstallation goes smoothly. A bit of organization in the fall saves significant time when you're eager to get planting in early spring.
Step 7: Document Your Raised Bed Garden Layout for Next Season
This final step is one that many growers skip and almost always wish they hadn't: documenting what you grew, where you grew it, and how it performed. A simple raised bed planting layout sketch — even a hand-drawn diagram noting which crops occupied which sections — is invaluable for crop rotation planning next year.
Crop rotation in raised bed gardening is a proven strategy for reducing soil-borne disease pressure and balancing nutrient demand across beds. According to guidelines from the University of California Cooperative Extension, rotating plant families across different bed positions each season interrupts pest and disease cycles that are specific to one plant family. If your tomatoes struggled with blight this year in a particular bed, moving that crop to a different bed next season and resting that soil with a nitrogen-fixing cover crop or legume significantly reduces recurrence risk.
Note which varieties performed well in your specific raised bed layout, which soil amendments you applied and when, and any pest or disease issues you observed. This record becomes a personalized growing reference that improves year over year — the kind of accumulated knowledge that separates confident growers from those who feel like they're starting over every spring.
Tip: A simple notebook or phone photo log works perfectly well. You don't need a specialized app — just consistent, dated notes taken while the details are still fresh.
Common Mistakes and Troubleshooting in Fall Raised Bed Preparation
| Symptom | Likely Cause | How to Fix |
|---|---|---|
| Soil is compacted and draining poorly by spring | Bare soil was left exposed to winter rain and freeze-thaw cycles without mulch or cover | Apply 3-4 inches of organic mulch next fall; consider a cover crop in future seasons |
| Overwintered plants die despite precautions | Frost cloth or mulch applied too early, trapping warmth and preventing dormancy hardening | Wait for two or three light frosts before applying heavy insulation; match timing to your zone |
| Raised bed panels have shifted or bowed by spring | Soil expansion from freezing pushed against panels; fasteners not tightened before winter | Inspect and tighten fasteners every fall; consider reinforcing corners on beds in high-freeze zones |
| Soil is depleted and seeds germinate slowly in spring | No fall amendment; organic matter not added before winter to break down naturally | Add compost and aged organic matter every fall as a standard practice, not only when problems appear |
| Garlic planted in fall doesn't emerge well | Planted too late, or mulch layer applied before cloves established root contact | Plant garlic in the correct window for your zone; allow cloves to settle for 1-2 weeks before heavy mulching |
| Irrigation lines cracked over winter | Water left in lines that froze and expanded | Flush and drain all lines completely before first freeze; store flexible hoses indoors |
Pro Tips for Better Results from Your Fall Bed Preparation
Think of fall prep as a capital investment, not a chore. The time and modest material cost of fall preparation — compost, mulch, frost cloth — directly reduces the labor and supply costs you'll face in spring. Growers who skip fall prep consistently spend more time and money in April trying to rehabilitate beds that could have been ready to plant weeks earlier.
Match your bed height to your overwintering strategy. Taller beds — Anleolife's 24" extra-tall and 30" extra-tall models, for instance — retain more soil volume, which means more thermal mass to buffer temperature swings. A deeper soil column stays warmer longer into the cold season and warms up faster in early spring, giving you a meaningful extension on both ends of the growing year. If you're still in the process of choosing or expanding your setup, reviewing how to size a raised garden bed kit before purchasing can help you make a decision that serves both summer growing and winter protection goals.
Don't neglect the soil biology. A common misconception in fall bed prep is that the goal is simply to clean everything out and "put the bed to sleep." In reality, healthy raised bed soil is biologically active even in winter — fungal networks, beneficial bacteria, and earthworms continue working below the frost line. Your goal is to support that activity, not shut it down. Mulch and compost additions feed the soil food web through winter, so the beds that emerge in spring are genuinely healthier than the ones you put to rest in fall.
Use fall to reconfigure your raised bed layout if needed. If certain beds underperformed this season because of shading, poor drainage, or awkward access, the off-season is the time to address those structural issues. Moving a modular bed, adding a new bed in a sunnier position, or reconfiguring a bed layout to improve workflow is far easier before spring planting urgency sets in.
Plan your spring layout now, while the current season's results are fresh. The most productive raised bed growers we work with consistently report the same habit: they plan next year's raised bed planting layout in the fall, not in the spring. When the details of what worked and what didn't are still clear, planning is faster, more accurate, and more likely to result in meaningful improvements.
Common Questions
Q1: How do I know when it's time to start preparing my raised garden bed for winter?
The right time to begin fall raised bed preparation is roughly 4 to 6 weeks before your region's average first hard frost — not the first light frost, but the first freeze that consistently damages tender crops. Check the USDA Plant Hardiness Zone Map to confirm your zone and typical frost timing. Starting early gives you time to harvest, amend soil, plant garlic or cover crops, and apply mulch in the correct sequence without rushing any step.
Q2: Is galvanized steel a safe and durable material for raised garden beds in cold climates?
Galvanized steel is one of the most durable materials for raised garden beds in cold-climate conditions. The zinc coating on galvanized steel creates a barrier that resists corrosion from moisture, soil contact, and freeze-thaw cycling better than bare metal or most wood options. Anleolife's galvanized steel raised garden beds are rated to last up to 20 years, making them a strong long-term value choice for growers in northern zones where winters are harsh and repeated seasonal stress on bed materials is unavoidable.
Q3: How much does fall raised bed preparation typically cost, and is it worth it?
Fall raised bed prep is one of the highest-return investments in home gardening. The primary materials — compost, organic mulch, and frost cloth — are modest in cost and widely available. The ROI comes in the form of better spring soil quality, reduced need for purchased fertilizers, stronger plant establishment, and fewer disease or pest problems carried over from the previous season. Growers who invest in proper fall preparation consistently report less spring remediation work and earlier first harvests, compounding the value season after season.
Summary
Preparing your raised garden bed for cooler temperatures is a practical, high-value process that protects your soil, your plants, and the bed structure itself — and sets the stage for a more productive growing season next year.
Key Takeaways:
- Harvest and clear beds completely before the first hard frost; remove diseased material rather than composting it
- Amend soil every fall with compost and organic matter — fall amendment integrates fully by spring, feeding plants exactly when they need it
- Mulch or cover-crop bare beds to protect soil structure and biological activity through winter
- Inspect and maintain your raised bed structure in fall, while conditions allow for easy repairs
- Drain and store irrigation equipment before freezing temperatures arrive
- Document your raised bed garden layout and crop performance to inform smarter rotation and planning next season
The most valuable habit you can build as a raised bed gardener is treating fall not as the end of the gardening year, but as the beginning of next year's success. Every hour invested in October and November compounds into an easier, more abundant spring.
Ready to upgrade your raised garden bed setup before winter sets in? Explore Anleolife's full range of galvanized steel and rust-resistant raised garden beds — available in heights from 18" to 35" waist-high models — at the Anleolife website, or through Amazon, Walmart, Home Depot, Lowe's, and Wayfair. With a nationwide U.S. warehouse network spanning California, Texas, Florida, New York, Illinois, and Washington, delivery arrives in as fast as 3–8 business days, so your garden upgrade plans move at your pace. From a first single bed to a fully integrated planting-and-raising ecosystem, Anleolife grows with you every step of the way.
Sources
- U.S. Department of Agriculture (USDA). "Plant Hardiness Zone Map."
https://www.usda.gov/ - U.S. National Sustainable Agriculture Information Service (ATTRA). "Sustainable Soil Management: Organic Matter and Cover Crops."
https://attra.ncat.org/ - University of California Cooperative Extension. "Crop Rotation Principles and Practices for Home Gardens."
https://ucanr.edu/ - U.S. Environmental Protection Agency (EPA). "Composting at Home: Benefits and Best Practices."
https://www.epa.gov/ - ASTM International. "Standard Specifications for Steel Sheet, Zinc-Coated (Galvanized) by the Hot-Dip Process."
https://www.astm.org/
Note: Standards and guidelines may be updated; please check the latest official documents or consult professional advisors for current recommendations.








