


























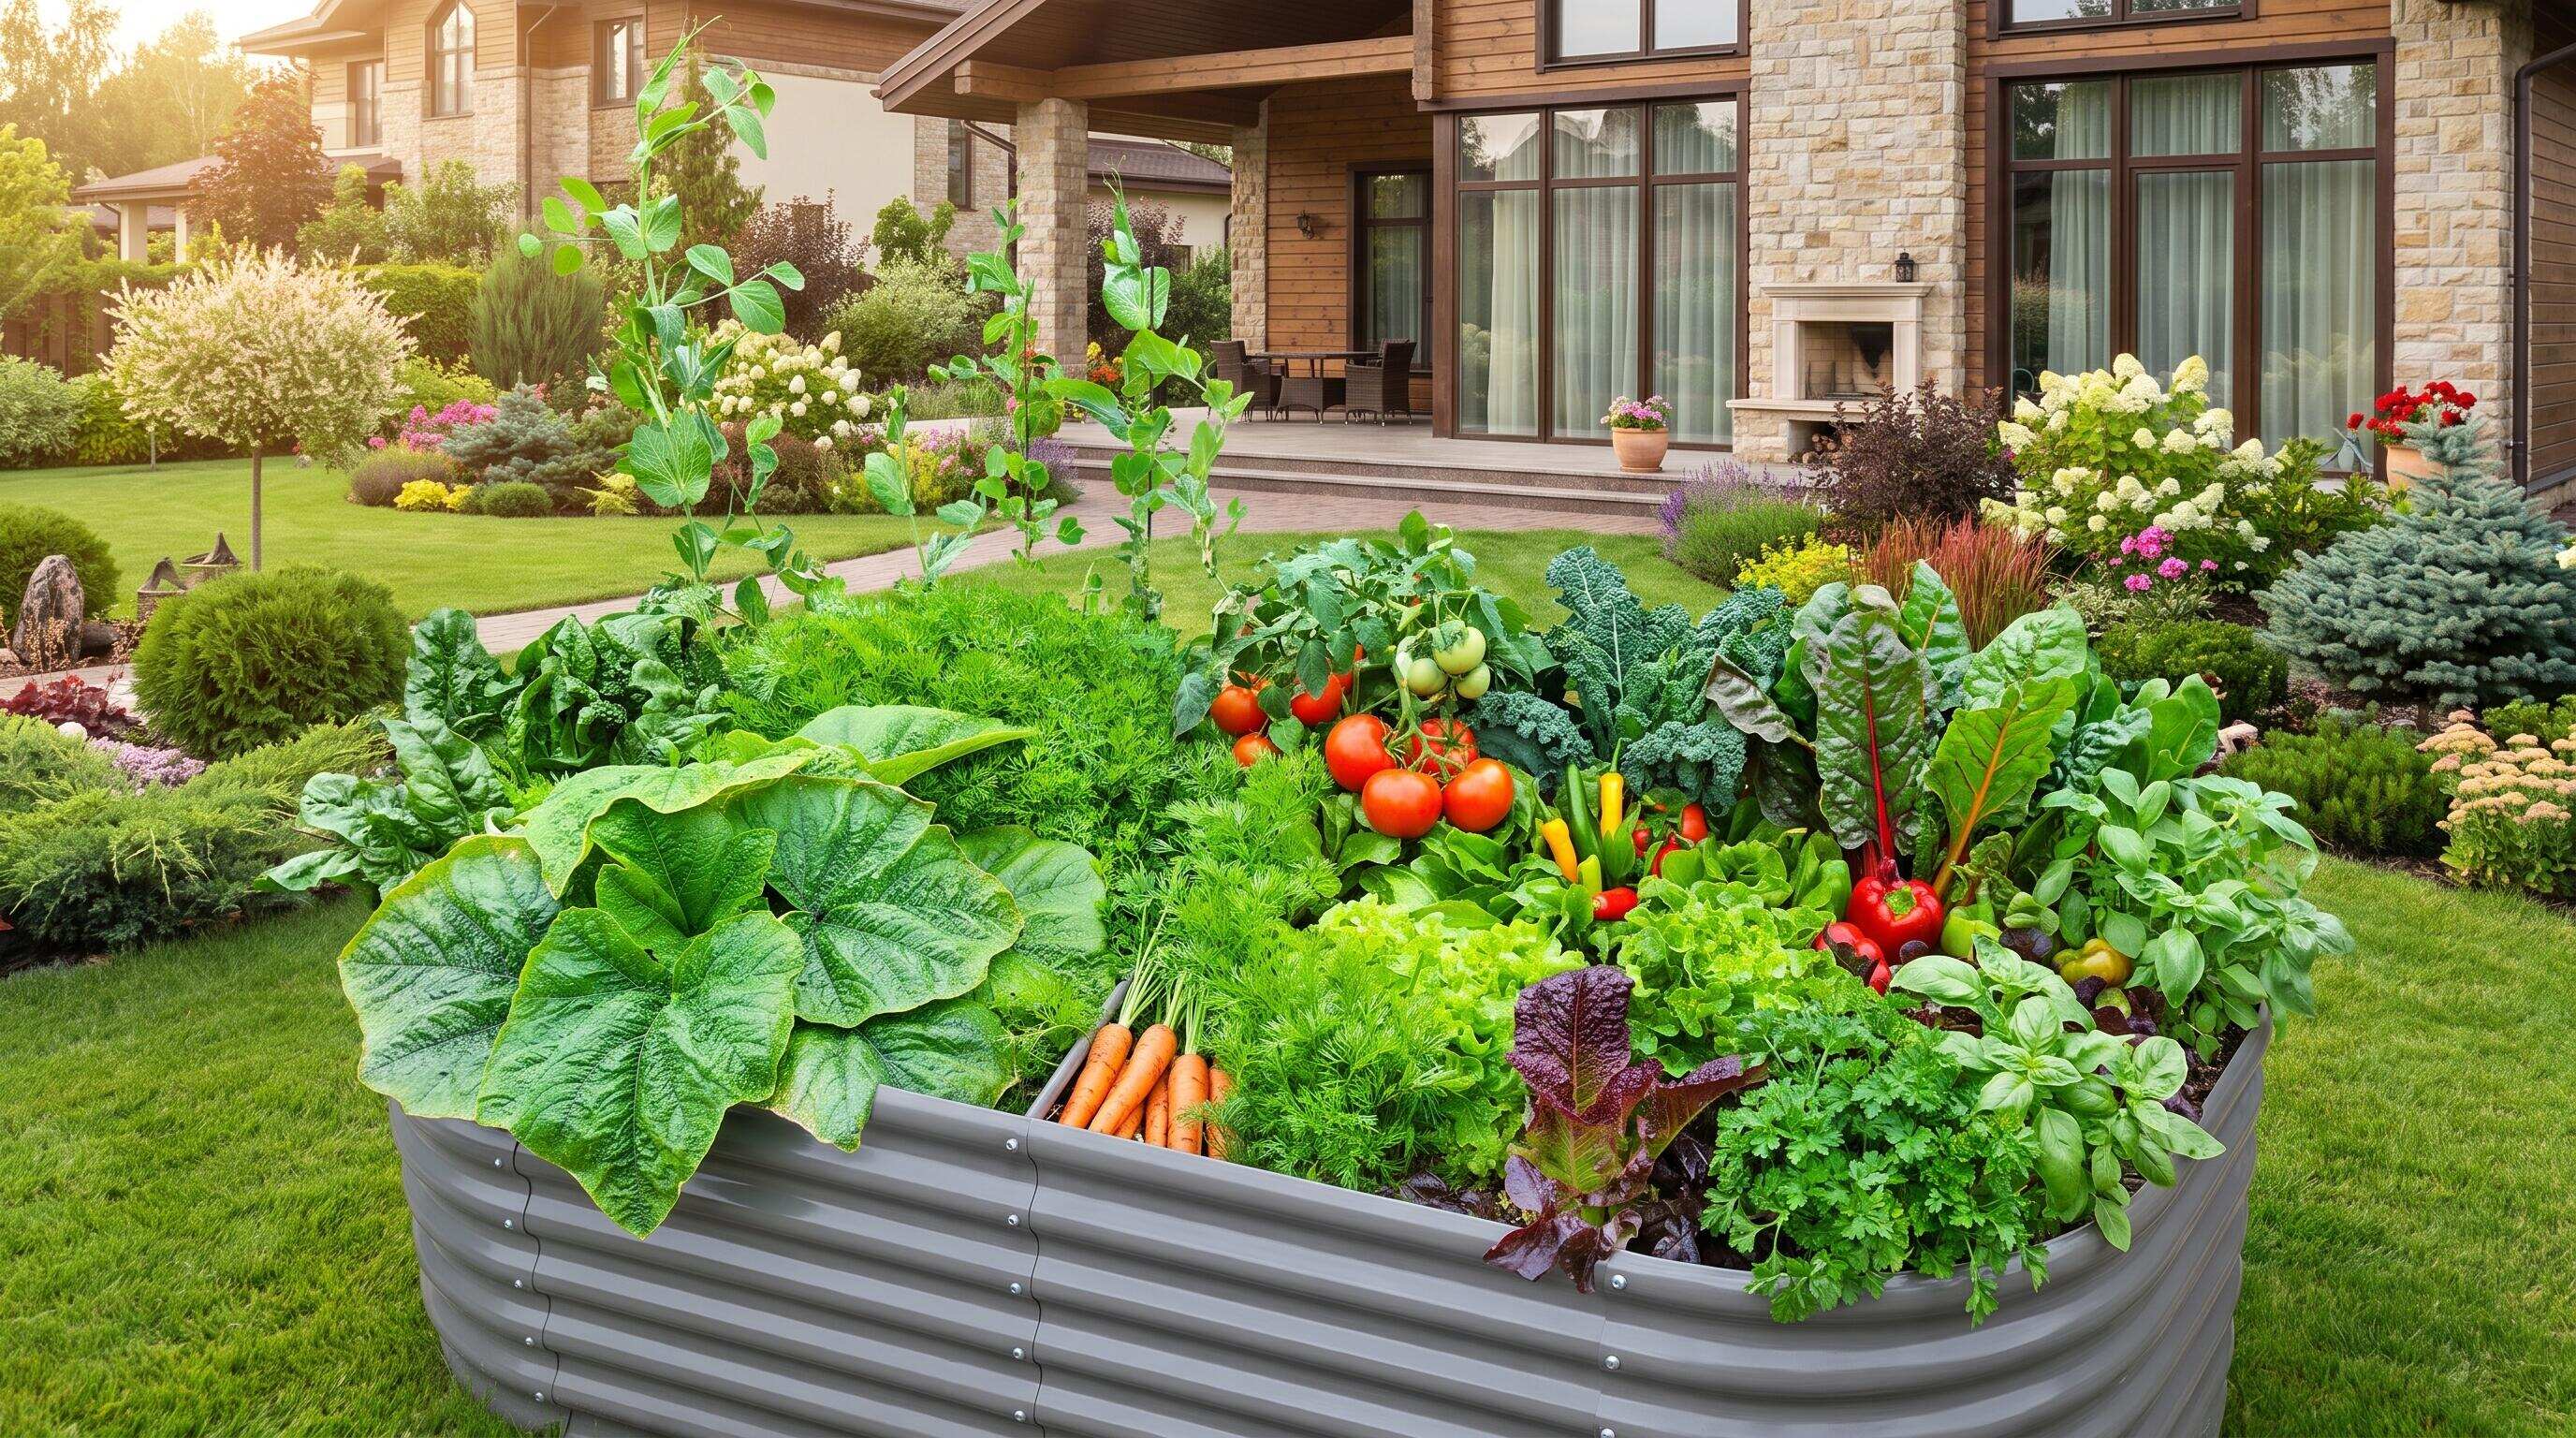
ALT: Beginner-friendly DIY gardening kit with raised bed garden layout tools and soil system
What Every Beginner Needs to Know About a Truly Friendly DIY Gardening Kit This Season
A well-designed raised bed garden layout is the single most important factor separating a frustrating first season from a genuinely rewarding one. Across the home gardening community in North America, interest in DIY growing kits has grown steadily — and in our work with new gardeners, a pattern we consistently see is that most early failures trace back not to bad seeds or poor weather, but to a poorly planned setup before the first seed ever goes in the ground.
This article unpacks what truly makes a DIY gardening kit beginner-friendly in practical, concrete terms: how a clear raised bed planting layout gives beginners an actionable roadmap, why material quality and modular design matter more than size, and how the right soil system transforms a metal box into a thriving micro-ecosystem. The core conclusion is simple — a genuinely beginner-friendly kit combines structural durability, intuitive layout guidance, and a soil system that forgives early mistakes. By the end, you will know exactly what to look for, what to avoid, and how to set yourself up for a productive, enjoyable season.
- A beginner-friendly kit must solve three problems simultaneously: where to place plants (layout), what to grow them in (soil), and how to expand without starting over (modularity).
- The raised bed layout itself is often the missing piece — even a quality bed with mediocre layout planning leads to overcrowding, shading conflicts, and poor yields.
- For middle-class families, eco-conscious growers, urban micro-gardeners, and retirees, the right setup should feel empowering on day one, not overwhelming.
Who This Guide Is For — and When It Applies
Applicable Scenarios:
- First-time gardeners who have never grown food outdoors and want a structured, low-risk starting point this season
- Urban and suburban homeowners with limited yard space who need a compact, efficient raised bed planting layout
- Empty nesters and retirees looking for a low-maintenance, ergonomically accessible growing system they can expand gradually over time
Not Applicable / Cautions:
- Experienced market gardeners managing large-scale production plots — the beginner-centered guidance here may feel too foundational for your context
- Renters without permission to install permanent structures or modify soil, since some recommendations assume ground-level or semi-permanent placement
Why Raised Bed Layout Planning Has Become the Cornerstone of Beginner Gardening
A raised bed garden layout is a structured planting plan that assigns specific crops to defined zones within a contained growing environment — typically a metal, wood, or composite frame filled with a managed soil system. For beginners, this structure replaces guesswork with a repeatable, learnable system.
In our experience working across the full spectrum of home gardening setups — from compact urban balcony beds to sprawling suburban planting grids — the gardeners who succeed in their first season are almost always the ones who planned their layout before they planted. Those who simply fill a bed and scatter seeds often face an avoidable season of overcrowding, poor light distribution, and nutrient competition.
The home gardening category has seen a meaningful shift toward system-based thinking. Rather than buying individual components — a bag of soil here, a packet of seeds there — today's beginners are increasingly looking for complete setups that include a bed, a soil framework, and a planting guide. According to the Old Farmer's Almanac, a structured approach to raised bed vegetable garden layouts significantly reduces beginner failure rates by giving growers a clear visual plan before the first plant goes in the ground (see the Raised Bed Garden Layout Plans resource from the Almanac for a practical starting reference).
The shift toward galvanized steel beds has further accelerated this trend. Steel beds offer structural permanence — meaning the layout you plan today can anchor your garden for years to come. At Anleolife, our galvanized steel raised garden beds are built with a service life of up to 20 years, which changes the calculus entirely: the layout you establish this season is not a temporary experiment but the foundation of a long-term growing system.
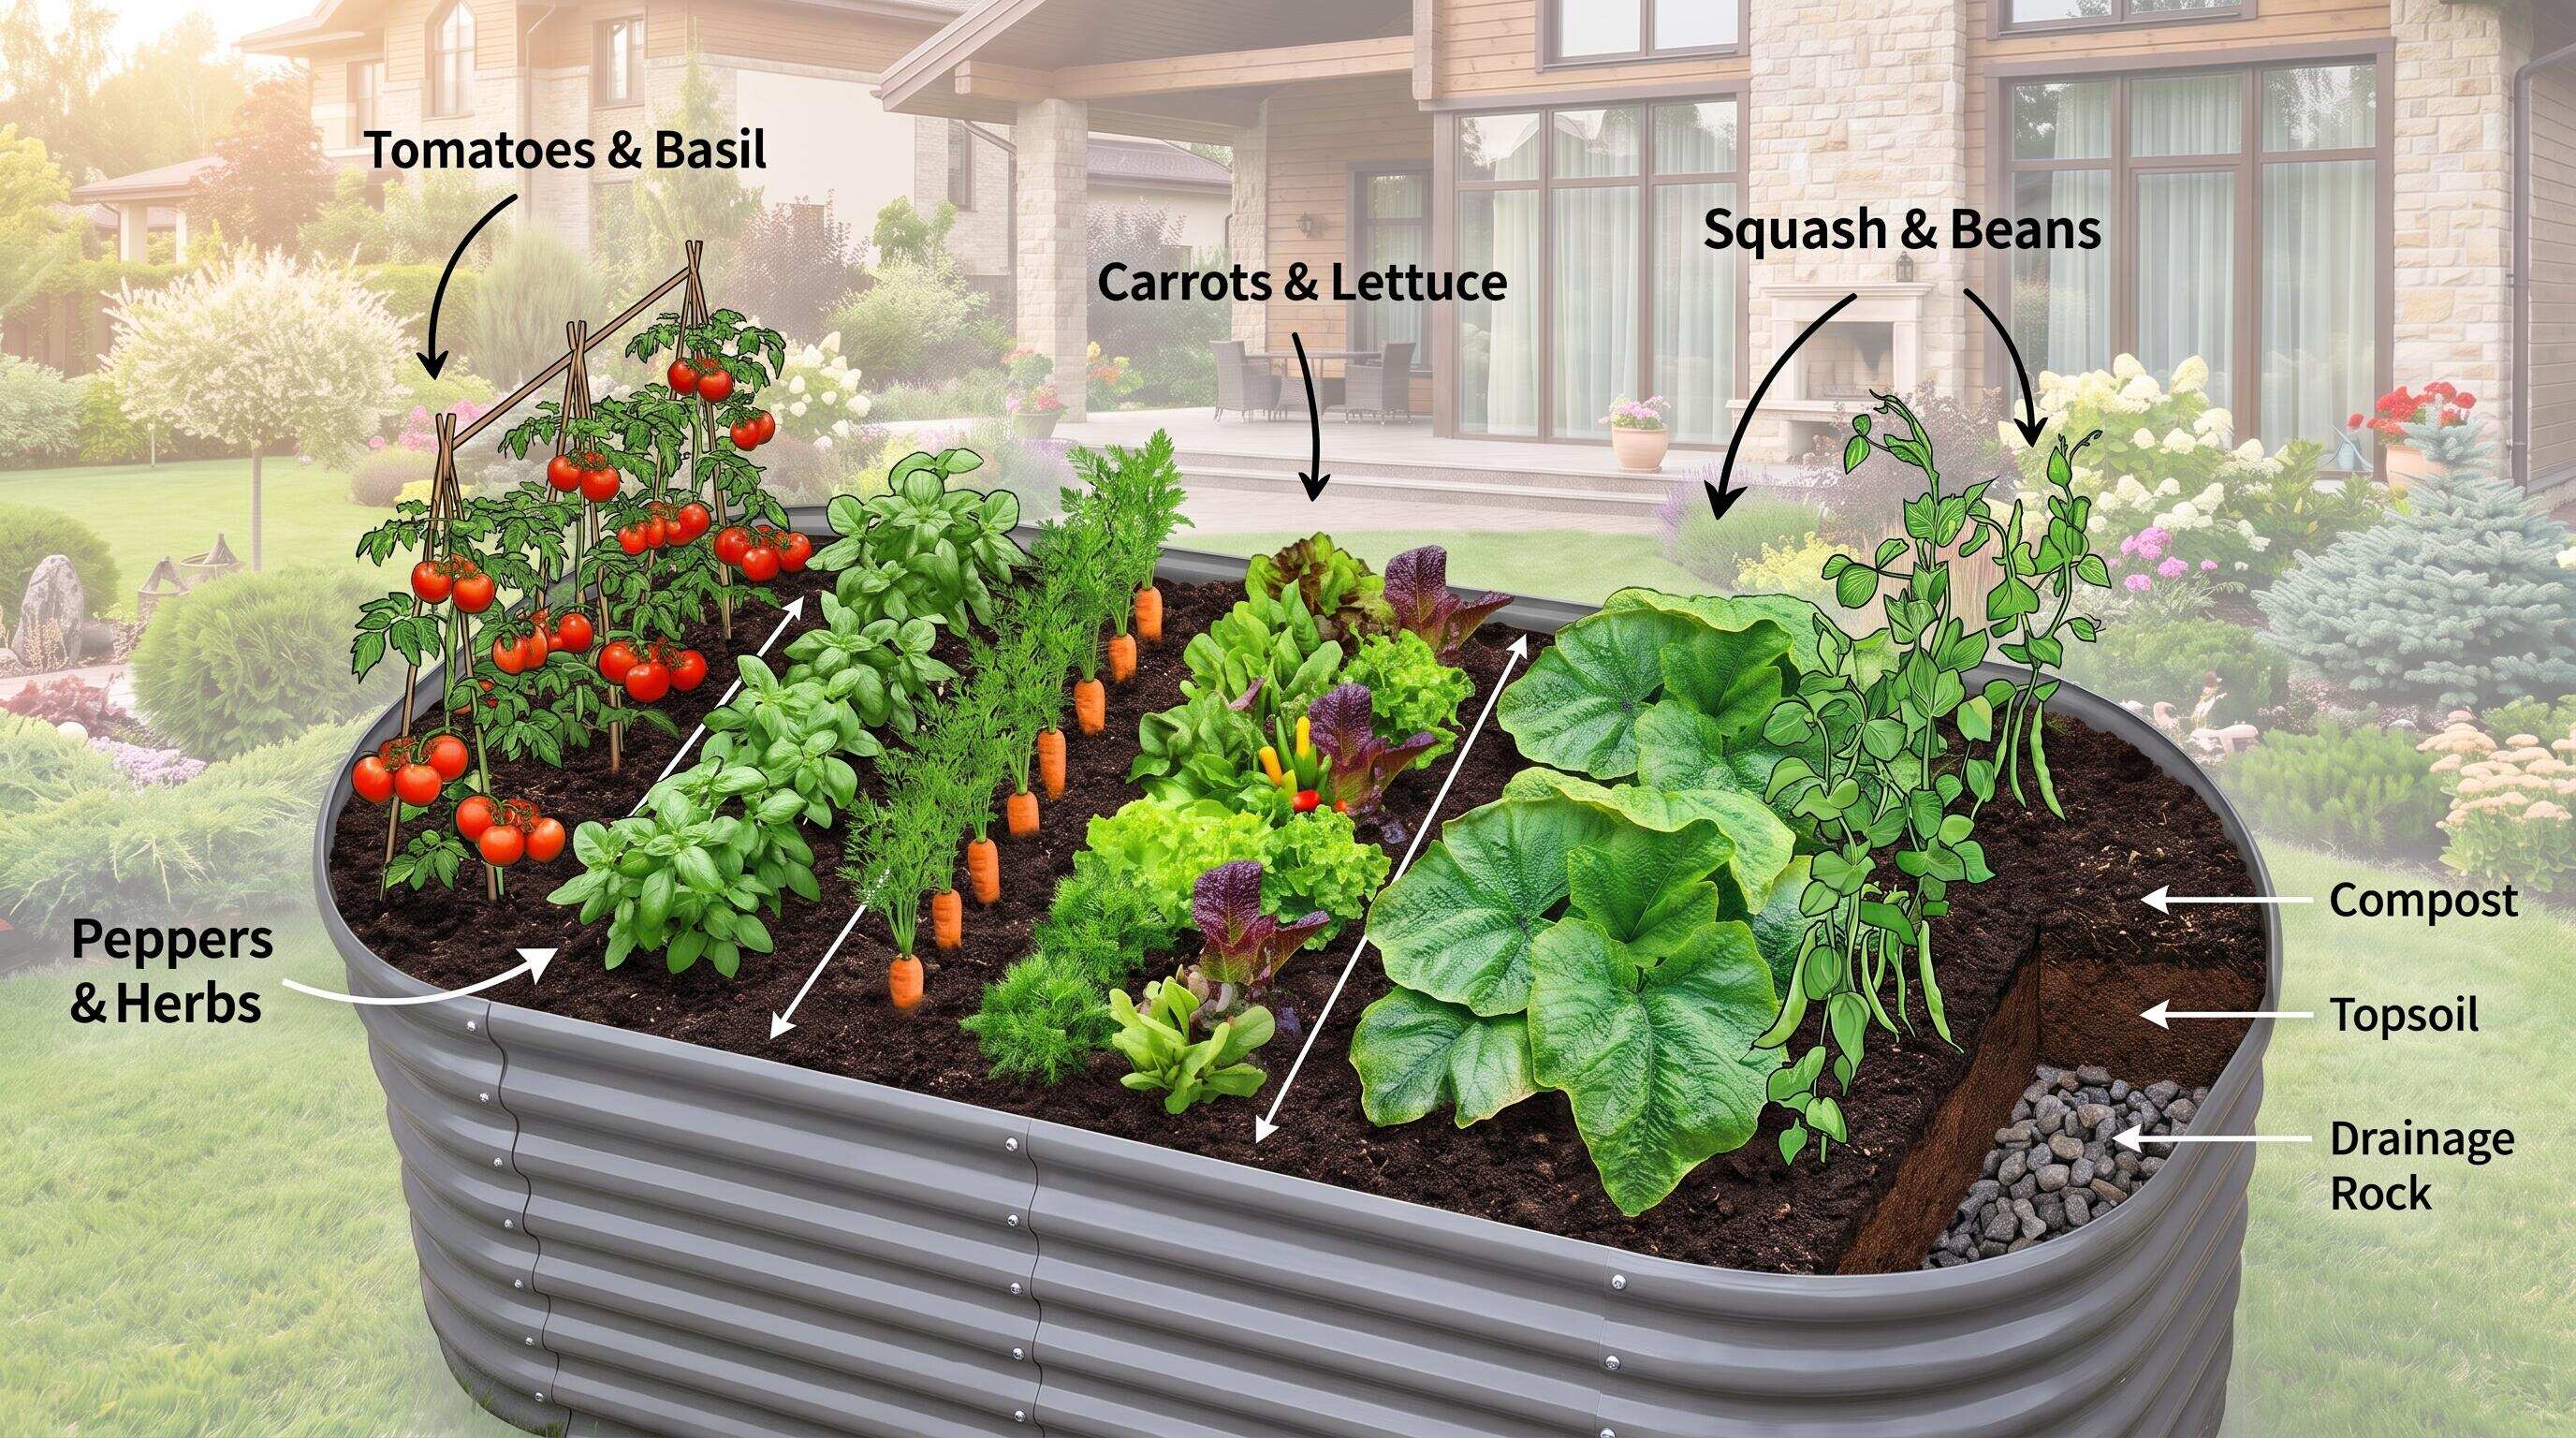
ALT: Top-down view of a raised bed planting layout plan showing companion planting zones and soil layers for beginner home gardeners
One practical implication of this longevity is that it justifies more careful upfront planning. A bed that will anchor your garden for two decades deserves a layout strategy that accounts not just for this season's crops, but for how your gardening ambitions might evolve. That is a fundamentally different mindset from a temporary container garden, and it shapes every recommendation in this guide.
Building a Beginner-Friendly Raised Bed Kit: From Setup to First Harvest
Three-Step Quick Start for Your First Raised Bed Season
Step 1: Choose the Right Bed Size and Height for Your Space and Body
The first decision in any raised bed garden layout is selecting the physical dimensions of the bed itself. For beginners, the most common mistake is going too large — a sprawling bed that is difficult to reach across leads to compacted soil from stepping inside the frame and neglected far corners. A practical rule of thumb: you should be able to reach the center of the bed comfortably from any side without stepping in. For most adults, this means a maximum width of about four feet for a bed accessed from both sides, or about two feet for a bed against a wall or fence. Height matters just as much, particularly for retirees or anyone with back or knee concerns — taller beds reduce bending and make the entire gardening experience more sustainable long-term. Anleolife offers raised garden beds ranging from standard 18-inch heights up to waist-high 35-inch models, giving beginners meaningful options based on their physical needs and available space. Plan to spend an afternoon — roughly two to four hours — on this decision, measuring your space and sketching a rough footprint before purchasing.
Step 2: Plan Your Raised Bed Planting Layout Before You Fill
Planning your raised bed planting layout on paper (or digitally) before filling the bed with soil is one of the highest-leverage actions a beginner can take. A layout plan assigns each plant a specific zone based on its mature size, light requirements, and companion planting relationships. The square-foot gardening method — which divides the bed into a grid of one-square-foot cells, each assigned a specific crop density — is one of the most beginner-friendly frameworks available. Taller plants like tomatoes or trellised beans go to the north end of the bed (in the Northern Hemisphere) to avoid shading lower-growing crops. Root vegetables occupy dedicated rows where they will not compete with surface-spreading herbs. According to the planting guidance compiled by Savvy Gardening, a well-structured 4x8 raised bed vegetable garden layout can produce a genuinely diverse harvest from a compact footprint when crops are zoned intentionally. Allow one to two hours for this planning step — it pays dividends for the entire season.
Step 3: Build Your Soil System Layer by Layer
A raised bed is only as productive as the soil system inside it. For beginners, a layered approach — sometimes called the "lasagna method" — simplifies what can otherwise feel like an intimidating topic. Start with a base layer of coarse material (straw, leaves, or wood chips) to promote drainage and gradually decompose into nutrients. Add a thick middle layer of quality compost, then finish with a top layer of fine, loamy growing mix. This layered soil system creates a living environment that retains moisture, supports beneficial microbes, and provides the nutrient density that beginners often cannot achieve with raw garden soil alone. Most raised beds need to be filled only once if the soil system is established correctly from the start — and with a bed rated for 20 years of use, that initial investment in soil quality compounds dramatically over time. This step typically takes a half-day, including sourcing and transporting materials.
Comparing the Most Common Raised Bed Options for Beginners
Beginners face a real choice between wood, fabric, and galvanized steel beds — and the differences go deeper than aesthetics. The table below compares these three material types across dimensions that matter most for a first-season grower building toward a long-term setup.
| Comparison Dimension | Wood Raised Beds | Fabric Grow Bags | Galvanized Steel Raised Beds |
|---|---|---|---|
| Structural lifespan | Varies widely; untreated wood degrades within a few seasons | Short to medium; fabric degrades with UV exposure | Up to 20 years with proper galvanized coating |
| Ease of layout planning | Moderate; fixed shape once built | Low; flexible shape but no defined grid | High; fixed frame supports consistent grid-based layouts |
| Soil volume and depth | Good; customizable depth at build time | Limited; depth constrained by bag height | Excellent; multiple height options from 18 inches to 35 inches |
| Ergonomic accessibility | Depends on build height | Low; typically ground-level | High; waist-high options available |
| Rust and rot resistance | Prone to rot without treatment | N/A | Galvanized coating resists rust; no rot |
| Beginner assembly | Moderate; requires tools and carpentry | Easy but imprecise | Easy to moderate; modular designs snap together |
| Scalability | Difficult; each new bed is a separate build project | Moderate | High; modular systems allow expansion without starting over |
The pattern we see consistently in first-season gardeners is that wood beds feel accessible at the outset but create frustration within two or three seasons as they degrade, shift, or require replacement. Galvanized steel beds have a higher upfront investment but eliminate nearly all of those maintenance concerns — and their structural permanence makes them the natural anchor for a long-term raised bed garden layout plan.
What the Layout Plan Actually Looks Like — and Why It Matters More Than Most Beginners Realize
A raised bed layout is more than a planting diagram — it is a decision-making framework that shapes everything from watering frequency to harvest scheduling. Understanding its components in depth is what separates a moderately productive first season from an exceptional one.
The Grid as a Mental Model
The square-foot gardening grid — popularized by Mel Bartholomew and widely adopted in beginner gardening programs — divides a raised bed into a matrix of planting cells. Each cell is assigned a crop based on that plant's space requirements: large plants like zucchini or tomatoes occupy multiple cells, while compact plants like lettuce or radishes can be planted in dense clusters within a single cell. This grid approach makes the layout immediately visual and intuitive, which is precisely why it works so well for beginners.
For a standard 4x8 bed, the grid produces 32 one-square-foot cells — enough to grow a genuinely diverse mix of vegetables, herbs, and edible flowers in a single season. The Gardeners.com resource on Pre-Planned Gardens offers pre-designed layout templates that beginners can use directly without having to design from scratch — a useful shortcut for anyone who finds the blank-grid approach overwhelming.
Vertical Integration Within the Layout
One of the most underused strategies in beginner raised bed planting layouts is vertical growing. By training vining or climbing plants — cucumbers, pole beans, indeterminate tomatoes — up a trellis installed at the back of the bed, growers effectively multiply their growing surface without expanding the bed's footprint. This is particularly valuable for urban micro-gardeners and suburban families with compact lots, where horizontal space is the primary constraint.
A well-designed layout assigns vertical space as deliberately as horizontal space. Tall-growing crops belong at the north end of the bed or along the back wall; low-growing ground covers and root vegetables fill the sunny, open front section. This vertical-horizontal integration is what allows a single well-planned raised bed to produce far more than its footprint would suggest.
Companion Planting as a Layout Strategy
Companion planting — placing mutually beneficial plant species adjacent to one another — is one of the most powerful tools available within a raised bed planting layout, and it is one that beginners often overlook in favor of single-variety rows. Classic combinations like the "Three Sisters" (corn, beans, squash) or basil planted adjacent to tomatoes have documented benefits for pest deterrence, nitrogen fixation, and space efficiency.
Incorporating companion planting into a raised bed layout does require slightly more upfront planning, but the payoff is substantial: reduced pest pressure, better space utilization, and a more ecologically balanced growing environment — all priorities for the eco-conscious, health-oriented growers who make up a significant share of today's beginner gardening community.
Rotating the Layout Seasonally
A 20-year raised bed is not a static installation — it is a dynamic growing system that evolves with each season. Crop rotation — moving plant families to different zones of the bed each season — prevents the buildup of soil-borne pathogens and nutrient depletions associated with growing the same crops in the same spot year after year. For beginners, a simple four-zone rotation (leafy greens, fruiting plants, root vegetables, legumes) mapped onto the raised bed layout provides structure without complexity.
Keeping a simple layout journal — even a photo of each season's planting map — gives beginners the data they need to rotate intelligently. Over multiple seasons, this practice compounds into significantly higher yields and fewer pest and disease problems.
Modularity as a Layout Amplifier
One of the most practically important features of a well-designed beginner kit is modularity — the ability to expand the growing system incrementally without starting from scratch. Anleolife's modular raised garden bed line is specifically designed for this kind of staged growth: a gardener can start with a single compact bed and add adjacent modules as confidence and appetite grow, maintaining a coherent overall raised bed garden layout rather than a collection of mismatched containers.
This modular approach also means that the layout plan can scale. A grower who starts with an 8x4 bed and adds a second module the following season can extend their companion planting zones, introduce a dedicated herb section, or create a separate bed for perennial crops — all while preserving the grid-based planning logic they established in year one.
Advanced Considerations for Gardeners Ready to Go Beyond the Basics
Once the fundamentals of a beginner-friendly raised bed garden layout are in place, there are several higher-order decisions that separate a good first season from a genuinely excellent long-term growing system.
Soil System Maintenance Over Time
A raised bed's soil system is a living entity that changes with each season. Beginners who establish a strong initial soil structure — rich compost base, good drainage layer, quality top mix — will still need to replenish organic matter each spring, as decomposition naturally depletes the bed over the winter. Adding a two-to-three-inch layer of fresh compost at the start of each season is the single highest-impact maintenance action available to any raised bed gardener. In our experience, gardeners who treat their soil as an ongoing investment rather than a one-time setup consistently outperform those who do not, regardless of what they plant.
Common Misconception: Bigger Beds Always Mean Better Yields
A pattern we consistently see with ambitious beginners is the impulse to go large immediately — choosing the biggest available bed footprint under the assumption that more space equals more food. In practice, a smaller, exceptionally well-managed bed routinely outproduces a larger, neglected one. A compact raised bed with a thoughtful raised bed layout, a quality soil system, and consistent attention to watering and feeding will yield more — and provide a more enjoyable experience — than an oversized bed that overwhelms a first-season grower.
Integrating the Three Gardening Scenarios
For gardeners whose ambitions extend beyond planting into a fuller homestead vision, the raised bed is most powerful when it connects to a broader ecosystem. At Anleolife, our full-scenario product philosophy spans three interconnected areas: Planting (metal raised garden beds and soil systems), Raising (chicken coops and rabbit hutches whose by-products become natural fertilizer for the beds), and Beautification (decorative accessories and pathway systems that connect growing zones into a cohesive garden environment). The raised bed garden layout, in this context, is not just a planting plan — it is the anchor of an integrated outdoor living system.
Questions & Answers
Q1: How do I choose the right raised bed height for a beginner setup?
Raised bed height should be matched to both the crops you plan to grow and your physical comfort. Shallow-rooted crops like lettuce, herbs, and radishes do well in beds as low as 12 to 18 inches, while deep-rooted vegetables like tomatoes, carrots, and squash benefit from 24 inches or more. For gardeners with back or knee concerns — including many retirees and older adults — a waist-high bed at 30 to 35 inches dramatically reduces strain and makes gardening sustainable year-round. Anleolife's range spans from 18-inch standard heights to 35-inch waist-high models, giving beginners a meaningful choice based on real ergonomic needs.
Q2: Is a pre-planned layout template better than designing my own raised bed planting layout?
Pre-planned layout templates are an excellent starting point for beginners because they eliminate the analysis paralysis that comes with a blank grid. Resources like the Almanac's raised bed layout plans and Gardeners.com's pre-planned garden designs offer season-tested configurations that account for companion planting, light requirements, and crop spacing — without requiring the beginner to research all of those variables independently. That said, a custom layout tailored to your specific bed dimensions, climate zone, and dietary preferences will always outperform a generic template over time. The best approach is to start with a template in year one and progressively customize it as you learn what works in your specific environment.
Q3: How long does it take to set up a complete beginner raised bed garden kit, and how soon can I expect results?
A complete raised bed setup — including assembly, soil layering, and initial planting — typically takes a single weekend for most beginners. Assembly of a quality steel raised bed usually takes one to three hours depending on size and the number of panels. Soil filling and layering adds another two to four hours. Planning and initial planting can be done on the same day or the day after. From planting to first harvest, fast-maturing crops like radishes and lettuce can be ready in as little as four to six weeks, while fruiting crops like tomatoes typically take eight to twelve weeks. Anleolife's warehouse network ensures delivery within 3–8 business days, so you can order with confidence that your kit arrives in time to plant.
Final Thoughts
A truly beginner-friendly DIY gardening kit succeeds on three levels simultaneously: it provides a structurally durable, long-lasting bed that becomes a permanent anchor for your outdoor space; it supports a thoughtful raised bed garden layout that gives you a clear, actionable plan before you plant your first seed; and it incorporates a soil system that creates the kind of living, productive growing environment that turns gardening from a frustrating experiment into a deeply satisfying practice.
The three key points worth carrying forward are these. First, layout planning is not optional — it is the difference between a productive season and a chaotic one. Second, material quality compounds over time: a galvanized steel bed built to last 20 years justifies a far more deliberate layout strategy than a seasonal container. Third, start smaller than you think you need, execute it exceptionally well, and expand from there — modularity is your friend.
Your next step is practical and immediate: measure your available outdoor space, sketch a rough layout grid, and identify the two or three crops you most want to grow this season. From that starting point, everything else — bed size, soil mix, companion planting configuration — follows logically.
Ready to build a raised bed setup that grows with you for years to come? Explore Anleolife's full range of galvanized steel raised garden beds, modular systems, and complete gardening solutions at the Anleolife website. With a nationwide U.S. warehouse network in California, Texas, Florida, New York, Illinois, and Washington, your order arrives in 3–8 business days — fast enough to plant this season. Shop across major platforms including Amazon, Walmart, Home Depot, Lowe's, Wayfair, or directly at Anleolife.com. Whether you are starting with your first 8x4 bed or expanding into a full planting-and-raising ecosystem, Anleolife grows with you every step of the way.
Sources
- The Old Farmer's Almanac. "Raised Bed Garden Layout Plans".
https://www.almanac.com/raised-bed-vegetable-garden-layouts-beginners - Savvy Gardening. "4x8 Raised Bed Vegetable Garden Layout Ideas".
https://savvygardening.com/4x8-raised-bed-vegetable-garden-layout/ - Gardeners.com. "Pre-Planned Gardens".
https://www.gardeners.com/pages/kitchen-garden-planner-preplanned-gardens
Note: Standards and guidelines may be updated; please check the latest official documents or consult professional advisors for the most current information.








