


























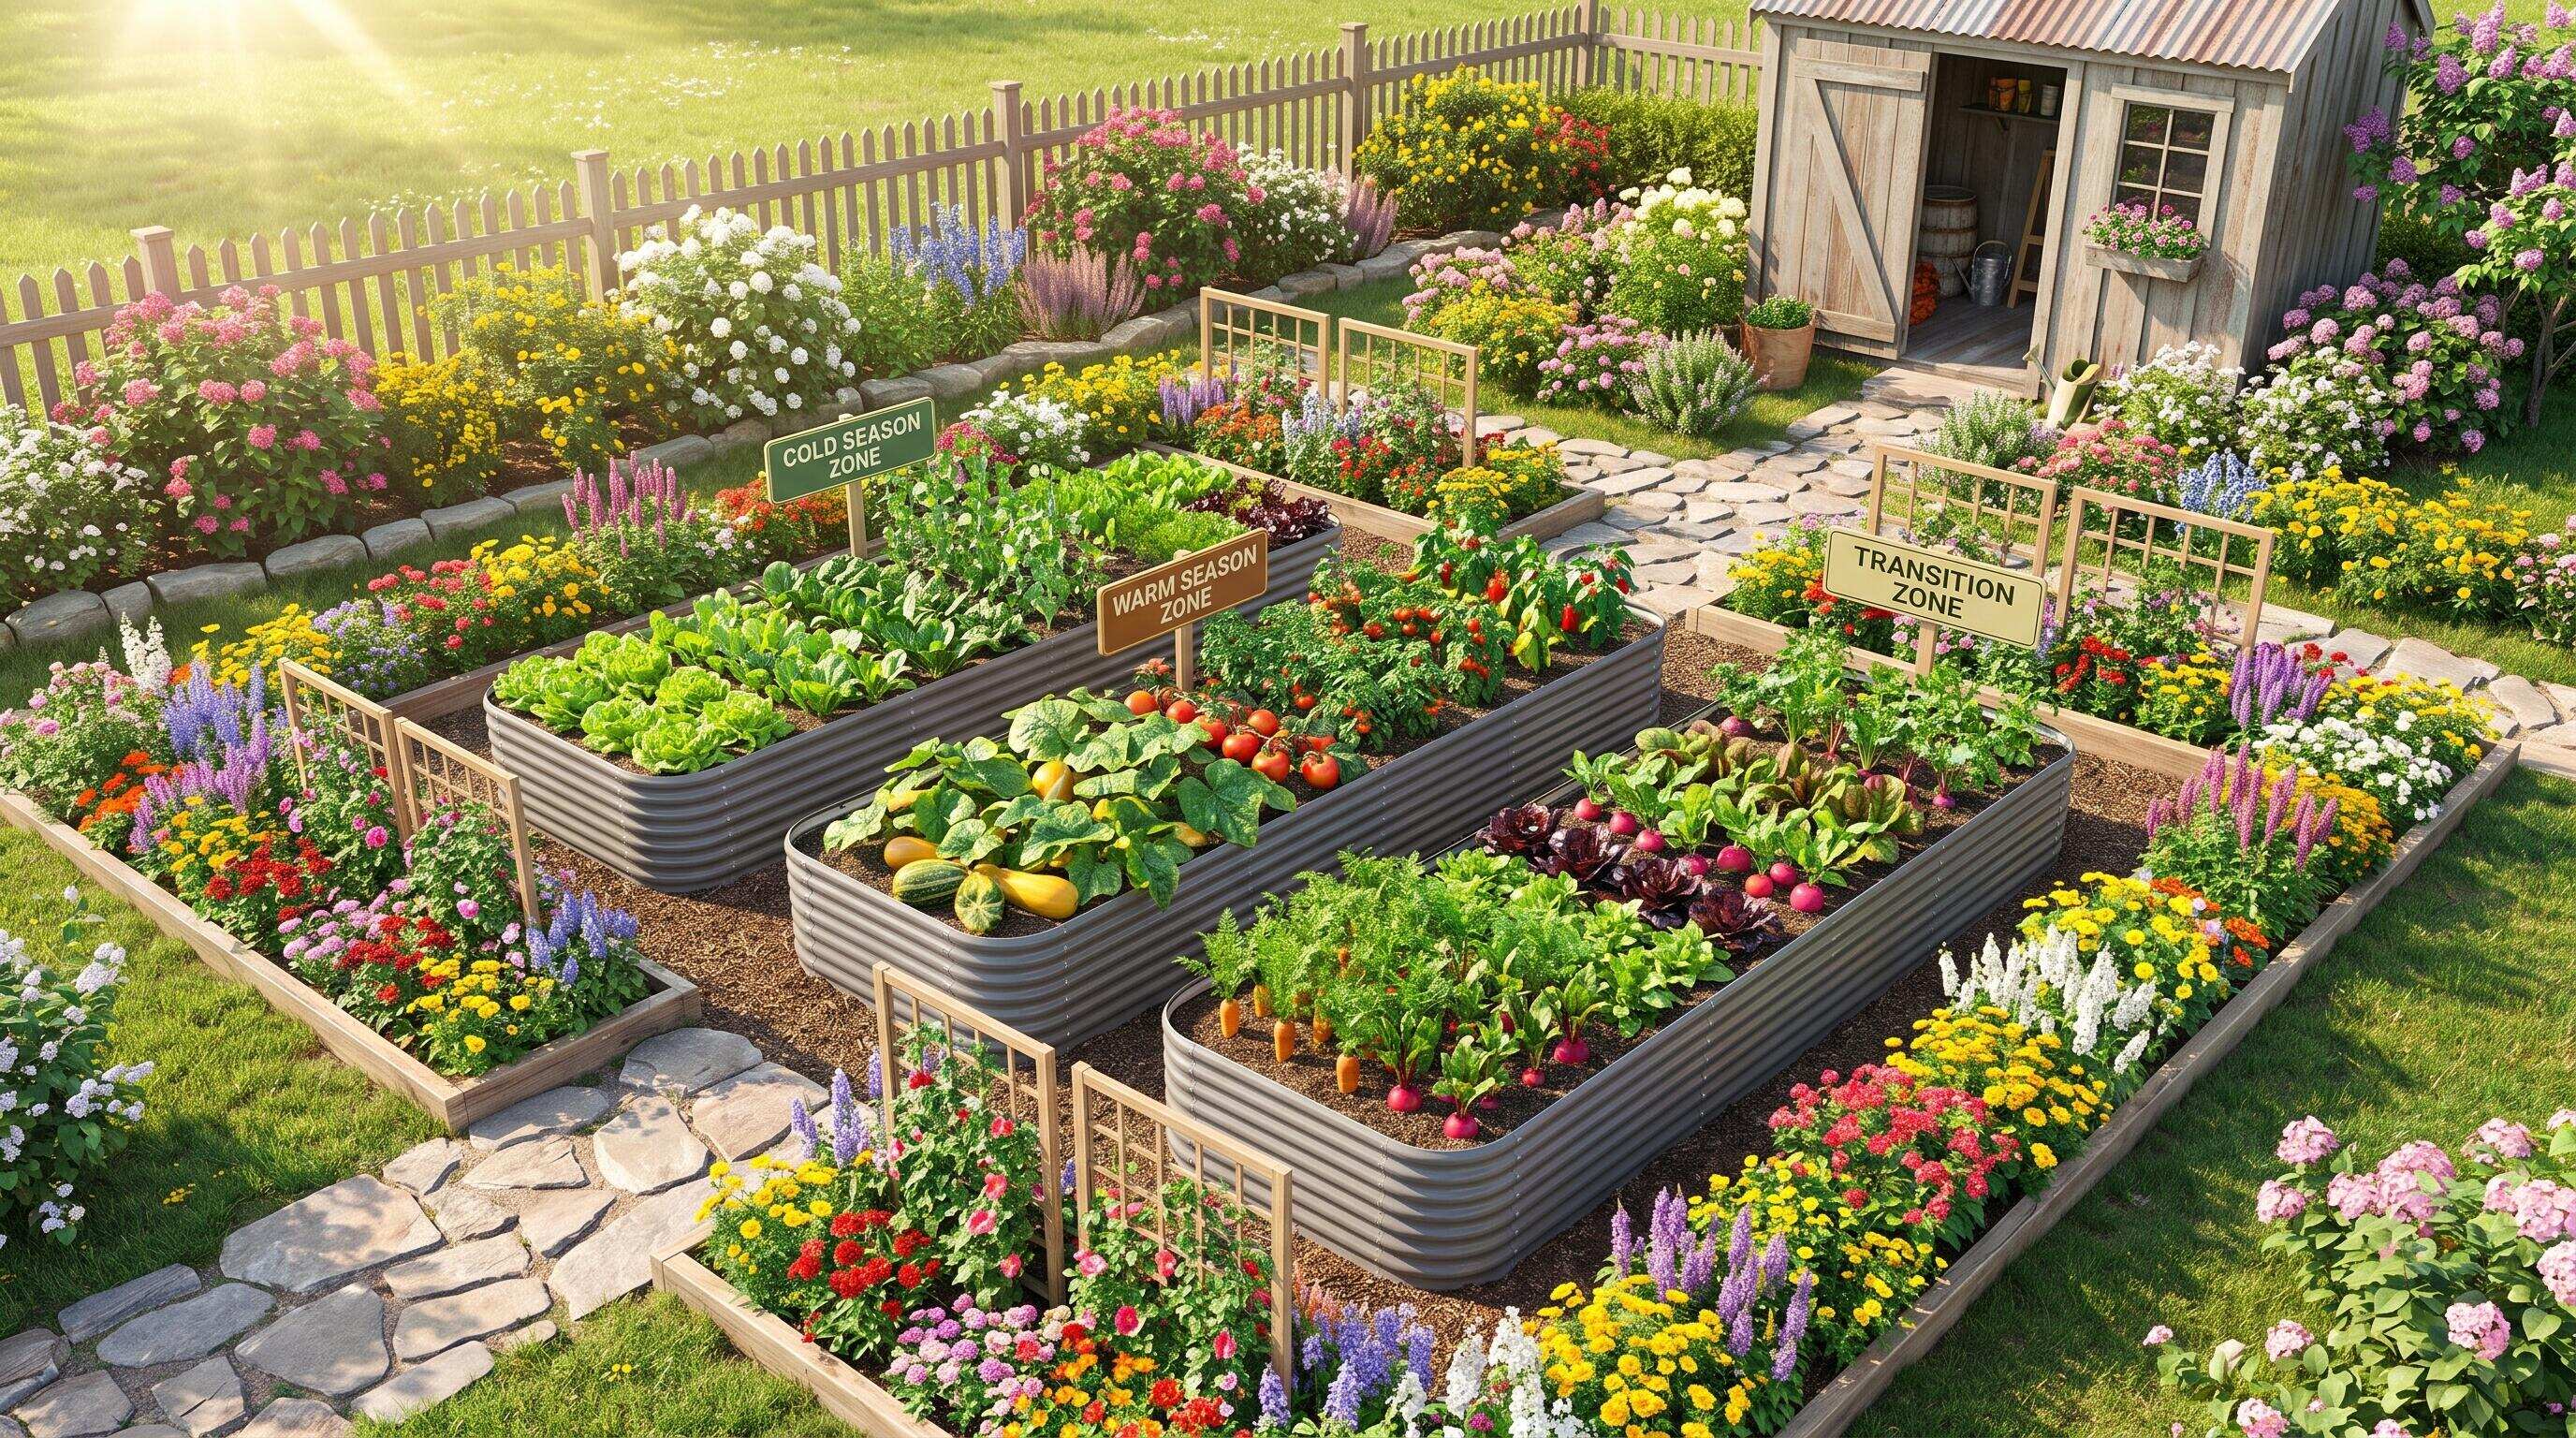
ALT: DIY backyard transformation with raised bed garden layout and planting plan over one season
Plan Your Raised Bed Garden Layout for a Full-Season Backyard Transformation
What is the most effective way to transform a neglected backyard into a productive, beautiful outdoor space within a single growing season? The answer lies in sequencing your work strategically — starting with your raised bed garden layout and building outward from there into a complete planting, raising, and beautification plan.
This guide is written for the homeowner who has a clear vision but needs a practical road map. Whether you are a middle-class family looking to grow your own food, a health-conscious grower reducing your reliance on store-bought produce, an urban micro-gardener working with a compact yard, or an empty nester finally investing in the outdoor space you have always wanted — this is for you. In our work supporting home gardeners across North America, one pattern we consistently see is that people underestimate the power of sequencing. Those who plan their raised bed planting layout before they lift a single shovel make better decisions, spend less money, and enjoy a more rewarding season than those who build as they go.
Before You Start: Prerequisites and Preparation for Your Raised Bed Layout
A successful one-season backyard transformation does not begin with purchasing materials — it begins with a clear picture of what you want and an honest assessment of what you have. Before diving into the step-by-step sequence, take time to gather the information and materials that will prevent costly mid-project pivots.
Site assessment comes first. Walk your yard at different times of day and note where sunlight falls, where drainage is poor, and where foot traffic naturally flows. Most vegetables and herbs require a minimum of six hours of direct sunlight daily, so your raised bed layout must account for this before anything else is decided.
Know your dimensions. Measure your available space accurately. Even a rough sketch on paper — showing the yard boundaries, existing structures, trees, fencing, and utility access points — will save you from ordering beds that do not fit or placing them in locations that block access.
Understand your soil situation. Native soil quality affects what amendments you will need to fill your beds. If your yard soil is heavy clay or rocky, you will be relying entirely on the soil system inside your raised beds, which means planning fill volume carefully.
Set a realistic budget. Frame your transformation in phases if needed. A well-designed raised bed garden layout does not have to be completed all at once; a modular approach lets you expand intelligently without overspending in the first season.
Checklist before starting:
- Sun and shade map of your yard at different times of day
- Accurate measurements of available planting space
- List of crops or plants you intend to grow (affects spacing and bed depth choices)
- Basic tools: tape measure, string line or marking paint, shovel, level, wheelbarrow
- Soil amendment plan or pre-blended raised bed soil
- Knowledge of your local last frost date and growing season length
- Rough budget with a contingency allowance
Time and effort estimate: A thoughtful planning phase takes anywhere from a long weekend to two weeks of casual observation and note-taking. The physical installation and planting work spans the bulk of the season, but each phase is manageable when broken into clearly defined steps.
Step-by-Step Instructions: Sequencing Your Raised Bed Garden Layout Over One Season
Step 1: Map Your Raised Bed Garden Layout Before Purchasing Anything
A raised bed garden layout is a spatial plan that determines the number, size, orientation, and placement of your beds relative to your yard's sun exposure, access paths, and intended use zones. Create this plan on paper or using a simple free diagramming tool before spending a single dollar on materials.
Start by drawing your yard to scale — even a rough approximation helps. Mark where sunlight is strongest for the longest part of the day; this is where your primary food-growing beds belong. Reserve shadier zones for herbs that tolerate lower light or for decorative plantings. Then decide on bed orientation: in most North American latitudes, orienting the long axis of rectangular beds north-to-south ensures that taller plants (staked tomatoes, trellised beans) do not shade shorter ones.
Consider access carefully. A bed width of 4 feet allows most adults to reach the center from either side without stepping into the bed — a principle the University Cooperative Extension programs across the United States consistently recommend for productive, soil-health-preserving raised bed design. Leave at least 18 to 24 inches of pathway between beds for comfortable movement with a wheelbarrow or garden cart.
Tip: Sketch at least two alternative layouts before committing. In our experience working with home gardeners, the second or third draft almost always improves on the first by catching access or sunlight conflicts that were not obvious initially.
Step 2: Choose Your Raised Bed Materials and Build or Assemble the Beds
With your raised bed layout confirmed, select the bed type that matches your goals, budget, and long-term plans. Galvanized steel raised garden beds have become the dominant choice for serious home gardeners in recent years for good reason: they are structurally robust, aesthetically clean, and engineered to last. Anleolife's galvanized steel raised garden beds are designed to deliver up to 20 years of service life, making them a genuinely cost-effective long-term investment compared to wood beds that may need replacement within a few seasons.
The range of available sizes is wide enough to suit nearly any raised bed planting layout. For a starter setup, an 8x4 ft bed is the classic choice — large enough to be productive, small enough to reach every corner. If vertical space matters (for those with mobility considerations or a desire to garden without kneeling), extra-tall and waist-high options offer meaningful ergonomic advantages. For smaller yards or balcony-adjacent patios, narrower configurations or round raised garden beds can anchor a compact but complete planting scheme.
Assemble beds on a flat, cleared surface. Use a level to confirm they sit even — a slight tilt causes uneven watering and can stress the structure over time. Once level, position them according to your layout plan before filling, because a filled bed is not easily relocated.
Tip: If you plan to expand your raised bed layout in future seasons, invest in modular raised garden bed systems from the start. Modular designs allow you to reconfigure or extend your beds without starting from scratch, which pays dividends in flexibility and cost savings over time.
Step 3: Build Your Soil System — The Foundation of Raised Bed Gardening Success
The soil system inside your raised beds is as important as the beds themselves. Raised bed gardening's core advantage over in-ground planting is the ability to control your growing medium completely — but only if you fill the beds with the right mix.
A high-performing raised bed soil system typically combines three components: a structural base of topsoil or compost to provide body, a porous amendment such as perlite or coarse sand to ensure drainage and aeration, and a rich organic component — aged compost, worm castings, or composted manure — to supply nutrients. According to guidelines published by the United States Department of Agriculture's Natural Resources Conservation Service (NRCS), healthy garden soil should support active biological life, drain freely, and hold sufficient moisture between waterings. A well-constructed raised bed fill mix achieves all three.
Calculate your fill volume before purchasing soil. Multiply the length, width, and depth of each bed to get the cubic footage required, then convert to cubic yards if purchasing bulk soil. Under-filling beds is a common and costly mistake — plant roots need depth to thrive, and shallow fill produces shallow root systems and stressed plants.
Tip: Top-dress your beds with a thin layer of fresh compost at the start of each season. This simple annual practice maintains organic matter levels and microbial activity, keeping your soil productive year after year without expensive restarts.
Step 4: Design Your Raised Bed Planting Layout Using Companion Planting and Succession Principles
A raised bed planting layout is the crop-level plan that decides which plants go where inside each bed, and when they are planted throughout the season. A thoughtful planting layout does more than fill space — it maximizes yield, deters pests, and keeps your beds productive from early spring through fall.
Start with your highest-priority crops — the vegetables or herbs your household uses most or that deliver the best return on growing effort. Tomatoes, peppers, salad greens, herbs, and beans consistently top the list for North American home gardeners. Assign these crops to your best-sun beds and work outward from there.
Apply companion planting principles to increase pest resistance and improve yields naturally. Basil planted alongside tomatoes, for example, is widely reported by experienced gardeners and supported by observations in integrated pest management literature to improve growing conditions for both plants. Marigolds planted at bed edges deter many common soil pests. Tall climbers (beans, cucumbers) belong on the north side of a bed so they do not shade lower-growing plants.
Use succession planting to keep beds productive all season. As one crop finishes, replace it immediately with a transplant or direct sow of the next. Cool-season crops (lettuce, spinach, radishes) can fill beds in early spring, be pulled when summer heat arrives, replaced with warm-season crops, and then followed again by fall cool-season plantings. This three-rotation approach, as documented in resources such as My Vegetable Garden Layout Part 2 (Raised Beds) from Growing the Home Garden, can nearly triple the effective output of a given bed over the course of a season.
Tip: Map your planting layout on paper with seasonal columns — spring, summer, and fall — so you can see the full rotation at a glance and identify gaps in productivity before the season begins.
Step 5: Install Irrigation and Establish Watering Routines
Raised beds drain more freely than in-ground plots, which is one of their great strengths — and one of their few demands. Because they dry out faster, consistent moisture management is essential. Installing a simple drip irrigation or soaker hose system at the time of bed setup (before plants are in) is far easier than retrofitting one later.
Drip irrigation delivers water directly to root zones, reduces fungal disease risk by keeping foliage dry, and can be connected to a simple timer for hands-off consistency. For gardeners who prefer hand-watering, a quality wand that reaches bed centers without compressing the soil is a worthwhile investment. The goal in either case is consistent soil moisture — not waterlogged, not bone-dry — throughout the growing season.
Tip: Check soil moisture by pressing a finger two inches into the bed. If soil at that depth feels dry, water thoroughly. If it feels damp, check again in a day. This simple test is more reliable than any fixed watering schedule, because evaporation rates change significantly with temperature and wind.
Step 6: Add the Beautification and Raising Layers
A complete backyard transformation goes beyond growing food. Once your raised bed garden layout is in place and planting is underway, the beautification and optional animal-raising components of the yard can be layered in without disrupting the growing areas.
Pathway systems between beds serve a functional purpose — keeping foot traffic off growing soil — while also defining the visual structure of your garden. Gravel, stepping stones, wood chip paths, or decomposed granite all create clean transitions between beds and the surrounding lawn or hardscape. Decorative accessories such as plant markers, trellis panels, and border edging add a finished, intentional quality that elevates the overall impression of the space.
For families interested in the Raising dimension of their backyard ecosystem — small-scale poultry or rabbits — this phase is also the right time to site and install chicken coops or rabbit hutches. Placement matters here too: site these structures downwind of your primary garden space, near a water source, and in a location that allows easy cleaning and access. The integration of a small animal-raising element into a backyard garden creates a beneficial loop: bedding material and manure from coops and hutches can be composted and returned to the soil system inside your raised beds.
Tip: Resist the urge to do everything at once. Adding one beautification element per month — pathway one month, decorative edging the next, trellising after that — keeps the project manageable and allows you to evaluate what actually enhances the space before committing to permanent installations.
Step 7: Document, Evaluate, and Plan for Next Season
The final step in a one-season backyard transformation is the one most gardeners skip: systematic documentation and end-of-season evaluation. What you record this season becomes the planning advantage that makes next season significantly more productive and less expensive.
Keep a simple garden journal — even a notes app on your phone works — recording what you planted, when you planted it, how it performed, and what you wish you had done differently. Note which bed locations outperformed others, which crops delivered strong yields, and which were not worth the space. Photograph your raised bed layout at multiple points in the season so you have a visual record of how the space evolved.
At season's end, assess your soil system. Add a compost top-dress, correct any pH issues identified during the season, and cover bare beds with mulch or a cover crop to protect soil biology through winter. Evaluate whether your current raised bed layout served your needs or whether additional beds, a different configuration, or expanded beautification elements would improve next year's experience.
Tip: The best time to order next season's seeds, additional beds, and soil amendments is at the end of the current season — prices are often better, selection is wider, and you will have clear data from this season to guide smarter decisions.
Common Mistakes and Troubleshooting in Raised Bed Garden Layouts
| Symptom | Likely Cause | How to Fix |
|---|---|---|
| Plants are stunted and pale despite adequate watering | Soil mix lacks organic matter or has compacted over time | Top-dress with quality compost; aerate the top inch of soil with a hand fork |
| One bed consistently outperforms identical adjacent beds | Undetected difference in sunlight exposure or drainage | Observe hourly sun patterns; adjust layout or relocate beds if possible |
| Raised bed frame is bowing outward after filling | Bed was overfilled or material was not designed for the fill weight | For future beds, choose heavy-duty or reinforced bed designs; for existing beds, add corner bracing |
| Pest pressure is high despite companion planting | Planting density is too low, leaving bare soil that invites pests | Increase planting density; use floating row covers during pest pressure peaks |
| Cool-season crops bolt early | Bed is positioned in full reflected heat from a nearby wall or hard surface | Relocate beds away from heat-reflective surfaces; use shade cloth during hottest weeks |
| Soil dries out too fast | Insufficient organic matter or inadequate mulch layer | Increase compost content; apply a 2-inch mulch layer on top of the soil surface |
| Beds are difficult to reach in the center | Bed width is too wide for the gardener's reach | For future layouts, plan beds no wider than 4 feet; use a kneeling pad or step stool for existing wider beds |
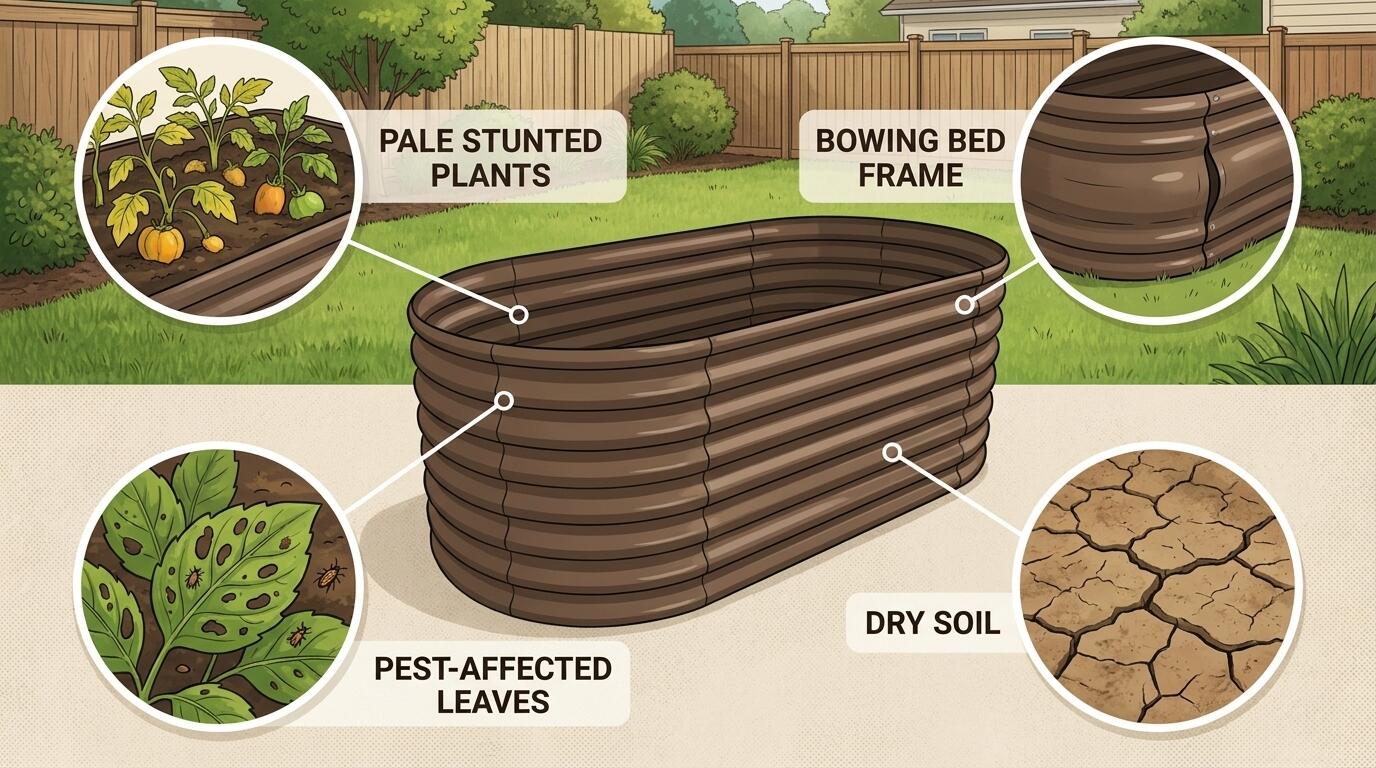
ALT: Troubleshooting common raised bed garden layout problems including soil, pests, and plant growth issues
Pro Tips for Better Results in Your Raised Bed Transformation
Orient and observe before you build permanently. One of the most consistent patterns we see in home garden projects is that gardeners place beds where they think the sun is best, rather than where observation confirms it. Spend at least one full week — ideally two — noting sun patterns at 9 a.m., noon, and 3 p.m. before finalizing your raised bed layout. This one step prevents the single most expensive mistake in backyard garden design: a misplaced permanent structure.
Invest in bed depth early. Many first-time raised bed gardeners underinvest in depth and then supplement poorly. Extra-tall and waist-high bed configurations cost more upfront but pay for themselves in root health, soil warmth, and gardener comfort over multiple seasons. If you grow root vegetables — carrots, parsnips, beets — depth is particularly non-negotiable.
Think in three seasons, not one. A raised bed planting layout that accounts for spring, summer, and fall crops from the first day of planning will consistently outperform one planned season by season. Designing the full rotation before the first seed goes in is a hallmark of experienced home growers, and it is one of the simplest ways to dramatically improve your harvest without spending more money.
Soil is a living system, not a static medium. A common misconception we encounter repeatedly is that raised bed soil, once filled, needs only water and fertilizer to perform. In reality, the biological community in well-managed raised bed soil — the fungi, bacteria, earthworms, and microorganisms that make nutrients available to plants — requires ongoing organic matter to thrive. Annual compost additions and minimal soil disturbance preserve this living system and reduce fertilizer dependency over time.
Plan your layout for maintenance efficiency, not just aesthetics. The most beautiful raised bed garden layout is the one you can actually maintain on a busy schedule. Wide, clear pathways; beds sized to your reach; a simple irrigation system; and beds positioned near water access all reduce the time cost of gardening and increase the likelihood that you will keep up with it through the full season.
Questions & Answers
Q1: How do I decide how many raised beds to start with in my first season?
Start with the number of beds you can realistically maintain, fill with quality soil, and actively plant — not the number that fills your yard. For most first-season gardeners, two to four beds of manageable size provide enough growing space to produce meaningful harvests while remaining approachable. A modular raised bed system makes it easy to add capacity in subsequent seasons as your confidence and routine mature. Begin smaller and succeed completely rather than overextend and manage poorly.
Q2: Is galvanized steel safe to use for growing vegetables in raised garden beds?
Galvanized steel raised garden beds are widely used and considered safe for food production by the home gardening community. The zinc coating used in galvanization is a naturally occurring mineral element present in soil and required in trace amounts by plants. Extensive use by home gardeners across North America has not produced documented evidence of problematic leaching at normal garden conditions. For additional peace of mind, using a quality liner or purchasing beds specifically marketed for food production provides further assurance.
Q3: How long does a complete one-season backyard transformation take, and what does it cost?
The timeline for a full-season raised bed backyard transformation spans roughly four to six months from initial layout planning through end-of-season documentation — though active installation typically concentrates into a few intensive weekends. Cost varies widely based on the number and size of beds, soil volume, irrigation, and beautification elements chosen. The most cost-effective approach is to invest in durable, long-life materials (such as galvanized steel beds rated for 20 years) upfront, reducing the replacement costs that accumulate with cheaper alternatives over time.
The Bottom Line
Transforming a backyard over one season is genuinely achievable — but only when the work is sequenced deliberately, starting with your raised bed garden layout and building outward through soil preparation, planting design, irrigation, and beautification.
Key Takeaways:
- Map your raised bed layout and observe sun patterns before purchasing any materials — this single step prevents the most costly and common mistakes.
- Choose bed materials for longevity; galvanized steel beds designed to last up to 20 years deliver far better return on investment than cheaper short-lived alternatives.
- A strong soil system is the foundation of raised bed gardening success — fill depth, organic matter content, and drainage all matter as much as the bed itself.
- Design your raised bed planting layout with three seasons in mind from day one; succession planting dramatically increases productivity without additional space or investment.
- Layer in beautification and optional raising elements after the core growing infrastructure is stable — sequenced additions are easier to manage and evaluate than simultaneous projects.
The best next step is to start your site assessment this week, sketch your first raised bed layout draft, and identify the bed sizes and configurations that fit your space and goals.
Ready to move from planning to building? Anleolife offers a complete range of raised garden beds, soil solutions, and garden beautification products available through major retailers including Amazon, Walmart, Home Depot, Lowe's, and Wayfair, as well as directly through the Anleolife website. With a nationwide U.S. warehouse network spanning California, Texas, Florida, New York, Illinois, and Washington, orders arrive within 3–8 business days — so your transformation can begin as soon as your plan is ready. From your first raised bed to a fully integrated planting and raising ecosystem, Anleolife grows with you every step of the way.
Sources & Citations
- Growing the Home Garden. "My Vegetable Garden Layout Part 2 (Raised Beds)".
https://growingthehomegarden.com/my-vegetable-garden-layout-part-2/ - United States Department of Agriculture (USDA). Natural Resources Conservation Service — Soil Health Resources.
https://www.nrcs.usda.gov/ - U.S. Environmental Protection Agency (EPA). Composting and Soil Management Guidance.
https://www.epa.gov/
Note: Standards and guidelines may be updated; please check the latest official documents or consult professional advisors.








