

























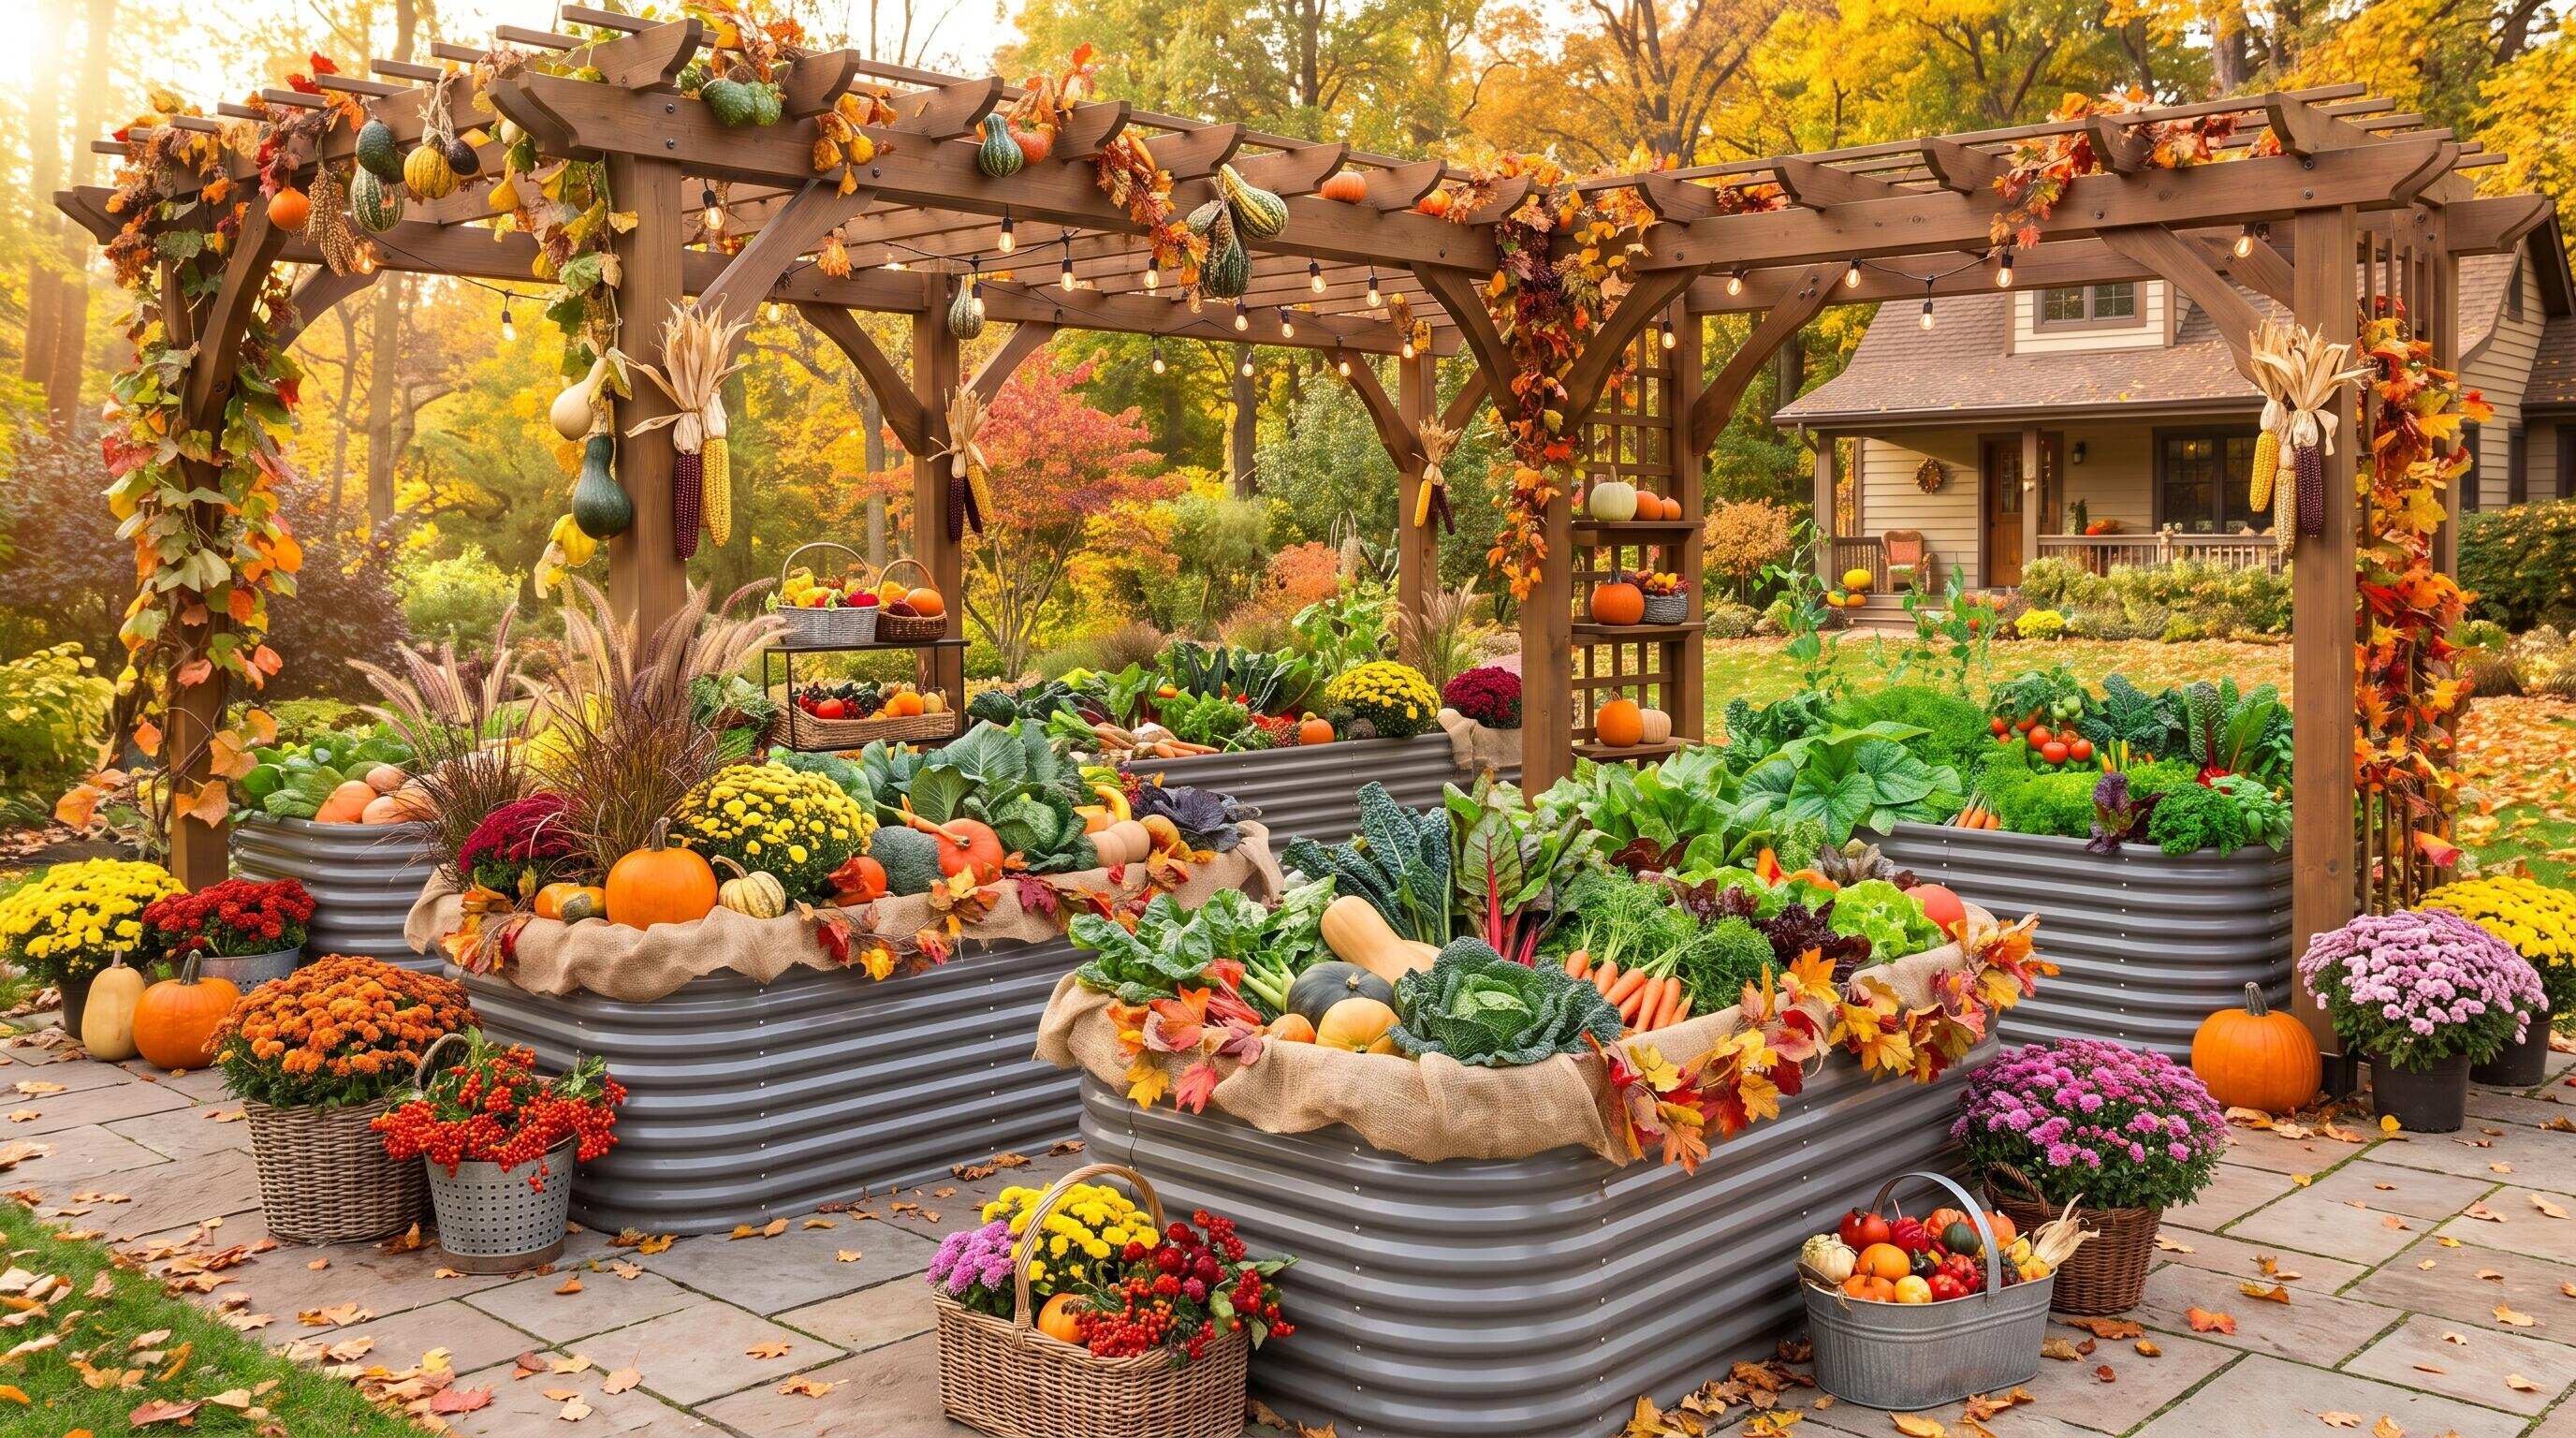
ALT: Raised bed garden layout with trellises and edging for a finished fall design
Transform Your Yard This Fall: Pairing Trellises and Edging With Raised Beds for a Complete Garden Design
You've set up your raised beds, filled them with quality soil, and planted a solid lineup of fall crops — but something still feels unfinished. The beds look functional, but the yard as a whole lacks that cohesive, intentional quality you've been envisioning. This is a pattern we consistently see in our work with home gardeners: the beds themselves are done right, but the surrounding framework — the trellises, edging, pathways, and structural accents — hasn't yet been addressed.
A well-thought-out raised bed garden layout is more than where crops sit. It's a system of visual and functional relationships that makes the entire yard feel designed rather than assembled. When trellises add vertical structure and edging defines clean boundaries, a collection of garden beds transforms into an outdoor space you're genuinely proud to spend time in — especially as the season shifts and fall's cooler light starts to show every detail in sharper relief.
This guide covers seven practical elements you can pair with your raised beds to achieve that finished fall look. Each item has been selected because it serves both a functional purpose and a design purpose, because it works across a range of yard sizes and budgets, and because it integrates naturally with the kind of durable, long-lasting raised beds serious gardeners rely on.
The Seven Elements That Complete a Fall Raised Bed Layout
Freestanding Panel Trellises for Vertical Growing and Visual Structure
A freestanding panel trellis is a self-supporting vertical frame — typically constructed from metal, wood, or coated wire — that stands independently behind or alongside a raised bed to support climbing plants and create visual height. In a fall garden context, trellises do double duty: they hold late-season climbers like scarlet runner beans or ornamental gourds, and they serve as a visual anchor that gives the raised bed planting layout a sense of scale and intentionality.
In our experience, one of the most underused design moves in home gardens is simply adding height. When all planting elements sit at the same ground level (or bed-wall level), the yard reads as flat and disconnected. A vertical panel at the back of an 8x4 bed immediately establishes a layered composition — low edging plants in front, mid-height crops in the center, climbing plants reaching upward at the rear — that reads as designed from every angle.
Freestanding panel trellises are particularly effective when placed at the back of beds that face south or west, so climbing foliage doesn't shade shorter fall crops like kale, spinach, or lettuce. For fall specifically, consider leaving a freestanding trellis in place even after the season ends; the geometric structure adds interesting negative space to the winter garden and gives you a visual backbone to build next year's raised bed garden layout around.
Best for: Gardeners who want vertical interest without committing to permanent wall-mounted structures, or anyone growing climbing fall crops alongside ornamental vines.
Watch out: Freestanding trellises can become unstable in strong autumn winds. Choose panels with a wide base or stake them alongside the raised bed frame for added security during stormy fall weather.
Obelisk and Teepee Trellises for Focal-Point Design
An obelisk or teepee trellis is a freestanding, three-dimensional structure — usually pyramidal in form — that functions as a sculptural focal point within or beside a raised bed. Unlike flat panel trellises, obelisks create a 360-degree climbing surface, which makes them ideal for plants that sprawl in multiple directions, and they act as a natural eye-catcher that draws attention to the heart of your raised bed layout.
The reason obelisks deserve a separate mention from panel trellises is that they change the experience of moving through a garden. When you place an obelisk at the center of a square or round raised bed, you create a destination — a point the eye travels to before scanning outward to the surrounding elements. This is especially effective in fall when many plants are winding down and the structure of the garden becomes more visible than the foliage.
In raised bed gardening, obelisks work beautifully inside larger square formats. A round raised bed — the kind that creates a naturally soft, cottage-garden feel — pairs particularly well with a centered obelisk, reinforcing the circular composition and giving late-season ornamental gourds or flowering beans a place to perform.
Best for: Homeowners who want a formal or cottage-style focal point, and gardeners using square or round raised beds who want to maximize the vertical use of interior bed space.
Watch out: Obelisks placed inside a bed occupy root space. If you're growing root vegetables or densely planted greens in fall, position the obelisk to one side rather than the center to avoid competing with crop roots.
Metal Edging and Landscape Borders for Clean Definition
Metal landscape edging is a low-profile border installed at ground level around and between raised garden beds to define pathways, contain mulch, and create a clean visual separation between planting areas and lawn or gravel. In a finished fall garden design, edging is the element that makes everything else look intentional.
According to guidance from university cooperative extension programs across the United States, defined bed boundaries are one of the most effective low-cost upgrades a home gardener can make to the overall appearance and maintainability of a garden space. Without edging, mulch migrates onto pathways, grass creeps into planting areas, and the overall layout looks blurred — especially in autumn when falling leaves create visual clutter.
Galvanized or powder-coated steel edging pairs naturally with galvanized steel raised garden beds from a material and aesthetic standpoint. The same clean metallic finish that runs along the bed walls continues at ground level, creating a consistent design language across the full raised bed planting layout. For gardeners using Anleolife's galvanized steel raised garden beds — which are built for a lifespan of up to 20 years — matching metal edging is a practical long-term investment that will hold its shape season after season without the cracking or warping that plagues plastic alternatives.
Best for: Anyone transitioning from a casual growing setup to a more polished outdoor living space, and gardeners whose beds are surrounded by lawn that tends to creep inward.
Watch out: Metal edging can have sharp edges during installation. Wear gloves and take care when cutting to custom lengths; pre-formed corner pieces reduce the number of cuts required.
Gravel and Decomposed Granite Pathways for Functional Flow
A pathway system between raised beds is a navigational and design feature that defines how people move through a garden space, prevents soil compaction in growing areas, and contributes significantly to the overall look of the raised bed layout. Gravel and decomposed granite are two of the most popular materials because they drain well, suppress weeds, and stay in place when properly edged.
Pathways often feel like a secondary concern — something to figure out after the beds are set up. In practice, the quality of the pathway material is what visitors and the homeowner notice first when standing at the garden entrance. A bed of healthy kale surrounded by muddy, undefined ground reads very differently than the same bed framed by a clean gravel path.
For fall specifically, good pathway drainage is a functional priority. Autumn rains and morning condensation can turn unimproved ground between beds into soft, slippery mud. A decomposed granite or pea gravel path, held in place by metal edging on both sides, stays firm and dry underfoot and protects the nearby raised bed soil system from runoff disruption.
The width of the pathways matters to the raised bed garden layout as much as the material. Most ergonomics guidance suggests a minimum of 18 inches between beds for comfortable access, with 24 to 36 inches recommended for paths you'll walk along carrying tools or a harvest basket. Combining modular raised beds into a cohesive backyard design involves planning these pathway widths before the beds are placed — retrofitting them afterward is significantly more work.
Best for: Gardeners with multiple raised beds who want a unified, park-like aesthetic, and anyone dealing with persistent mud or water pooling between growing areas.
Watch out: Gravel pathways without a weed barrier underneath will require periodic raking and replenishment as material settles or migrates. Install landscape fabric beneath the gravel to reduce long-term maintenance.
Raised Bed Corners and Protective Caps as Finishing Details
Protective corner pieces, post caps, and decorative finials are small structural additions that go at the top edges and corners of raised garden beds to give them a finished, furniture-quality appearance. While they seem minor, these details are what separate a bed that looks like a temporary growing container from one that looks like a permanent feature of a designed outdoor space.
This is the garden equivalent of crown molding — the detail that signals craftsmanship. When the top edge of a raised bed is capped cleanly, the eye reads the structure as complete. Without that cap, the raw edge draws attention to the construction of the bed rather than the plants growing within it.
Galvanized steel raised garden beds from Anleolife are engineered for structural integrity and long-term durability, and adding coordinating caps or post accents reinforces the design coherence of the overall raised bed layout. For fall in particular, when deciduous trees drop leaves into open beds and the growing season is winding down, decorative caps also provide a small amount of protection to the top rail of the bed frame against moisture accumulation over winter.
Best for: Gardeners who want their raised bed planting layout to feel like an integrated part of a designed outdoor living area rather than a purely utilitarian growing setup.
Watch out: Not all cap styles are compatible with all bed heights and wall thicknesses. Confirm measurements before purchasing — a cap designed for thinner lumber won't fit the walls of a heavy-duty steel raised bed without modification.
Garden Arches and Tunnel Trellises for Dramatic Entry Points
A garden arch or tunnel trellis is a full-span overhead structure that creates a passageway between or above raised garden beds, supporting climbing plants across the top and sides while defining an entry point into the main garden space. In a fall raised bed garden layout, an arch signals arrival — it tells anyone approaching that they are entering a designed space, not just a collection of growing containers.
In our experience with clients working on larger backyard layouts, the addition of an arch at the garden entrance produces an immediate and disproportionate impact on how the whole space is perceived. The structure doesn't need to be elaborate — a simple powder-coated metal arch draped with late-season hops, scarlet beans, or even ornamental squash creates a dramatic seasonal moment that ties the raised bed layout together into a cohesive scene.
For maximum design impact in fall, choose climbing plants for the arch that have good structure and color into October and beyond — ornamental gourds, climbing nasturtiums, and certain bean varieties hold their interest well into the cooler months. When the season ends, a bare metal arch still functions as a strong geometric element in the winter garden, serving as a visual preview of next year's raised bed planting layout.
Best for: Gardeners with enough space between two parallel rows of raised beds, or anyone creating a dedicated garden zone they want to demarcate with a sense of arrival and ceremony.
Watch out: Tunnel trellises require a stable foundation. In windy regions, ground anchors or concrete footings may be necessary to keep tall arches upright. Check local soil conditions before installing.
Lighting Along Pathways and Bed Perimeters for Ambiance and Safety
Pathway and perimeter lighting — including stake lights, solar lanterns, and low-voltage landscape fixtures — extends the functional and aesthetic life of a fall garden into the evening hours and contributes meaningfully to the finished quality of a raised bed garden layout. As days shorten in autumn, outdoor lighting becomes especially impactful.
According to the U.S. Department of Energy, solar-powered outdoor lighting has improved substantially in output and reliability in recent years, making it a practical choice for garden applications without the need for wiring. Low-profile solar stake lights placed along gravel pathways, or small lanterns set at the corners of raised garden beds, transform the garden after dusk into an inviting extension of indoor living space.
The practical case for pathway lighting is equally strong: the shorter days of fall mean you're frequently working in, or simply moving through, the garden after dark. Good lighting around beds reduces the risk of stepping into a bed by accident and makes late-season harvest tasks — like gathering the last of the fall greens — much safer and more enjoyable.
When integrating lighting into the raised bed planting layout, align fixtures with the edging and pathway design rather than placing them ad hoc. Lights that follow the line of the metal edging reinforce the geometric order of the layout; lights scattered randomly undercut the design coherence the other elements create. Preparing your garden beds for the fall planting season is also the right moment to plan and install pathway lighting before the shorter days arrive in earnest.
Best for: Gardeners who use outdoor space in the evening and anyone who wants the fall garden to function as an outdoor living area beyond daylight hours.
Watch out: Battery life and solar charge efficiency drop as temperatures fall and daylight hours shorten in late fall. Choose fixtures rated for cold-weather performance, and position solar panels where they'll receive maximum sun exposure even on low-angle autumn days.
Quick Comparison at a Glance
Choosing the right structural and design elements to pair with your raised beds depends on your priorities — vertical growing, visual polish, safety, or seasonal drama. The table below summarizes the seven elements covered in this guide.
| Element | Best For | Key Strength | Limitation |
|---|---|---|---|
| Panel Trellises | Climbers and back-of-bed vertical structure | Flexible, moveable, easy to scale | Wind instability if not anchored |
| Obelisk / Teepee Trellises | Focal-point design in square or round beds | 360-degree growing surface, sculptural appeal | Occupies root space inside the bed |
| Metal Edging and Borders | Clean definition between beds and pathways | Long-lasting, matches galvanized bed aesthetics | Requires careful installation; sharp edges |
| Gravel / DG Pathways | Navigational flow and drainage between beds | Excellent drainage, professional appearance | Needs weed barrier; replenishment over time |
| Caps and Corner Accents | Furniture-quality finish on bed structure | Elevates visual quality; minor weather protection | Compatibility varies by bed type and size |
| Garden Arches / Tunnels | Entry-point drama and overhead climber support | Transforms the whole layout's perceived scale | Requires stable foundation; space-intensive |
| Pathway and Perimeter Lighting | Evening usability and ambiance | Extends garden use into shorter fall evenings | Cold-weather solar performance may degrade |
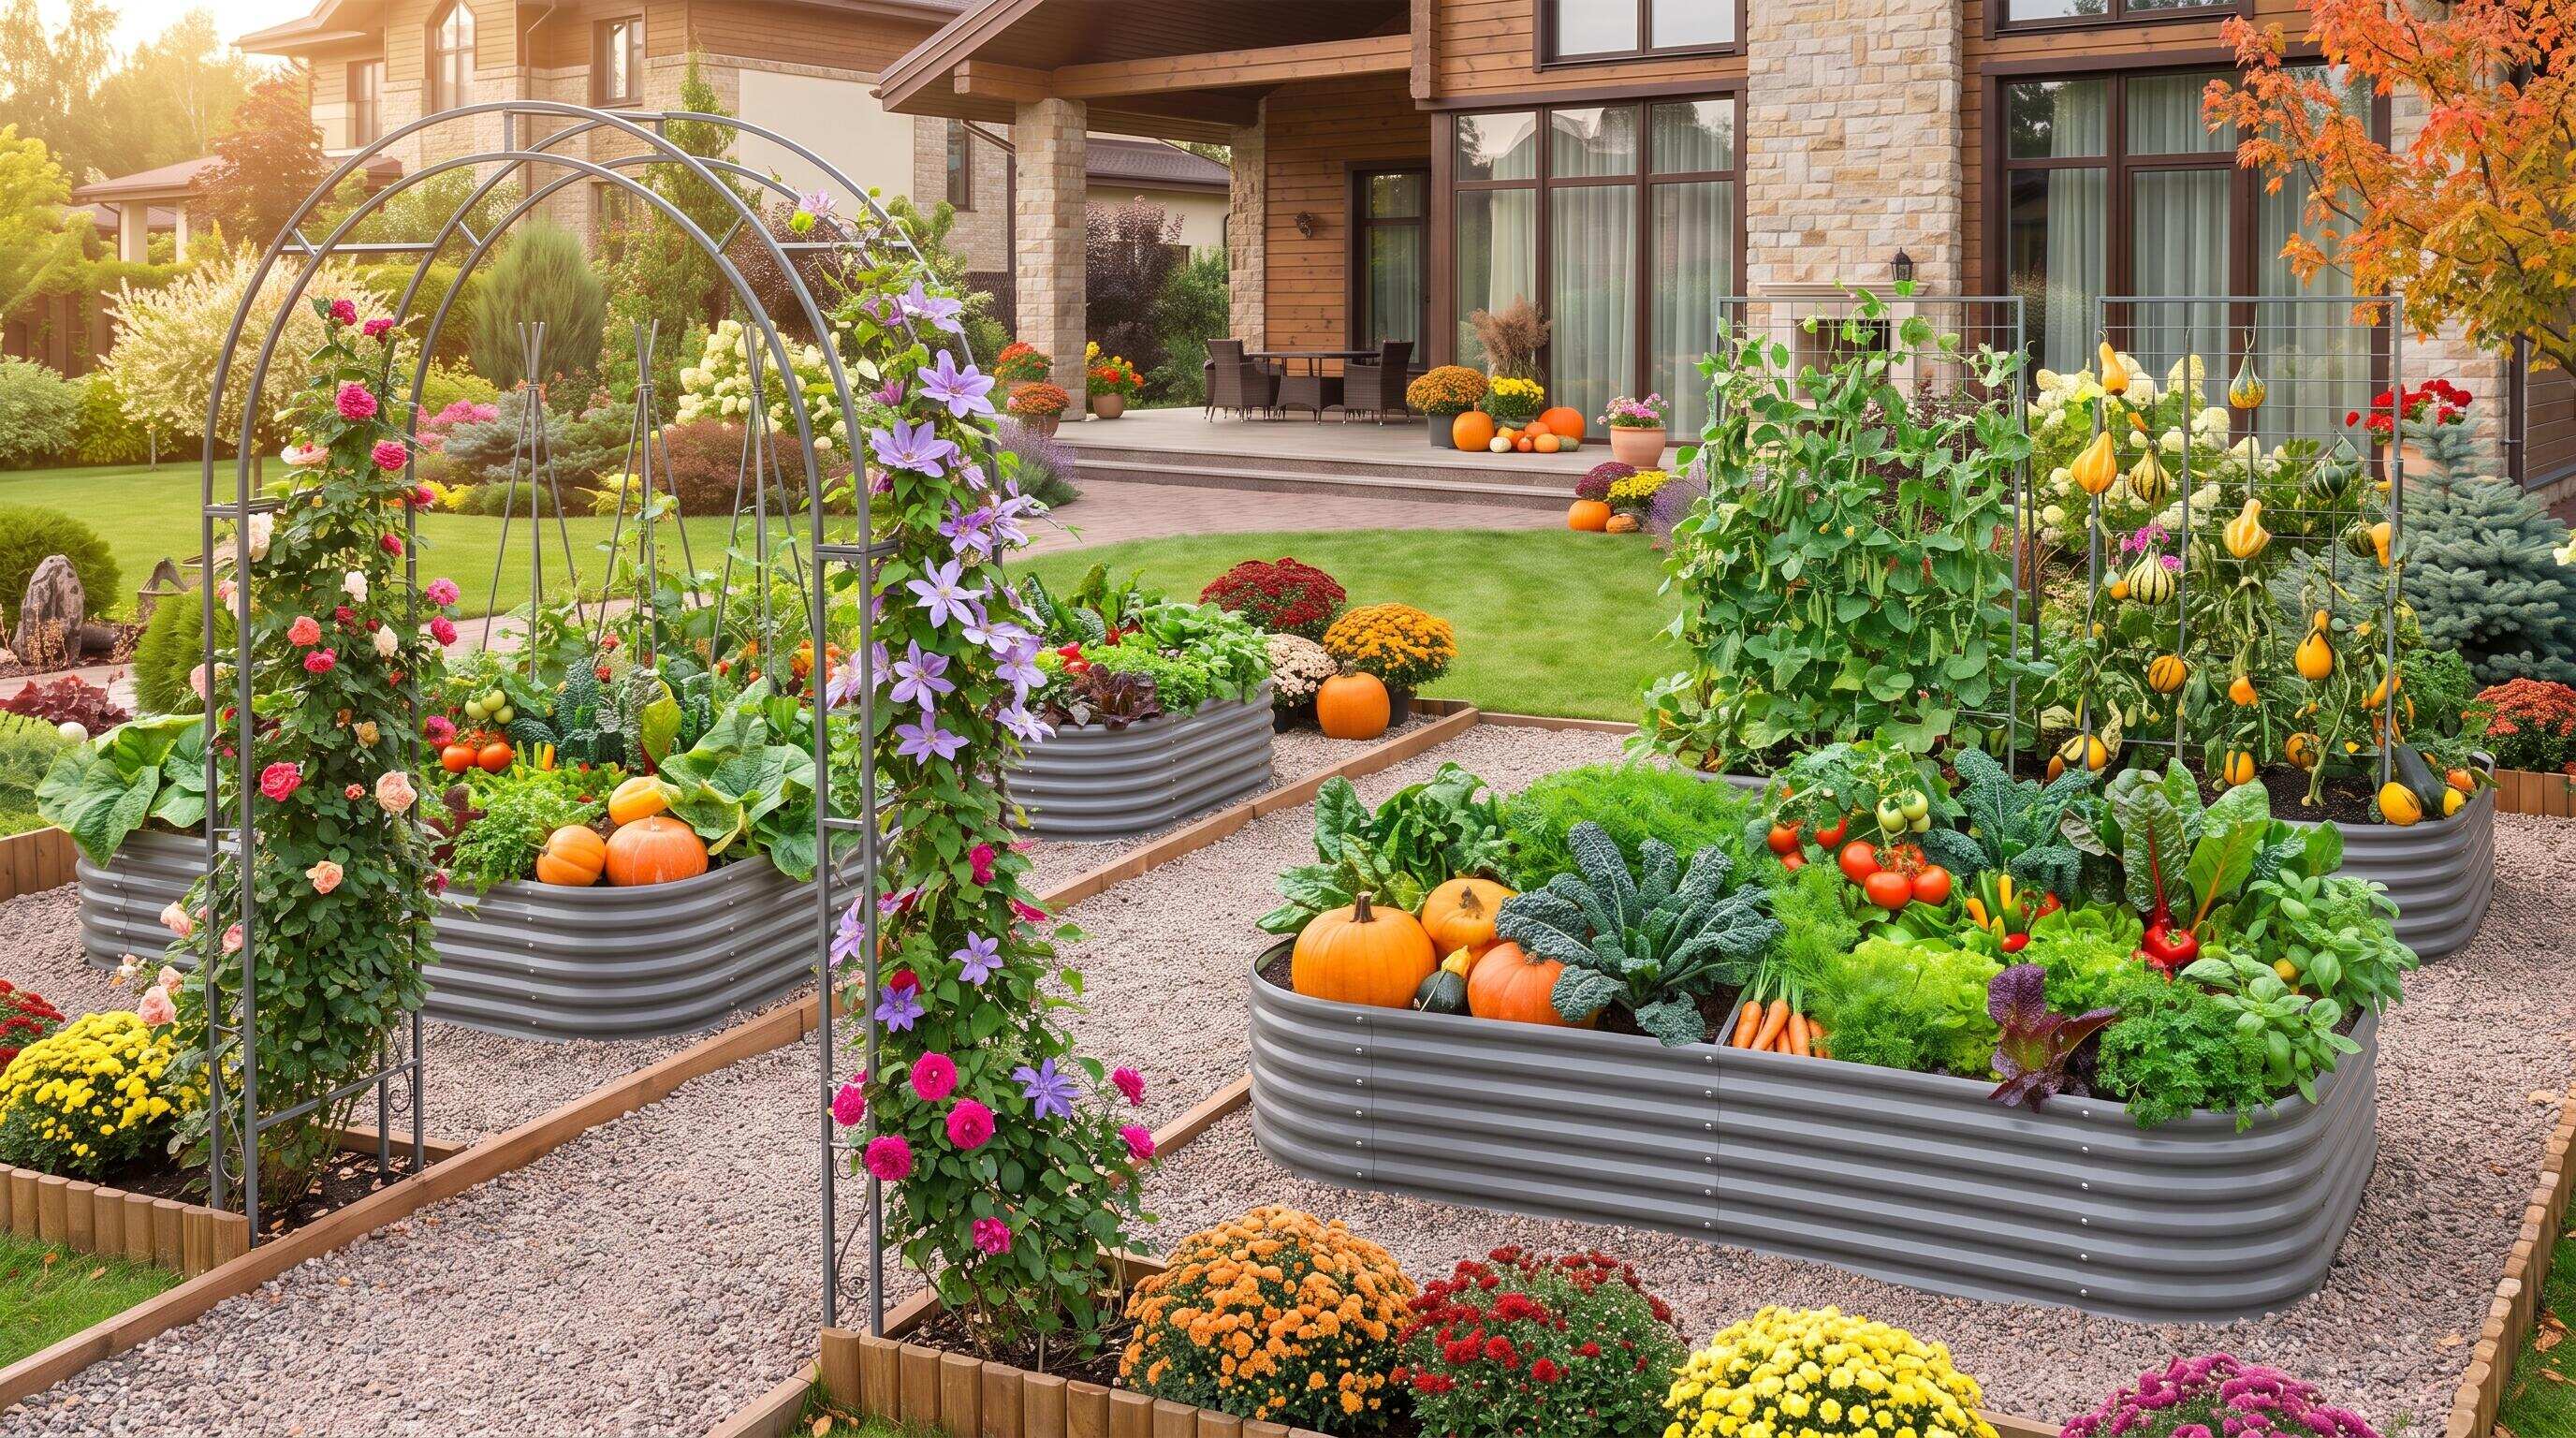
ALT: Finished fall raised bed garden layout featuring metal trellises, gravel pathways, edging, and an arch entry for a cohesive outdoor design
How to Choose the Right Elements for Your Raised Bed Layout
The right combination of structural and decorative elements for your raised bed garden layout depends on three practical factors: the size of your garden space, the intensity of your fall planting, and how much time you want to spend on seasonal maintenance. Here's how to map your situation to the right choices.
If you're working with a small urban plot or patio garden, prioritize vertical elements — a single panel trellis or obelisk behind one or two beds achieves a significant design upgrade without consuming horizontal space. Add metal edging along the perimeter to give the arrangement a finished edge, and simple solar stake lights to extend usability into fall evenings.
If you have a medium-sized backyard with several raised beds arranged in a grid, focus first on pathways and edging as the connective tissue of the layout. Well-defined gravel paths with matching metal edging create a unified framework that makes individual beds feel like parts of a composed whole. Then layer in a panel trellis or two where you're growing climbers, and consider a garden arch if you have two parallel rows of beds with space between them.
For larger garden setups or gardeners building out a full planting-and-growing ecosystem, all seven elements can be combined thoughtfully. Begin with planning a modular garden layout that can grow with your needs over time, then add structural elements in phases — pathways and edging first, trellises second, decorative accents and lighting last.
One common misconception worth addressing: many gardeners assume that adding trellises and edging is primarily a cosmetic upgrade. In practice, these elements improve the functional performance of the raised bed planting layout. Trellises reduce disease pressure by improving air circulation around climbing crops. Edging reduces weed pressure and keeps pathway materials where they belong. Lighting reduces accident risk in low-light conditions. The aesthetic payoff is real, but so is the functional one.
A final note on timing: fall is an ideal season to make these additions because beds are transitioning from high-summer productivity to cooler-season growing, giving you a natural window to install structural elements without disrupting active crops. Installing now also means everything is in place before the garden needs to be assessed and maintained through winter, which makes the early-spring assessment — checking for anything that needs attention before next planting season — much more straightforward.
Frequently Asked Questions FAQ
Q1: How do I integrate trellises with raised garden beds without damaging the bed walls?
Integrating trellises with raised garden beds without damage is straightforward when you use freestanding or externally anchored designs rather than drilling into the bed walls directly. Freestanding panel trellises can lean against the outer face of the bed or be staked into the ground immediately behind it. For metal raised beds built to last up to 20 years, preserving the structural integrity of the walls by avoiding penetrations is always the better long-term choice. External trellis brackets that clamp onto the bed rail without piercing the metal are also available as a clean, damage-free solution.
Q2: Are metal edging and gravel pathways appropriate for small urban gardens?
Metal edging and gravel pathways are well-suited to small urban gardens — in fact, they're often more impactful at smaller scales because every detail is more visible. A single strip of metal edging along a compact raised bed layout gives the space a refined, intentional look without requiring significant space or budget. Keep pathway widths modest — 18 inches is workable in tight spaces — and choose fine-grade gravel or decomposed granite, which compacts more easily and feels less visually heavy than large-diameter stones in a small garden.
Q3: How long does it take to add trellises, edging, and pathways to an existing raised bed setup?
For most home gardeners, adding trellises, edging, and a basic gravel pathway to an existing raised bed garden layout takes one to two weekends of focused work. Metal edging along a standard 8x4 bed perimeter can typically be installed in an afternoon. Laying a gravel pathway between two rows of beds — including installing weed barrier and spreading and raking gravel — usually takes a half to full day depending on length. Trellises are the fastest element; most freestanding panel designs assemble and stake into position in under an hour per unit.
Summary
Pairing trellises and edging with raised beds isn't a finishing touch reserved for gardeners with large budgets or elaborate spaces. It's a practical design decision that improves how a raised bed garden layout functions, how it looks, and how much you enjoy spending time in it — especially through the quieter, more reflective pace of the fall season.
Three points worth carrying forward from this guide:
First, vertical structure transforms the perceived scale of a raised bed layout. A single well-placed trellis or obelisk adds more visual impact than doubling the number of beds, and it does it without expanding the garden's footprint.
Second, edging and pathways are the connective tissue that unifies individual raised beds into a composed design. Without them, even the best bed placement and planting plan can look fragmented.
Third, fall is the right time to make these additions — before the garden goes into its lower-maintenance winter mode and while you have clear sight lines to assess what the layout needs. Investing in structural upgrades now means next spring's growing season starts from a stronger, more functional foundation.
For those working with Anleolife's galvanized steel raised garden beds — built for durability across up to 20 years of garden seasons — the structural elements covered here are natural complements that match the long-term quality of the beds themselves.
Ready to build a fall garden layout that looks as good as it grows? Visit the Anleolife website to explore raised garden beds in a range of heights and footprints, from compact 18-inch tall options to waist-high 35-inch designs — and pair them with the trellises, edging, and pathway systems that complete the picture. With warehouse locations across California, Texas, Florida, New York, Illinois, and Washington, delivery arrives in 3–8 business days. Anleolife products are also available on Amazon, Walmart, Home Depot, Lowe's, and Wayfair, so your garden upgrade is never more than a few days away.
References
- U.S. Department of Energy. "Outdoor Lighting and Solar Technology for Residential Applications."
https://www.energy.gov - United States Department of Agriculture (USDA). "Home and Community Gardening Resources."
https://www.usda.gov - University Cooperative Extension Services (National). "Raised Bed Gardening: Design, Soil, and Structural Guidance."
https://www.extension.org - American Society of Landscape Architects (ASLA). "Residential Landscape Design Principles and Best Practices."
https://www.asla.org
Note: Standards and guidance documents may be updated; please check the latest official publications or consult professional advisors for current recommendations.






