Garden Life Guide

Top Mulching Strategies for Raised Garden Beds to Lock In Summer Moisture

Top Mulching Strategies for Raised Garden Beds to Lock In Summer Moisture

on May 13 2026
ALT: Raised garden bed filled with vegetable plants covered in organic mulch to retain summer soil moisture Why Summer Mulching in Raised Garden Beds Is the Game-Changer Your Garden Needs Key Conclusion: Mastering mulching strategies for raised garden beds is one of the most impactful steps any home grower can take before summer heat peaks. The right mulch layer locks in moisture, moderates soil temperature, suppresses weeds, and reduces watering frequency โ€” translating directly into healthier plants and lower water bills. Whether you're working with a compact urban raised bed or a sprawling backyard layout, the principles of effective mulching apply universally and are easy to implement with the right guidance. Summer heat is relentless, and for raised bed gardeners, the challenge of moisture retention becomes critical from June onward. Because raised garden beds drain faster than in-ground plots โ€” a feature that's great for root health but challenging in drought conditions โ€” they lose moisture more quickly under direct sun exposure. Without a protective mulch layer, soil can dry out within hours on a hot afternoon, stressing your plants and forcing you into daily watering routines. The good news? A well-applied mulch layer can reduce watering needs by up to 50%, according to horticultural research, while simultaneously building soil biology, managing weed pressure, and keeping root zones cool. This guide walks through the top mulching strategies for raised garden beds specifically, addressing everything from material selection to layering techniques, seasonal timing, and common mistakes to avoid. Who Should Use These Mulching Strategies for Raised Garden Beds โœ… Applicable Scenarios: Home gardeners growing vegetables, herbs, or flowers in metal or wood raised garden beds during spring through early fall Urban micro-gardeners with limited space who need maximum efficiency from every square foot Eco-conscious growers who want to reduce water consumption and build organic soil health naturally Empty nesters or retirees who prefer low-maintenance gardening practices that still yield abundant results New raised bed gardeners looking to establish strong moisture management habits from day one โŒ Not Applicable/Cautions: Seedlings in germination phase: Heavy mulch applied directly over germinating seeds can block light and trap too much moisture, promoting damping-off disease Cool-season crops in early spring: Mulching too early in spring can keep soil temperatures artificially low, slowing the growth of warm-season transplants Raised beds with persistent waterlogging issues: Adding mulch before resolving drainage problems may worsen root rot conditions The Science Behind Moisture Loss in Raised Garden Beds โ€” and Why Mulching Solves It Raised garden beds warm up faster than ground-level soil in spring, which is one of their greatest advantages for extending the growing season. However, that same thermal efficiency becomes a liability in summer. Elevated exposure to sun and wind accelerates evaporation from the soil surface, and because raised beds have defined boundaries and typically superior drainage, moisture exits the system faster than in traditional garden plots. Research from the University of California Cooperative Extension has consistently highlighted soil moisture conservation as one of the top challenges for home gardeners in warm, dry climates. The organization notes that mulching is among the most cost-effective, sustainable interventions available to residential gardeners โ€” reducing both water use and the need for synthetic weed control. For raised bed gardeners specifically, the dynamics are even more pronounced. A standard 18-inch-tall raised bed exposes more soil volume to air temperature swings. In an 8x4 configuration with deeper soil mass, the upper several inches can reach temperatures that actively damage feeder roots during peak afternoon heat. This is where a 2โ€“4 inch mulch layer becomes transformative โ€” it insulates the surface, prevents evaporative loss, and creates a microclimate where soil biology can thrive. If you're early in your raised garden bed journey and still evaluating bed options and budget, the guide How Much Should You Spend on a Raised Garden Bed This Season? offers an excellent breakdown of what to prioritize. Once your bed is in place and planted, moisture management through mulching becomes your next high-impact skill to develop. The environmental case for mulching is also compelling. With water scarcity increasingly relevant across the American West and South โ€” regions where Anleolife has significant customer bases in California, Texas, and Florida โ€” reducing irrigation frequency is both ecologically and economically smart. Mulching aligns directly with sustainable home gardening values that many middle-class families and eco-conscious growers prioritize. Core Mulching Strategies to Lock In Moisture All Summer Long Three-Step Quick Start for New Raised Bed Mulchers Step 1: Prepare Your Raised Bed Surface Before Mulching Before applying any mulch, water your raised bed thoroughly so the soil is already moist at the time of application โ€” this locks moisture into the soil from the start. Remove any weeds that have emerged, as mulch will suppress future growth but not eliminate existing plants. For beds with new transplants, allow seedlings to establish for at least one to two weeks post-transplant before applying mulch around them. This process takes about 20โ€“30 minutes per standard 8x4 bed. Step 2: Choose Your Mulch Material and Apply at the Right Depth Select an organic mulch material suited to your crop type and climate (detailed comparison in the next section). Apply mulch to a depth of 2โ€“3 inches for most vegetable gardens, or up to 4 inches for perennial herbs and flower beds. Keep mulch pulled back 1โ€“2 inches from the base of plant stems to prevent rot and pest harborage. A single bag of commercial wood chip mulch typically covers approximately 6โ€“8 square feet at 3-inch depth, so calculate your bed dimensions in advance. This step takes 15โ€“30 minutes. Step 3: Monitor, Replenish, and Adjust Throughout the Season Organic mulches break down over the season โ€” which is a benefit for soil biology but means you'll need to replenish. Check mulch depth every 4โ€“6 weeks during summer and add a thin layer as needed to maintain the 2โ€“3 inch target. After major rain events, gently fluff matted mulch to restore air circulation and prevent mold development. At season's end, incorporate remaining mulch into the top layer of your bed's soil to add organic matter. Comparing the Best Mulch Materials for Raised Garden Beds Different mulch materials offer distinct advantages depending on your garden goals, local availability, aesthetic preferences, and budget. The table below compares the most popular options across dimensions that matter most to raised bed gardeners. Comparison Dimension Straw / Hay Wood Chips / Shredded Bark Compost Mulch Moisture Retention Excellent โ€” forms a loose, breathable layer that holds humidity well Very good โ€” dense coverage reduces evaporation significantly Good โ€” doubles as a soil amendment while retaining moisture Weed Suppression Good when applied thickly Excellent โ€” heavy material blocks light effectively Moderate โ€” may contain viable weed seeds if not fully composted Decomposition Rate Fast (1 season) โ€” adds organic matter quickly Slow to moderate โ€” lasts 1โ€“2 seasons Very fast โ€” essentially integrates into soil by season's end Availability & Cost Widely available; inexpensive Available at garden centers; moderate cost Can be made at home; low to no cost Aesthetic Appeal Rustic, natural look Polished, formal appearance Blends into soil; minimal visual impact Best For Vegetable gardens, annual crops Pathways, perennials, ornamental beds Nutrient-hungry crops needing enriched soil Pest Considerations May harbor slugs and snails if piled thick Minimal pest attraction when dry Low pest risk when fully cured This comparison makes it clear that no single mulch is universally superior โ€” the best choice depends on your specific raised bed goals. For most summer vegetable gardens, straw mulch offers the ideal balance of moisture retention, affordability, and easy availability. Wood chips work beautifully for raised beds integrated into decorative landscaping designs. In-Depth Guide to Mulching Strategies for Raised Beds by Crop Type and Bed Depth Mulching Vegetable Crops: Tomatoes, Peppers, and Cucurbits For heat-loving vegetables like tomatoes, peppers, eggplants, and squash, maintaining consistent soil moisture is directly tied to fruit quality. Irregular moisture causes blossom end rot in tomatoes and bitter cucumbers โ€” problems that can devastate a season's harvest. Apply a 2โ€“3 inch layer of straw mulch around these crops after transplanting, once soil has warmed to at least 60ยฐF. Keep mulch away from stems but allow it to extend to the bed edges. For Anleolife's raised beds in the 18-inch tall range โ€” such as the 8x4 or 12x3 configurations โ€” a full mulch layer across the bed surface dramatically reduces mid-day water stress on these thirsty crops. A practical tip: lay a soaker hose or drip irrigation line on the soil surface before applying mulch. Mulching over your drip system delivers water directly to roots while the mulch seals moisture in from above โ€” a dual-action approach that can reduce watering time by more than half. Mulching for Deeper Raised Beds (24"โ€“35" Tall) Extra-tall raised beds โ€” including Anleolife's 24-inch Extra Tall and 30-inch Extra Tall configurations โ€” hold significantly more soil volume. While this depth is excellent for root crops and offers built-in ergonomic benefits, the deeper soil column actually retains moisture better through capillary action. This means mulching at the standard 2-inch depth is usually sufficient, rather than the thicker layers sometimes used in shallow beds. The ergonomic advantage of waist-high raised beds (Anleolife's 35-inch Waist-High 4x1.5 ft bed, for instance) also means you're more likely to notice and address mulch breakdown quickly because of the comfortable working height โ€” an underrated benefit for older gardeners and those with mobility considerations. Protecting Smaller and Round Raised Beds For compact configurations like the Round Raised Garden Bed (18" Tall, 48" Wide), mulching requires a slightly different technique. The curved geometry means mulch can shift toward edges more easily. Use a slightly coarser material like wood chips to maintain stable coverage, and check mulch distribution after rain or wind events more frequently than you would with rectangular beds. Smaller beds like the 4x1.5 or 6x2 configurations used by urban micro-gardeners also benefit from mulching โ€” perhaps even more so, since their smaller soil volumes are more vulnerable to rapid moisture loss. These beds are popular for herbs and salad greens, which appreciate consistent moisture but are sensitive to overwatering. Straw or shredded leaf mulch at 1.5โ€“2 inches works well for these crops. Slug and Snail Management Under Mulch One legitimate concern with organic mulch โ€” especially straw and leaf litter โ€” is that it creates a moist, protected habitat that slugs and snails love. The best way to prevent slugs and snails in raised beds is to combine mulch use with a few targeted deterrents: copper tape applied around the bed perimeter creates a mild electrical barrier that slugs avoid; food-grade diatomaceous earth sprinkled at the soil-mulch interface is effective after dry spells; and iron phosphate-based baits (like Sluggo) are certified for organic gardens and safe around pets and wildlife. Raised beds made from galvanized steel โ€” like Anleolife's Galvanized Steel Raised Garden Beds โ€” offer an additional advantage here: their smooth metal sides make it harder for slugs to climb in compared to wood or stone-edged beds. Pairing this structural deterrent with the right mulch management strategy gives you strong pest protection without reaching for chemical insecticides. The Role of Soil Quality Under Your Mulch Even the best mulch strategy is limited by what's happening in the soil beneath. Mulch retains moisture, but the soil itself needs the structure to hold and distribute that moisture to plant roots. For raised bed gardeners looking to optimize their soil foundation, the resource What Is the Best Soil Mix for Raised Garden Beds? (The Mel's Mix Guide) provides a proven framework for building moisture-retentive, well-draining raised bed soil that works synergistically with mulching. Great mulching on poor soil still produces mediocre results. But mulching on a well-structured soil mix creates a system where moisture is captured, retained, and made consistently available to plant roots โ€” exactly what summer crops need to thrive. ALT: Straw mulch layered around summer vegetables in a galvanized steel raised garden bed to conserve moisture and suppress weeds Advanced Mulching Techniques and Common Misconceptions Layering Mulch with Living Groundcovers One advanced strategy that experienced raised bed gardeners use is combining a traditional mulch layer with low-growing living groundcovers โ€” plants like creeping thyme, sweet alyssum, or white clover โ€” that suppress weeds and conserve moisture through living root systems. This approach is particularly effective in larger raised beds (8x4 and above) where companion planting is already integrated into the design. If you're exploring how to optimize your bed layout for both productivity and moisture management, the article How to Build a Raised Garden Bed Layout for Families with Limited Backyard Space offers practical layout planning strategies that can be combined with mulching for a fully optimized growing system. Misconception: "More Mulch Is Always Better" A very common mistake among new gardeners is applying mulch too thickly, particularly around the base of plants. Mulch piled against stems creates "mulch volcanoes" โ€” a term professionals use for the misguided practice of mounding mulch around tree and plant trunks. This traps excess moisture against soft plant tissue, promotes fungal disease, and can attract boring insects. Always maintain a clear gap of at least 1โ€“2 inches between mulch and any plant stem. Misconception: "Mulching Once Per Season Is Enough" Organic mulches decompose โ€” that's actually one of their greatest features, as decomposed mulch adds organic matter to your soil and feeds beneficial microorganisms. However, it does mean that a single application in early June may be nearly exhausted by late August in hot climates. Plan for at least one mid-season top-up, especially in raised beds in full sun in states like Texas, Florida, or California where Anleolife serves a high concentration of customers. Synthetic Mulch: Knowing When (and When Not) to Use It Black plastic mulch and landscape fabric are sometimes marketed for raised beds. While black plastic can effectively warm soil and suppress weeds early in the season, it degrades in UV exposure, is not eco-friendly, and disrupts the soil biology that makes raised bed gardening so rewarding long-term. For health-conscious and eco-minded gardeners, organic mulch alternatives are strongly preferable. Frequently Asked Questions FAQ Q1: How do I choose the best mulch for moisture retention in a raised garden bed? The best mulch for moisture retention depends on your crop type and aesthetic preferences. Straw mulch is the top choice for vegetable gardens because it's loose, breathable, and holds humidity well around roots. Wood chips are excellent for ornamental raised beds or perennial herbs. Compost mulch doubles as a soil amendment, making it ideal for heavy-feeding crops. Apply any of these at a 2โ€“3 inch depth, keeping material away from plant stems to prevent rot. Q2: Is it safe to use mulch in galvanized steel raised garden beds? Yes, organic mulch is completely safe and highly beneficial in galvanized steel raised garden beds. The steel structure doesn't interact negatively with any standard organic mulch material. In fact, the combination works particularly well: the galvanized steel walls help regulate bed temperature and the mulch layer locks in moisture, creating a stable microenvironment for plant roots. Anleolife's galvanized steel raised garden beds are built for 20-year durability, making them an ideal long-term platform for these soil and mulch management practices. Q3: How often should I replace or replenish mulch in a raised bed during summer? Plan to replenish mulch every 4โ€“6 weeks during peak summer. Organic mulches like straw decompose more quickly in heat, and the target is always 2โ€“3 inches of depth. A quick check every few weeks โ€” simply pressing your hand into the mulch to test depth โ€” tells you whether it's time to add more. At season's end, work remaining decomposed mulch into the top layer of your soil as a natural amendment. This is low-effort maintenance with compounding benefits for soil health year over year. Summary Mastering summer mulching for raised garden beds is one of those foundational practices that delivers outsized returns on minimal investment. Here are the three core takeaways from this guide: 1. Mulch is your most powerful moisture management tool. A consistent 2โ€“3 inch layer of organic mulch reduces evaporation, moderates soil temperature, suppresses weeds, and supports soil biology โ€” all at once. For raised beds in hot, sunny locations, this single practice can halve your watering frequency. 2. Match your mulch to your crops and bed depth. Straw excels in vegetable gardens; wood chips suit ornamental and perennial beds; compost mulch feeds hungry plants while protecting moisture. Deeper beds (24"โ€“35" tall) need less mulch depth than shallow configurations. Adjust your approach based on what you're growing and how your beds are structured. 3. Consistent maintenance beats a single heavy application. Check mulch depth every 4โ€“6 weeks, keep it away from plant stems, deter slugs with structural and organic methods, and integrate mulching with strong soil management for maximum results across the entire growing season. Your next step: walk out to your raised beds today, check current mulch depth, and schedule your first mid-season top-up. The investment of an hour now pays off in healthier plants, lower water bills, and a more resilient garden all the way through fall harvest. Ready to Upgrade Your Raised Garden Bed System? Anleolife supports your entire garden journey with a nationwide U.S. warehouse network strategically located in California, Texas, Florida, New York, Illinois, and Washington โ€” ensuring delivery within 3โ€“8 business days so your garden upgrade plans never have to wait. Our products are available across major e-commerce platforms including Amazon, Walmart, Home Depot, Lowe's, Wayfair, and directly at Anleolife.com, providing consistent quality assurance and reliable after-sales service wherever you prefer to shop. Anleolife's product ecosystem covers three core gardening scenarios: Planting (including our galvanized steel and rust-resistant raised garden beds, built to last 20 years), Raising (chicken coops, rabbit hutches), and Beautification (decorative accessories, pathway systems) โ€” meeting your complete needs from functionality to aesthetics. We understand that an ideal garden isn't built overnight. It grows gradually, with better decisions each season. Our modular product design allows flexible expansion based on your needs โ€” from your first 8x4 raised garden bed to a fully integrated planting-and-raising ecosystem. We grow with you every step of the way. References University of California Agriculture and Natural Resources. "Mulching in the Garden and Landscape".https://ucanr.edu/sites/soilandwater/Soil_Management/Mulching/ U.S. Department of Agriculture Natural Resources Conservation Service. "Organic Mulch and Soil Moisture Conservation".https://www.nrcs.usda.gov/resources/guides-and-instructions/organic-matter Penn State Extension. "Mulches for the Home Landscape".https://extension.psu.edu/mulches-for-the-home-landscape Oregon State University Extension Service. "Mulching Woody Ornamentals with Organic Materials".https://extension.oregonstate.edu/gardening/techniques/mulching-woody-ornamentals-organic-materials University of Minnesota Extension. "Mulch for the Home Garden".https://extension.umn.edu/planting-and-growing-guides/mulch Note: Standards and recommendations may be updated. Please check the latest official documents or consult professional horticultural advisors for current guidance. About Anleolife Anleolife is a leading outdoor garden solutions provider in North America, dedicated to offering a full-scenario product ecosystem for home gardening enthusiasts, covering planting, raising, and garden beautification. Since its founding, Anleolife has upheld its brand mission, "Made for Garden Life," continuously innovating products and optimizing services to help hundreds of thousands of users upgrade their gardens, reconnect with nature, and enjoy a better garden lifestyle. From the first raised bed to a complete outdoor living space, Anleolife is the partner that grows alongside you through every season.
Square Foot Gardening in Raised Beds: How to Plan Your Layout This Summer

Square Foot Gardening in Raised Beds: How to Plan Your Layout This Summer

on May 13 2026
ALT: Square foot gardening layout in raised metal garden beds with labeled planting grid for summer vegetables Why Square Foot Gardening in Raised Beds Is the Smartest Summer Strategy Key Conclusion: Square foot gardening in raised beds transforms even the smallest outdoor space into a high-yield, beautifully organized growing system. By dividing your raised bed into clearly defined planting squares, you eliminate guesswork, reduce waste, and maximize every inch of soil. Whether you're a first-time grower or a seasoned home gardener, combining the square foot method with quality raised garden beds gives you structured productivity, cleaner aesthetics, and a summer harvest you can genuinely be proud of. There's a quiet revolution happening in American backyards. Millions of home growers are ditching sprawling in-ground rows in favor of compact, organized, deeply productive raised bed systems. And at the heart of this shift is a deceptively simple method: square foot gardening. Developed by Mel Bartholomew in the 1980s and popularized through decades of real-world results, this approach divides your planting area into individual one-square-foot sections, each designated for a specific crop. Combined with the structural advantages of a quality raised garden bed, it creates a complete growing system that's hard to beat. This summer, the question isn't whether you should try square foot gardening in raised bedsโ€”it's how to plan your layout for maximum results. In this guide, we'll walk you through every step, from choosing the right bed size to setting up drainage, managing pests with netting, and even adding finishing touches like pathway lighting to make your garden both functional and beautiful. Who This Guide Is For โœ… Applicable Scenarios: Home gardeners with limited yard space who want to grow more food in less area Families looking to establish a structured, low-maintenance vegetable garden this summer Urban micro-gardeners and apartment dwellers with patios, balconies, or small lots Empty nesters and retirees who want an organized, easy-to-manage garden without back strain Eco-conscious growers interested in reducing water use, soil waste, and chemical inputs โŒ Not Applicable/Cautions: Large-scale commercial growers who need field-level row cropping systems Gardeners planning to grow sprawling crops like pumpkins or large melons, which need significantly more horizontal space than a single square can provide Those unwilling to invest in quality soil mix, since square foot gardening's success is highly dependent on a nutrient-rich, well-draining growing medium The Background: Why Raised Beds and Square Foot Gardening Are a Natural Pair For decades, traditional gardening meant long rows, wide spacing, and significant wasted soil. The square foot method changed that by challenging conventional spacing rules and proving that you could grow far more in a fraction of the spaceโ€”if you prepared your soil and planned your layout correctly. Raised garden beds amplify these benefits in several important ways. Because the soil in a raised bed is never walked on, it stays loose and aerated, which is critical for root development. The contained structure makes it far easier to maintain a premium soil mix, control drainage, and manage pests. And perhaps most importantly for summer gardening, raised beds warm up faster in spring and stay productive longer into the fall. The market data reflects this trend. According to the National Gardening Association, food gardening participation in the U.S. has grown significantly over the past decade, with raised bed gardening consistently cited as the fastest-growing segment. More Americans than ever are prioritizing homegrown produceโ€”not just for flavor and freshness, but for food security, mental wellness, and a deeper connection to the natural world. If you're just getting started and wondering about investment, it's worth reading How Much Should You Spend on a Raised Garden Bed This Season? for a clear breakdown of what to expect at different budget levels. The short answer: a well-chosen raised bed is a long-term asset, not just a seasonal expenseโ€”especially when you're working with a structure built to last up to 20 years. The combination of raised bed infrastructure and square foot planning creates something greater than either approach alone. It's a systemโ€”a repeatable, scalable, and genuinely enjoyable way to grow food and flowers all summer long. Planning Your Square Foot Garden Layout: A Complete Summer Guide Three-Step Quick Start Step 1: Choose Your Raised Bed Size and Height The first decision is your bed dimensions. For square foot gardening, the most important rule is that you should be able to reach the center of the bed from either side without stepping in. This is why a 4-foot width is the gold standard. Anleolife offers a wide range of options that fit this method perfectlyโ€”from the 18" Tall 8x4 ft Galvanized Steel Raised Garden Bed for ground-level growing, to the 24" Extra Tall 8x4 ft for deeper root crops and more ergonomic access. If space is extremely tight, a 4x4 ft or 6x3 ft bed is an excellent starting point. Allow 30โ€“45 minutes to finalize your layout plan on paper before purchasing. Step 2: Design Your Grid and Plant Spacing Chart Once your bed is selected, draw a simple grid dividing the total area into one-square-foot sections. A standard 8x4 ft bed gives you 32 squares to work with. Each square gets one crop type, and the number of plants per square depends on the mature size of the plant: one tomato plant per square, four lettuce plants per square, nine spinach plants per square, or up to 16 radish plants per square. Use a pencil and graph paperโ€”or a free online garden plannerโ€”to assign each square before you sow. This step takes about 20โ€“30 minutes but saves enormous time and confusion throughout the season. Step 3: Set Up Your Bed, Soil, and Structural Accessories Install your raised bed in a location that receives at least 6โ€“8 hours of direct sunlight. Fill it with a high-quality soil mix specifically suited for raised bedsโ€”the Mel's Mix Guide is an excellent resource for getting the right blend of compost, vermiculite, and peat moss. Add any physical markers (string, wooden dowels, or bamboo stakes) to visually divide your grid. Then install drainage support, netting if needed, and any lighting or pathway features before planting. This setup stage typically takes one afternoon and sets the foundation for the entire season. Comparing Raised Bed Options for Square Foot Gardening Not all raised beds are created equal for the square foot method. The right choice depends on your available space, the crops you want to grow, and how much bending or kneeling you're comfortable with. Here's a comparison of some of the most popular Anleolife raised bed configurations for summer square foot gardening: Comparison Dimension 18" Tall 8x4 ft Galvanized Steel 24" Extra Tall 8x4 ft 30" Extra Tall 10x3 ft Total Planting Squares 32 squares 32 squares 30 squares Ideal For General vegetables, herbs, flowers Root crops, deep-rooted plants Long, narrow layouts; ergonomic access Soil Depth Advantage Good for most summer crops Excellent for tomatoes, peppers, carrots Superiorโ€”reduced bending for retirees Access Ease Moderate (some bending required) Good Excellent waist-high access Lifespan Up to 20 years Up to 20 years Up to 20 years Best User Profile Families, first-time growers Experienced growers, deep-root crops Empty nesters, retirees, accessibility needs Rust Resistance Galvanized steel construction Galvanized steel construction Heavy-duty construction For those working with genuinely limited backyard space, the How to Build a Raised Garden Bed Layout for Families with Limited Backyard Space guide offers creative layout strategies for making multiple smaller beds work together as a cohesive system. Deep Dive: Building a Functional and Beautiful Summer Garden System Drainage: The Foundation of a Healthy Raised Bed One of the most overlooked but critical aspects of raised bed gardening is proper drainage. When people ask about the best way to install a drainage system in raised beds, the answer involves several layered strategies. Start by ensuring your raised bed is placed on a level surface with natural soil or gravel belowโ€”both allow excess water to drain freely. If you're placing a bed on a hard surface like concrete or a deck, add a layer of gravel or coarse material at the base of the bed before filling with soil. Many experienced gardeners use a layer of landscape fabric on the interior bottom to prevent soil loss while still allowing drainage. Inside the bed, your soil mix plays the largest drainage role. A well-structured mixโ€”roughly one-third compost, one-third coarse vermiculite, and one-third peat moss or coconut coirโ€”drains efficiently while retaining just enough moisture for root development. Avoid heavy clay-based soils entirely in raised beds, as they compact over time and create waterlogging that kills roots and promotes fungal disease. If you're growing in a region with heavy summer rainfall, consider slightly elevating one end of the bed to encourage natural slope drainage. You can also use raised bed legs or supports that lift the structure off the ground, improving airflow and drainage from below. Pest Management: Netting Solutions That Actually Work A flourishing summer garden inevitably attracts unwanted guests. Aphids, caterpillars, cabbage moths, and slugs can devastate a carefully planned square foot layout in days. The best defense is physical exclusionโ€”and that means insect netting. When evaluating top-rated insect netting materials for vegetable gardens, look for fine-mesh options (typically 0.6mm to 1.5mm aperture) that block most flying insects while still allowing light, air, and rain to reach your plants. Lightweight row cover fabric also works well for early-season frost protection and doubles as an insect barrier. For gardeners in exposed locations, garden netting for windy climates needs to be heavier gauge and secured firmly at the edges. Hail nets or windbreak mesh can be anchored to the sides of your raised bed using clips or hooks. Anleolife's galvanized steel beds are particularly well-suited for thisโ€”the sturdy steel walls give you a solid anchor point for netting frames or hoops, unlike lightweight plastic or fabric beds that shift in strong winds. For square foot gardens, a simple hoop tunnel built over the bed using flexible PVC piping or fiberglass rods can support netting without shading out plants. Secure the netting at the base and use clips to open it for watering, harvesting, and maintenance. This approach is inexpensive, reusable, and highly effective. Watering and Hose Management Consistent watering is essential in summer, especially during heat waves when raised beds can dry out faster than in-ground plots. The best approach for square foot gardens is drip irrigation or soaker hoses, which deliver water directly to the root zone without wetting foliage (reducing disease risk). For gardeners thinking about hose storage solutions and reel systems, keeping your hose organized is more than aestheticsโ€”it protects your hose from UV degradation and kinking, and it keeps pathways safe. Wall-mounted hose reels or freestanding hose cart systems are both practical options. Position your storage point close to a spigot and within easy reach of your raised beds to minimize friction in your daily watering routine. If you're managing multiple raised beds, consider installing a simple timer-controlled irrigation system. These can be set to water automatically during cooler parts of the dayโ€”early morning is idealโ€”reducing evaporation and keeping your plants consistently hydrated without daily effort. Pathway Lighting and Garden Aesthetics A square foot garden isn't just a food production systemโ€”it's a living feature of your outdoor space. As summer evenings lengthen, good pathway lighting transforms your garden from a daytime workspace into an evening sanctuary. When exploring top-rated string lights and pathway lighting options, solar-powered LED string lights are among the most popular choices for raised bed gardens. They require no wiring, are energy efficient, and cast a warm ambient glow that enhances any garden layout. Pathway stake lights placed along the edges of your raised bed walkways improve both safety and visual appeal. For a more structured look, consider low-voltage landscape lighting along gravel or bark chip pathways between beds. This not only illuminates your space but also signals clear walking paths, which is particularly valuable in multi-bed layouts where you might have several raised beds arranged in rows or a U-shape. Combining functional lighting with beautiful garden organization is part of what makes square foot gardening in raised beds such a satisfying pursuit. You're not just growing foodโ€”you're designing a space you actually want to spend time in. ALT: Overhead square foot gardening grid layout in galvanized steel raised beds with summer vegetables and pathway lighting Advanced Tips: Taking Your Square Foot Layout to the Next Level Succession Planting for Continuous Harvest One of the most powerful features of the square foot method is how well it supports succession plantingโ€”the practice of staggering plantings so you always have something ready to harvest. Instead of planting all 16 radish squares at once, plant four squares every two weeks. This ensures a steady supply rather than a glut followed by a long gap. Apply the same logic to lettuce, spinach, cilantro, and bush beans. When one square is harvested, refresh the soil with a small amount of compost and replant immediately. In a warm summer climate, this cycle can repeat three or four times in a single season. Vertical Growing for Space Efficiency Many summer cropsโ€”cucumbers, pole beans, peas, and some tomato varietiesโ€”grow vertically and can be trained up trellises or wire supports. In a square foot garden, assigning one square to a vertically growing crop and training it up a support structure behind the bed can dramatically increase your yield without taking up additional horizontal space. Place taller crops on the north side of your bed (in the Northern Hemisphere) to prevent them from shading shorter plants. This strategic placement ensures every square gets adequate sunlight throughout the day. Common Misconceptions About Square Foot Gardening Misconception 1: More plants per square = more yield. Overcrowding is one of the most common mistakes. The spacing recommendations in the square foot method are carefully calibrated for the mature size of each plant. Cramming extra plants into a square increases competition for water and nutrients and actually reduces total yield. Misconception 2: Any soil will work. Standard garden soil is too dense for raised beds. The square foot method was specifically designed around a light, nutrient-rich, well-draining mix. Using the wrong soil is one of the most reliable ways to underperform with this method. Misconception 3: Square foot gardening only works for vegetables. In reality, the method works equally well for herbs, annual flowers, and even small fruit varieties. Many gardeners dedicate squares to pollinator-friendly flowers like marigolds and nasturtiums, which naturally deter pests while attracting beneficial insects. Frequently Asked Questions FAQ Q1: How do I set up proper drainage in a raised garden bed? Start by ensuring the base of your raised bed allows free drainageโ€”natural ground below is ideal, but a gravel layer works on hard surfaces. Use a high-quality soil mix that includes coarse vermiculite or perlite to improve internal drainage. Avoid heavy clay soils entirely. If you're in a high-rainfall area, slightly angle the bed or use a landscape fabric liner at the base to slow soil loss while maintaining water flow. Good drainage is the single most important factor in preventing root rot and fungal disease in summer raised beds. Q2: Is insect netting effective for protecting raised bed vegetables in summer? Yesโ€”physical netting is one of the most effective and chemical-free pest management strategies available to home gardeners. Fine-mesh insect netting (0.6mmโ€“1.5mm) blocks cabbage moths, aphids, and other flying pests while still allowing sunlight, air, and rainfall to reach your plants. For windy climates, choose a heavier gauge netting and secure it firmly to the sides of your galvanized steel bed using clips. A simple hoop tunnel frame makes installation and removal easy for daily maintenance. Q3: How long does it take to set up a square foot garden from scratch, and what will it cost? For a single 8x4 ft raised bed, plan for roughly one afternoon of setupโ€”about 3โ€“4 hours including bed assembly, soil filling, grid marking, and initial planting. Costs vary, but a quality galvanized steel raised bed built to last up to 20 years represents strong long-term value. Factor in soil mix (typically the largest upfront cost), seeds or seedlings, and any accessories like netting or drip irrigation. For a detailed cost breakdown by budget level, see our guide on how much to spend on a raised garden bed this season. Summary Square foot gardening in raised beds is one of the most effective, accessible, and genuinely enjoyable approaches to home food growing available today. As we've explored throughout this guide, the combination of structured grid planning, quality raised bed infrastructure, and smart supporting systemsโ€”drainage, pest netting, efficient watering, and beautiful lightingโ€”creates a summer garden that performs as well as it looks. Here are the three core takeaways to carry forward: 1. Plan before you plant. Taking the time to map out your grid, assign crops by spacing needs, and sequence your plantings for succession harvest pays dividends throughout the entire season. 2. Invest in structure. A galvanized steel raised bed with a 20-year lifespan isn't an expenseโ€”it's infrastructure. Combined with the right soil mix and drainage setup, it creates the optimal growing environment that the square foot method needs to truly shine. 3. Make it beautiful. Pathway lighting, organized hose storage, neatly strung netting, and clean grid divisions aren't just practicalโ€”they make your garden a place you want to spend time every day. That engagement is what transforms a good garden plan into an exceptional summer experience. Your next step is simple: choose your bed size, sketch your grid, and get your soil ordered. The summer growing window is wide open right nowโ€”don't let it pass without making the most of it. Start Growing with Anleolife This Summer Nationwide U.S. warehouse network: Strategically located in California, Texas, Florida, New York, Illinois, and Washington to ensure delivery within 3โ€“8 business daysโ€”so your garden upgrade plans never have to wait. Multi-channel sales network: Products are available on major e-commerce platforms including Amazon, Walmart, Home Depot, Lowe's, and Wayfair, as well as the official website Anleolife.com, providing consistent quality assurance and after-sales service. Three core scenarios: Planting (metal raised garden beds, soil systems), Raising (chicken coops, rabbit hutches), and Beautification (decorative accessories, pathway systems)โ€”meeting complete needs from functionality to aesthetics. We understand that an ideal garden is not built overnight, but gradually improved over time. Our modular product design allows flexible expansion based on your needsโ€”from your first 8x4 ft garden bed to a fully integrated planting-and-raising ecosystem. We grow with you every step of the way. References National Gardening Association. "Garden to Table: A Guide to Home Food Gardening".https://garden.org University of California Cooperative Extension. "Raised Bed Gardening".https://ucanr.edu/sites/MGLosAngeles/files/146388.pdf Penn State Extension. "Vegetable Gardening in Raised Beds".https://extension.psu.edu/vegetable-gardening-in-raised-beds Oregon State University Extension Service. "Raised Bed Gardening".https://extension.oregonstate.edu/gardening/techniques/raised-bed-gardening USDA National Institute of Food and Agriculture. "Community and Home Gardening Resources".https://www.nifa.usda.gov Note: Standards and recommendations may be updated. Please check the latest official documents or consult a professional garden advisor for guidance specific to your region and climate. About Anleolife Anleolife is a leading outdoor garden solutions provider in North America, dedicated to offering a full-scenario product ecosystem for home gardening enthusiasts, covering planting, raising, and garden beautification. Since its founding, we have upheld our brand mission, "Made for Garden Life," continuously innovating products and optimizing services to help hundreds of thousands of users upgrade their gardens, reconnect with nature, and enjoy a better garden lifestyle.
Advanced Soil Layering Techniques for Raised Garden Beds This Season

Advanced Soil Layering Techniques for Raised Garden Beds This Season

on May 13 2026
ALT: Advanced soil layering techniques for raised garden beds showing compost, topsoil, and drainage layers this season Why Soil Layering Is the Secret to a Thriving Raised Garden Bed This Season Key Conclusion: Mastering advanced soil layering techniques for raised garden beds is the single most impactful decision you can make this season. A properly layered bed mimics the complexity of natural ecosystems, delivering drainage, aeration, nutrient density, and long-term fertility in one structured system. Whether you're setting up your first bed or optimizing an established planting space, understanding how layers work together transforms average yields into extraordinary ones โ€” season after season. Growing your own food is one of the most rewarding lifestyle choices you can make. But even the best seeds and the most dedicated watering schedule can't compensate for poor soil structure. Raised garden beds offer a unique opportunity that in-ground gardening simply doesn't: total control over your growing medium from the very bottom layer to the surface. This article will walk you through exactly how to layer your raised bed soil for maximum fertility, drainage, and long-term productivity. We'll cover which materials belong in each layer, how depth affects performance, and which plant types benefit most from specific layering configurations. Who Should Use These Soil Layering Techniques โœ… Applicable Scenarios: Gardeners setting up new raised beds this season who want to build the ideal soil profile from scratch Home growers experiencing waterlogging, nutrient depletion, or compaction in existing raised beds Urban micro-gardeners and small-space growers looking to maximize output per square foot Empty nesters and retirees seeking a low-maintenance, high-performance garden system that requires less annual amendment โŒ Not Applicable/Cautions: Container gardens under 8 inches deep, where true layering is not structurally feasible without sacrificing root space Gardeners using primarily peat-based mixes without organic matter additions โ€” layering alone won't compensate for fundamentally poor base materials Beds placed in full shade where soil temperature and microbial activity remain too low for active decomposition layers to function effectively The Science Behind Raised Bed Soil Structure (And Why It Matters More Than You Think) Most gardeners focus on what they plant. The best gardeners focus on what their plants grow in. Soil structure in a raised bed is fundamentally different from in-ground soil. Because raised beds are elevated, enclosed, and often filled with custom mixes, the natural stratification that occurs over decades in native soil doesn't happen on its own. You have to create it intentionally. Research from the University of California Cooperative Extension and USDA soil health programs consistently shows that structured growing media โ€” with distinct layers serving drainage, microbial activity, nutrient retention, and surface-level feeding โ€” outperforms homogeneous single-medium beds across nearly every measurable crop metric: yield weight, root development depth, disease resistance, and water use efficiency. Here's the core principle: healthy plant roots need three things simultaneously โ€” moisture access, oxygen availability, and nutrient proximity. A single-medium fill (such as plain topsoil or bagged potting mix) compromises at least one of these requirements within a single growing season as the medium compacts, pore spaces close, and nutrients leach downward. Layering solves this structurally. By placing materials with different physical properties at different depths, you create a gradient: free-draining materials at the base prevent waterlogging; decomposing organic matter in the middle generates sustained heat and nutrition; a refined growing medium at the top gives roots immediate access to a perfectly calibrated environment. This is also where the question of what's the best material for affordable raised garden beds intersects directly with soil strategy. The bed itself โ€” its height, material, and configuration โ€” determines how many distinct layers you can realistically install. Taller beds allow more complex layering systems, which is one reason many experienced gardeners prefer beds in the 18โ€“30 inch height range. If you're considering your budget alongside your soil strategy, How Much Should You Spend on a Raised Garden Bed This Season? offers a practical breakdown of where investment makes the biggest difference โ€” and soil setup is near the top of that list. Modern home gardeners are increasingly interested in the hugelkultur method, lasagna gardening, and the no-till layered approach โ€” all of which draw on the same foundational principle: mimic nature's layering, accelerate it, and direct it toward productive food growing. These aren't passing trends. They represent a genuine shift in how backyard growers think about soil as a living, dynamic system rather than a static growing medium. Building the Perfect Soil Profile: Your Three-Step Layering System Quick-Start: Setting Up Your Layered Raised Bed Step 1: Install and Prepare Your Raised Bed Structure Before any soil goes in, your bed needs to be properly positioned and prepared. Choose a site that receives at least 6โ€“8 hours of direct sunlight. Place cardboard or several layers of newspaper across the bottom interior to suppress weeds and encourage earthworm activity from below โ€” this takes about 10โ€“15 minutes and makes a measurable difference in long-term soil health. Make sure your bed is level to prevent uneven drainage. Step 2: Build Your Base and Middle Layers Fill the bottom third of your bed with coarse organic material: wood chips, straw, leaves, small branches, or even untreated cardboard chunks. This is your decomposition layer โ€” it will break down slowly over 1โ€“3 years, generating gentle heat and feeding soil microbes. On top of this, add a transition layer of aged compost mixed with topsoil. This middle zone is where most root activity will eventually migrate as the decomposition layer breaks down beneath it. This step typically takes 30โ€“60 minutes depending on bed size. Step 3: Add and Refine Your Top Growing Layer The top 6โ€“8 inches of your bed should consist of your primary growing medium โ€” a well-balanced blend of compost, quality topsoil, and a perlite or coarse sand component for aeration. This is where seeds germinate, transplants anchor, and most active root feeding occurs. Finish with a 2โ€“3 inch layer of mulch for your vegetable garden โ€” organic options like straw, shredded leaves, or wood chips reduce evaporation, moderate soil temperature, and suppress weeds without chemicals. Comparing Soil Layering Methods for Raised Garden Beds Different layering philosophies suit different gardening goals, bed sizes, and budgets. Here's a practical comparison to help you choose the right approach: Comparison Dimension Classic Layered Fill Hugelkultur Method Lasagna/No-Till Method Best for bed depth 18โ€“24 inches minimum 24โ€“35+ inches ideal Works at 12โ€“18 inches Primary materials Compost, topsoil, perlite Wood logs, compost, soil Cardboard, compost, organic layers Water retention Moderate-high Very high (wood absorbs moisture) High Time to plant readiness Immediate 2โ€“4 weeks optimal 2โ€“6 weeks Annual amendment needs Moderate Low after year 2 Low to moderate Best for beginners Yes Moderate learning curve Yes Long-term fertility Good with regular compost top-dressing Excellent (multi-year decomposition) Excellent For most home gardeners, especially those new to raised bed growing, the Classic Layered Fill approach offers the best balance of immediacy, control, and performance. The Hugelkultur method rewards patience and delivers impressive long-term results, making it ideal for deeper beds and gardeners thinking years ahead. Layer-by-Layer: A Detailed Guide to Each Zone in Your Raised Bed The Drainage Foundation Layer The very bottom of your raised bed serves one critical purpose: preventing water from pooling and suffocating roots. This layer should consist of coarse, porous material that allows water to pass through freely while still providing some structural support for the layers above. Excellent materials for this layer include wood chips, gravel (if drainage is a persistent issue), straw, or broken-up wood. If you're using the hugelkultur approach, large logs and branches go here. Aim for this layer to take up roughly 20โ€“30% of your bed's total depth. One often-overlooked element at this stage is weed barrier management. A layer of cardboard or overlapping newspaper placed before any fill material creates an effective temporary barrier that breaks down within 6โ€“12 months โ€” adding organic matter as it does โ€” while preventing aggressive perennial weeds from pushing up into your carefully constructed soil profile. The Decomposition and Nutrient-Generation Zone Directly above your drainage foundation sits the layer that makes soil layering in raised garden beds distinctly superior to simple fill methods: the decomposition zone. This middle layer is where organic matter actively breaks down, generating microbial activity, mild heat, and a slow-release stream of nutrients that feeds your growing medium above. Fill this zone with a combination of aged compost (at least 60 days old), fallen leaves, kitchen scraps buried in bulk, grass clippings, or partially decomposed wood chips. This is also the zone where earthworm activity concentrates most intensely over time. Worms drawn upward from native soil (via the cardboard base layer) will colonize this zone, aerating it constantly and converting organic matter into nutrient-dense castings that move upward with irrigation water. For gardeners using beds with greater depth โ€” such as 24-inch extra-tall or 30-inch waist-high configurations โ€” this decomposition zone can be expanded significantly, allowing for a more complex and long-lasting nutrient reservoir. The Transition Compost Layer Between your decomposition zone and your surface growing medium, a transition layer of well-aged compost serves as a bridge. This zone should be nearly finished compost โ€” dark, crumbly, and earthy-smelling โ€” mixed with a small proportion of quality topsoil. The transition layer serves two purposes. First, it provides a physical buffer so that raw organic material from the decomposition zone doesn't directly contact seedling roots. Second, it acts as a reservoir of immediately available nutrients โ€” fully broken-down organic compounds that roots can access as soon as they extend downward from the growing layer above. The Active Growing Surface Layer Your top 6โ€“8 inches is where the magic of day-to-day growing happens. This layer must balance several competing demands: it needs to be loose enough for seeds to germinate and roots to establish, moisture-retentive enough to reduce watering frequency, nutritious enough to feed crops through their full growth cycle, and well-draining enough that roots never sit in saturated conditions. The widely respected What Is the Best Soil Mix for Raised Garden Beds? (The Mel's Mix Guide) offers a proven formula for this top layer โ€” a blend of compost, coarse vermiculite, and a variety of organic matter sources that consistently outperforms single-source growing media. For most vegetables, herbs, and annual flowers, a well-constructed top layer requires minimal amendment beyond a seasonal top-dressing of fresh compost โ€” one of the great advantages of a properly layered bed over single-medium fills that exhaust quickly. The Mulch Finish: Your Seasonal Top Dressing No layering system is complete without a surface mulch layer. The best mulch for a vegetable garden balances weed suppression, moisture retention, and thermal regulation โ€” and the good news is that several affordable options deliver on all three. Straw (not hay, which contains seeds) is the classic vegetable garden mulch: lightweight, easy to apply, and effective at keeping soil temperatures stable during both spring cool spells and midsummer heat. It breaks down within a season, adding organic matter directly to your top growing layer. Shredded leaves are an excellent free resource that many gardeners overlook. Run autumn leaves through a lawnmower or leaf blower with a collection bag, and you have premium mulch material that slowly releases nutrients as it decomposes. Wood chip mulch โ€” particularly arborist chips that include both wood and leaf material โ€” is increasingly popular for vegetable beds and has shown strong results in university trial gardens. It suppresses weeds aggressively, retains moisture well, and contributes to long-term soil carbon content. Apply 2โ€“3 inches of your chosen mulch after planting, keeping it pulled back slightly from plant stems to prevent rot. Replenish as needed through the season. ALT: Cross-section diagram of raised garden bed showing advanced soil layering technique with drainage base, compost middle zone, growing medium, and straw mulch top layer for vegetable garden this season Advanced Considerations: Adapting Your Layering Strategy by Climate, Bed Type, and Crop Climate Zone Adaptations for Raised Bed Soil Layering What climate zones work best for small raised beds? The honest answer is: all of them โ€” with the right layering adjustments. In cooler northern climates (USDA Zones 3โ€“5), the decomposition layer in your raised bed provides meaningful thermal benefit. As organic material breaks down, it generates gentle heat that can extend your growing season by 2โ€“4 weeks on either end. Darker mulch colors absorb more sunlight, warming the root zone faster in spring. In hot southern and southwestern climates (Zones 8โ€“11), the priority shifts to moisture retention and temperature moderation. Heavier compost proportions in the top layer, combined with thick straw mulch, protect roots from heat stress. Hugelkultur-style wood-heavy base layers offer exceptional water storage in drought-prone regions. In mid-Atlantic and Pacific Northwest climates, waterlogging risk increases during rainy seasons. Prioritize a robust drainage foundation layer, and consider mixing perlite or coarse sand into your top growing medium to maintain adequate aeration even in prolonged wet weather. Choosing the Right Raised Bed for Your Layering Goals Soil layering is only as good as the structure containing it. The best material for affordable raised garden beds continues to be galvanized steel โ€” it's weather-resistant, structurally sound, and doesn't leach chemicals into your carefully built soil system. Anleolife's galvanized steel raised garden beds are built to last up to 20 years, giving your layered soil system the time it needs to fully mature and perform at its best. The available height range โ€” from standard 18-inch models to extra-tall 24-inch, 30-inch, and even 35-inch waist-high configurations โ€” directly determines how complex and effective your layering system can be. Deeper beds (24 inches and above) support a full three-zone layering system with genuine decomposition, transition, and growing zones. Shallower 18-inch beds work well for a simplified two-layer approach. For families working with limited outdoor space, How to Build a Raised Garden Bed Layout for Families with Limited Backyard Space provides smart configuration strategies that work beautifully with layered soil systems. Common Misconceptions About Soil Layering Misconception 1: "More layers always means better results."Quality matters more than quantity. Three well-chosen, well-executed layers outperform six poorly selected ones. Focus on the function of each layer rather than adding complexity for its own sake. Misconception 2: "You need to replace all your soil each season."A well-layered bed improves with age. The decomposition layer breaks down and feeds the layers above it. Your main annual task is top-dressing with 1โ€“2 inches of fresh compost โ€” not rebuilding from scratch. Misconception 3: "Layering is only for large beds."Compact beds โ€” even round raised garden beds or smaller square configurations โ€” benefit from layering. Simply scale the thickness of each layer proportionally to your available depth. Misconception 4: "Garden edging and bed walls don't affect soil performance."They do. The best garden edging material for raised beds is one that doesn't interfere with soil moisture dynamics โ€” non-toxic, non-leaching materials like galvanized steel or food-safe powder-coated metals keep your soil chemistry intact. Avoid treated wood in beds where edible crops are grown. Frequently Asked Questions FAQ Q1: How do I know if my raised bed soil layering is working correctly? Watch for three indicators in the first 4โ€“6 weeks: consistent moisture levels without waterlogging (the top inch dries, but soil 2โ€“3 inches down remains evenly moist), vigorous early root development in transplants (visible through rapid above-ground growth), and the absence of compaction when you gently press the surface after watering. Active earthworm presence when you probe the soil is another excellent sign that your decomposition layer is functioning as intended. Q2: Is it necessary to use a garden rake to prepare each soil layer before adding the next? Yes โ€” and a good garden rake is genuinely important at this stage. A quality bow rake or level-head rake allows you to spread each layer evenly, break up clumps, and ensure uniform thickness across the entire bed surface. Uneven layers create pockets of poor drainage or nutrient concentration. A sturdy, wide-headed rake with appropriate tine spacing makes this job significantly easier and produces more consistent results than hand-leveling alone. Q3: How long does it take for the decomposition layer to start benefiting my plants, and does the layering system need rebuilding each year? The decomposition layer typically begins contributing measurable nutrients to the zone above it within 4โ€“8 weeks of installation, depending on ambient temperature, moisture levels, and the materials used. Microbial activity accelerates significantly in warm conditions. You do not need to rebuild your layering system annually โ€” this is one of the major advantages of the approach. Simply top-dress with 1โ€“2 inches of fresh compost each spring, replenish your mulch layer as it breaks down, and allow the underlying layers to continue their long-term decomposition cycle naturally. Summary Advanced soil layering for raised garden beds isn't a complicated technique reserved for expert growers โ€” it's a structured, logical approach to building the growing environment your plants genuinely need. Here are the three core takeaways from everything we've covered: 1. Layer function matters more than layer count. Build each zone with a clear purpose: drainage at the base, decomposition and nutrient generation in the middle, refined growing medium at the top, and protective mulch at the surface. Four well-executed layers deliver transformative results. 2. Your bed's depth determines your layering potential. Taller raised beds โ€” particularly in the 24โ€“35 inch range โ€” unlock the full power of complex layering systems, including hugelkultur approaches that deliver multi-year fertility with minimal annual effort. Choosing the right bed height is a soil strategy decision, not just a comfort one. 3. Layered soil improves with time. Unlike basic potting mix that exhausts within a season, a properly layered raised bed grows more fertile over years. With a galvanized steel raised bed built to last up to 20 years, you're investing in a growing system that compounds in performance season after season. Your next step: assess your current beds or choose your new bed size, then map out your specific layering plan using the framework in this article. Whether you start with a standard 18-inch bed or invest in a deeper 30-inch configuration, the principles remain the same โ€” build from the bottom up, with purpose at every layer. Start Your Best Garden Season Yet with Anleolife Anleolife's nationwide U.S. warehouse network โ€” strategically located in California, Texas, Florida, New York, Illinois, and Washington โ€” ensures delivery in 3โ€“8 business days, so your raised bed arrives ready to work when your garden planning is complete. Products are available across major platforms including Amazon, Walmart, Home Depot, Lowe's, Wayfair, and directly at Anleolife.com, giving you consistent quality assurance and after-sales support wherever you prefer to shop. Anleolife's three core product scenarios โ€” Planting (metal raised garden beds and soil systems), Raising (chicken coops and rabbit hutches), and Beautification (decorative accessories and pathway systems) โ€” cover the full range of your outdoor garden needs, from first harvest to fully integrated backyard ecosystem. We understand that an ideal garden is not built overnight, but gradually improved over time. Our modular product design allows flexible expansion based on your needs โ€” from your first 8x4 garden bed to a fully integrated planting-and-raising ecosystem. We grow with you every step of the way. References United States Department of Agriculture Natural Resources Conservation Service. "Soil Health โ€” Fundamentals".https://www.nrcs.usda.gov/conservation-basics/natural-resource-concerns/soils/soil-health University of California Agriculture and Natural Resources. "Soil and Fertilizer Management for Home Gardeners".https://ucanr.edu/ Penn State Extension. "Building Healthy Garden Soil".https://extension.psu.edu/building-healthy-garden-soil Oregon State University Extension Service. "Mulching Woody Ornamentals with Organic Materials".https://extension.oregonstate.edu/gardening/techniques/mulching-woody-ornamentals-organic-materials National Gardening Association. "Raised Bed Gardening Guide".https://garden.org/learn/articles/view/2761/ Note: Standards and best practices may be updated. Please check the latest official documents or consult professional advisors for the most current guidance. About Anleolife Anleolife is a leading outdoor garden solutions provider in North America, dedicated to offering a full-scenario product ecosystem for home gardening enthusiasts, covering planting, raising, and garden beautification. Since its founding, we have upheld our brand mission, "Made for Garden Life," continuously innovating products and optimizing services to help hundreds of thousands of users upgrade their gardens, reconnect with nature, and enjoy a better garden lifestyle.
5 Mistakes to Avoid When Buying Your First Metal Raised Garden Bed

5 Mistakes to Avoid When Buying Your First Metal Raised Garden Bed

on May 13 2026
ALT: First-time buyer evaluating metal raised garden beds to avoid common purchasing mistakes in backyard garden Why Your First Metal Raised Garden Bed Purchase Deserves More Research Than You Think Key Conclusion: Buying your first metal raised garden bed is an exciting step toward healthier, more productive home growing โ€” but it's surprisingly easy to get wrong. From choosing the wrong size to overlooking material quality, these missteps can cost you time, money, and harvest seasons. Understanding what to look for in top rated raised planters for vegetables, which materials raised garden beds that won't rot truly deliver long-term value, and how structural durability relates to your garden layout will transform a potentially frustrating first purchase into a decades-long investment. First-time buyers are often surprised to discover how many variables go into selecting the right metal raised garden bed. It isn't just about picking a size or a color โ€” the decisions you make at the point of purchase ripple forward through your entire gardening experience. Choose poorly, and you may find yourself dealing with rusting panels, poor drainage, inadequate growing depth, or a bed that simply doesn't fit your backyard layout. The good news is that the most common mistakes are completely avoidable once you know what to watch for. This guide walks you through the five biggest errors new buyers make, offers practical guidance for each one, and points you toward solutions that will serve your garden โ€” and your family โ€” for years to come. Who This Guide Is For (and Who Should Read It Before Buying Anything) โœ… Applicable Scenarios: First-time gardeners setting up their initial raised bed system in a backyard, patio, or urban micro-garden Home growers who have tried wooden raised beds before and want to upgrade to a longer-lasting metal option Empty nesters and retirees looking for a low-maintenance, ergonomically comfortable garden setup Health-conscious families interested in growing their own organic vegetables and want top rated raised planters for vegetables โŒ Not Applicable/Cautions: Experienced gardeners who have already built a functioning raised bed ecosystem and are simply seeking replacement panels Gardeners in extreme climates with specific regulatory requirements for container gardening (always check local ordinances before installing) The Rising Popularity of Metal Raised Garden Beds โ€” and Why Mistakes Are So Common The home gardening market has expanded significantly over the past several years. According to the National Gardening Association, participation in food gardening in the United States has surged, with millions of new households planting edibles for the first time. Within this wave of new gardeners, metal raised garden beds have become one of the most sought-after products โ€” and for good reason. Unlike wooden beds that rot, warp, or require chemical treatment to extend their lifespan, metal raised beds offer structural durability that genuinely lasts. When made from high-quality galvanized steel, a well-built raised bed can realistically serve your garden for up to 20 years โ€” a fact that makes the upfront investment far more justified than it might initially appear. But popularity comes with a crowded marketplace, and a crowded marketplace means a lot of products of varying quality, confusing specifications, and marketing language designed to sell rather than inform. New buyers are left to navigate sizing charts, material grades, height options, and assembly methods without a clear framework for decision-making. That's where mistakes creep in. If you're wondering how much you should spend on a raised garden bed this season, understanding the common mistakes first will help you allocate your budget far more wisely โ€” because a slightly higher investment in the right product often prevents a much costlier replacement down the line. The five mistakes covered below aren't theoretical. They come from real patterns observed among first-time buyers, and each one has a clear, practical solution. The Five Mistakes โ€” and How to Sidestep Every One of Them A Three-Step Framework Before You Buy Before diving into the individual mistakes, it helps to establish a quick decision-making framework. Applying these three steps before you place any order will dramatically reduce the chance of a mismatched purchase. Step 1: Map Your Space and SunlightSpend 15โ€“20 minutes walking your intended garden area at different times of day. Note where full sun (6+ hours of direct sunlight) lands, where drainage is poor, and how much flat usable space you actually have. This step prevents one of the most common errors: buying a bed that's physically incompatible with your available garden zone. Sketch a rough layout โ€” even a quick phone photo works โ€” before choosing dimensions. Step 2: Define Your Primary Growing GoalsAre you growing deep-rooted vegetables like tomatoes and carrots, or do you plan to start with herbs and leafy greens? Do you want to kneel and work at ground level, or would a taller bed spare your back? Answering these two questions determines the height you need far more reliably than any generic recommendation. A 30-inch waist-high bed is a completely different product experience from an 18-inch standard bed. Step 3: Set a Realistic Budget Range โ€” Then Add 15%Most first-time buyers set a budget, find a product at that price, and call it done. A smarter approach is to set your target budget and then check what an additional 15% would get you. In the metal raised bed market, that increment often means the difference between a thin, untreated panel and a properly galvanized, rust-resistant structure that will last two decades. It also means the difference between a bed that comes with a warranty and one that ships without any after-sales support. Comparing Your Core Options: Size, Height, and Material at a Glance Once your framework is in place, you'll face three interconnected decisions: size, height, and material. Understanding how these interact helps avoid the most impactful buying mistakes. Comparison Dimension Standard Height (18") Extra Tall (24"โ€“30") Waist-High (35") Best For Herbs, leafy greens, shallow-rooted crops Tomatoes, peppers, deep-rooted vegetables Gardeners with limited mobility, seniors Soil Capacity Lower soil volume needed Moderate to high soil volume High soil volume, excellent root expansion Physical Effort Requires bending/kneeling Reduced bending Minimal bending, back-friendly Structural Demand Standard Higher (thicker panels preferred) Highest (robust reinforcement essential) Typical Use Case Beginner setups, urban micro-gardens Family vegetable gardens Accessible gardens for retirees or those with mobility needs This table reflects the range offered by Anleolife's product lineup, which spans from 18" tall garden beds for entry-level growers all the way to 35" waist-high options for gardeners who need ergonomic accessibility without sacrificing growing capacity. The Five Mistakes โ€” Explained in Full Detail Mistake 1: Choosing Size Based on Aesthetics Rather Than Garden Logic The most visually appealing bed isn't always the most functional one. Many first-time buyers choose a size because it "looks right" in a product photo, without considering whether it fits their actual outdoor space or gardening habits. The practical issue: A bed that's too wide means you can't comfortably reach the center without stepping inside it โ€” damaging soil structure and compacting the root zone. The general guideline is that you should be able to reach the center of the bed from either side without stretching uncomfortably, which typically means a width of no more than 4 feet if you access the bed from both sides, or 2 feet if you access from only one side. What to do instead: Measure your available space with a tape measure, not just your eyes. If you're working with limited backyard space, a long narrow bed often outperforms a large square one in terms of practical accessibility. For structured layout planning, this guide on how to build a raised garden bed layout for families with limited backyard space walks through several smart configurations that maximize yield without overwhelming your garden footprint. Anleolife's lineup includes a wide variety of sizes โ€” from compact 6x2 ft modular options to sprawling 12x3 ft galvanized steel beds โ€” precisely because no single size fits every garden situation. Mistake 2: Ignoring Height Requirements for Your Crop Selection Height is the single most underestimated specification in a raised garden bed purchase. New buyers frequently default to the most common 18" option because it's the most widely available, without checking whether it actually suits what they want to grow. The practical issue: Root crops like carrots, parsnips, and beets need significant soil depth to develop properly. Tomatoes and peppers benefit from deeper beds to establish strong root systems. If you're growing primarily shallow-rooted herbs and lettuce, 18" works fine โ€” but if your ambitions extend to a full vegetable garden, you may quickly find yourself limited. What to do instead: Match height to your crop list. If your priority is deep-rooted vegetables, look at 24" or 30" extra-tall options. If accessibility is a concern โ€” particularly relevant for retirees and gardeners managing joint issues โ€” Anleolife's 35" waist-high raised garden bed eliminates the need to bend or kneel almost entirely, making daily tending, watering, and harvesting far more comfortable. Mistake 3: Overlooking Material Quality โ€” The Real Cost of Cheap Metal Not all metal raised garden beds are built the same. "Metal" as a category can mean anything from thin, untreated steel that rusts within a single season to thick, properly galvanized panels engineered for multi-decade outdoor use. This is the mistake with the most direct financial consequence. The practical issue: A low-quality metal bed may cost less upfront, but if it begins to rust and deteriorate within two or three seasons, you've lost both the initial investment and the time spent filling, planting, and establishing your garden. You'll also face the hassle of disassembling a degraded bed and replacing it entirely. What to look for: The key phrase to understand is galvanized versus merely "metal-coated" or "powder-coated." True galvanization involves a zinc coating process that actively resists oxidation, even when the surface is scratched. Anleolife's galvanized steel raised garden beds are built with this in mind, with materials explicitly described as rust-resistant and designed to last up to 20 years โ€” that's a lifespan that makes the price-per-year calculation remarkably favorable. For buyers researching recommended materials for raised garden beds that won't rot, galvanized steel consistently outperforms wood (which rots), untreated steel (which rusts), and plastic (which degrades under UV exposure). To understand the full picture of what galvanized steel construction means for longevity, this beginner's complete buying guide to galvanized steel raised garden beds is an excellent resource. Mistake 4: Failing to Plan for Soil Volume and Drainage A metal raised garden bed is only as good as what goes inside it. Yet a surprisingly large number of first-time buyers purchase a bed without thinking through the soil requirements โ€” and end up with either insufficient growing medium, poor drainage, or both. The practical issue: Larger and taller beds require significantly more soil volume than buyers often expect. If you underestimate and try to fill the difference with substandard garden soil or pure topsoil, your plants will struggle. Conversely, if the bed doesn't have adequate drainage (either from the soil mix itself or from the base setup), waterlogging can rot roots and create fungal issues. What to do instead: Before buying your bed, calculate the approximate soil volume you'll need and budget for it separately. A well-aerated, nutrient-rich soil mix โ€” often called a three-way blend of compost, topsoil, and a structure amendment like perlite or coarse sand โ€” performs far better than standard bagged garden soil alone. For guidance on exactly what to put inside your raised bed, the resource on the best soil mix for raised garden beds using Mel's Mix methodology is widely regarded as a practical starting point. Also consider where you'll place the bed: directly on grass or soil allows natural drainage and worm activity, while placement on concrete or pavers requires a fabric liner or drainage layer at the base. Mistake 5: Buying Without Considering Long-Term Expandability Many first-time buyers think small โ€” a single 4x4 bed to test the waters โ€” without considering whether their chosen product can grow with them. This is a completely reasonable starting point, but if the brand or product line you choose doesn't offer modular expansion options, you may find yourself starting from scratch when your gardening enthusiasm (inevitably) grows. The practical issue: A standalone, non-modular bed locks you into a fixed footprint. When you want to add a second or third bed, you may find that the dimensions don't align, the aesthetics don't match, or the assembly system is incompatible. This creates visual inconsistency in your garden and forces you to mix and match products that weren't designed to coexist. What to do instead: Even if you're only buying one bed now, choose from a brand with a coherent, expandable product ecosystem. Anleolife's modular raised garden bed range โ€” available in sizes from 6x2 ft up to 30" extra-tall 8x4 ft configurations โ€” is specifically designed for this kind of phased growth. Your first bed can become part of a larger, integrated garden layout without any incompatibility issues. When thinking about types of garden trellis for climbing plants and garden beautification elements down the line, choosing an expandable system from the start means your structural beds, decorative accessories, and pathway systems can all grow together as a cohesive whole rather than a patchwork of mismatched products. ALT: Modular galvanized steel raised garden beds in multiple heights and sizes showing expandable backyard vegetable garden layout Advanced Considerations for Savvier First-Time Buyers What About Garden Tool Storage and Accessories? Once your raised bed is in place, you'll quickly discover that good gardening requires the right tools nearby. What are the best garden tool storage solutions for small spaces? For urban micro-gardeners and those with compact outdoor areas, wall-mounted vertical organizers, slim-profile tool caddies that hang from fencing, or rolling carts that store flat against a wall are all practical options. Keeping essential tools โ€” trowels, pruners, gloves, and ties โ€” within arm's reach of your raised bed dramatically improves your daily gardening routine. What's the Best Hose Length for a Small Backyard? Many first-time gardeners wonder: what's the best hose length for a small backyard? The answer depends on your specific layout, but as a general rule, measure the distance from your nearest outdoor tap to the farthest point of your garden bed and add roughly 10 feet of buffer. A hose that's slightly too long is far less frustrating than one that falls short. For raised beds elevated above ground level, a hose with an adjustable nozzle allows you to control water pressure and reduce soil disturbance during watering. Don't Confuse "Rust-Resistant" with "Rust-Proof" A common misconception among first-time buyers is that any metal product labeled "rust-resistant" will perform identically to one that is specifically galvanized. The distinction matters. Rust-resistant coatings can be abraded, chipped, or degraded over time โ€” particularly in high-humidity climates or coastal environments. True galvanization creates a metallurgical bond between the zinc layer and the steel, providing a fundamentally different level of protection. Always ask or confirm the specific treatment method, not just the marketing label. The 20-Year Lifespan Calculation Is Real โ€” But Only With Quality Products The claim that a metal raised garden bed can last 20 years is legitimate for well-manufactured galvanized steel products โ€” but it assumes proper installation, reasonable maintenance (like clearing standing water from panel surfaces after heavy rain), and a product built to appropriate material standards. Budget-grade metal beds with thin panels and inadequate coating will not approach this lifespan. When evaluating any product, look at the panel thickness, the specifics of the coating treatment, and whether the brand backs its claims with a warranty or documented product testing. Frequently Asked Questions FAQ Q1: How do I choose the right height for my first metal raised garden bed? The right height depends on two factors: what you're growing and your physical comfort level. For herbs, salad greens, and shallow-rooted crops, an 18" tall bed provides sufficient depth. For tomatoes, peppers, and root vegetables, consider 24" or 30" extra-tall options that allow deeper root development. If you have back or knee concerns โ€” common among retirees and older gardeners โ€” a 35" waist-high raised garden bed virtually eliminates the need to bend, making daily gardening genuinely comfortable. Q2: Are galvanized steel raised garden beds safe for growing vegetables and edible crops? This is a very common and reasonable concern. Galvanized steel uses a zinc coating to prevent rust, and research from food-safety and soil science communities has generally found that the leaching of zinc into soil from galvanized containers is minimal and within safe ranges for food gardening. However, buyers who prefer extra reassurance can use a food-safe liner inside the bed as an additional barrier. For confirmed guidance, consult resources from the National Gardening Association or your local cooperative extension service. Q3: How long does a good quality metal raised garden bed last, and what's the delivery timeframe from Anleolife? A high-quality galvanized steel raised garden bed, properly maintained, can realistically last up to 20 years โ€” a lifespan that makes it substantially more cost-effective than wood over the long term. As for getting your bed delivered, Anleolife operates a nationwide U.S. warehouse network in California, Texas, Florida, New York, Illinois, and Washington, with delivery typically completed within 3โ€“8 business days after your order is placed. Summary Buying your first metal raised garden bed is a genuinely rewarding decision โ€” when it's made with the right information. The five mistakes covered in this guide โ€” choosing size aesthetically rather than functionally, ignoring height requirements, overlooking material quality, failing to plan for soil and drainage, and not considering expandability โ€” are all avoidable with a little upfront thinking. Here are the three core takeaways to carry forward: Match your bed to your garden reality, not to a product photo. Measure your space, understand your crops, and choose dimensions that make sense for both. Material quality is the most important long-term variable. A properly galvanized steel raised garden bed rated for up to 20 years of use is a fundamentally different product from a budget metal option, and the price difference is usually justified many times over across the bed's lifespan. Think in terms of a system, not a single purchase. Even your first bed is the beginning of a garden ecosystem. Choosing a brand with a coherent, expandable product lineup means you can grow your setup over time without starting over. Your next step: use the three-step framework from earlier in this guide โ€” map your space, define your crops, set a realistic budget โ€” and then browse with purpose rather than impulse. Start Your Garden Journey with Anleolife Anleolife operates a nationwide U.S. warehouse network strategically located in California, Texas, Florida, New York, Illinois, and Washington, ensuring delivery within 3โ€“8 business days โ€” so your garden upgrade plans never have to wait through long shipping delays. Products are available across major e-commerce platforms including Amazon, Walmart, Home Depot, Lowe's, and Wayfair, as well as directly at Anleolife.com, where you'll find consistent quality assurance and dedicated after-sales support. Anleolife's three core scenarios โ€” Planting (metal raised garden beds, soil systems), Raising (chicken coops, rabbit hutches), and Beautification (decorative accessories, pathway systems) โ€” cover the full spectrum of home garden needs, from functional infrastructure to the finishing touches that make a garden feel like yours. We understand that an ideal garden isn't built overnight. It's built gradually, season by season, with thoughtful choices that compound over time. Our modular product design allows flexible expansion based on your needs โ€” from your very first raised garden bed to a fully integrated planting-and-raising ecosystem. We grow with you, every step of the way. References National Gardening Association. "Garden to Table: A Guide to Growing Food at Home".https://garden.org University of California Agriculture and Natural Resources. "Raised Bed Gardening".https://ucanr.edu/ U.S. Environmental Protection Agency. "Growing Gardens in Urban Soils".https://www.epa.gov/brownfields/growing-gardens-urban-soils Penn State Extension. "Raised Bed Gardening".https://extension.psu.edu/raised-bed-gardening Oregon State University Extension Service. "Raised Bed Gardening: Soil, Materials, and Management".https://extension.oregonstate.edu/ Note: Standards and recommendations may be updated. Please check the latest official documents or consult professional horticultural advisors for current best practices. About Anleolife Anleolife is a leading outdoor garden solutions provider in North America, dedicated to offering a full-scenario product ecosystem for home gardening enthusiasts, covering planting, raising, and garden beautification. Since its founding, we have upheld our brand mission, "Made for Garden Life," continuously innovating products and optimizing services to help hundreds of thousands of users upgrade their gardens, reconnect with nature, and enjoy a better garden lifestyle.
Raised Garden Bed Black Friday & Spring Sales: When to Buy for the Best Price

Raised Garden Bed Black Friday & Spring Sales: When to Buy for the Best Price

on May 13 2026
ALT: Gardener shopping for the best deals on raised garden beds during Black Friday and spring sales events Raised Garden Bed Sales Timing: How to Get the Best Deal on Black Friday and Spring Events Key Conclusion: Knowing when to buy your raised garden beds can save you significantly โ€” sometimes 20โ€“40% off retail price. The two biggest windows are Black Friday (late November) and spring pre-season sales (February through April). Whether you're eyeing a compact galvanized steel raised garden bed for an urban balcony or a full modular system for a sprawling backyard, timing your purchase strategically means more garden for less money โ€” without compromising on quality, durability, or the 20-year lifespan you deserve. Shopping for raised garden beds without a timing strategy is like planting tomatoes in December โ€” the effort is there, but the results won't be. Smart gardeners know that price cycles follow predictable seasonal rhythms, and the best deals are available to those who plan ahead. In this guide, we'll break down exactly when to buy, how to compare deals across major platforms, and how to choose the right raised bed product for your space and budget โ€” all without overspending or second-guessing yourself. Who Should Read This Guide? โœ… Applicable Scenarios: Home gardeners planning their first raised bed setup and wanting to maximize budget Existing gardeners looking to expand their growing space with additional modular or galvanized beds Budget-conscious shoppers who prefer to plan purchases months in advance around known sale events Retirees and empty nesters who garden as a lifestyle and want durable, long-lasting investments Urban micro-gardeners monitoring compact raised bed deals on Amazon, Walmart, or Home Depot โŒ Not Applicable/Cautions: Gardeners who need raised beds immediately due to an urgent planting deadline (rush purchases rarely align with sale windows) Shoppers prioritizing the absolute lowest price over product quality โ€” the cheapest options may not offer the 20-year durability worth paying slightly more for Those unfamiliar with what to look for in material quality, who may benefit from reading a complete buying guide first before hunting deals Why Timing Your Raised Garden Bed Purchase Actually Matters The raised garden bed market has grown dramatically over the past decade. According to the National Gardening Association, participation in food gardening in the United States has risen sharply, with millions of households maintaining a home garden each year. This surge in demand has two important effects: it creates more competitive pricing among sellers, and it concentrates the best discounts into predictable seasonal windows. Here's the core dynamic at play: garden product manufacturers and retailers set their promotional calendars around two major cycles โ€” the holiday shopping season (peaking with Black Friday and Cyber Monday in late November) and the pre-spring buying window (February through April, as gardeners prepare for the growing season). Outside of these windows, prices tend to hold steady or even edge upward as peak demand arrives. Understanding How Much Should You Spend on a Raised Garden Bed This Season? is the essential first step โ€” because knowing your baseline spending range helps you recognize a genuine deal when you see one. Is a 20% discount on a $300 bed actually better than paying full price for a $180 bed? These are the kinds of comparisons this guide will help you navigate. What makes raised garden beds especially worth buying on sale is their long-term value proposition. A quality galvanized steel raised bed from Anleolife, for example, is designed to last 20 years โ€” meaning even a $30โ€“$50 savings at the point of purchase translates into decades of compounding value. This isn't a disposable garden accessory; it's a long-term infrastructure investment for your home. The question of what's the best material for affordable raised garden beds also plays into timing decisions. Galvanized steel consistently outperforms wood on longevity (no rot, no warping), and rust-resistant steel options offer even greater protection in humid climates. The best time to invest in high-quality materials is when those products go on sale โ€” not when you're forced to buy quickly at full price. The Two Best Times to Buy: A Deep Dive Into Black Friday vs. Spring Sales Three Steps to Building Your Deal-Hunting Strategy Step 1: Set Your Budget and Product Wishlist in Advance Before any sale event hits, know exactly what you're shopping for. Measure your garden space, decide on a height preference (standard 18-inch beds vs. extra-tall 24โ€“30-inch beds vs. waist-high 35-inch models), and determine how many beds you need. This pre-planning takes about 30โ€“60 minutes but prevents impulse purchases that don't fit your space or budget. Reference your wishlist during the sale and resist adding items not on it. Step 2: Track Prices for 4โ€“6 Weeks Before the Sale Price tracking is the most underrated move in deal hunting. Many retailers practice "sale theater" โ€” inflating prices briefly before marking them down. Use free tools like CamelCamelCamel (for Amazon) or simply check the product pages weekly starting about six weeks before Black Friday or the spring sale you're targeting. This gives you a genuine baseline so you can verify that the "50% off" claim is real. Step 3: Compare Across Multiple Channels Before Purchasing Anleolife products, for example, are available across Amazon, Walmart, Home Depot, Lowe's, Wayfair, and the official Anleolife.com website. On any given sale day, prices may vary across these platforms โ€” sometimes significantly. Spend 15โ€“20 minutes on sale day checking all major channels before committing. The official website may offer exclusive bundles or site-wide discounts not available on third-party marketplaces. Black Friday vs. Spring Sales: Which Is Better for Raised Garden Beds? Both sale seasons have distinct advantages, and the right choice depends on your personal situation. Here's a detailed comparison to help you decide: Comparison Dimension Black Friday (Late Nov) Spring Pre-Season (Febโ€“Apr) Early Summer Clearance (Juneโ€“July) Discount Depth High (20โ€“40% common) Moderate (10โ€“25% typical) Variable (clearance on older inventory) Product Availability Excellent โ€” full catalog Best selection of new models Limited โ€” popular sizes sell out fast Shipping Speed 3โ€“8 business days (peak season; plan ahead) 3โ€“8 business days (standard) 3โ€“8 business days (standard) Best For Planning next year's garden Immediate spring planting needs Budget shoppers flexible on size Risk Level Low โ€” beds stored indoors until spring Low โ€” use immediately Medium โ€” limited size options Soil & Accessory Bundling Sometimes available Frequently bundled with soil kits Rare The Black Friday Advantage Black Friday is arguably the single best moment to purchase raised garden beds if you're willing to plan ahead. The discount depth is typically at its annual peak, inventory is fully stocked with the latest models, and you have the luxury of researching without the time pressure of an upcoming planting season. Buying in November for a spring garden setup gives you time to plan your layout, order soil, and even build or assemble the beds before the ground thaws. The one caveat: Black Friday coincides with peak shipping season for all retailers. Anleolife's warehouse network โ€” spanning California, Texas, Florida, New York, Illinois, and Washington โ€” is designed to fulfill orders within 3โ€“8 business days year-round, but it's wise to order early in the sale window rather than waiting until Cyber Monday to ensure your beds arrive before the holiday rush. The Spring Pre-Season Advantage For gardeners who didn't catch the Black Friday window, February through April offers an excellent second chance. As the gardening season approaches, retailers run pre-season promotions to drive early purchases, and manufacturers often introduce new product lines at competitive introductory prices. This is the ideal window for gardeners in warmer climates (California, Florida, Texas) who may be planting as early as February or March. Spring sales also tend to bundle well โ€” retailers frequently pair raised garden beds with soil mixes, seeds, or drip irrigation components. If you're starting a new garden from scratch, this bundling can represent excellent overall value even if the bed discount itself is slightly smaller than a Black Friday figure. What's the Best Material for Affordable Raised Garden Beds? This question comes up constantly among budget-conscious shoppers, and it deserves a direct answer: galvanized steel is the best material for the price when you factor in lifespan. Here's the reasoning: Wood raised beds โ€” cedar, pine, or Douglas fir โ€” are popular for their natural aesthetics, but they rot over time, especially in wet climates. You might get 5โ€“8 years from a high-quality cedar bed, but you'll need to replace it. Over a 20-year horizon, you could buy two or three wooden beds. A single galvanized steel raised bed, engineered to last 20 years, eliminates that replacement cycle entirely. For shoppers seeking best budget-friendly raised bed options under $200, galvanized steel at the standard 18-inch height offers exceptional value. Anleolife's galvanized steel lineup includes multiple sizes at this tier, from compact configurations ideal for patios to longer rectangular beds suited to serious vegetable growing. At sale pricing, these beds often fall comfortably within the under-$200 range while offering durability that wooden alternatives simply can't match at equivalent price points. Rust-resistant raised garden beds take this a step further, with enhanced corrosion protection that makes them especially well-suited to humid coastal environments or gardens with frequent overhead watering. If you're gardening in Florida, coastal California, or the Pacific Northwest, the rust-resistant category is worth the slight premium โ€” especially when purchased during a sale. How to Choose the Right Size for Your Space Before you get swept up in sale excitement, knowing your ideal bed size is critical. If you're working with a small backyard or urban patio, compact configurations (like 4x4 or 6x3 footprints) are often the right choice. If you're building out a more ambitious kitchen garden, larger 8x4 or 12x3 configurations give you serious growing capacity. For families with limited outdoor space, the guide on How to Build a Raised Garden Bed Layout for Families with Limited Backyard Space offers excellent strategic advice on maximizing yield in compact areas. The key insight: a well-planned small raised bed garden often outperforms a sprawling, disorganized large one. Height is equally important. Standard 18-inch beds work well for most crops and most users. Extra-tall 24-inch and 30-inch options are ideal for deeper-rooted vegetables and for gardeners who prefer to work without kneeling. Waist-high 35-inch models are transformative for seniors, retirees, or anyone with mobility considerations โ€” they bring the garden up to a comfortable working height without any bending at all. What about soil? Choosing the right height also means planning your soil volume. Before your sale purchase, take a few minutes to review What Is the Best Soil Mix for Raised Garden Beds? (The Mel's Mix Guide) to understand how much soil you'll need and what blend works best for your crops. Buying soil in bulk during a spring sale bundle is a smart way to stretch your overall garden budget. Platform-by-Platform: Where to Find the Best Deals Different retail channels run promotions at slightly different times and with different discount structures. Here's a practical breakdown: Amazon: The most competitive channel for Black Friday deals, with Lightning Deals offering deep discounts for short windows. Subscribe to price drop alerts on products you're watching. Walmart: Strong spring pre-season promotions, particularly in February and March. Walmart's price-matching policy can also be leveraged if you find a lower price elsewhere. Home Depot and Lowe's: Both run "Spring Black Friday" events โ€” typically in March and April โ€” that rival November deals on garden products specifically. These are particularly strong for garden infrastructure items like raised beds. Wayfair: Known for seasonal "Way Day" sales (typically in spring) that include outdoor and garden products at significant discounts. Anleolife.com Official Site: Exclusive deals and bundles not always replicated on third-party platforms. Direct purchasing also ensures you're getting authentic products with full warranty and after-sales support. ALT: Anleolife galvanized steel raised garden beds arranged in a family backyard during spring planting season, showing various heights and sizes Advanced Tips: Getting Maximum Value Beyond the Sticker Price Three Situations Where the "Best Deal" Isn't What It Seems Situation 1: Deep Discount on an Inferior Material A 50% discount on a thin-gauge steel bed may still leave you with a product that rusts, bends under soil pressure, or fails within a few years. Always cross-reference the discount against material quality. Genuine galvanized steel with proper coating thickness is the benchmark โ€” if a product can't confirm its material specifications, that's a red flag regardless of the price. Situation 2: Great Bed Price, Hidden Shipping Costs Some marketplace sellers list attractive base prices but offset them with high shipping fees โ€” especially for heavy metal raised beds. Calculate total delivered cost, not just the listed price. Anleolife's warehouse network across six states (California, Texas, Florida, New York, Illinois, and Washington) is specifically structured to minimize shipping distances and ensure consistent 3โ€“8 business day delivery without surprise freight charges. Situation 3: Buying Too Small to Save Money Now It's tempting to start with the smallest, most affordable bed to "test" raised bed gardening. But if you end up loving it โ€” which most gardeners do โ€” you'll buy a second or third bed at full price later. Modular raised garden bed systems solve this problem elegantly: they're designed for incremental expansion, letting you start with one configuration and add sections over time without any waste. Common Misconceptions About Raised Bed Sales Misconception: "The official website is always more expensive." Not true. Anleolife's official site runs exclusive promotions, bundle deals, and loyalty offers that can match or beat marketplace pricing โ€” with the added benefit of direct customer support. Misconception: "Any raised bed will last decades." Lifespan varies enormously by material and build quality. Anleolife's galvanized steel raised garden beds are built for a 20-year lifespan โ€” a specification that most budget alternatives cannot match, making the comparison on a per-year-of-use basis very different from a sticker-price comparison. Misconception: "Spring is the only time to buy garden products." As this guide demonstrates, Black Friday consistently delivers the deepest discounts on raised garden beds, often surpassing spring sale events in both percentage discount and absolute savings. Frequently Asked Questions FAQ Q1: How far in advance should I buy a raised garden bed to get the best Black Friday price? Start tracking prices 4โ€“6 weeks before Black Friday โ€” usually early to mid-October. This gives you a clear baseline to verify that advertised discounts are genuine. Once you've confirmed a real deal, don't wait until Cyber Monday to purchase; popular sizes and configurations sell out quickly. With Anleolife's delivery window of 3โ€“8 business days, a Black Friday purchase will arrive well before the holiday, giving you time to assemble and plan your spring garden setup before the new year. Q2: Are spring sales on raised garden beds as good as Black Friday deals? Spring pre-season sales (February through April) are excellent โ€” but they typically offer slightly smaller discounts (10โ€“25%) compared to Black Friday (20โ€“40%). Where spring sales often win is in bundling: retailers frequently package raised beds with soil mixes, seeds, or irrigation supplies, making the total value compelling even if the bed discount is smaller. Spring is also ideal for gardeners who need their beds ready for immediate use rather than storing them over winter. The best approach is to target Black Friday for the biggest savings, with spring as a strong backup. Q3: How much can I realistically save on a raised garden bed during sale events? Savings vary by product tier and retailer, but during Black Friday, discounts of 20โ€“40% are realistic on quality galvanized steel raised garden beds. On a mid-range bed priced around $150โ€“$250, that translates to $30โ€“$100 in savings per unit. If you're building out a full garden setup with two or three beds โ€” as many serious gardeners do โ€” total savings can reach $100โ€“$300 or more in a single shopping event. Over a 20-year product lifespan, those upfront savings compound into genuinely significant lifetime value. Summary Timing is one of the most powerful and underutilized tools in a gardener's budget toolkit. By targeting your raised garden bed purchases during Black Friday (late November) or spring pre-season sales (February through April), you can realistically save 20โ€“40% on products that will serve your garden for up to 20 years. Three core principles to carry forward: Plan before you shop. Know your space, preferred bed height, and target budget before any sale event opens. Impulse purchases rarely align with long-term garden needs. Prioritize material quality over sticker price. A 20-year galvanized steel bed purchased at a 25% discount is worth far more than a cheap wooden bed at full price that needs replacing in five years. Compare across all channels. Anleolife products are available on Amazon, Walmart, Home Depot, Lowe's, Wayfair, and Anleolife.com โ€” prices and bundles differ, and a few minutes of comparison shopping can yield meaningful additional savings. Your next step: decide whether Black Friday or spring sales better align with your planting calendar, set a price alert on your target products today, and use the intervening weeks to finalize your garden layout and soil plan. Start Building Your Best Garden with Anleolife Nationwide U.S. warehouse network: Strategically located in California, Texas, Florida, New York, Illinois, and Washington to ensure delivery within 3โ€“8 business days โ€” so your garden upgrade plans never have to wait, whether you're buying in November or April. Multi-channel sales network: Products are available on major e-commerce platforms including Amazon, Walmart, Home Depot, Lowe's, Wayfair, as well as the official website Anleolife.com, providing consistent quality assurance and after-sales service. Three core scenarios: Planting (metal raised garden beds, soil systems), Raising (chicken coops, rabbit hutches), and Beautification (decorative accessories, pathway systems), meeting complete needs from functionality to aesthetics. We understand that an ideal garden is not built overnight, but gradually improved over time. Our modular product design allows flexible expansion based on your needs โ€” from your first galvanized steel raised bed to a fully integrated planting-and-raising ecosystem. We grow with you every step of the way. References National Gardening Association. "Gardening Trends and Participation Statistics".https://garden.org University of California Agriculture and Natural Resources. "Home Vegetable Gardening Guides".https://ucanr.edu/ U.S. Department of Agriculture (USDA). "Planting Zones and Growing Season Information".https://www.usda.gov/ Consumer Reports. "How to Get the Best Price on Garden and Outdoor Products During Sales Events".https://www.consumerreports.org/ National Sustainable Agriculture Information Service (ATTRA). "Raised Bed Gardening".https://attra.ncat.org/ Note: Retail pricing, sale timing, and discount availability vary by retailer and year. Always verify current pricing directly with the seller before purchasing. Standards and program availability may be updated โ€” consult the latest official retailer communications or contact Anleolife customer support for current offers. About Anleolife Anleolife is a leading outdoor garden solutions provider in North America, dedicated to offering a full-scenario product ecosystem for home gardening enthusiasts, covering planting, raising, and garden beautification. Since its founding, we have upheld our brand mission, "Made for Garden Life," continuously innovating products and optimizing services to help hundreds of thousands of users upgrade their gardens, reconnect with nature, and enjoy a better garden lifestyle.
How to Choose the Right Grow Light Wattage for Your Indoor Garden This Summer

How to Choose the Right Grow Light Wattage for Your Indoor Garden This Summer

on May 13 2026
ALT: Gardener choosing the right grow light wattage for indoor garden plants during summer growing season Why Grow Light Wattage Matters More Than You Think This Summer Key Conclusion: Choosing the correct grow light wattage for your indoor garden this summer is one of the most impactful decisions you can make for plant health, energy efficiency, and harvest yield. Too little wattage leaves plants leggy and light-starved; too much wastes electricity and can scorch tender leaves. Understanding the relationship between wattage, coverage area, plant type, and growth stage gives home growers a practical edgeโ€”whether you're growing herbs on a windowsill or running a full-scale indoor vegetable operation alongside your outdoor raised beds. Summer might seem like the last time you'd need to worry about indoor grow lightsโ€”after all, the sun is blazing outside. But for urban apartment dwellers, gardeners in extreme-heat climates, or hobbyists running seedling stations for fall transplants, grow lights remain essential year-round. The challenge is matching light intensity to your specific plants, space, and goals without overspending on electricity or underpowering your setup. This guide breaks down everything you need to know: from the science behind wattage and light output, to practical step-by-step selection, to how indoor growing complements an outdoor raised bed garden. Whether you're a seasoned gardener or just getting started, you'll walk away with a clear, confident plan. Who This Guide Is For โœ… Applicable Scenarios: Home growers starting seeds indoors for fall transplant into outdoor raised garden beds Urban apartment gardeners with limited or no direct sunlight year-round Hobby growers cultivating herbs, microgreens, or compact vegetables in basement or garage grow rooms during summer heat waves Empty nesters and retirees expanding their gardening hobby into a year-round indoor-outdoor system โŒ Not Applicable/Cautions: Commercial greenhouse operations requiring industrial-scale lighting systems with specialized engineering Growers in climates with abundant summer sun and no space constraints who can rely entirely on natural light outdoors Anyone looking to use decorative lighting (such as string lights or accent lamps) as a substitute for horticultural grow lightsโ€”these do not provide usable plant light spectrum Understanding the Grow Light Wattage Landscape The indoor gardening market has expanded dramatically over the past decade. According to the USDA's recent urban agriculture reports, millions of American households now engage in some form of indoor or container gardening. With that growth has come an overwhelming array of grow light optionsโ€”LED panels, HID systems, fluorescent T5s, quantum boardsโ€”each marketed with different wattage claims and coverage promises. The problem? Wattage alone is a poor indicator of grow light quality. A 1000W HID light and a 200W LED quantum board may produce similar amounts of usable plant light (measured in PPFDโ€”Photosynthetic Photon Flux Density), but the LED draws a fraction of the electricity and generates far less heat. For summer growing, heat management becomes especially critical: the last thing you want is a high-heat light system competing with your air conditioning. Understanding how to decode wattage, actual draw vs. equivalent wattage, and coverage area recommendations is the foundation of smart grow light selection. This knowledge doesn't just serve your indoor gardenโ€”it informs how you time seedling starts to align with outdoor planting windows in your raised bed layout for families with limited backyard space, helping you maximize harvests across both growing environments. The secondary benefit of getting wattage right is cost control. The U.S. Department of Energy notes that lighting accounts for a meaningful portion of household electricity use, and grow lightsโ€”run 12โ€“18 hours dailyโ€”can add up quickly. Choosing efficient, appropriately sized grow lights keeps your gardening hobby enjoyable without budget surprises. How to Choose the Right Grow Light Wattage: A Practical System Three-Step Quick Start Step 1: Calculate Your Grow Space Area Before you shop, measure your grow area in square feet. This is the single most important starting point. A standard rule of thumb for LED grow lights is to aim for approximately 20โ€“40 watts of actual draw per square foot for flowering or fruiting plants, and 10โ€“20 watts per square foot for seedlings, herbs, and leafy greens. A 2x4 ft grow tent (8 sq ft) growing tomatoes needs roughly 200โ€“320W of actual LED power. This step takes about 5 minutes and eliminates most guesswork. Write down your dimensions before comparing any light models. Step 2: Match Wattage to Plant Type and Growth Stage Not all plants have the same light appetite. Seedlings and leafy greens (lettuce, spinach, basil) are low-light crops that thrive with lower wattage and shorter daily light periods (12โ€“14 hours). Fruiting plants (tomatoes, peppers, cucumbers) are high-light crops that need higher wattage and longer photoperiods (16โ€“18 hours). During summer, if you're starting fall transplants indoors, you're likely in seedling or vegetative stageโ€”meaning you can use lower wattage settings, which also reduces heat buildup in your growing space. Check your specific plant's Daily Light Integral (DLI) requirements for best results. Step 3: Factor In Heat, Efficiency, and Budget Compare actual wattage draw (not "equivalent" claims), energy efficiency ratings, and heat output for your shortlisted lights. In summer, LED quantum boards and strip LEDs are strongly preferred over HID or high-output fluorescents because they run cooler. Calculate your monthly electricity cost by multiplying wattage ร— daily hours รท 1000 ร— your local kWh rate ร— 30. A 200W LED running 16 hours/day at $0.13/kWh costs roughly $12.50/monthโ€”very manageable. Set a budget that includes the light, a timer, and any cooling fans you might need. Grow Light Type Comparison: Finding the Best Fit for Your Summer Indoor Garden With so many grow light categories on the market, home gardeners often feel paralyzed by choice. The table below compares the three most common options available to hobbyists, based on general performance characteristics widely reported in horticultural and energy efficiency literature. Comparison Dimension LED Quantum Board T5 Fluorescent HID (HPS/MH) Energy Efficiency Highest (most lumens per watt) Moderate Lower Heat Output Low Low-Moderate High Summer Suitability Excellent Good Poor (adds heat load) Upfront Cost Moderate to High Low Moderate Lifespan Very Long Moderate Shorter Best For All stages; fruiting plants Seedlings, herbs, leafy greens Large-scale fruiting (not ideal for summer) Spectrum Control Full spectrum, often dimmable Limited Fixed spectrum Coverage per Fixture Wide Narrow Wide For most home growers this summerโ€”especially those in warmer U.S. climatesโ€”LED quantum boards represent the best all-around choice. They deliver the right spectrum for every growth stage, run cool enough to use without major HVAC adjustments, and are increasingly affordable as the technology matures. Deep Dive: Wattage Guidelines by Plant Category and Space Seedlings and Starts: Low Demand, High Reward Seedlings are the most forgiving category when it comes to grow light selection. Young plants are sensitive to light intensityโ€”too much too soon can cause bleaching or stress. For a standard seedling tray covering roughly 2x4 ft, a light with 40โ€“80W of actual LED draw is typically sufficient. If you're starting tomatoes, peppers, or brassicas indoors in July or August for a fall garden transplant, position your grow light 18โ€“24 inches above the seedling tray and run it for 14โ€“16 hours per day. A simple plug-in timer (under $15 at any hardware store) automates this completely. When seedlings develop their first true leaves, you can gradually increase light intensity or lower the fixture slightly. This is also a perfect time to think about where those seedlings will eventually land outdoors. As you plan your raised garden bed budget for this season, factor in the cost of starting plants from seed indoorsโ€”it's significantly cheaper than buying nursery transplants and gives you access to far more variety. Herbs and Leafy Greens: The Sweet Spot for Indoor Summer Growing Herbs like basil, cilantro, parsley, and mint, along with leafy greens such as lettuce, arugula, and spinach, are the ideal candidates for indoor summer growing. They have moderate light requirements and relatively short growth cycles, meaning you can harvest repeatedly throughout the season. For a 2x2 ft herb shelf or countertop garden, 30โ€“60W of actual LED draw is typically plenty. These plants do well under full-spectrum LED strips or compact quantum boards positioned 12โ€“18 inches above the canopy. Running lights for 12โ€“14 hours daily mimics a natural summer photoperiod and keeps plants from bolting prematurely. One practical tip for herb growers: controlling whiteflies on raised bed plants naturally is a concern that extends indoors too. Indoors, whiteflies can arrive on store-bought plants. Keep new additions quarantined for a week before introducing them to your grow space. Yellow sticky traps work well indoors, and a diluted neem oil spray applied to the undersides of leaves handles most infestations without harsh chemicals. Good air circulationโ€”provided by a small oscillating fanโ€”also discourages pest establishment. Fruiting Vegetables: High Demand, Higher Wattage Tomatoes, peppers, cucumbers, and beans are high-light, high-energy crops. Growing them entirely indoors under artificial light is possible but requires a serious commitment to wattage. For a 4x4 ft footprint, expect to need 200โ€“320W of actual LED power to achieve fruiting. This is where quality matters mostโ€”cheap grow lights often overstate their wattage and underdeliver on actual PPFD at canopy level. For summer indoor growing of fruiting plants, ventilation is non-negotiable. Even efficient LED boards produce some heat at these wattages. A small inline fan connected to a carbon filter keeps air moving and temperature stable. If your grow space gets above 85ยฐF regularly, plant stress and reduced pollination will limit your yields regardless of light quality. If fruiting crops feel like a large indoor commitment, consider a hybrid approach: start them indoors under grow lights through the seedling and early vegetative stage, then transplant outdoors into galvanized steel raised garden beds for the bulk of their growing season. Anleolife's raised garden bedsโ€”built to last up to 20 yearsโ€”create the ideal permanent outdoor home for your most demanding vegetables, complementing whatever you're doing indoors. Microgreens: Maximum Efficiency at Minimum Wattage Microgreens are the indoor gardening sweet spot for efficiency. These dense, nutritious crops (sunflower, pea shoots, radish, broccoli) grow in shallow trays and reach harvest in 7โ€“14 days. They require less light than any other food cropโ€”20โ€“40W of actual LED draw over a standard 10x20 inch flat is sufficient. They don't need a long photoperiod (10โ€“12 hours works well), and they tolerate lower light spectrum ranges. For anyone curious about indoor gardening but cautious about cost or complexity, microgreens are the perfect entry point. The wattage investment is minimal, the turnaround is fast, and the nutritional density is impressive. Practical Considerations: Summer-Specific Factors That Affect Wattage Choice Heat Management Is Your Priority Summer growing indoors means your home's ambient temperature is already elevated. Every watt of grow light power that isn't converted to plant-usable light becomes heat in your grow space. This is the single biggest reason to prioritize LED technology over HID systems during summer months. If you're growing in a basement or climate-controlled room, LED efficiency allows you to maintain stable temperatures without dramatically increasing your AC load. In a garage or attic grow space without AC, even LEDs may require supplemental cooling if ambient temperatures exceed 80ยฐF regularly. Light Duration vs. Light Intensity: Getting the Balance Right A common misconception among new indoor gardeners is that you can compensate for low wattage by simply running lights longer. This works to a limited degree but hits biological limits quickly. Plants process light through photosynthesis at a rate determined by intensityโ€”a dim light run for 20 hours cannot replicate a bright light run for 14 hours for fruiting crops. For seedlings and greens, longer hours with lower intensity is often fine. For fruiting plants, intensity (wattage per square foot) cannot be easily substituted with time. The Best Garden Tool Storage Solutions for Small Spaces If you're combining indoor grow light setups with outdoor gardening tools, space management becomes a real consideration. For small-space gardeners, vertical storageโ€”wall-mounted pegboards, magnetic strips for small hand tools, and stackable storage binsโ€”keeps grow room accessories organized without eating into your plant footprint. Store your timers, pH meters, and nutrient solutions in labeled bins near your grow area so your workflow stays efficient. Keeping your indoor and outdoor gardening tools separate and clearly organized also reduces contamination risk between environments. What's the Best Hose Length for a Small Backyard? For those running both indoor grow lights and outdoor raised beds, coordinating your watering setup matters. For a small backyard or patio with one or two raised garden beds, a 25โ€“50 foot hose is typically idealโ€”long enough to reach all corners of a standard bed without dragging excess length that creates tangling hazards. Pair this with a quality adjustable nozzle for precise watering control. Indoors, a simple watering can or a small pump-fed drip system handles your grow trays without the complexity of a full hose setup. Recommended Materials: Raised Garden Beds That Won't Rot While exploring indoor lighting, many gardeners simultaneously think about upgrading their outdoor growing infrastructure. The most frequently recommended material for outdoor raised beds is galvanized or rust-resistant steelโ€”specifically because it resists the rot, warping, and pest damage that plagues wood beds over time. For ongoing guidance on what soil mix works best in raised garden beds, a quality growing medium in a well-built metal bed dramatically reduces the maintenance burden compared to wood alternatives. Anleolife's galvanized and rust-resistant raised garden beds are engineered for a 20-year lifespan, making them one of the most cost-efficient investments in your overall garden system. Best Mulch for Your Vegetable Garden When your indoor seedlings eventually move outdoors into raised beds, mulching becomes one of the best practices for moisture retention and weed suppression. Straw mulch is the classic recommendation for vegetable bedsโ€”it's light, affordable, breaks down slowly, and doesn't introduce weed seeds the way some hay mulches can. Wood chip mulch works well in pathways between beds but can temporarily tie up nitrogen if incorporated into soil. Grass clippings (untreated) make excellent mulch for established beds. Apply 2โ€“3 inches of mulch around transplants as soon as they go in the ground. ALT: Efficient LED grow lights illuminating seedling trays indoors while galvanized steel raised garden beds await transplants outdoors in summer garden Advanced Considerations: Beyond Basic Wattage Dimming Capability: The Feature Most Beginners Overlook Many modern LED grow lights include dimming functionalityโ€”the ability to run at 50%, 75%, or 100% output. This feature is more valuable than most beginners realize. During seedling stage, running at 50% prevents light stress and saves electricity. As plants mature into vegetative and flowering stages, you ramp up gradually. A dimmable light is essentially two or three grow lights in one, adapting to your plants' changing needs without requiring fixture changes. Understanding "Actual Draw" vs. "Equivalent" Wattage LED grow light manufacturers frequently advertise their products with inflated "equivalent" wattage figuresโ€”claiming a 200W LED "replaces" a 1000W HPS. While there's some truth to efficiency comparisons, shopping by equivalent wattage leads to confusion. Always look for actual wattage draw from the wallโ€”this is the true energy consumption figure and the most reliable basis for coverage area calculations. A Common Misconception: "More Light Always Means More Growth" Plants have a maximum light saturation point (the Light Saturation Point, or LSP) beyond which additional light provides no photosynthetic benefit and can cause damage. For most vegetables, this ceiling is well within what a reasonably sized LED panel can provide. Running your lights at maximum intensity 24 hours a day won't accelerate growthโ€”it will stress your plants, increase electricity costs, and shorten bulb lifespan. Respecting natural light/dark cycles (photoperiods) is fundamental to healthy plant biology. Relationship with Nutrient Management Indoors Higher wattage and light intensity drive faster photosynthesis, which in turn increases a plant's nutrient and water uptake. If you upgrade to a higher-wattage system, expect to adjust your watering frequency and fertilization schedule accordingly. Plants under strong artificial light tend to consume nutrients faster than those grown under natural light or weaker artificial sources. Frequently Asked Questions FAQ Q1: How do I calculate the right wattage for my specific grow tent size? Measure your grow tent's square footage (length ร— width). For leafy greens and herbs, target 15โ€“20 watts of actual LED draw per square foot. For fruiting plants like tomatoes and peppers, aim for 25โ€“40 watts per square foot. A 4x4 ft tent (16 sq ft) growing tomatoes would need roughly 400โ€“640W of actual LED output for optimal fruiting. Always verify a light's actual wattage drawโ€”not its "equivalent" claimโ€”before purchasing. Many manufacturers list both; look for "actual draw" or "system wattage." Q2: Is it safe to run grow lights all summer in a home with central air conditioning? Yes, with appropriate planning. Modern LED grow lights are significantly cooler than HID systems and can be safely run in air-conditioned spaces. The key factors are ensuring your grow area has adequate air circulation (a small oscillating fan is usually sufficient), keeping your light fixture at the manufacturer-recommended hanging height to prevent heat concentration near the canopy, and monitoring temperature at canopy level with an inexpensive thermometer. If canopy temperatures stay below 80โ€“82ยฐF, your AC system can handle the additional heat load from most residential LED setups. Q3: How long does it take to see results after setting up the right wattage grow light? With the correct wattage matched to plant type, most growers see noticeable improvement within 7โ€“14 days. Seedlings develop sturdier stems and deeper green color within a week of being placed under appropriately powered lights. Herbs show accelerated leaf production within 10 days. The key signal that your wattage is right is compact, upright growthโ€”stretched, leggy plants indicate insufficient light intensity, while bleached or crispy leaf edges suggest too much intensity or the fixture is too close to the canopy. Summary Choosing the right grow light wattage for your indoor garden this summer comes down to three core principles: know your space, know your plants, and prioritize efficiency. Calculating your grow area and matching wattage to specific plant light requirements eliminates most common mistakes. Choosing LED technologyโ€”particularly dimmable quantum boardsโ€”addresses summer heat concerns while delivering full-spectrum light at genuine energy efficiency. The broader takeaway is that indoor and outdoor growing aren't competing prioritiesโ€”they're complementary systems. Grow lights let you extend your season, start transplants earlier, and grow crops that don't thrive in your local outdoor climate. A well-planned outdoor raised bed system receives those indoor-started plants at their strongest, setting up abundant harvests. Here are your next steps: Measure your grow space and calculate your target wattage range using the formulas in this guide Compare at least three LED options by actual wattage draw, coverage area specs, and dimming capability Set up a timer and temperature monitor before your first plants go under the lights When your indoor seedlings are ready to graduate outdoors, make sure they're heading into a setup built to last. Call to Action Anleolife is your complete outdoor garden partner, designed to work hand-in-hand with everything you're building indoors. Our nationwide U.S. warehouse networkโ€”strategically located in California, Texas, Florida, New York, Illinois, and Washingtonโ€”ensures delivery within 3โ€“8 business days, so your garden upgrade plans never have to wait regardless of where you're located. Our multi-channel sales network means you can shop wherever you're most comfortable: Amazon, Walmart, Home Depot, Lowe's, Wayfair, or directly at Anleolife.comโ€”with consistent quality assurance and after-sales service across every platform. Our three core gardening scenarios cover your complete journey: Planting: Metal raised garden beds (galvanized steel, rust-resistant, modular, and heavy-duty options) and soil systems built for serious growing Raising: Chicken coops and rabbit hutches for those expanding into backyard food production Beautification: Decorative accessories and pathway systems that transform a functional garden into a beautiful outdoor living space We understand that an ideal garden isn't built overnightโ€”it's cultivated gradually, season by season. Our modular product design lets you start with one raised bed and expand into a full planting-and-raising ecosystem at your own pace. From your first indoor seedling tray to a flourishing outdoor garden built on beds engineered to last 20 years, Anleolife grows with you every step of the way. References U.S. Department of Agriculture (USDA). "Urban Agriculture and Indoor Growing Resources."https://www.usda.gov/topics/farming/urban-agriculture U.S. Department of Energy. "Lighting Efficiency and Energy Savings for Residential Growers."https://www.energy.gov/energysaver/lighting-choices-save-you-money University of California Cooperative Extension (UC ANR). "Vegetable Gardening: Light Requirements and Grow Light Selection."https://ucanr.edu/ Cornell University Cooperative Extension. "Controlled Environment Agriculture: Lighting for Plant Growth."https://cals.cornell.edu/school-integrative-plant-science/horticulture National Gardening Association. "Understanding Grow Lights for Home Gardens."https://garden.org/ Note: Standards and recommendations may be updated. Please check the latest official documents or consult professional advisors for current guidance. About Anleolife Anleolife is a leading outdoor garden solutions provider in North America, dedicated to offering a full-scenario product ecosystem for home gardening enthusiasts, covering planting, raising, and garden beautification. Since its founding, we have upheld our brand mission, "Made for Garden Life," continuously innovating products and optimizing services to help hundreds of thousands of users upgrade their gardens, reconnect with nature, and enjoy a better garden lifestyle.
Watering Schedules for Raised Garden Beds in Hot Summer Weather

Watering Schedules for Raised Garden Beds in Hot Summer Weather

on May 13 2026
ALT: Raised garden bed with drip irrigation system keeping vegetables healthy during hot summer weather Why Summer Watering in Raised Garden Beds Requires a Different Strategy Key Conclusion: When temperatures rise above 85ยฐF, raised garden beds lose moisture dramatically faster than in-ground gardensโ€”often two to three times more quickly. Without a well-planned watering schedule for raised garden beds in hot summer weather, even healthy plants can wilt, bolt, or fail within days. Understanding the science of soil moisture, evaporation, and plant uptake is essential for any gardener who wants to keep a productive, thriving summer garden. Summer gardening in a raised bed offers tremendous advantagesโ€”better drainage, warmer soil, fewer weedsโ€”but it also comes with one significant challenge: heat and water management. Because raised beds sit above ground level, they drain faster, warm up faster, and lose moisture through evaporation much more rapidly than traditional in-ground plots. For the enthusiastic home grower in Texas, Florida, or California, this can feel like a constant battle against the thermometer. The good news is that a smart watering strategy, tailored specifically to summer conditions, can make all the difference. Whether you're growing tomatoes, cucumbers, squash, or herbs, learning when, how much, and how often to water your raised beds during peak summer will not only save your plantsโ€”it will save you time, water, and frustration. Who This Guide Is For: Applicable Scenarios and Cautions โœ… Applicable Scenarios: Home gardeners growing vegetables, herbs, or flowers in metal or galvanized steel raised garden beds during summer months (Juneโ€“September) Urban micro-gardeners with limited outdoor space who rely on raised beds as their primary growing medium Empty nesters or retirees managing backyard gardens who want to simplify their watering routine without sacrificing plant health Gardeners in hot-weather states like Texas, Florida, California, Arizona, and Georgia where summer temperatures regularly exceed 90ยฐF โŒ Not Applicable/Cautions: Gardeners growing primarily drought-tolerant native plants or cactus gardens, which require a fundamentally different irrigation philosophy Those with very deep raised beds filled with dense clay-heavy soilโ€”drainage dynamics and moisture retention will differ significantly Gardeners relying solely on rainfall in temperate or coastal climates where summer temperatures rarely exceed 75ยฐF Understanding Why Raised Beds Lose Water Faster in Summer To build an effective summer watering plan, it helps to first understand why raised garden beds behave so differently from in-ground soil during hot weather. The answer lies in physics, airflow, and surface area. Raised beds are exposed on all sides. Unlike ground-level soil that's insulated by surrounding earth, a raised bed's wallsโ€”whether galvanized steel, corrugated metal, or woodโ€”are surrounded by open air. In direct summer sun, this means the metal or wooden walls absorb heat, which radiates inward and accelerates evaporation from the soil surface. A raised bed in full sun on a 95ยฐF afternoon can lose a half-inch or more of soil moisture in a single day. Studies from the University of California Cooperative Extension have found that container-style growing systems, including raised beds, can require up to 50% more frequent irrigation than in-ground gardens during periods of extreme heat. This isn't a design flawโ€”it's simply the tradeoff for the superior drainage, root development, and pest resistance that raised beds provide. There's also the question of soil composition. Most raised bed gardeners use a light, well-draining mixโ€”often a variation of the popular "Mel's Mix" approach. You can learn more about constructing the ideal growing medium in this guide to What Is the Best Soil Mix for Raised Garden Beds? (The Mel's Mix Guide). These loose, airy mixes are fantastic for root health, but they drain quicklyโ€”which means summer watering demands go up. Additionally, plant transpiration peaks on hot days. Large-leafed crops like squash and cucumbers can transpire enormous volumes of water through their leaves as temperatures climb. Your plants are literally pumping moisture out of the soil and releasing it into the air at an accelerated rate. Understanding these dynamics isn't meant to alarm youโ€”it's meant to arm you. With the right schedule and techniques, you can keep your raised bed garden thriving all summer long without wasting water or hovering over your hose twice a day. Building Your Summer Watering Schedule: A Practical, Step-by-Step System Three-Step Quick Start for Summer Bed Watering Step 1: Assess Your Bed's Current Moisture Level Before watering, always check the soil. Push your finger two inches into the soil near the center of the bedโ€”not just the edge. If the soil feels dry at that depth, it's time to water. If it still feels cool and slightly moist, wait a few more hours. This quick finger-check takes about 30 seconds but prevents both underwatering and overwatering. Do this every morning during summer, ideally before 8 a.m. Step 2: Water Deeply, Not Frequently Rather than sprinkling lightly every day, aim for deep, thorough watering sessions that penetrate 6โ€“8 inches into the soil. This encourages roots to grow downward, where soil stays cooler and retains moisture longer. A slow drip irrigation system or a soaker hose left running for 20โ€“30 minutes typically achieves this depth. Shallow, frequent watering leads to shallow root systems that become even more vulnerable to heat stress. Step 3: Mulch Immediately After Watering Apply a 2โ€“3 inch layer of organic mulchโ€”straw, wood chips, or shredded leavesโ€”over the surface of your raised bed immediately after watering. Mulch dramatically reduces surface evaporation, can lower soil temperature by 10โ€“15ยฐF, and suppresses weeds that compete for moisture. Reapply mulch every few weeks as it breaks down, adding organic matter to your soil in the process. Watering Method Comparison: Which Approach Works Best in Summer Heat? There are several popular methods for watering raised garden beds, and each has distinct advantages and disadvantages during hot summer weather. Here's a practical comparison to help you choose the right approach for your garden setup and lifestyle: Comparison Dimension Hand Watering (Hose/Can) Drip Irrigation System Soaker Hose Water Efficiency Lowโ€“Medium (significant evaporation loss) High (delivers water directly to roots) High (slow seep reduces evaporation) Ease of Use Easy but time-intensive Moderate setup, then largely automated Easy setup, semi-automated Cost Very low Medium to high (timer, tubing, emitters) Low to medium Best For Small beds, casual gardeners Multiple beds, tech-comfortable growers Single to mid-size beds, budget-conscious growers Evaporation Risk High (especially midday watering) Very low Low Uniformity of Coverage Variable (user-dependent) Excellent with proper emitter placement Good for row crops, uneven for scattered plants Summer Suitability Fair (early morning only) Excellent Very Good For most serious summer gardeners managing raised beds in hot climates, drip irrigation paired with a timer is the gold standard. It removes human error, delivers water at the root zone where it's needed most, and can be programmed to run before sunriseโ€”the optimal time to water. Detailed Guidance: Timing, Frequency, and Adjusting for Heat Waves The Best Time of Day to Water Raised Beds in Summer The single most impactful change you can make to your summer watering routine is adjusting when you water. Early morningโ€”between 5 a.m. and 8 a.m.โ€”is the undisputed optimal window. At this time, temperatures are lowest, wind is usually calm, and the soil can absorb water before the day's heat drives evaporation. Plants also enter the hot afternoon hours with fully saturated root zones, giving them reserves to draw on. Avoid watering in the middle of the day. Not only does midday irrigation lose a significant portion of water to evaporation before it reaches roots, but water droplets on leaves can act as magnifying lenses under intense sun, contributing to leaf scorch on sensitive plants like tomatoes and basil. Evening watering is often presented as a second-best option, but in humid climates, wet foliage overnight creates ideal conditions for fungal diseases like powdery mildew, early blight, and botrytis. If morning watering is truly impossible, evening watering at the base of plants (using soaker hoses or drip lines, avoiding leaf contact) is acceptableโ€”but morning remains the clear winner. How Often Should You Water in Summer? Frequency depends on several variables: your climate, bed depth, soil composition, and what you're growing. As a general framework for hot summer weather (consistent daytime temps above 85ยฐF): Shallow beds (under 12 inches): Water daily, or even twice daily during heat waves above 100ยฐF Standard depth beds (12โ€“18 inches): Water every 1โ€“2 days Extra-tall or deep beds (24โ€“30+ inches): Water every 2โ€“3 days, as the deeper soil mass retains moisture significantly longer Anleolife's raised garden bed lineup spans a wide range of depthsโ€”from standard 18-inch tall beds ideal for most vegetables to extra-tall 24-inch and 30-inch options that provide superior soil volume and moisture retention. For gardeners in intensely hot climates like Texas or Arizona, choosing a deeper bed profile from Anleolife's range can meaningfully reduce summer watering frequency by giving roots access to cooler, moister soil further down. If you're still deciding on which bed size suits your needs and budget, this resource on How Much Should You Spend on a Raised Garden Bed This Season? offers excellent practical guidance. Are Metal Raised Garden Beds Safe for Vegetables in Summer Heat? One of the most common questions gardeners ask is: are metal raised garden beds safe for vegetables? The concern usually relates to two thingsโ€”heat transfer from the metal walls to the soil, and the potential leaching of chemicals or heavy metals into food crops. On the safety front, high-quality galvanized steel raised garden bedsโ€”like those offered by Anleolifeโ€”use a zinc-based coating that is considered food-safe by horticultural authorities. Modern galvanizing processes do not use lead or cadmium, and zinc leaching into soil is minimal and generally not harmful to plants or humans at the levels involved. In fact, zinc is an essential micronutrient for plant growth. Regarding heat, yes, metal walls do warm up faster than wood. This is actually an advantage in spring and fall, extending the growing season. In summer, the metal walls can get quite hot to the touch. The practical solution is a combination of mulching (which insulates the soil surface), choosing deeper beds (more soil mass moderates temperature swings), and ensuring your watering schedule keeps the root zone consistently moist. The soil in the interior of a well-mulched, properly watered metal raised bed remains productive even when exterior temperatures soar. Anleolife's galvanized steel raised garden beds are built with a 20-year lifespan in mind, using rust-resistant materials that maintain structural integrity even through years of seasonal temperature extremesโ€”summer heat, winter frost, and everything in between. How to Prevent Slugs and Snails in Raised Beds During Summer While not directly a watering topic, slug and snail management is closely connected to moisture management. The best way to prevent slugs and snails in raised beds during summer is to water in the morning rather than evening. Slugs and snails are most active at night and are attracted to moist, cool soil surfaces. By watering early in the day, the soil surface dries out by nightfall, making your beds significantly less hospitable to these pests. Additional measures include: Placing copper tape around the perimeter of your raised bed walls (copper creates a mild electrical reaction that deters mollusks) Removing any debris, boards, or mulch piles adjacent to beds where slugs shelter during the day Spreading diatomaceous earth around the base of plants, reapplying after watering or rain Hand-picking slugs in the early morning when they're still visible on or near plants The elevated design of raised garden beds already provides a degree of protectionโ€”it's harder for ground-level pests to reach plants in a 24-inch extra-tall bed than in a flat in-ground plot. This is one of the understated benefits of investing in taller raised bed profiles. Managing Watering During Extreme Heat Waves When temperatures surge above 100ยฐF for multiple consecutive days, standard watering schedules may not be sufficient. During heat emergencies, consider these additional strategies: Shade cloth: Drape 30โ€“40% shade cloth over your beds during the hottest part of the day (11 a.m.โ€“4 p.m.). This reduces soil temperature significantly without cutting enough light to inhibit fruiting. Double watering: During heat waves, water once in the early morning as usual, then do a light top-up in the late afternoon (around 5โ€“6 p.m.) to replenish moisture lost through peak-hour transpiration. Humidity management: Misting the air around heat-sensitive crops like lettuce or spinach (not the soil, and not directly on leaves) can reduce ambient temperature slightly and slow transpiration. Temporary windbreaks: Hot, dry winds strip moisture from leaves faster than direct sun alone. Temporary fabric windbreaks or strategic placement of taller crops can shield sensitive plants. For gardeners managing multiple raised beds, How to Build a Raised Garden Bed Layout for Families with Limited Backyard Space offers thoughtful strategies for positioning beds to naturally manage sun exposure and airflow throughout the growing season. ALT: Gardener applying straw mulch to an Anleolife galvanized steel raised garden bed to conserve moisture during hot summer weather Advanced Summer Watering: Misconceptions, Special Situations, and Soil Connections Common Misconceptions About Summer Watering Misconception #1: "More water is always better in summer."Overwatering is actually one of the leading causes of raised bed plant failure, even in summer. Waterlogged soil suffocates roots by displacing oxygen, creating conditions perfect for root rot pathogens like Pythium and Phytophthora. Always check soil moisture before watering, regardless of temperature. Misconception #2: "Wilting always means underwatering."Many plantsโ€”especially large-leafed crops like squashโ€”exhibit heat wilting in the afternoon even when soil moisture is perfectly adequate. This is a temporary physiological response to high transpiration demand. Check the soil first. If it's moist, wait until evening; the plant will almost certainly recover on its own as temperatures drop. Misconception #3: "Watering frequency is the same for all vegetables."Water needs vary dramatically by crop. Lettuce, spinach, and shallow-rooted herbs need frequent, lighter watering. Deep-rooted tomatoes and peppers prefer infrequent but deep watering that encourages downward root growth. Squash and cucumbers fall in the middle. Tailoring your schedule by plant type rather than applying a single routine to the whole bed improves both plant health and water efficiency. Special Situation: New Seedlings and Transplants in Summer Heat Young transplants have not yet established root systems capable of pulling moisture from deep soil. For the first two weeks after transplanting into a raised bed in summer, you may need to water more frequentlyโ€”even daily for small seedlings in intense heatโ€”focusing on keeping the top few inches of soil consistently moist until roots develop. Once established, transition to the deeper, less frequent watering schedule appropriate for mature plants. The Soil-Water Connection Your watering schedule is only as effective as your soil mix allows it to be. A dense, compacted soil will pool water at the surface and remain dry in the root zone. A properly mixed, well-draining but moisture-retentive soilโ€”rich in compost and balanced organic matterโ€”absorbs water evenly and holds it at the root level where plants need it most. Investing in good soil is the single most effective way to reduce summer watering labor. Frequently Asked Questions FAQ Q1: How do I know if my raised garden bed soil is holding enough moisture in summer? The most reliable method is the finger test: push your index finger two inches into the soil in the center of the bed. If it feels dry, water immediately. If it feels cool and barely damp, water within a few hours. You can also use an inexpensive soil moisture meter, which gives a numeric reading and removes guesswork. Check at the same time each morning for consistency, and adjust your schedule based on what you find rather than following a rigid fixed routine regardless of conditions. Q2: Is it safe to use a timer-based drip irrigation system for raised garden beds in summer? Yes, and for most gardeners managing raised beds through a hot summer, an automated drip irrigation timer is one of the best investments they can make. Set the timer to run in the early morning (5โ€“7 a.m.) for 20โ€“30 minutes. This delivers water directly to the root zone, minimizes evaporation loss, and frees you from daily manual watering. Pair the system with regular soil checks to ensure the runtime is appropriate for your specific bed size, soil mix, and current weather conditions. Q3: How much water does a raised garden bed actually need per day in summer? As a general guideline, most raised garden beds in hot weather (85ยฐF+) need approximately 1โ€“2 inches of water per week, with higher temperatures pushing toward the upper end. Translated to volume, an 8x4 ft raised bed needs roughly 4โ€“8 gallons of water per watering session when watering every other day. However, this varies based on bed depth, soil type, mulch coverage, and plant density. Rather than targeting a fixed number, use the soil moisture check method to guide actual watering decisions. Summary Keeping a raised garden bed thriving through the heat of summer isn't about watering moreโ€”it's about watering smarter. Three principles define a successful summer watering strategy: Water deeply and infrequently. Shallow, frequent watering creates shallow, vulnerable root systems. Deep watering every one to three days (adjusted for bed depth and temperature) builds roots that can access cool, moist soil and withstand heat stress far better. Time your watering precisely. Early morning wateringโ€”between 5 and 8 a.m.โ€”maximizes absorption, minimizes evaporation, and keeps foliage dry overnight to reduce disease risk. This one change can dramatically improve your bed's summer performance. Mulch, monitor, and adjust. A 2โ€“3 inch mulch layer is your best passive tool for water retention and soil temperature management. Combined with regular moisture checks and a willingness to adapt your schedule during heat waves, mulching can reduce watering frequency and protect plants on the hottest days of summer. The quality of your raised garden bed matters too. A well-built, deep-profile galvanized steel bed from Anleolifeโ€”designed to last 20 yearsโ€”gives you the structural foundation to implement these watering strategies effectively, with adequate soil volume, proper drainage, and the thermal properties to keep roots productive through summer and beyond. Start with the basics, refine as you observe your plants, and enjoy the satisfaction of a summer garden that not only survives the heatโ€”but thrives in it. Ready to Build a Garden That Handles Summer Like a Pro? Anleolife brings your ideal garden within reach, with products available across a nationwide U.S. warehouse networkโ€”strategically located in California, Texas, Florida, New York, Illinois, and Washingtonโ€”ensuring delivery within 3โ€“8 business days so your garden upgrade plans never have to wait. Shop on the platforms you trust: Amazon, Walmart, Home Depot, Lowe's, Wayfair, and directly at Anleolife.com, with consistent quality assurance and after-sales support wherever you buy. Anleolife's three core product scenarios have everything you need: Planting: Galvanized steel raised garden beds, rust-resistant raised garden beds, heavy-duty raised garden beds, modular beds, and round beds in a wide range of sizesโ€”from compact 4x1.5 ft waist-high beds to expansive 12x3 ft and 10x3 ft configurations Raising: Chicken coops and rabbit hutches for a complete backyard homestead experience Beautification: Decorative accessories and pathway systems that transform your garden from functional to beautiful We understand that an ideal garden isn't built overnightโ€”it's grown gradually, season by season. Anleolife's modular product design allows flexible expansion based on your needs, from your first raised bed to a fully integrated planting-and-raising ecosystem. We grow with you every step of the way. References University of California Cooperative Extension. "Watering Home Gardens and Landscape Plants."https://ucanr.edu/sites/UrbanHort/Water_Use_of_Turfgrass_and_Landscape_Plants/ U.S. Environmental Protection Agency (EPA). "WaterSense: Water-Efficient Landscaping."https://www.epa.gov/watersense/landscaping-tips Penn State Extension. "Irrigation Scheduling for Gardens."https://extension.psu.edu/irrigation-scheduling Colorado State University Extension. "Raised Bed Gardening."https://extension.colostate.edu/topic-areas/yard-garden/raised-bed-gardening-7-238/ National Gardening Association. "Watering Your Garden."https://garden.org/learn/articles/view/3565/ Note: Standards and recommendations may be updated. Please check the latest official documents or consult a local extension service professional for the most current guidance. About Anleolife Anleolife is a leading outdoor garden solutions provider in North America, dedicated to offering a full-scenario product ecosystem for home gardening enthusiasts, covering planting, raising, and garden beautification. Since its founding, we have upheld our brand mission, "Made for Garden Life," continuously innovating products and optimizing services to help hundreds of thousands of users upgrade their gardens, reconnect with nature, and enjoy a better garden lifestyle.
Trellis Systems for Raised Garden Beds: Maximizing Vertical Growing Space This Summer

Trellis Systems for Raised Garden Beds: Maximizing Vertical Growing Space This Summer

on May 13 2026
ALT: Vertical trellis system installed on a galvanized steel raised garden bed maximizing summer growing space with climbing vegetables Why Trellis Systems Are the Secret to a Thriving Summer Raised Garden Bed Key Conclusion: Adding a trellis system to your raised garden bed is one of the most impactful upgrades you can make this summer. By training climbing vegetables and flowering vines to grow vertically, you reclaim precious horizontal space, improve airflow to reduce disease, and dramatically increase your harvest per square foot. Whether you're growing tomatoes, cucumbers, pole beans, or ornamental climbers, vertical growing transforms even the most compact garden into a high-producing, visually stunning outdoor space. Summer is the season when every square inch of your garden matters. For gardeners working with raised beds, the challenge isn't just what to grow โ€” it's how to grow more in the space you already have. That's where vertical growing with trellis systems becomes a game-changer. A well-designed trellis does three things beautifully: it organizes your garden for better plant health, maximizes your yield without expanding your footprint, and adds architectural elegance to your outdoor space. Whether you're a seasoned grower or just setting up your first raised bed, understanding how to integrate trellis systems into your garden setup will help you get dramatically more out of this growing season. Who Should Use a Trellis System with Their Raised Garden Bed? โœ… Applicable Scenarios: Urban micro-gardeners and balcony growers who need to maximize limited horizontal space by growing vertically Home growers cultivating vining crops like tomatoes, cucumbers, squash, beans, peas, or climbing flowers such as morning glories and sweet peas Families with raised garden beds looking to improve plant airflow, reduce fungal disease, and make harvesting easier and more ergonomic Empty nesters and retirees who want a low-maintenance, organized growing system that reduces bending and keeps the garden tidy Eco-conscious gardeners interested in maximizing productivity without expanding their garden's physical footprint โŒ Not Applicable/Cautions: Gardeners growing only low-lying crops such as root vegetables (carrots, beets, radishes), lettuce, or herbs โ€” these plants don't benefit from trellis support and prefer open canopy space Beds located in extremely high-wind areas without proper trellis anchoring โ€” unsecured trellis structures in strong winds can damage plants or tip over raised beds; always anchor trellises securely into the ground or bed walls Very shallow raised beds that may not provide sufficient structural integrity for heavy trellis loads without additional anchoring solutions The Case for Vertical Growing: Why Summer Is the Perfect Time to Start Summer gardening comes with a unique set of challenges. Heat intensifies, growth accelerates, and vining plants that seemed manageable in spring quickly sprawl into tangles that shade out neighbors, trap moisture, and become havens for pests and disease. Traditional flat growing simply doesn't serve ambitious gardeners well โ€” especially those working in raised beds. Across North America, home gardening has surged in popularity in recent years. Millions of households now maintain backyard or patio gardens, and the demand for space-efficient, high-yield growing solutions has never been higher. Vertical gardening with trellis systems has emerged as one of the most-searched and most-adopted techniques for raised bed gardeners precisely because it solves so many problems at once. When you train plants to grow upward, you immediately free up horizontal surface area for additional crops. A single 8x4 ft raised garden bed, for example, becomes far more productive when the back portion is dedicated to vertical climbers on a trellis, while the front portion continues to host compact ground-level plants. This layered approach โ€” often called "stacking" or "companion planting in vertical layers" โ€” is one of the most efficient ways to garden. If you're still deciding on the right raised bed setup for your household, How to Build a Raised Garden Bed Layout for Families with Limited Backyard Space is an excellent starting point that covers space planning in detail. And if you're weighing your investment options, How Much Should You Spend on a Raised Garden Bed This Season? provides helpful budget guidance tailored to different household needs. Beyond productivity, vertical growing brings genuine aesthetic value. A trellis draped in lush climbing beans or flowering vines transforms a utilitarian garden bed into a beautiful living structure โ€” the kind that makes your outdoor space feel intentional and curated rather than utilitarian. Setting Up Your Trellis System: From Planning to First Training Three-Step Quick Start for Trellis Integration Step 1: Choose the Right Trellis Style for Your Crops and Bed Size Before purchasing or building a trellis, identify which plants you're growing and how much support they'll need. Lightweight crops like peas and morning glories thrive on simple twine or netting stretched between vertical posts. Medium climbers like cucumbers and pole beans do well with wire panel trellises or bamboo A-frames. Heavy producers like indeterminate tomatoes or squash need robust vertical support โ€” cattle panels or heavy-gauge wire attached to sturdy posts set 18โ€“24 inches into the ground. Plan this step before planting season begins, ideally spending 30โ€“60 minutes sketching your bed layout. Step 2: Install Your Trellis Structure Before or at Planting Time This is a mistake many gardeners make โ€” installing the trellis after plants have already begun growing. Driving posts into soil near established roots disturbs them and can cause damage. Instead, set your trellis posts at the same time you prepare your bed for the season. For raised garden beds, you have two primary installation options: anchor posts directly into the ground through the bed's open base, or secure them to the exterior walls of the bed using trellis brackets or clamps. Both approaches are effective; the right choice depends on your bed's height and wall material. Step 3: Train Your Plants Early and Consistently Once seedlings are a few inches tall and beginning to send out tendrils or lateral stems, begin gently guiding them toward the trellis. Use soft plant ties, jute twine, or silicone clips โ€” never wire or hard ties that can cut into stems. Check your plants every 3โ€“5 days during peak summer growth, as vines can advance several inches in a single day. Consistent early training prevents the plant from spreading horizontally, which keeps the bed organized and ensures the trellis does its job effectively throughout the season. Comparing the Most Popular Trellis Systems for Raised Garden Beds There's no single "best" trellis โ€” the right system depends on your crops, your bed dimensions, your budget, and how much effort you want to put into setup and seasonal teardown. Here's a practical comparison of the most widely used options among raised bed gardeners: Comparison Dimension A-Frame / Bamboo Trellis Wire Panel Trellis Netting / String Trellis Best Crops Cucumbers, beans, peas Tomatoes, squash, heavy vines Peas, lightweight climbers, flowers Structural Strength Moderate High Low to moderate Cost Low to moderate Moderate to high Very low Installation Complexity Simple (no tools needed) Moderate (posts required) Very simple Wind Resistance Moderate High (when anchored) Low (needs stable anchors) Reusability High (bamboo may degrade) Very high Moderate (netting can tangle) Aesthetic Appeal Rustic / natural look Industrial / functional Clean / minimalist Ideal Bed Size Smaller beds (4x4 or 6x3) Larger beds (8x4 or 12x3) Any size For gardeners using Anleolife's lineup of galvanized steel raised garden beds โ€” available in sizes ranging from compact 4x4 footprints to expansive 12x3 and 8x4 configurations โ€” wire panel trellises tend to be an excellent match for larger beds, while A-frame systems pair beautifully with mid-size beds. The structural walls of galvanized steel beds also make it easy to attach trellis hardware directly to the bed panels, providing a clean, integrated look. Detailed Trellis Setup Guide: Techniques, Tips, and Plant-Specific Strategies Matching Trellis Height to Your Raised Bed One of the most frequently overlooked details in trellis planning is accounting for the height of your raised bed itself. Anleolife offers raised garden beds ranging from 18-inch standard height all the way to 35-inch waist-high models. A trellis installed on an 18-inch bed that reaches 5 feet above the soil surface will sit approximately 6.5 feet off the ground โ€” which is manageable for most gardeners. On a 30-inch or 35-inch tall waist-high bed, that same trellis will be well over 7 feet from the ground, which may be too high for comfortable harvesting. As a practical rule: aim for your total growing height (bed height + trellis height above soil) to remain within comfortable arm's reach โ€” typically no more than 6.5 to 7 feet for most adults. This makes harvesting, pruning, and training genuinely enjoyable rather than a ladder-requiring chore. The Best Crops for Vertical Raised Bed Growing Not all summer vegetables are created equal when it comes to vertical growing. Here's a breakdown of the most rewarding climbers: Indeterminate Tomatoes are the classic trellis crop. They continue growing all season long and can reach heights of 6 feet or more. Use a sturdy vertical stake, wire cage, or Florida weave system with wooden posts and twine. Prune lateral shoots (suckers) to direct energy into the main vine and fruit production. Cucumbers are extremely well-suited to vertical growing โ€” in fact, cucumbers grown vertically are often straighter, cleaner, and easier to harvest than those that sprawl on the ground. Use a wire panel or netting trellis and let the tendrils naturally grip as the plant climbs. Cucumbers grown vertically also tend to have fewer slug and soil-borne disease issues. Pole Beans are rapid climbers that can easily reach 6โ€“8 feet in a single season. They require minimal maintenance once established โ€” just provide a trellis or string network at planting time and let the plant do its work. Pole beans also fix nitrogen in the soil, making them excellent companion plants. Sugar Snap and Garden Peas are cool-season crops that benefit enormously from vertical support. Even in summer, peas grown on the shaded north side of a trellis can extend their productive season. Use netting or twine between posts for an easy, effective setup. Squash and Melons require more planning. Their fruits are heavy, and if you're growing them vertically, you'll need to support each individual fruit with a fabric sling or net to prevent stem breakage. This is a more advanced technique but incredibly rewarding for gardeners with limited horizontal space. How to Fill Your Raised Bed to Support Healthy Vertical Growth Vertical growing places higher demands on your soil because the plants you're training upward are often heavy feeders. A high-quality soil mix is essential. Many experienced raised bed gardeners follow the Mel's Mix approach โ€” a combination of compost, vermiculite, and peat moss or coconut coir โ€” which provides excellent drainage and nutrient density. You can learn more about building the ideal soil foundation in What Is the Best Soil Mix for Raised Garden Beds? (The Mel's Mix Guide). For eco-conscious gardeners wondering how to fill raised beds with recycled materials, there are several excellent options. Wood chips, straw, cardboard (as a base layer), compost from kitchen scraps, aged wood shavings, and leaf mold can all contribute to a healthy, living soil ecosystem. These materials improve drainage, add organic matter as they break down, and reduce the cost of filling large raised beds. Avoid using treated lumber scraps, synthetic materials, or anything that may leach chemicals into your growing medium. Seasonal Care and Trellis Maintenance Through Summer A trellis system requires some attention through the growing season to stay effective: Check ties weekly: Plant stems expand as they grow, and ties that were loose in June can become constrictive by August. Adjust or replace them regularly. Remove spent plant material promptly: Old leaves, diseased tissue, and finished fruits should be removed to keep the trellis clear and maintain airflow. Inspect structural integrity after storms: Heavy summer rain and wind can loosen posts or damage netting. A quick post-storm check prevents larger problems. Plan for end-of-season cleanup: Wire panel trellises can be cleaned, dried, and stored for reuse. Netting should be inspected for tangles and tears before being put away. Why Galvanized Steel Beds Are Ideal for Trellis Integration The structural integrity of your raised bed matters more than most gardeners realize when it comes to trellis systems. Beds made from flimsy plastic or untreated wood can flex, warp, or degrade โ€” making it difficult to securely attach trellis hardware to the walls. Anleolife's galvanized steel raised garden beds are built for exactly this kind of integration. The robust steel panels provide solid anchoring points for trellis brackets and posts, and the beds are engineered for a lifespan of up to 20 years โ€” meaning your investment in both the bed and the trellis system will pay dividends season after season. Whether you're working with an 18-inch standard height bed or a 30-inch extra tall model, the structural consistency of galvanized steel makes trellis attachment clean, secure, and durable. For gardeners new to metal raised beds, the Galvanized Steel Raised Garden Beds: A Beginner's Complete Buying Guide is an outstanding resource that covers material selection, setup, and long-term care in accessible detail. ALT: Anleolife galvanized steel raised garden bed with trellis system growing vertical cucumbers and tomatoes for maximum summer harvest space Advanced Trellis Techniques: Going Beyond the Basics Creating a Garden Room with Trellis Structures One underused application of trellises in raised bed gardens is using them to create visual dividers or "garden rooms" โ€” a technique beloved by landscape designers and increasingly popular among home gardeners. By positioning a tall trellis along the back edge of two adjacent raised beds and training flowering vines across both, you can create a living wall that provides privacy, blocks wind, and adds dramatic visual beauty to your garden space. This approach works particularly well with climbing roses, flowering beans, or ornamental sweet peas on a shared trellis structure between two Anleolife beds placed in a row. Handling Heavy Fruit on Vertical Trellises When growing squash, melons, or large beefsteak tomatoes vertically, each fruit needs individual support once it reaches meaningful size. Old pantyhose, mesh produce bags, or purpose-made fruit slings can be tied to the trellis to cradle each fruit and distribute its weight. This prevents the vine stem from breaking under the load and allows the plant to redirect energy into continued growth and production. Common Misconceptions About Trellis Systems Misconception 1: "Trellises are only for small gardens." Not true โ€” commercial growers use vertical growing systems at scale because of the efficiency gains. In a raised bed context, trellises are equally valuable whether you have one 4x4 bed or a full row of 12x3 beds. Misconception 2: "Any wood post will do for trellis support." Untreated wood posts set into moist soil will rot within a season or two. Use cedar, black locust, or metal posts for longevity, or choose purpose-built trellis hardware designed for garden bed integration. Misconception 3: "Once installed, a trellis runs itself." Trellis systems require consistent plant training, especially in the first half of the season. Plants that aren't guided regularly will find their own horizontal path, defeating the purpose of the vertical structure. Frequently Asked Questions FAQ Q1: How do I attach a trellis to a metal raised garden bed without damaging the panels? The most common and effective approach is to use purpose-made trellis bracket clamps that grip the top edge of the bed's steel panels without drilling or welding. These clamps hold vertical posts securely while remaining fully removable at the end of the season. Alternatively, you can drive stakes directly into the ground just outside the bed wall and attach trellis netting or wire panels to those external posts. For beds like those in Anleolife's galvanized steel lineup, the consistent panel thickness makes clamp-style brackets a reliable and non-destructive option. Q2: Are wire panel trellises safe to use with galvanized steel raised garden beds near edible plants? Yes โ€” standard galvanized steel and coated wire panels used for garden trellises are generally considered safe for food production when they meet normal consumer product standards. The concern about zinc leaching from galvanized materials into soil is considered minimal at normal gardening temperatures according to current horticultural guidance. Anleolife's galvanized steel raised garden beds are specifically designed for vegetable growing, and pairing them with appropriate wire trellis panels is a well-established, widely practiced combination among food gardeners across North America. Q3: How long does a good trellis system last, and is it worth the investment? A quality wire panel trellis with metal posts can last 10โ€“15 years or more with proper seasonal care โ€” cleaning, drying before storage, and inspecting for rust annually. Paired with an Anleolife galvanized steel raised garden bed rated for a 20-year lifespan, the combined system becomes a long-term garden infrastructure investment rather than a seasonal expense. Even budget-friendly options like bamboo A-frames last 3โ€“5 seasons if stored dry during winter. Given the significant increases in yield and plant health that vertical growing delivers, most gardeners find that any quality trellis system pays for itself within a single growing season. Summary Trellis systems are one of the most practical and rewarding upgrades you can bring to your raised garden bed setup this summer. The core value proposition is straightforward: First, vertical growing dramatically increases your productive yield per square foot โ€” giving compact beds the productivity of a much larger growing space without requiring any additional ground area. Second, proper trellising improves plant health by enhancing airflow, reducing soil-borne disease pressure, and making regular care like watering, pruning, and harvesting significantly easier and more enjoyable. Third, a well-designed trellis system transforms your raised bed garden into a visually compelling outdoor space โ€” one that reflects the thoughtful, intentional lifestyle that so many home gardeners are pursuing. The next steps are simple: assess which climbing crops you're growing this season, choose a trellis style matched to those crops and your bed dimensions, and install your structure before or at planting time. If you're still building out your raised bed setup, explore Anleolife's full lineup of galvanized steel and rust-resistant raised garden beds โ€” each one engineered to support not just your plants, but your entire garden vision for years to come. Ready to Grow Up? Let Anleolife Help You Build the Garden You Deserve Nationwide U.S. warehouse network: Strategically located in California, Texas, Florida, New York, Illinois, and Washington to ensure delivery within 3โ€“8 business days โ€” so your garden upgrade plans never have to wait. Multi-channel sales network: Products are available on major e-commerce platforms including Amazon, Walmart, Home Depot, Lowe's, and Wayfair, as well as the official website Anleolife.com, providing consistent quality assurance and after-sales service wherever you prefer to shop. Three core growing scenarios: Planting (metal raised garden beds, soil systems), Raising (chicken coops, rabbit hutches), and Beautification (decorative accessories, pathway systems) โ€” meeting your complete needs from functionality to aesthetics. We understand that an ideal garden isn't built overnight โ€” it's grown gradually, season by season. Anleolife's modular product design allows flexible expansion based on your evolving needs, from your first raised bed to a fully integrated planting-and-raising ecosystem. We grow with you, every step of the way. References University of California Agriculture and Natural Resources. "Vegetable Research & Information Center: Growing Tomatoes in the Home Garden".https://ucanr.edu/sites/anrstaff/files/215711.pdf Penn State Extension. "Trellising Vegetables in the Home Garden".https://extension.psu.edu/trellising-vegetables-in-the-home-garden National Gardening Association. "Vertical Gardening: Growing Up".https://garden.org/learn/articles/view/3785/ USDA National Institute of Food and Agriculture. "Community and School Garden Resources".https://www.nifa.usda.gov/topics/community-food-systems Oregon State University Extension Service. "Raised Bed Gardening".https://extension.oregonstate.edu/gardening/techniques/raised-bed-gardening Note: Horticultural guidelines and product standards may be updated over time. Please consult the latest official documents or a qualified garden advisor for the most current recommendations. About Anleolife Anleolife is a leading outdoor garden solutions provider in North America, dedicated to offering a full-scenario product ecosystem for home gardening enthusiasts, covering planting, raising, and garden beautification. Since its founding, we have upheld our brand mission, "Made for Garden Life," continuously innovating products and optimizing services to help hundreds of thousands of users upgrade their gardens, reconnect with nature, and enjoy a better garden lifestyle.
Companion Planting in Raised Garden Beds: What to Grow Together This Season

Companion Planting in Raised Garden Beds: What to Grow Together This Season

on May 13 2026
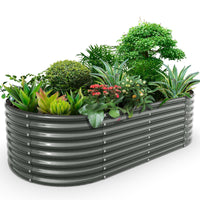
ALT: Companion planting in raised garden beds with tomatoes, basil, and marigolds growing together this season Why Companion Planting in Raised Garden Beds Is a Game-Changer This Season Key Conclusion: Companion planting in raised garden beds is one of the most effective strategies home gardeners can use to maximize yields, deter pests naturally, and improve soil health โ€” all within a compact, controlled growing environment. By thoughtfully pairing plants like tomatoes with basil, beans with corn, or marigolds with vegetables, you create a self-supporting ecosystem right in your backyard. Whether you're working with top rated raised planters for vegetables or a sprawling metal bed setup, the right plant partnerships can transform your growing season from ordinary to exceptional. Companion planting has been practiced for centuries โ€” long before the term was coined. Indigenous farming traditions like the "Three Sisters" (corn, beans, and squash planted together) demonstrated that plants can support one another in profound ways. Fast-forward to today, and this time-honored technique has found a perfect modern home: the raised garden bed. Raised beds give you unparalleled control over soil composition, drainage, and spacing, which makes companion planting not just possible but highly efficient. You can arrange plant combinations with precision, rotate crops season after season, and manage pests with minimal intervention. For families looking to grow healthier food, reduce chemical inputs, and make the most of limited backyard space, companion planting in a raised bed environment is simply one of the smartest moves you can make. Who Should Use This Companion Planting Guide โœ… Applicable Scenarios: Home gardeners growing vegetables, herbs, and flowers in metal or galvanized raised garden beds Urban micro-gardeners working with compact spaces who want to maximize every square foot Eco-conscious growers looking to reduce pesticide use through natural pest deterrence Empty nesters and retirees who want a low-maintenance, high-reward garden system Beginners setting up their first raised beds and unsure which plants to pair together โŒ Not Applicable/Cautions: Gardeners planning to grow only a single crop type (monoculture) who rely on chemical inputs and do not wish to integrate companion plants Those with established in-ground garden layouts where spacing and soil conditions cannot be easily adjusted to accommodate companion plant needs Growers with highly shaded spaces where companion plant combinations requiring full sun may underperform The Science and Story Behind Companion Planting Companion planting is the intentional pairing of different plant species in close proximity to benefit one or both plants. The benefits are wide-ranging: some companions repel pests, others attract beneficial insects, some fix nitrogen into the soil, and others provide physical support or ground cover that retains moisture. The scientific community has increasingly validated what generations of farmers knew intuitively. Research from institutions like the Rodale Institute and the University of California Agriculture and Natural Resources program confirms that polyculture growing systems โ€” which companion planting embodies โ€” can reduce pest pressure, improve biodiversity, and increase yields compared to monocultures. For modern home gardeners, raised garden beds have become the preferred canvas for companion planting. According to the National Gardening Association, sales of vegetable gardening supplies including raised bed kits have surged in recent years, driven by a growing interest in food sovereignty, organic growing, and outdoor wellness. Families want to know where their food comes from, and they want to grow it sustainably. What makes raised beds especially well-suited for companion planting is their structure. Because you're working with a defined, bordered growing area, you can think of each bed as its own microecosystem. You control the soil (want to start with a great foundation? Check out What Is the Best Soil Mix for Raised Garden Beds? (The Mel's Mix Guide) for expert guidance), the spacing, the watering, and of course, which plants live together. Another advantage: raised beds warm up faster in spring, extending your growing season. That means you can start companion combinations earlier and harvest longer. For gardeners in colder climates or those dealing with urban heat islands, this seasonal flexibility is invaluable. And if you're wondering about the investment side of things โ€” before committing to a new bed setup, it's worth reading How Much Should You Spend on a Raised Garden Bed This Season? to make sure you're choosing the right size and material for your goals. Anleolife's galvanized steel and rust-resistant raised beds, built to last up to 20 years, offer a long-term platform for building your companion planting practice season after season. How to Practice Companion Planting in Raised Garden Beds: A Complete Seasonal Guide Three-Step Quick Start for Companion Planting Success Step 1: Map Your Bed and Identify Your Anchor Crops Before you plant anything, spend 20โ€“30 minutes sketching out your raised bed layout on paper. Identify your "anchor crops" โ€” the main vegetables or fruits you most want to harvest, such as tomatoes, peppers, cucumbers, or squash. These anchor crops will determine which companion plants you choose. Place tall crops like tomatoes or corn toward the north side of the bed so they don't shade smaller companions. This planning step prevents overcrowding and sets you up for a harmonious growing season. Step 2: Select Your Companion Pairs Using Proven Combinations Once you know your anchor crops, research their best companions (we cover the top combinations in detail below). Aim to include at least one pest deterrent (such as marigolds or nasturtiums), one pollinator attractor (such as borage or dill), and one soil helper (such as beans or clover) in each bed. Keep a small notebook or use a garden planning app to record what you plant where โ€” this will be invaluable for crop rotation next season. Step 3: Plant, Monitor, and Adjust Sow or transplant your companion plants at the same time as your main crops, or stagger them by 1โ€“2 weeks if you need the companions to be established before pest pressure arrives. Water consistently and watch for signs of stress or overcrowding. Don't be afraid to thin out companions that are competing too aggressively for space or light. Companion planting is a dynamic practice โ€” you'll refine your combinations with each passing season. Companion Planting Combinations: What Works, What Doesn't, and Why Understanding which plants thrive together โ€” and which actively hinder each other โ€” is the core skill of companion planting. Here's a comparison of the most popular combinations for raised bed gardeners, along with their key benefits and any cautions. Plant Pairing Primary Benefit Pest Deterrence Soil Benefit Cautions Tomato + Basil Flavor enhancement, possible pest confusion Repels aphids and thrips Minimal Keep basil trimmed to avoid flowering and bolting Beans + Corn + Squash (Three Sisters) Structural support, ground cover Squash deters pests with rough leaves Beans fix nitrogen Needs wider beds; best in 8x4 ft or larger Carrots + Onions Mutual pest deterrence Onions repel carrot fly; carrots deter onion fly Minimal Don't plant near beans or peas Roses/Vegetables + Marigolds Pollinator attraction, pest deterrence Repels nematodes, aphids, whiteflies Minimal Annual, must replant each season Cucumbers + Nasturtiums Trap cropping, pollinator support Nasturtiums lure aphids away from cucumbers Minimal Nasturtiums can spread; trim regularly Brassicas + Dill Beneficial insect habitat Dill attracts predatory wasps Minimal Do not let dill mature near carrots Peppers + Carrots Space efficiency Carrots loosen soil for pepper roots Mild aeration Plant carrots first to allow establishment Deep Dive: The Best Companion Plant Combinations for This Season Tomatoes and Basil: The Classic Duo The tomato and basil pairing is perhaps the most celebrated companion planting combination in the home gardening world, and for good reason. Basil is believed to repel thrips, aphids, and certain flies, while many gardeners report that basil planted near tomatoes enhances the flavor of the fruit โ€” though this claim remains more anecdotal than scientifically confirmed. What is confirmed is that basil's aromatic oils create a confusing olfactory environment for many pest insects. 
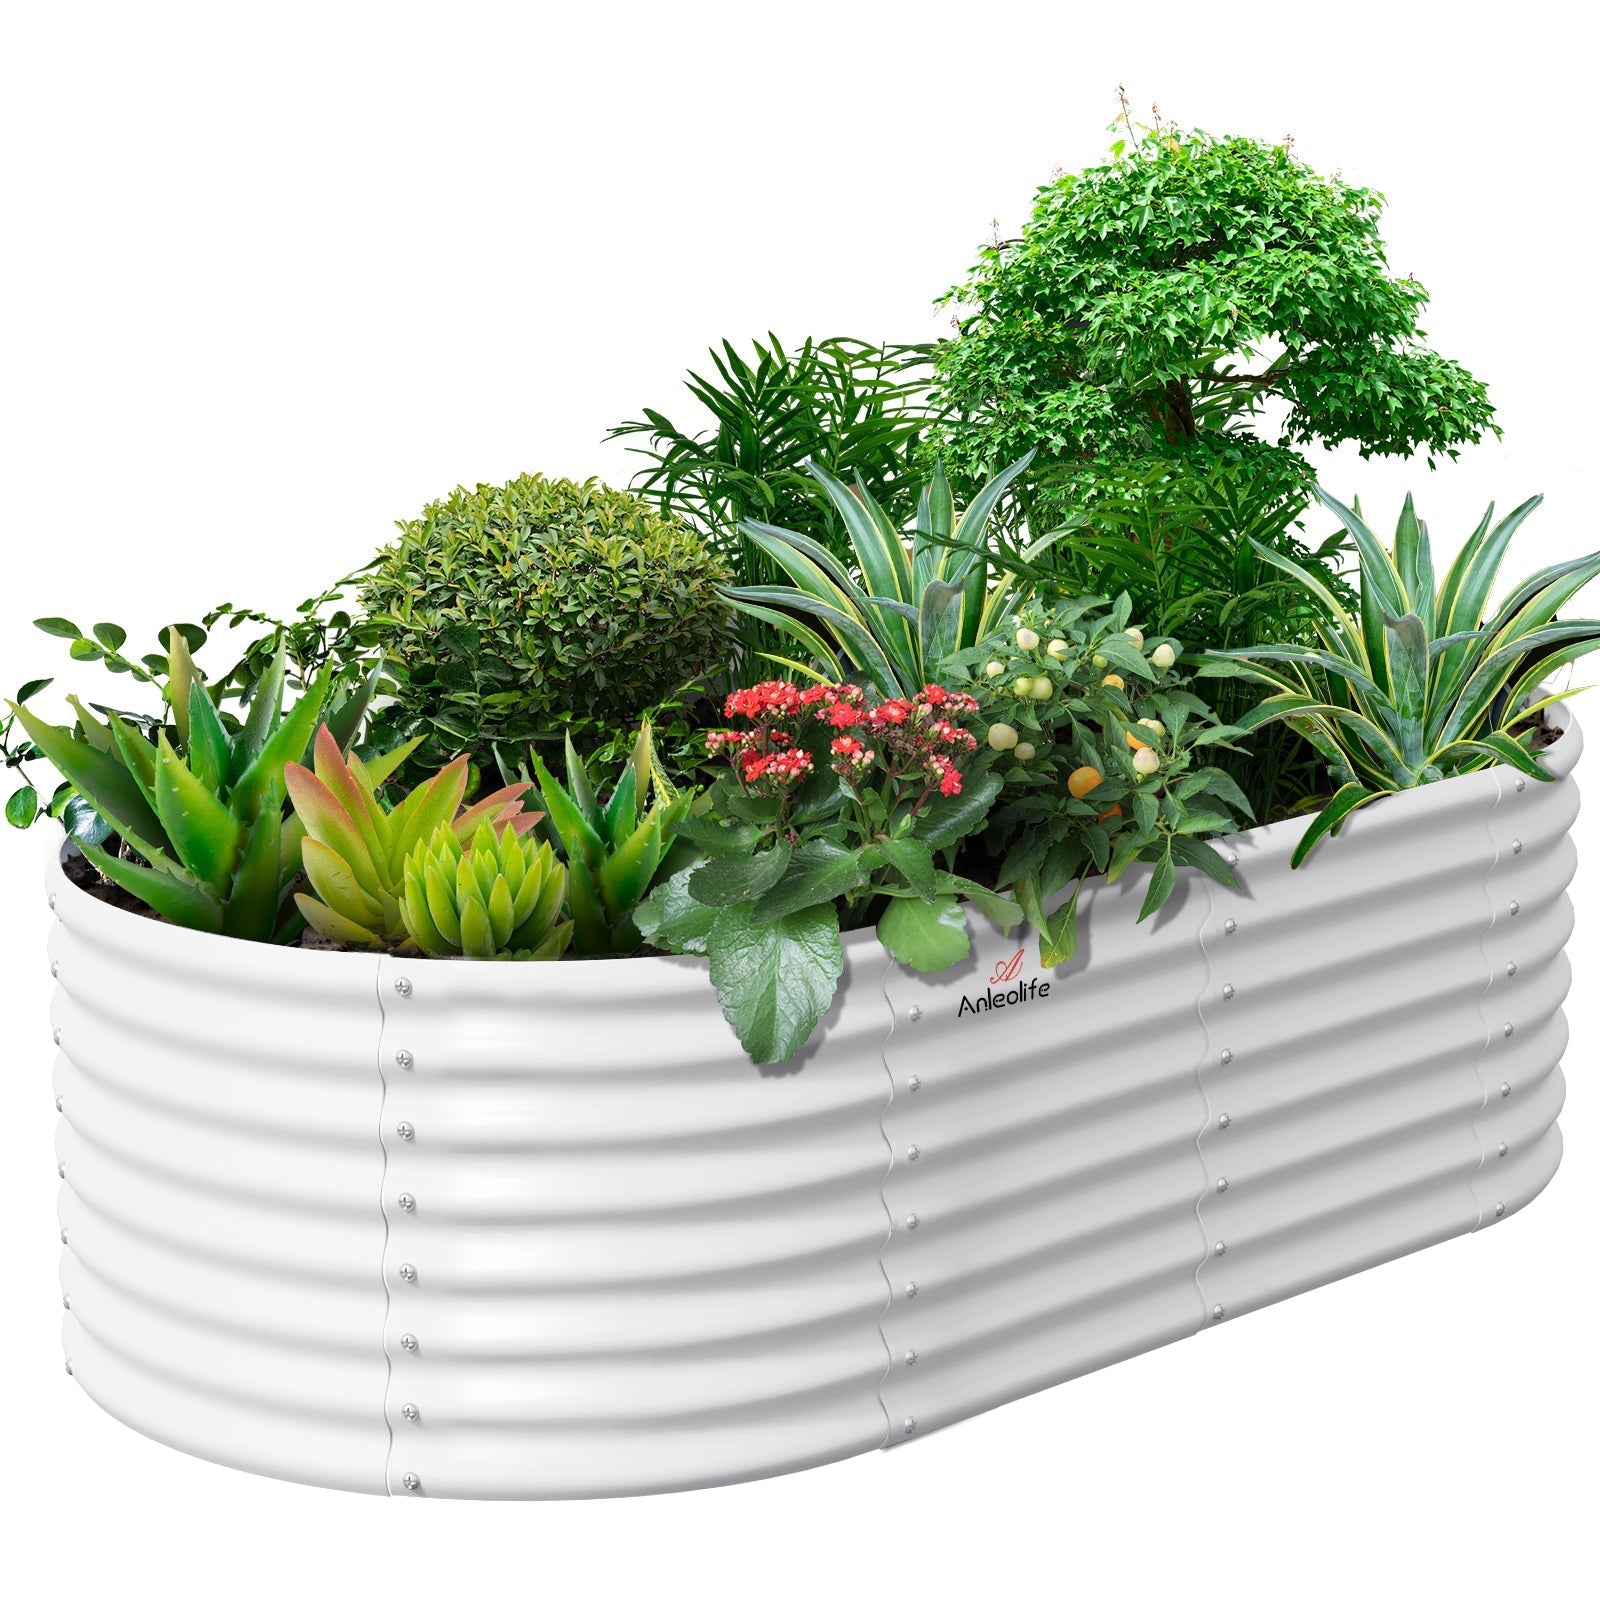
In a raised bed, plant basil at the base of tomato plants or at the front edge of the bed. A bed like the Anleolife 24" Extra Tall 8x4 ft Galvanized Steel Raised Garden Bed gives you generous vertical space for indeterminate tomato varieties while leaving plenty of room at the base for basil colonies. The taller walls also mean you retain soil moisture more effectively, benefiting both crops. Avoid planting basil near sage or rue, as these herbs can inhibit basil's growth. And if you're growing sweet basil specifically for culinary use, pinch back flower heads regularly to extend the harvest season. The Three Sisters: Corn, Beans, and Squash One of the most famous and functional companion planting systems in agricultural history, the Three Sisters method was developed by Indigenous peoples of North America. Here's how the system works: Corn provides a tall, sturdy stalk for pole beans to climb, eliminating the need for a separate trellis. Beans fix atmospheric nitrogen into the soil, feeding the corn and squash. Squash spreads wide, low leaves that act as living mulch, retaining soil moisture, suppressing weeds, and deterring pests with its rough, prickly texture. 
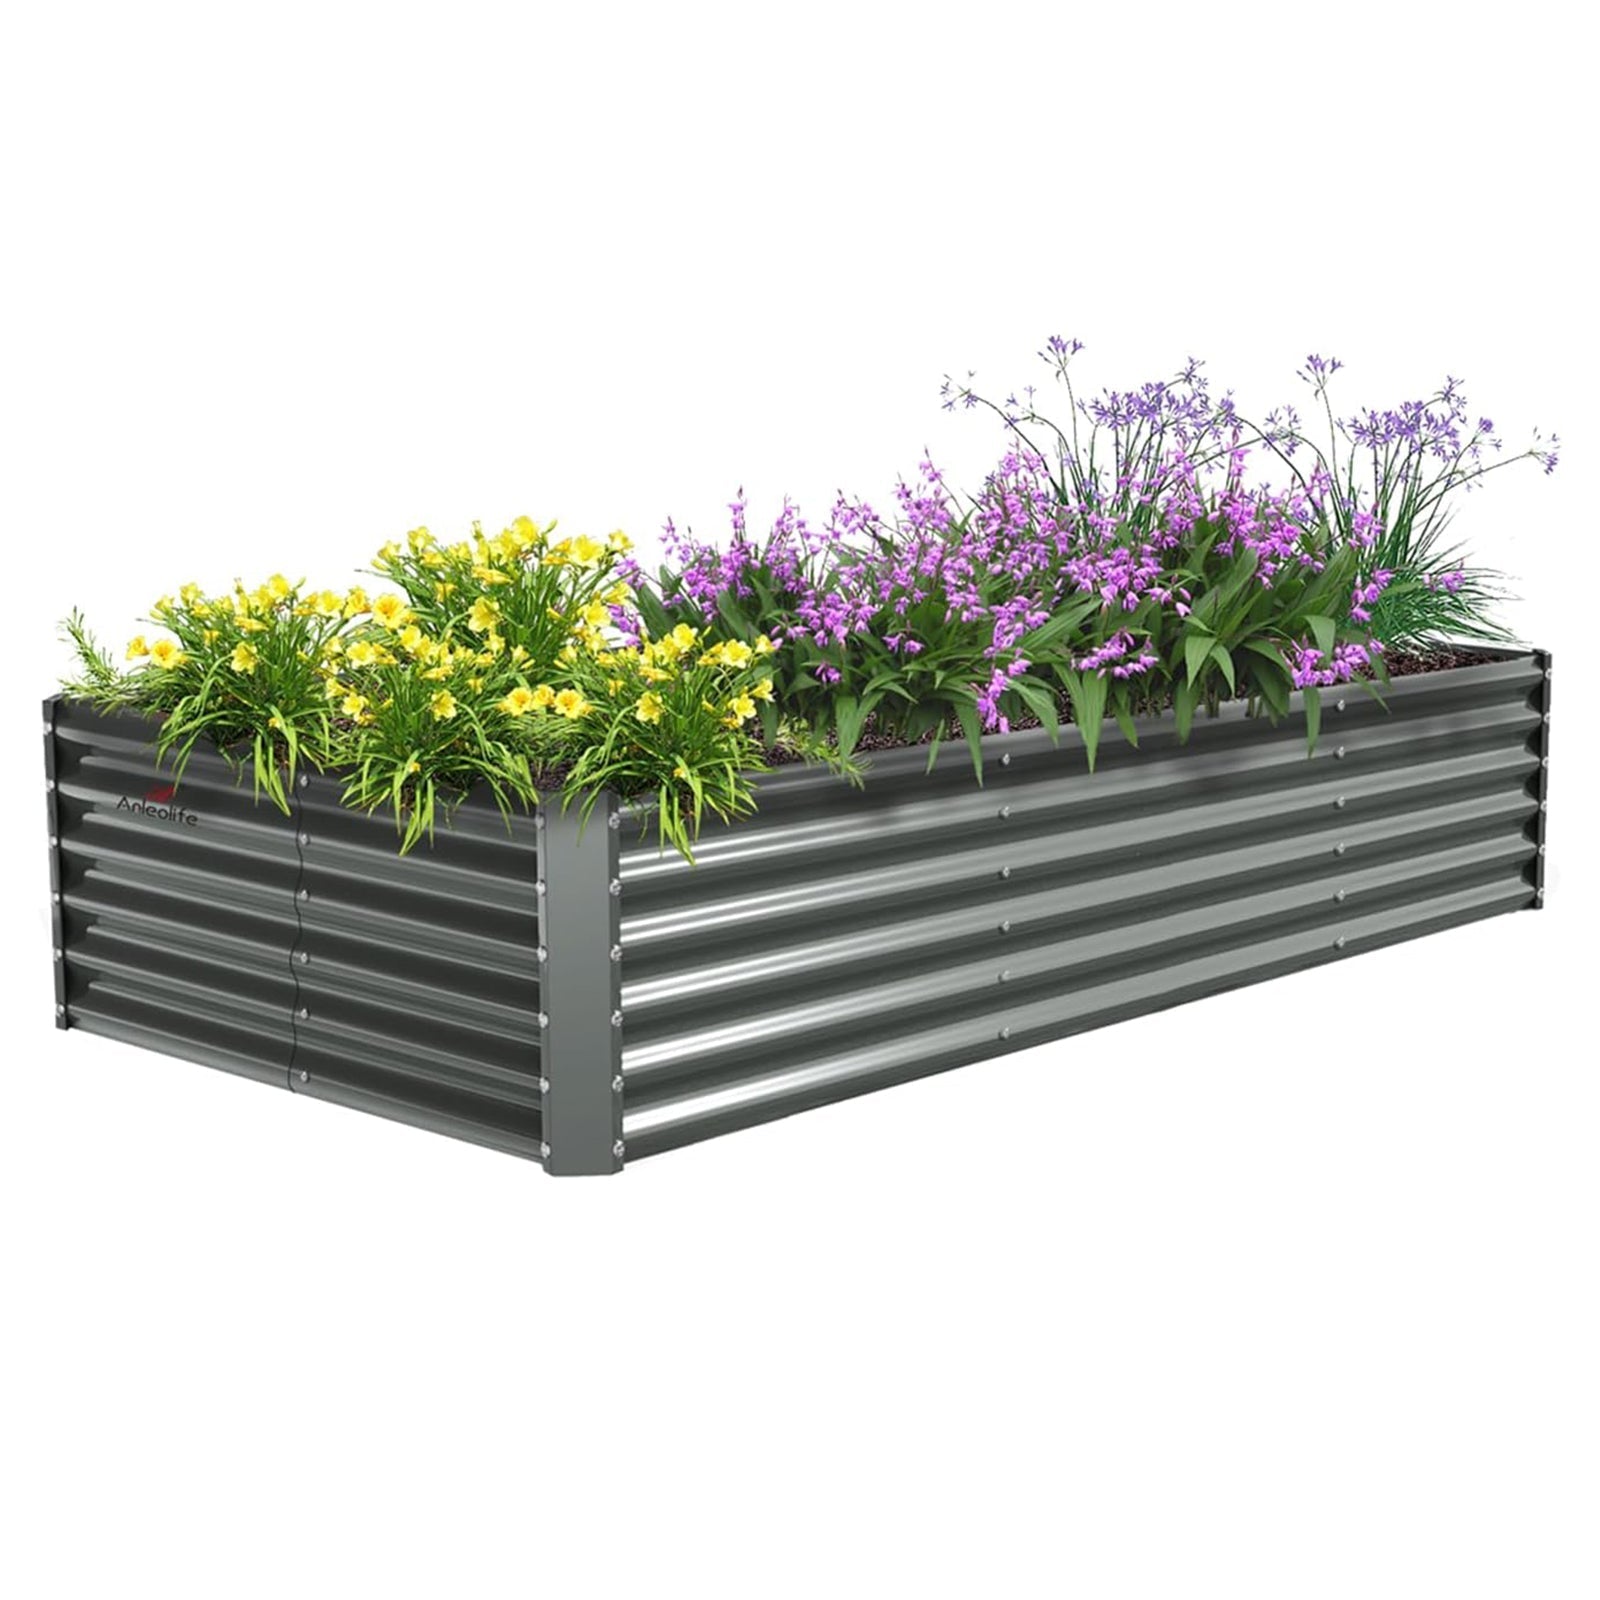
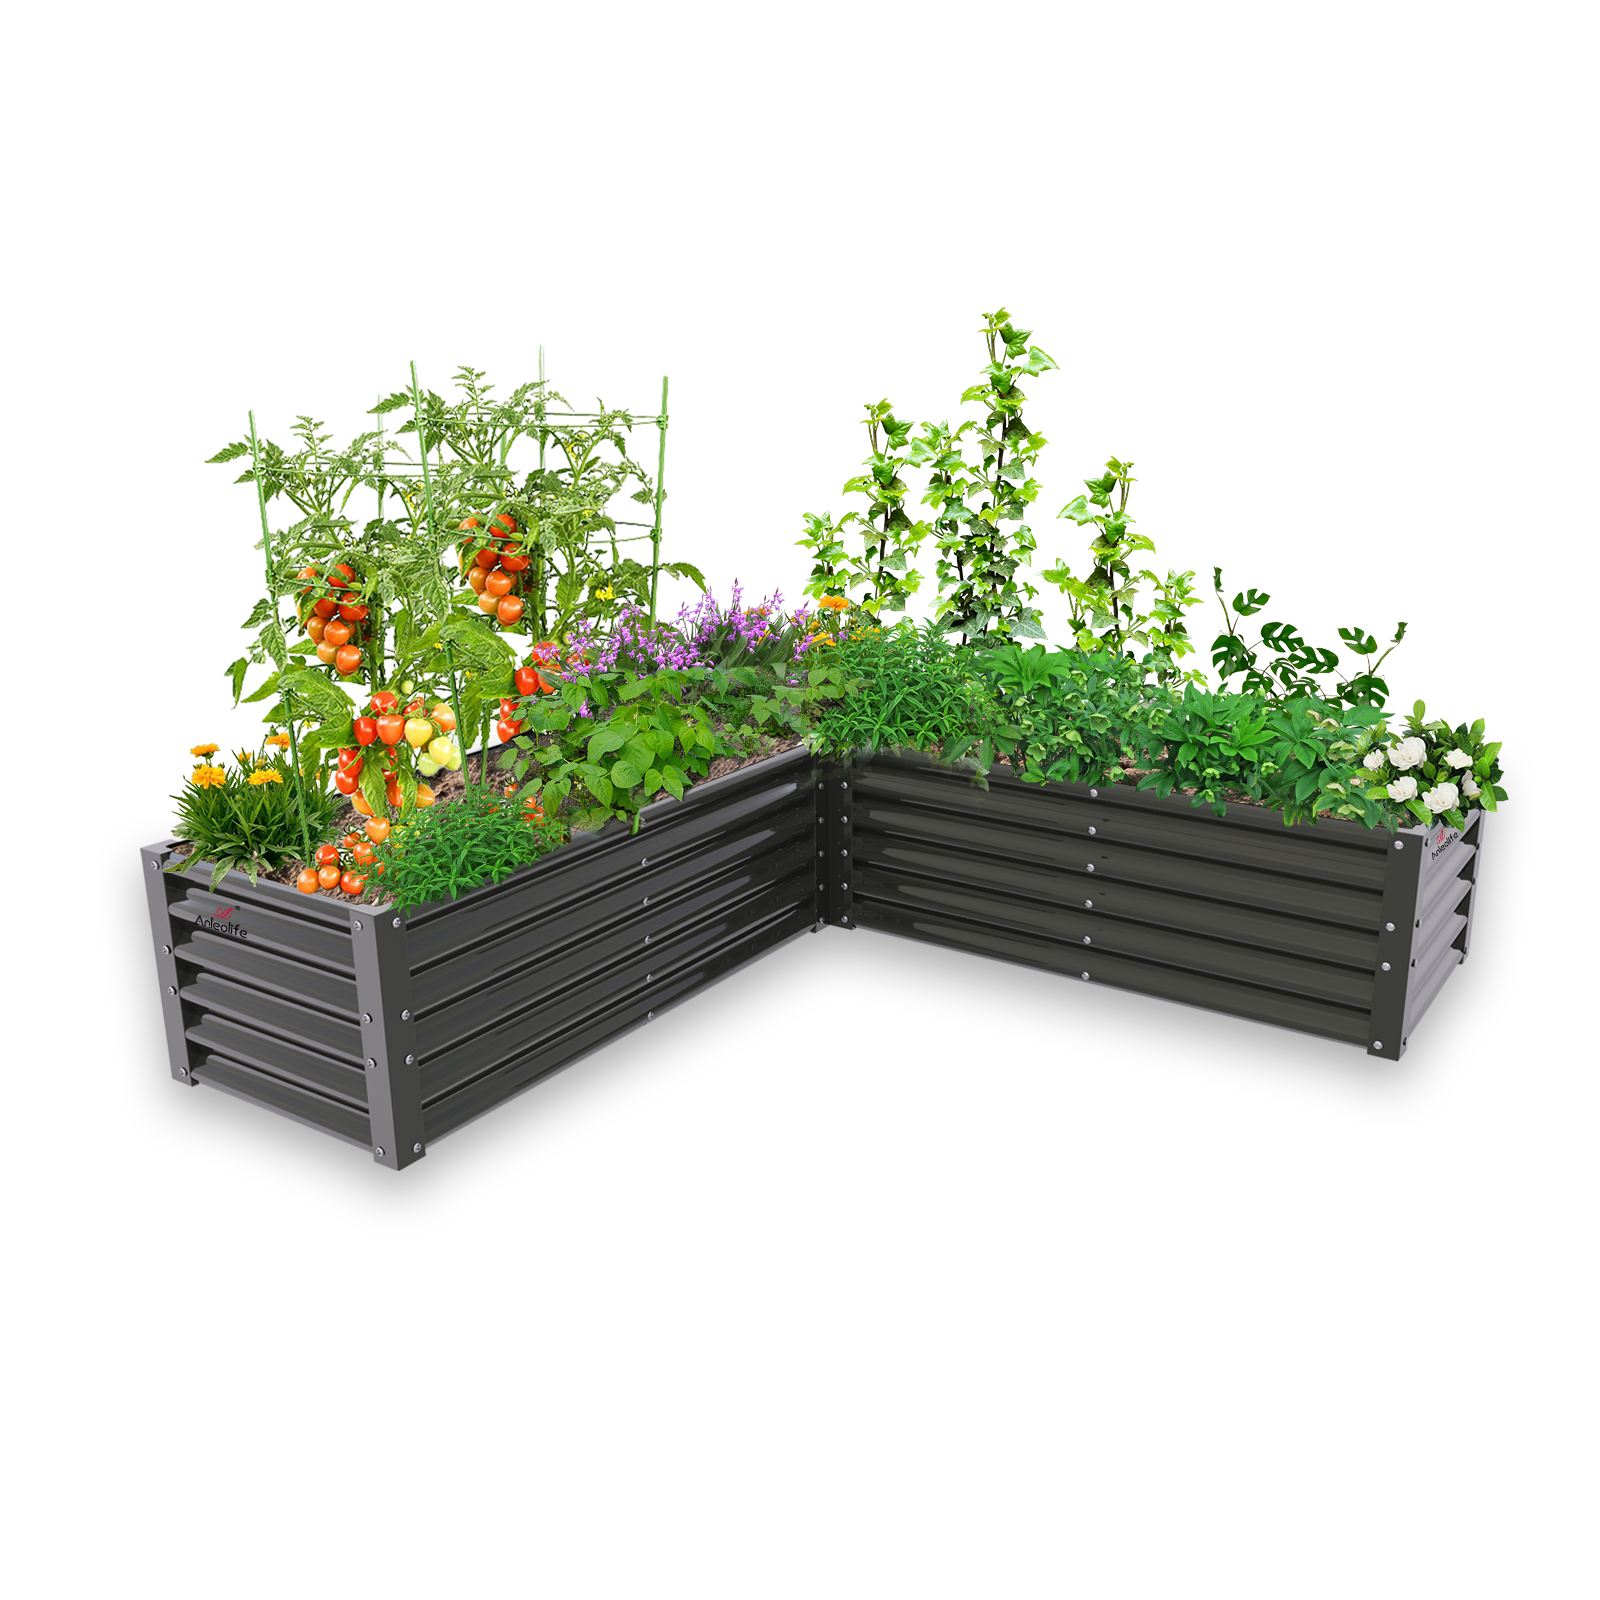
This system is ideally suited to a large raised bed. The Anleolife 30" Extra Tall 10x3 ft or 8x4 ft options provide the footprint and depth needed to support the Three Sisters' root systems and growth habits. The extra height also means roots can expand downward, reducing competition between species. Marigolds: The Universal Companion If there's one plant that deserves a spot in every raised garden bed, it's the marigold. French marigolds (Tagetes patula) are especially effective at repelling nematodes in the soil, while also deterring whiteflies, aphids, and even some beetles. Their bright blooms attract pollinators, including bees and butterflies, which benefit your entire vegetable garden. Plant marigolds as a border around the perimeter of your raised beds or interplant them throughout vegetable rows. They work particularly well alongside tomatoes, peppers, cucumbers, and brassicas. Best of all, marigolds are inexpensive, easy to grow from seed, and remarkably drought-tolerant once established. Carrots and Onions: Mutual Defenders Carrots and onions form an elegant pest-deterrence partnership. Onion flies are repelled by the scent of carrots, while carrot flies are confused and deterred by the strong aroma of onions. By interplanting these two root vegetables, you create a natural barrier against two of their primary pests without any chemical intervention. In a raised bed, sow onion sets between carrot rows. The shallow root systems of onions won't compete with the deeper-growing carrots, making this a genuinely space-efficient pairing โ€” ideal for urban micro-gardeners working with compact beds. Nasturtiums as Trap Crops for Cucumbers and Brassicas Nasturtiums are edible, beautiful, and strategically brilliant. They act as trap crops โ€” plants that attract pest insects away from your main crops. Aphids, in particular, are drawn to nasturtiums in preference to cucumbers, squash, and brassicas. By planting nasturtiums at the edges of your bed, you essentially create a sacrificial buffer zone that protects your vegetables. As a bonus, nasturtium flowers and leaves are entirely edible, with a peppery flavor that's wonderful in salads. They also attract predatory insects like ladybugs and lacewings, which will in turn prey on whatever aphids do remain in your garden. Brassicas and Dill: Pest Management Through Ecology Brassicas โ€” which include broccoli, cabbage, kale, Brussels sprouts, and cauliflower โ€” are notoriously vulnerable to caterpillars, cabbage worms, and aphids. Planting dill nearby serves two purposes: it attracts predatory wasps and other beneficial insects that prey on brassica pests, and its strong scent confuses pest insects searching for host plants. However, do not allow dill to fully mature near carrots, as mature dill can inhibit carrot growth. Harvest dill regularly to keep it in its productive vegetative state. Plants That Should NOT Share a Raised Bed Just as important as knowing what to grow together is knowing what to keep apart. Here are some key combinations to avoid: Tomatoes and fennel: Fennel is allelopathic to most vegetables, including tomatoes. Keep it in its own separate container or bed. Beans and onions/garlic: Alliums (onions, garlic, leeks) inhibit the growth of beans and peas. Brassicas and strawberries: These two compete aggressively and stunt each other's growth. Cucumbers and aromatic herbs like sage: Strong aromatic herbs can suppress cucumber growth. Matching Companion Planting to the Right Raised Bed Size The success of companion planting depends partly on having enough space for each plant combination to thrive. Here's how to think about bed size selection: 
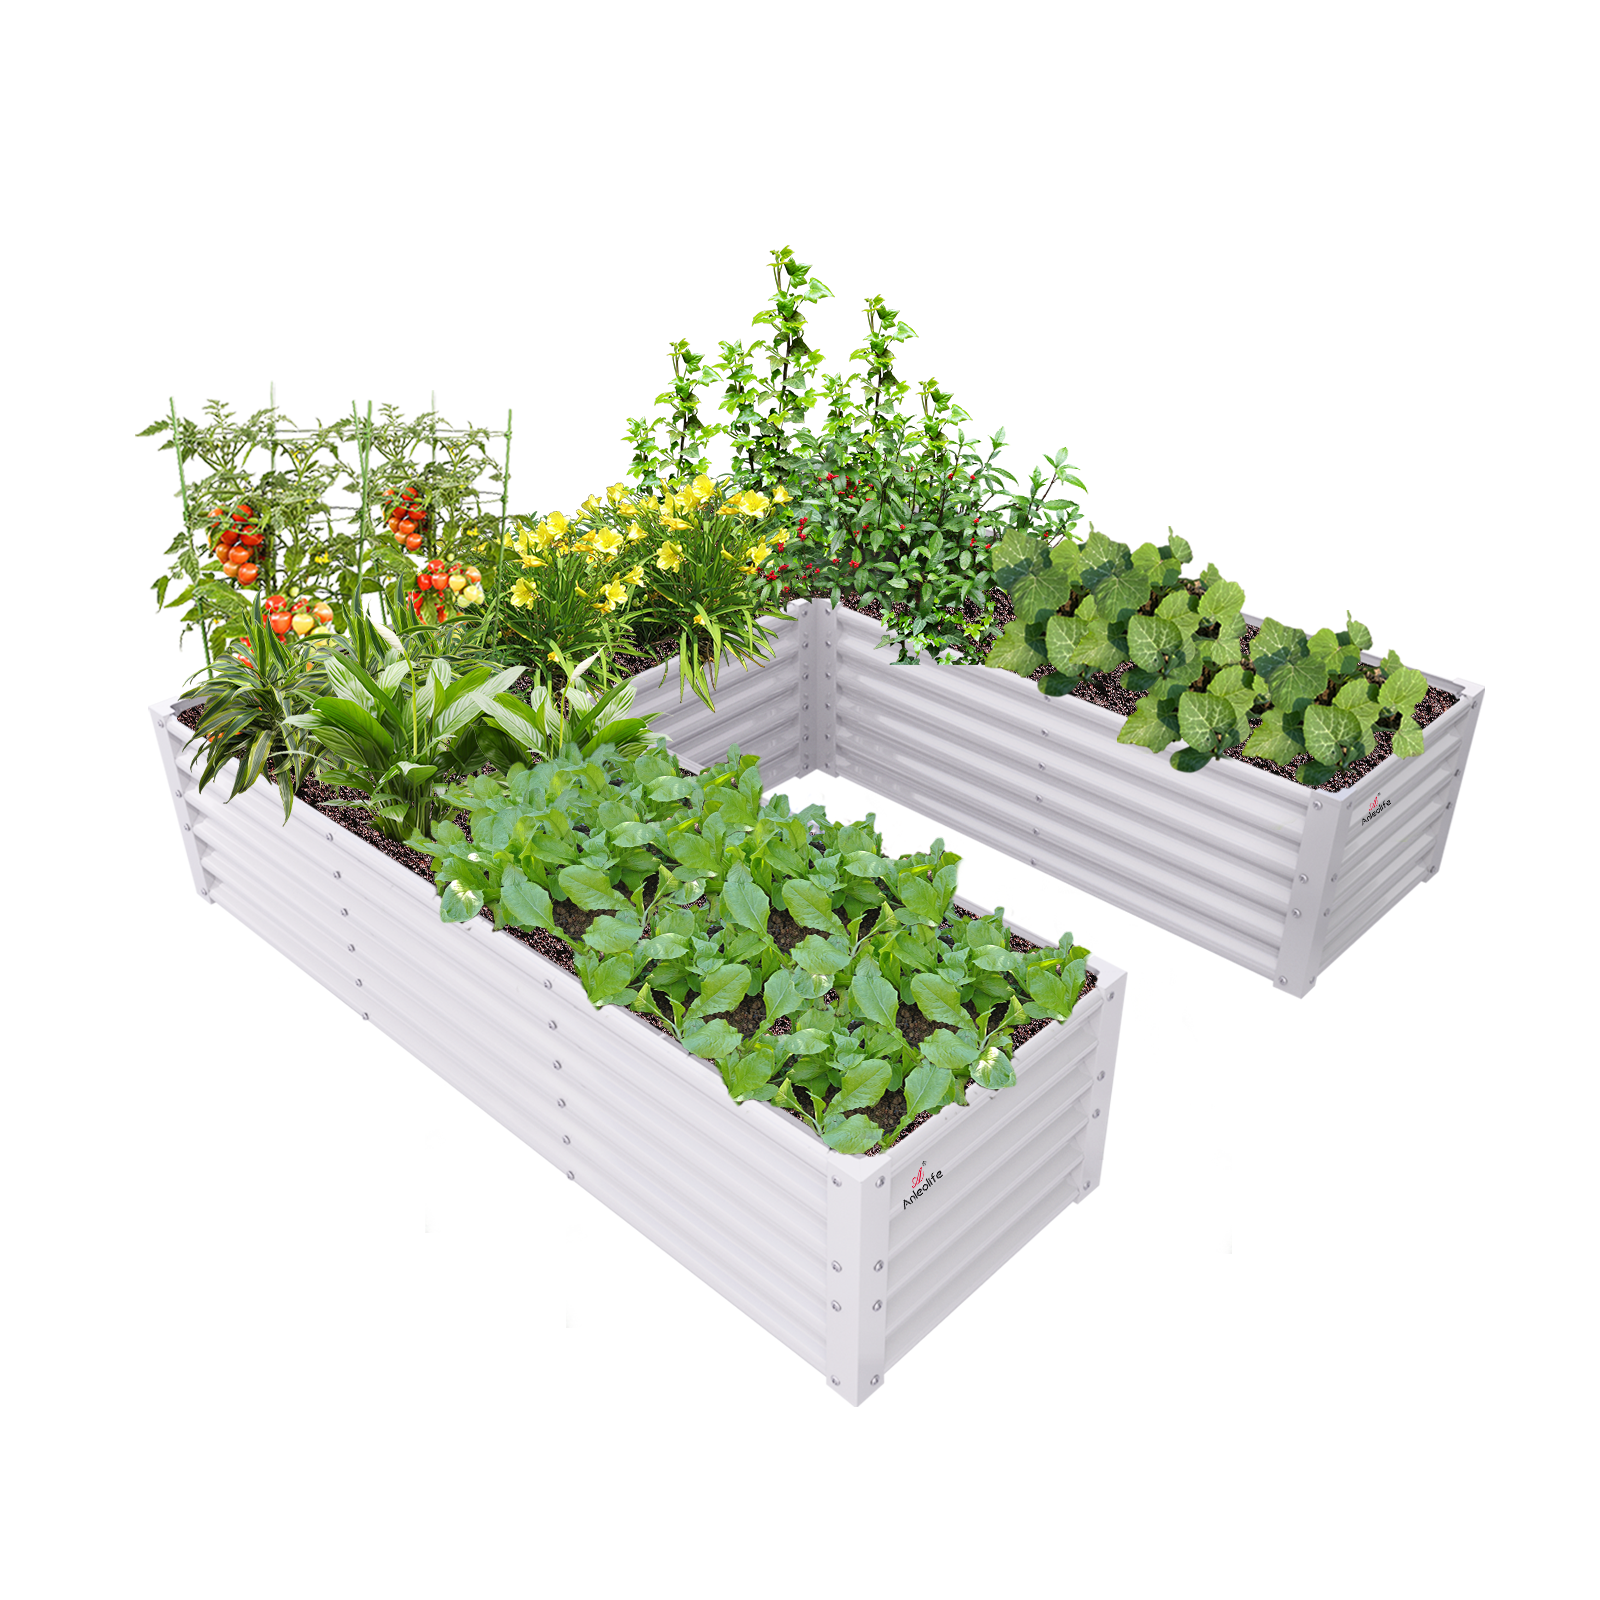
For simple two-plant pairings (tomatoes + basil, carrots + onions), even a compact raised bed works beautifully. Anleolife's 18" Tall 6x3 ft or 8x4 ft Rust-Resistant Raised Garden Beds offer an accessible footprint for first-time companion gardeners. For multi-crop systems like the Three Sisters, a larger bed is essential. The Anleolife 30" Extra Tall 10x3 ft or the 24" Extra Tall 8x4 ft Heavy Duty Raised Garden Beds provide the square footage and soil depth needed to support multiple large-growing plants simultaneously. 
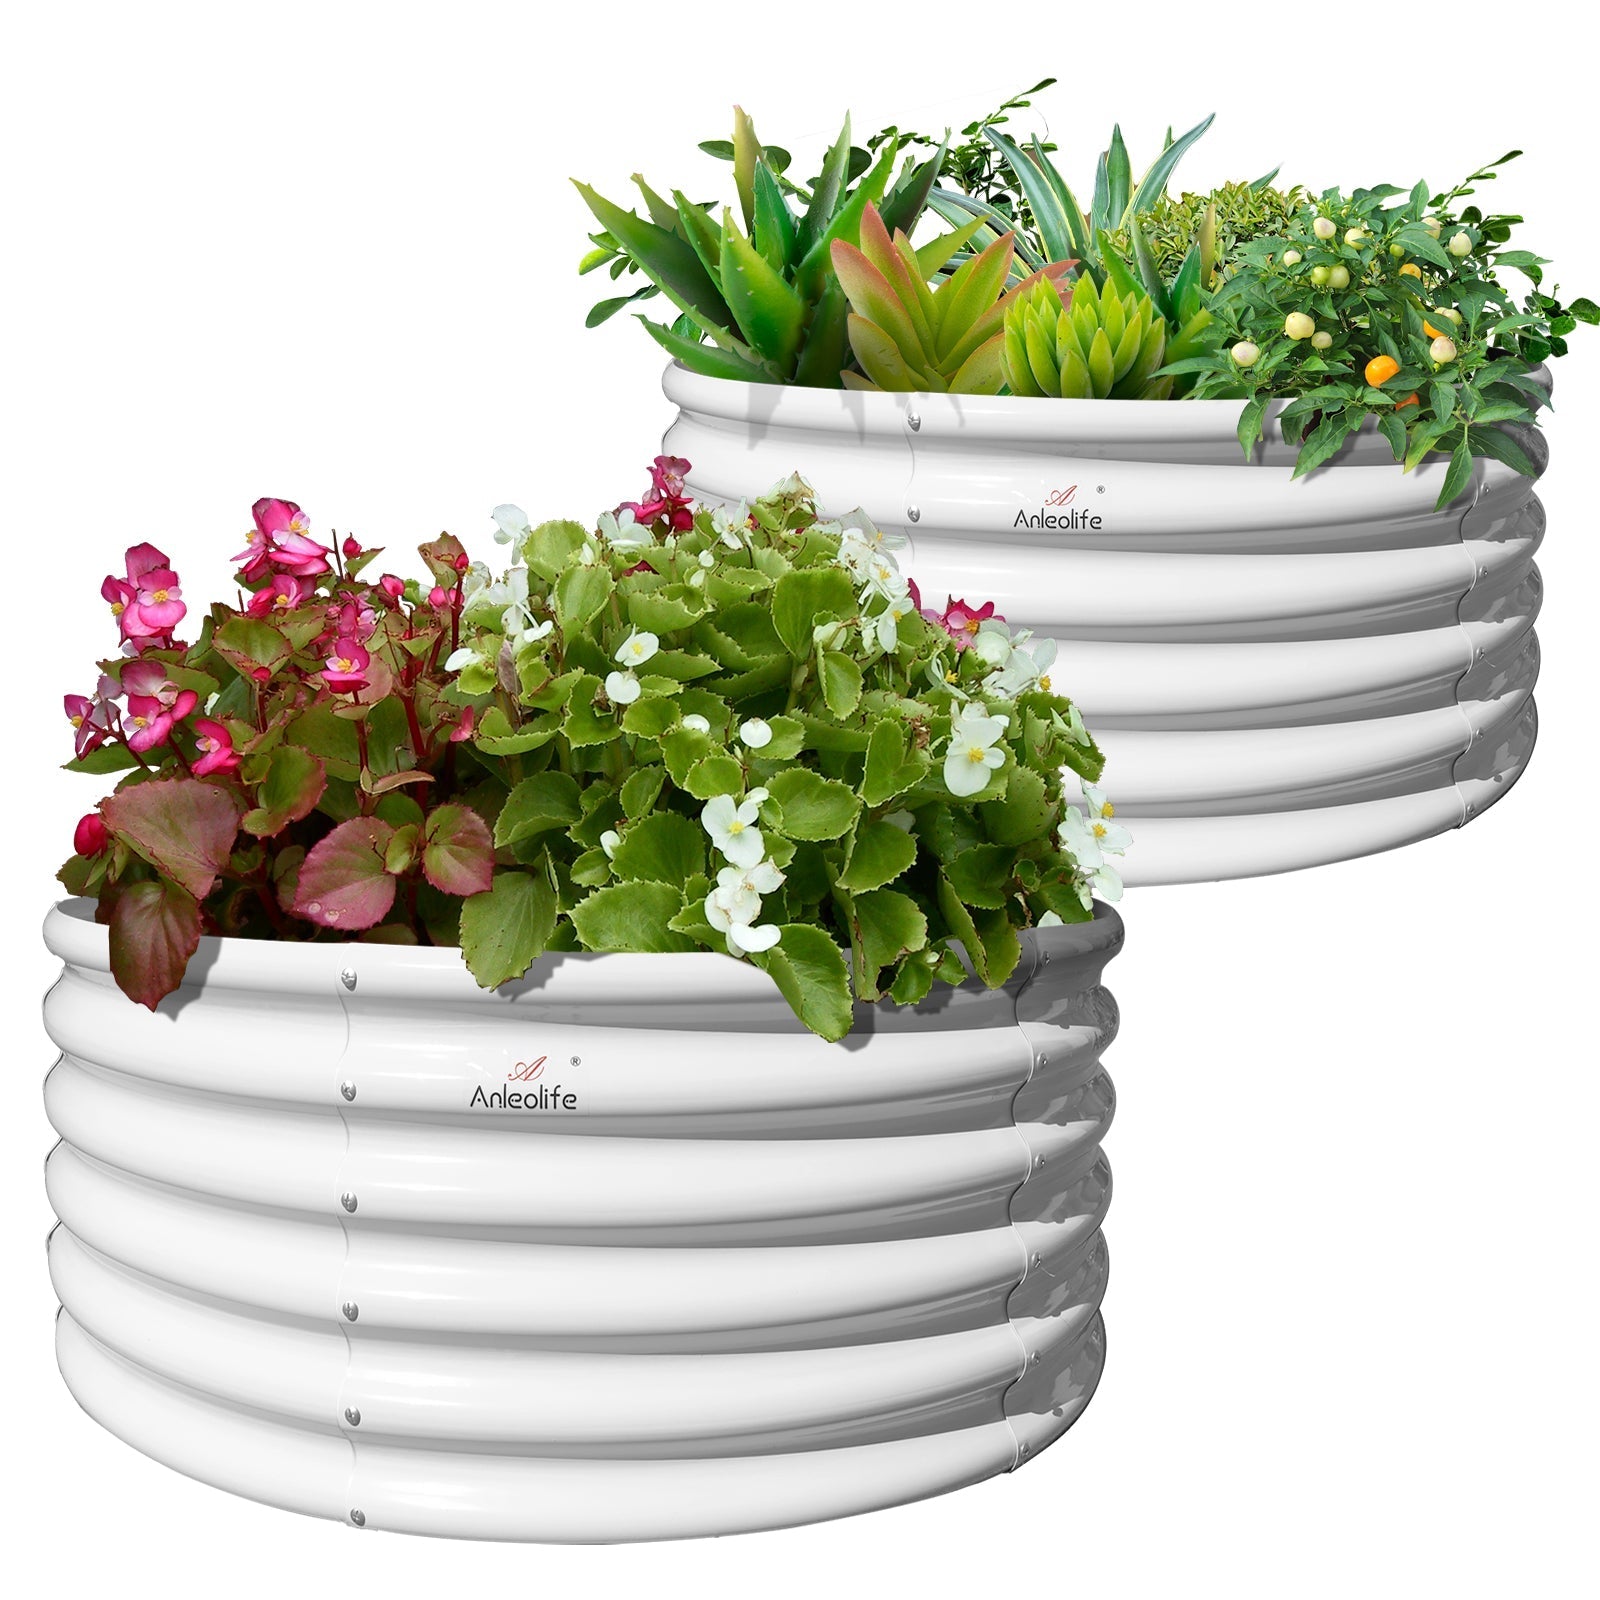
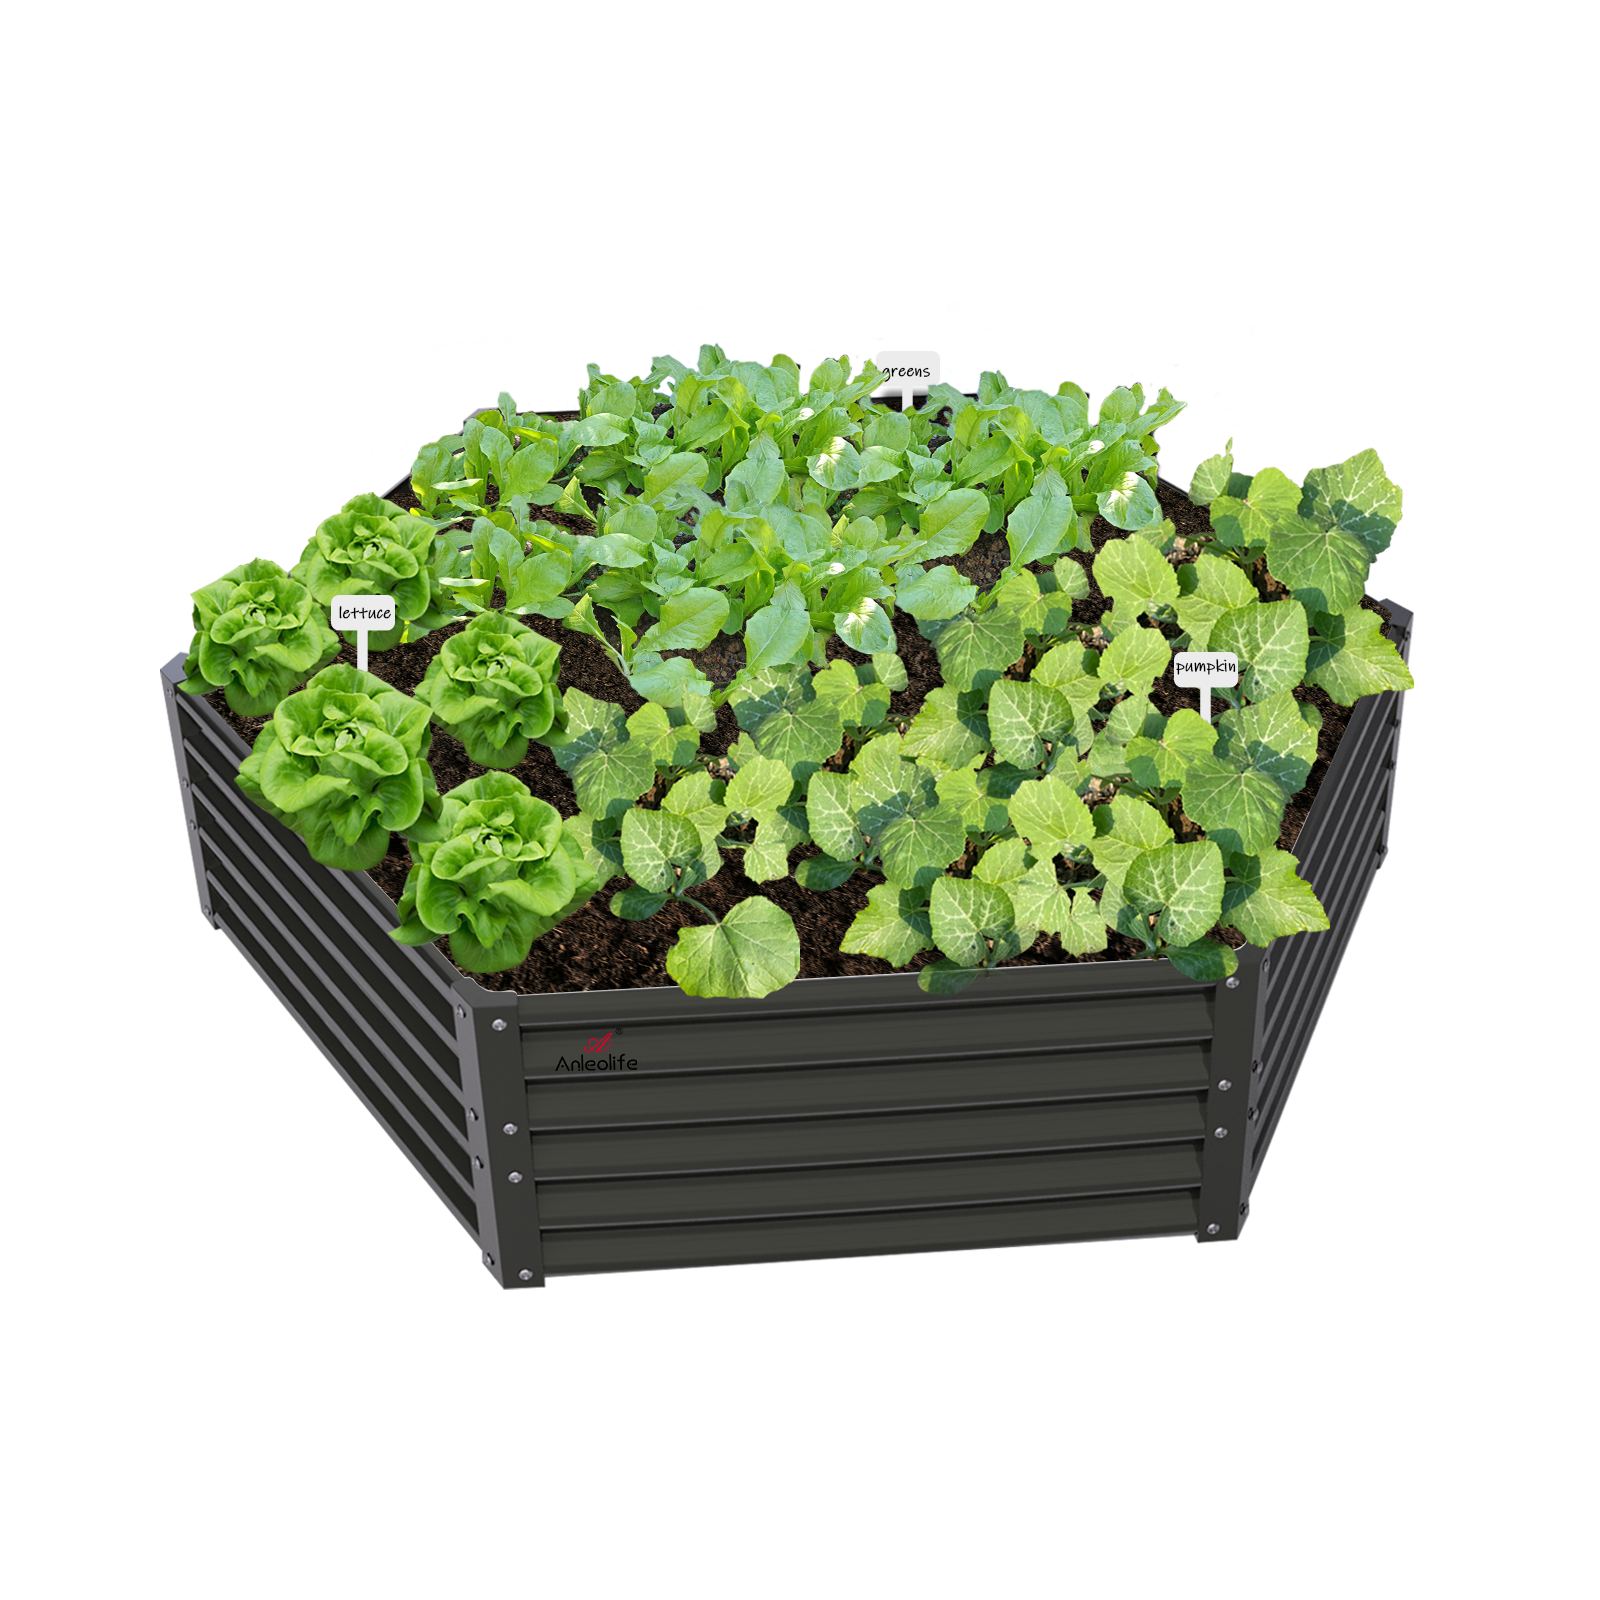
For container-style herb and flower pairings, smaller or round raised beds are perfect. The Anleolife 18" Tall 48" Wide Round Raised Garden Bed is a charming option for a dedicated herb-and-flower companion circle. 
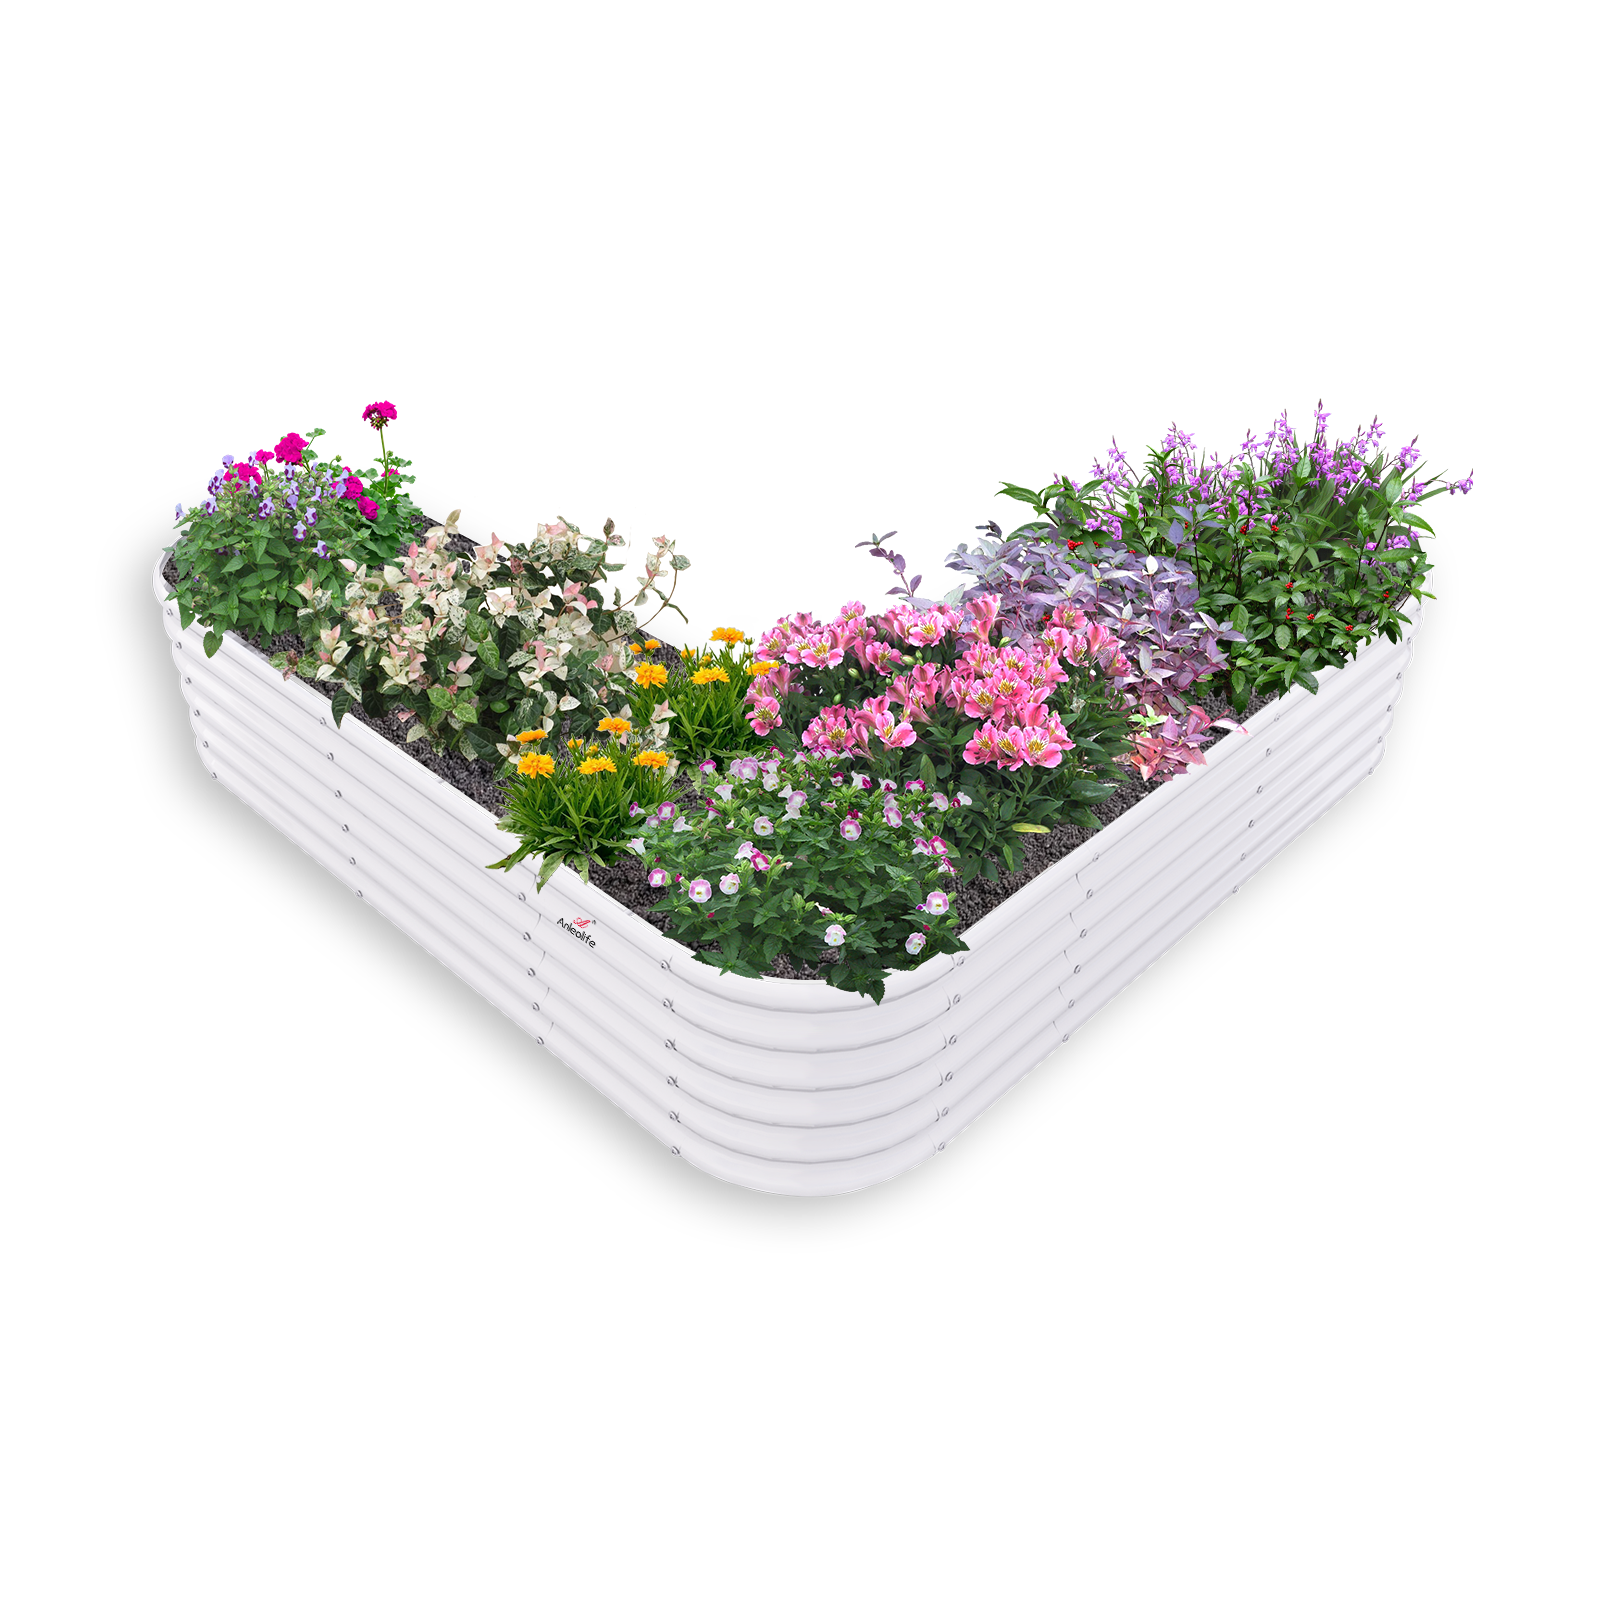
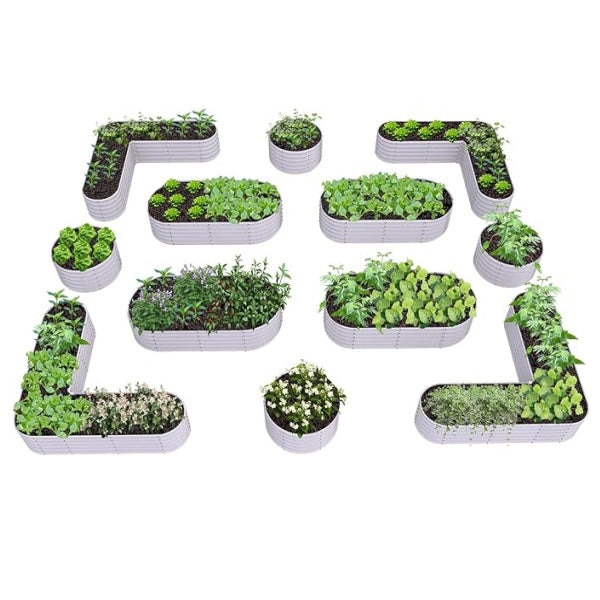
If you're designing a multi-bed garden layout, How to Build a Raised Garden Bed Layout for Families with Limited Backyard Space offers a practical framework for arranging multiple beds to maximize airflow, sunlight, and companion planting synergy even on a small property. All Anleolife raised garden beds are built to last up to 20 years, meaning your companion planting system can grow and evolve with you through many seasons without needing to replace your infrastructure. ALT: Gardener planting companion plants like marigolds, basil, and tomatoes in a tall galvanized steel raised garden bed for pest control and better yields Advanced Tips: Getting More from Companion Planting Each Season Seasonal Rotation and Companion Mapping One of the most overlooked aspects of companion planting is seasonal rotation. Just because tomatoes and basil worked beautifully in Bed A this summer doesn't mean you should repeat that exact combination in the same location next year. Rotating plant families through different beds prevents soil nutrient depletion, breaks pest and disease cycles, and allows nitrogen-fixing plants like beans to enrich different areas of your garden each year. Keep a simple garden journal noting what was planted where, what combinations performed best, and what issues arose. Over two to three seasons, you'll develop a personalized companion planting map that's optimized for your specific microclimate, bed layout, and preferred crops. Misconception: Companion Planting Is a Silver Bullet A common misconception is that companion planting alone will eliminate all pest and disease problems. In reality, it is one powerful tool within a broader integrated pest management (IPM) strategy. Healthy soil, proper watering, good air circulation, and regular monitoring remain equally important. Companion planting reduces pest pressure and improves growing conditions โ€” it doesn't guarantee immunity. Integrating Beneficial Insects Beyond Companion Plants Beyond plant companions, consider adding insect hotels or small habitat structures near your raised beds to house beneficial insects like solitary bees, lacewings, and ladybugs. These insects are your greatest allies in natural pest management and will work in concert with your companion plant selections to keep pest populations in check. Frequently Asked Questions FAQ Q1: How do I know which companion plants work best for my specific vegetables? Start by identifying the main pest threats to your primary vegetables โ€” for example, aphids for tomatoes or cabbage worms for brassicas โ€” then choose companions known to deter those pests. Reference guides from university extension programs (like UC Cooperative Extension) provide regionally specific companion planting charts. Begin with two or three proven pairings like tomato-basil or carrot-onion, and add complexity as your confidence grows. Many gardeners find that keeping a seasonal journal of what worked accelerates their learning significantly. Q2: Are there companion plants that work in every raised bed, regardless of what I'm growing? Yes โ€” marigolds and nasturtiums are widely regarded as near-universal companions. Marigolds deter soil nematodes, aphids, and whiteflies, while attracting pollinators that benefit virtually every flowering vegetable. Nasturtiums act as trap crops for aphids and are edible to boot. Both are easy to grow from seed, inexpensive, and adaptable to most raised bed conditions. Adding a border of marigolds around any raised garden bed is one of the simplest and most impactful things any gardener โ€” beginner or experienced โ€” can do this season. Q3: How much extra space do I need in my raised bed to accommodate companion plants? It depends on the combination. Compact herbs like basil require only 6โ€“8 inches of space per plant and can nestle easily at the base of tomatoes or peppers without significant competition. Larger companions like nasturtiums or squash need more room. As a general rule, plan for companion plants to occupy 20โ€“30% of your total bed space. For a standard 8x4 ft raised bed, that leaves ample room for both primary vegetables and multiple companion plant species growing comfortably side by side without overcrowding. Summary Companion planting in raised garden beds is one of the most rewarding practices a home gardener can adopt. It aligns perfectly with a philosophy of working with nature rather than against it โ€” using biodiversity, plant chemistry, and ecological relationships to create a healthier, more productive garden without relying on chemical pesticides. Here are the three core takeaways from this guide: Proven pairings matter: Classic combinations like tomatoes and basil, the Three Sisters, marigolds with vegetables, and carrots with onions deliver real, measurable benefits in terms of pest control, pollinator activity, and soil health. The right bed makes the difference: Matching your companion planting strategy to the right raised bed size and height ensures that all plants have room to thrive. Anleolife's range of galvanized steel, rust-resistant, and heavy-duty raised garden beds โ€” built to last 20 years โ€” provide the ideal long-term platform. This is a practice, not a one-time project: The most successful companion gardeners iterate season after season, refining their plant maps, rotating crops, and adding new combinations as their knowledge grows. Start small, stay curious, and trust the process. Your garden will reward you. Start Growing Smarter with Anleolife Anleolife's nationwide U.S. warehouse network โ€” strategically located in California, Texas, Florida, New York, Illinois, and Washington โ€” ensures delivery within 3โ€“8 business days, so your garden upgrade plans never have to wait. Whether you're ordering your first raised bed or expanding an existing setup, our products ship quickly and arrive ready to assemble. Our products are available across all major retail channels โ€” Amazon, Walmart, Home Depot, Lowe's, Wayfair, and directly at Anleolife.com โ€” offering consistent quality assurance and responsive after-sales support wherever you prefer to shop. Anleolife's three core scenarios cover everything your garden needs: Planting (metal raised garden beds, soil systems), Raising (chicken coops, rabbit hutches), and Beautification (decorative accessories, pathway systems) โ€” meeting your complete needs from function to aesthetics. We understand that an ideal garden isn't built overnight โ€” it grows gradually, just like the plants within it. Our modular product design allows flexible expansion based on your needs, from your first raised bed to a fully integrated planting-and-raising ecosystem. We grow with you every step of the way. References UC Agriculture and Natural Resources. "Companion Planting in the Vegetable Garden".https://ucanr.edu/ National Gardening Association. "Companion Planting Guide โ€” Plant Partners That Help Each Other Grow".https://garden.org/ Rodale Institute. "Polyculture and Companion Planting Research".https://rodaleinstitute.org/ Penn State Extension. "Integrated Pest Management in Home Vegetable Gardens".https://extension.psu.edu/ University of Minnesota Extension. "Raised Bed Gardening".https://extension.umn.edu/ Note: Standards and recommendations may be updated over time. Please check the latest official documents or consult a local extension service professional for the most current guidance. About Anleolife Anleolife is a leading outdoor garden solutions provider in North America, dedicated to offering a full-scenario product ecosystem for home gardening enthusiasts, covering planting, raising, and garden beautification. Since its founding, we have upheld our brand mission, "Made for Garden Life," continuously innovating products and optimizing services to help hundreds of thousands of users upgrade their gardens, reconnect with nature, and enjoy a better garden lifestyle.
Best Vegetables for Raised Garden Beds in Small Spaces: A Beginner's Pick

Best Vegetables for Raised Garden Beds in Small Spaces: A Beginner's Pick

on May 13 2026
ALT: Beginner gardener harvesting vegetables from small-space raised garden beds with compact planting layout Why Small-Space Raised Garden Beds Are Changing How Beginners Grow Food Key Conclusion: Growing your own vegetables doesn't require a sprawling backyard. With the right raised garden beds for small spaces, beginners can cultivate a surprisingly productive and rewarding kitchen garden in a compact patio, balcony, or urban yard. The key lies in choosing the best vegetables for raised bedsโ€”crops that thrive in confined soil volumes, grow vertically, and deliver fast, visible results that keep new gardeners motivated from the first seed to the first harvest. If you've ever stood in a small backyard, looked at a patch of compacted turf, and thought "there's no room for a real garden here," you're not alone. Millions of North American homeowners face exactly this challenge. The good news is that raised garden beds fundamentally change the equation. By concentrating your soil, nutrients, and planting efforts into a defined, manageable structure, you gain outsized yields from minimal footprintโ€”and you get to choose precisely what goes on your dinner table. This guide walks you through the best beginner-friendly vegetables for raised beds in small spaces, how to set up your bed for success, and how to match the right crops to the right container dimensions. Whether you're working with a 4x4 ft patio corner or a narrow 12x3 ft strip along a fence line, there's a productive planting strategy waiting for you. Who This Guide Is For โœ… Applicable Scenarios: Urban apartment dwellers with a patio, balcony, or small courtyard looking to grow their own food Suburban families with limited backyard space wanting a productive, organized kitchen garden Empty nesters and retirees seeking a lower-maintenance, high-reward garden project Beginner gardeners who want visible results quickly and a manageable learning curve Eco-conscious households interested in reducing grocery spending and chemical-free produce โŒ Not Applicable/Cautions: Gardeners planning to grow large vine crops like pumpkins or watermelons that require extensive sprawl (these need far more horizontal space than a small raised bed allows) Those expecting a raised bed to replace a large traditional garden plot overnight without adjusting plant selection Gardeners in zones with extreme climates who haven't accounted for seasonal soil temperature management in elevated structures The Small-Space Gardening Movement: Why Raised Beds Are the Smart Solution The interest in home food growing has surged significantly over the past several years. According to the National Gardening Association, food gardening participation has grown substantially across North American households, with first-time gardeners citing fresh produce quality, food security, and mental wellness as primary motivators. Yet the single biggest barrier reported by new growers isn't cost or know-howโ€”it's space. This is exactly where raised garden beds have stepped in as a practical, elegant solution. Unlike in-ground gardening, raised beds give you complete control over your soil environment. You're not fighting with clay, compaction, or drainage issues. You build your ideal growing medium from the ground up, place it exactly where it gets the best light, and plant at densities that in-ground gardening simply can't match. For small-space growers, the structure of the bed itself matters enormously. A well-built metal raised garden bed provides a clean boundary for intensive planting, prevents soil erosion and spread, warms up faster in spring, andโ€”critically for beginnersโ€”makes it far easier to spot problems before they escalate. Pests, weeds, and overwatering are all more manageable in a contained system. If you're still deciding on your setup, How Much Should You Spend on a Raised Garden Bed This Season? is an excellent starting resource that breaks down budget considerations clearly for first-time buyers. And if you're thinking beyond a single bed toward a coordinated layout, How to Build a Raised Garden Bed Layout for Families with Limited Backyard Space offers practical design frameworks that maximize every square foot. The best materials for raised garden beds that last the longest are consistently found to be galvanized or rust-resistant steel. Anleolife's galvanized steel and rust-resistant raised garden beds are engineered for a 20-year lifespan, meaning your investment today continues producing harvests for two full decadesโ€”a compelling argument for any budget-conscious household. Your First Raised Bed: A Three-Step Quick Start, Then the Best Vegetables to Plant Three-Step Quick Start for Beginners Step 1: Choose the Right Bed Size for Your Space Before you select a single seed packet, match your available space to the right bed dimensions. For a patio or compact yard, Anleolife's 18" Tall 4x4 ft or 18" Tall 8x4 ft galvanized steel raised garden beds are popular beginner choicesโ€”deep enough for most vegetables, wide enough for meaningful variety. If your space is more of a strip, the 18" Tall 12x3 ft option lines up beautifully along fences or walls. Measure your available area carefully, allow at least 18 inches of clearance on all sides for comfortable access, and choose a spot that receives a minimum of 6 hours of direct sunlight daily. This step typically takes about 30 minutes of planning. Step 2: Fill Your Bed with the Right Soil Mix The foundation of a productive raised bed is its growing medium. Never simply use native yard soilโ€”it compacts, drains poorly, and rarely offers the right nutrient profile. A well-tested approach is the classic Mel's Mix: a blend of compost, peat moss or coconut coir, and coarse vermiculite in roughly equal parts. This creates a light, moisture-retentive, nutrient-rich environment ideal for intensive small-space growing. For a deeper dive into soil strategy, What Is the Best Soil Mix for Raised Garden Beds? (The Mel's Mix Guide) provides a comprehensive breakdown. Filling a standard 8x4 ft bed to 18" depth will take approximately 1โ€“2 hours and is a task most beginners can handle in a single afternoon. Step 3: Select and Plant Your Beginner Vegetables Once your bed is filled and settled, it's time to plant. Start with a curated mix of fast-growing, high-yield crops that reward beginners with results within weeks rather than months. Space plants according to the square-foot gardening methodโ€”this maximizes density without crowding. Water deeply but infrequently to encourage root depth, and mark your plants clearly so you can track progress. Your first real harvest could come in as few as 30 days for fast crops like radishes and lettuce, keeping motivation high as you develop your gardening rhythm. Comparing the Best Vegetables for Small Raised Beds Choosing the right vegetables is half the battle. Not every crop is suited to confined soil volumes or close spacing. Below is a practical comparison of the top beginner picks organized by growth habit, yield speed, and suitability for small raised beds. Comparison Dimension Leafy Greens (Lettuce, Spinach, Kale) Root Vegetables (Radishes, Carrots, Beets) Fruiting Crops (Tomatoes, Peppers, Cucumbers) Space Required Per Plant Very compact (4โ€“6 inches apart) Moderate (3โ€“6 inches, depth-dependent) Larger footprint (12โ€“24 inches apart) Time to First Harvest Very fast (30โ€“45 days) Fast to moderate (25โ€“70 days) Moderate to slow (60โ€“90 days) Beginner Difficulty Very easy Easy to moderate Moderate (requires support/staking) Vertical Growing Option No (stays low) No (grows downward) Yes (excellent for trellising) Ideal Bed Depth 12โ€“18 inches 18โ€“24+ inches 18โ€“24 inches Succession Planting Friendly Yesโ€”highly recommended Yes, especially radishes Limited (one main season) Yield in Small Space High per square foot High per square foot High with vertical training The Top Beginner Vegetablesโ€”Detailed Growing Guide Lettuce and Salad Greens: The Small-Space Champion Lettuce is arguably the single best vegetable for a first raised garden bed. It grows fast, tolerates partial shade better than most crops, and can be harvested continuously using the "cut-and-come-again" methodโ€”snipping outer leaves while the plant continues growing from its center. In a 4x4 ft bed, you can plant 16 or more lettuce heads simultaneously using the square-foot method. Varieties like 'Black Seeded Simpson,' 'Buttercrunch,' and 'Red Sails' are particularly well-suited for beginners. Sow seeds directly into moist soil, thin to appropriate spacing, and expect your first harvest in roughly 30โ€“45 days. In cooler climates, lettuce can be grown in spring and again in fall, giving you two productive seasons from a single bed. Spinach and arugula follow a nearly identical growing pattern and can be interplanted with lettuce for a diverse salad mix from the same bed section. These greens also bolt (go to seed) in heat, so timing your planting to avoid peak summer temperatures is an important skill to develop early. Radishes: The Confidence Builder Few vegetables match the satisfaction-to-effort ratio of radishes for new gardeners. They germinate within days, grow rapidly, and can be ready to harvest in as few as 25 days from sowing. Their compact root system makes them ideal for filling gaps between slower-growing crops. Use radishes strategically as "nurse plants"โ€”sow them among slower crops like carrots or beets. The radishes will loosen and mark the soil as they grow, and you'll harvest them before they compete for space. This technique is known as interplanting and is one of the best productivity hacks for small raised beds. Tomatoes: Maximum Reward with Vertical Growing Tomatoes are the most-grown home garden vegetable in North America for good reasonโ€”they are enormously productive, far tastier fresh-picked than store-bought, and deeply satisfying to grow. The challenge in small spaces is their size, but this is solved almost entirely with vertical growing. Compact determinate varieties like 'Patio,' 'Tumbling Tom,' or 'Roma' are purpose-built for confined spaces. Indeterminate varieties like 'Sweet 100' cherry tomatoes can be trained up a trellis or stake system and grown in a single square foot of bed space vertically. In a 24" Extra Tall 8x4 ft Anleolife raised bed, you have the depth tomato roots crave combined with room for two to four tomato plants alongside complementary crops like basil, which acts as a natural pest deterrent. One of the most common questions from new tomato growers relates to pest control. For raised beds, the primary organic strategies include introducing beneficial insects (ladybugs, lacewings), using row cover fabric for early-season protection, and companion planting with strong-scented herbs like basil, marigold, and nasturtium. Keep beds clean of fallen debris to reduce overwintering pest populations, and inspect plants weekly for early signs of aphids or caterpillars. Peppers: Low Maintenance, High Reward Sweet bell peppers and compact hot pepper varieties like jalapeรฑos are excellent raised bed performers. They share soil and light requirements with tomatoes, making them natural companions in the same bed. Peppers are slower to mature but remarkably low-maintenance once established. They prefer consistent moisture (raised beds excel at this with good soil mix), plenty of sun, and warm root temperaturesโ€”which metal raised beds deliver efficiently by absorbing and retaining solar heat. Cucumbers: Vertical Space Maximizers Cucumbers are perfect small-space vegetables when grown vertically. Left to sprawl, a single cucumber plant can consume 3โ€“4 square feet of bed space. Trained up a simple trellis or net, that same plant occupies less than a single square foot of bed footprint. Bush varieties like 'Spacemaster' or 'Patio Snacker' are even more compact. A trellis set against the north edge of your raised bed prevents the cucumber canopy from shading shorter crops behind it. This is a critical layout tip for small-space gardensโ€”always orient tall vertical crops toward the north (in the Northern Hemisphere) so they don't shade their neighbors. Herbs: The Invisible High-Value Crop Herbs like basil, parsley, chives, and cilantro are enormously valuable in a small raised bed system. They occupy minimal space, produce continuously, are typically expensive to buy fresh at grocery stores, and many serve double duty as pest deterrents. Basil alongside tomatoes improves flavor and repels aphids. Chives deter Japanese beetles. Nasturtiums act as trap crops for aphids, pulling them away from more valuable plants. Dedicate one edge section of any bed to a rotation of herbsโ€”you'll use them constantly in the kitchen and they'll quietly protect the rest of your planting. Kale and Swiss Chard: The Workhorses of Cool Seasons For gardeners in regions with mild winters or extended fall seasons, kale and Swiss chard are exceptional performers. Both are extraordinarily nutritious, cold-hardy, and productive over long seasons. A single kale plant harvested correctly can produce leaves from spring through the first heavy frostโ€”often four to six months of continuous production. In a compact raised bed, two to four kale plants can supply a household with more leafy greens than most families can consume. Pair them with root vegetables in the same bed for a fall planting that maximizes every inch of growing space before winter. ALT: Small-space raised garden bed featuring lettuce, tomatoes, vertical cucumber trellis, and companion herbs for beginners Advanced Tips: Maximizing Yield in Small Raised Beds Succession Planting: Never Have an Empty Bed The most common mistake beginners make is planting everything at once and then watching half their bed sit empty after early crops are harvested. Succession planting solves this completely. Every two to three weeks, sow a new small batch of fast-growing cropsโ€”lettuce, radishes, spinachโ€”into the spaces left by harvested plants. This keeps your bed productive from early spring through late fall. A useful rule of thumb: whenever you harvest something, replant immediately. Keep a small tray of seedlings started indoors so you always have transplants ready to fill gaps. Soil Refreshing Between Seasons Raised beds benefit from an annual compost top-dress between growing seasons. Add 2โ€“3 inches of fresh compost each fall or spring, gently working it into the top layer of existing soil. This replenishes nutrients, improves soil structure, and reinvigorates the microbial activity that drives plant health. Because Anleolife's galvanized steel and rust-resistant beds are built for a 20-year lifespan, investing in ongoing soil quality pays dividends for years to come. Common Misconceptions About Small-Space Growing Misconception 1: More plants means more yield.Actually, overcrowding reduces air circulation, increases disease pressure, and forces plants to compete for water and nutrients. Follow recommended spacing even when it feels like "wasted" spaceโ€”you'll get better total yields than with a crowded bed. Misconception 2: You need full sun for everything.Leafy greens, herbs, and root vegetables actually tolerate partial shade quite well. If your small-space bed gets only 4โ€“5 hours of direct sun, skip the tomatoes and peppers and focus on greens and roots, which will still thrive. Misconception 3: Raised beds dry out too fast.A well-mixed soil in a quality raised bed retains moisture excellently. Adding organic matter and mulching the soil surface significantly reduces watering frequency. Many small-space gardeners water just two to three times per week in moderate climates. Frequently Asked Questions FAQ Q1: How do I fill a raised garden bed for vegetable growing on a budget? The most cost-effective approach is a modified Mel's Mix using locally sourced bulk compost, bagged coconut coir (often cheaper than peat moss), and coarse perlite or vermiculite. Many municipalities offer free or reduced-cost compost to residentsโ€”check your local public works department. For a full recipe and ratios tailored to different bed sizes, see the Mel's Mix Guide for detailed guidance. Avoid filling with native yard soil, which compacts quickly and limits root development. Q2: Are galvanized steel raised garden beds safe for growing vegetables? Yesโ€”modern galvanized steel raised beds are widely considered safe for food production. The zinc coating used in galvanization is the same mineral found naturally in soil and is an essential micronutrient for plants and humans alike. Studies by agricultural extension programs have found no meaningful zinc leaching into soil or crops at levels that pose health concern. Anleolife's galvanized steel and rust-resistant raised garden beds are built to food-safe standards and are designed to last up to 20 years, making them a sound long-term investment for home food growing. Q3: How long does it take to get started once I order a raised garden bed? With Anleolife's nationwide U.S. warehouse networkโ€”strategically located in California, Texas, Florida, New York, Illinois, and Washingtonโ€”your raised garden bed typically arrives within 3โ€“8 business days of ordering. Most beginners can assemble a standard raised bed in under an hour with basic tools. Fill and plant the same day if you have soil ready, or use the waiting time to source your soil mix and choose your seed varieties. From order to first seeds in the ground, most new gardeners are up and running within 10โ€“14 days. Summary Growing vegetables in a small space is not a compromiseโ€”it's a focused, highly rewarding approach to home food production that beginners often find more successful than sprawling garden attempts. The three core takeaways from this guide are: First, choose crops that are inherently suited to confined raised beds: leafy greens for speed and density, root vegetables for soil utilization, and fruiting crops like tomatoes and cucumbers trained vertically for maximum yield per square foot. Second, your raised bed structure is the foundation of everything. A quality galvanized steel or rust-resistant raised bed with good depth provides the root environment, drainage, and temperature regulation your vegetables need to thriveโ€”and with a 20-year lifespan, it grows with you through decades of seasons. Third, succession planting and companion planting turn a small bed into a continuously productive system. Never let bed space sit idle, and let your plants work togetherโ€”herbs protecting vegetables, radishes marking slower crops, tall plants sheltering shade-tolerant ones. Start small, start smart, and build confidence with your first harvest. The skills you develop in a 4x4 ft raised bed this season become the foundation for an expanding, flourishing garden in years to come. Your Next Step with Anleolife Anleolife's nationwide U.S. warehouse networkโ€”strategically located in California, Texas, Florida, New York, Illinois, and Washingtonโ€”ensures delivery within 3โ€“8 business days, so your garden upgrade plans never have to wait. Products are available across Amazon, Walmart, Home Depot, Lowe's, Wayfair, and directly at Anleolife.com, offering consistent quality assurance and after-sales service wherever you prefer to shop. Anleolife covers three core garden scenarios: Planting (metal raised garden beds, soil systems), Raising (chicken coops, rabbit hutches), and Beautification (decorative accessories, pathway systems)โ€”meeting complete needs from functionality to aesthetics. Our modular product design allows flexible expansion based on your needsโ€”from your first compact raised bed to a fully integrated planting-and-raising ecosystem. We grow with you every step of the way. References National Gardening Association. "Food Gardening in the United States."https://garden.org/learn/articles/view/4041/ University of California Agriculture and Natural Resources. "Vegetable Gardening Basics."https://ucanr.edu/ Penn State Extension. "Small-Scale Vegetable Gardening."https://extension.psu.edu/vegetable-gardening Oregon State University Extension Service. "Raised Bed Gardening."https://extension.oregonstate.edu/gardening/vegetables/raised-bed-gardening USDA National Institute of Food and Agriculture. "Home Gardening Resources."https://www.nifa.usda.gov/topics/home-gardening Note: Standards and research may be updated. Please check the latest official documents or consult a local agricultural extension advisor for region-specific guidance. About Anleolife Anleolife is a leading outdoor garden solutions provider in North America, dedicated to offering a full-scenario product ecosystem for home gardening enthusiasts, covering planting, raising, and garden beautification. Since its founding, we have upheld our brand mission, "Made for Garden Life," continuously innovating products and optimizing services to help hundreds of thousands of users upgrade their gardens, reconnect with nature, and enjoy a better garden lifestyle.
Advanced Composting Techniques to Supercharge Your Raised Bed Soil This Season

Advanced Composting Techniques to Supercharge Your Raised Bed Soil This Season

on May 13 2026
ALT: Gardener applying advanced compost to a raised bed soil system, boosting plant growth this season Why Advanced Composting Is the Secret Weapon for Raised Bed Gardeners Key Conclusion: Advanced composting techniquesโ€”including hot composting, vermicomposting, and bokashi fermentationโ€”can transform your raised bed soil into a nutrient-dense growing medium that dramatically improves plant health, root development, and seasonal yields. Whether you're growing herbs, vegetables, or flowers in galvanized steel raised garden beds or modular setups, supercharging your soil through smart composting is the single highest-return investment a home gardener can make this season. If you've ever wondered why some raised beds burst with lush growth while others limp along with lackluster harvests, the answer almost always comes down to soil qualityโ€”and more specifically, what's living in that soil. Compost isn't just fertilizer; it's a biological catalyst that feeds beneficial microbes, improves drainage, regulates moisture, and buffers pH all at once. This guide moves beyond the basics of "throw scraps in a bin and wait." We'll walk you through proven advanced composting strategies tailored specifically for raised bed gardeners, including how to choose the right composting method for your space, how to speed up decomposition, and how to integrate finished compost into your growing season for maximum results. Who Should Use These Advanced Composting Techniques โœ… Applicable Scenarios: Home gardeners who already have a raised bed setup and want to dramatically improve soil fertility season over season Eco-conscious growers looking to reduce kitchen and yard waste while building a closed-loop organic gardening system Urban micro-gardeners working with limited space who need to extract maximum productivity from compact beds Empty nesters and retirees who enjoy slow, intentional garden work and want to see the long-term payoff of excellent soil biology โŒ Not Applicable/Cautions: Gardeners expecting instant resultsโ€”advanced composting builds soil health progressively and requires patience and consistency Those with very small balcony setups who lack even minimal outdoor space for a composting vessel or worm bin (though indoor vermicomposting may still apply) Anyone unwilling to monitor moisture and temperature, as hot composting in particular requires active management to succeed The Science Behind Supercharged Raised Bed Soil Raised beds have an inherent advantage over in-ground gardens: you control the entire soil environment. But that control comes with responsibility. Unlike native soil that receives ongoing inputs from underground ecosystems, raised bed soil is essentially a closed system. Over time, nutrients deplete, organic matter breaks down, and soil structure can compactโ€”especially in intensively planted beds. This is where advanced composting steps in as a game-changer. Research from the Rodale Institute and university extension programs across the United States consistently shows that beds amended with high-quality compost outperform those treated with synthetic fertilizers alone in long-term soil health metrics. Compost improves the cation exchange capacity (CEC) of your soilโ€”its ability to hold onto nutrients rather than leaching them away with every watering. It introduces diverse communities of beneficial bacteria and fungi, including mycorrhizal networks that extend root reach and improve phosphorus uptake. For raised bed gardeners specifically, this matters because you're typically growing in a highly concentrated, intensively managed space. Whether you're working with a compact 4x4 bed for herbs and flowers or an expansive 12x3 layout for mixed vegetables, the soil in that bed has to work extraordinarily hard. Compost is what keeps it performing season after season. There's also a sustainability dimension that resonates deeply with today's eco-conscious home growers. The EPA estimates that food scraps and yard waste together constitute more than 30% of what Americans throw away. Composting that material and returning it to your garden beds is one of the most impactful closed-loop choices a household can make. Modern raised bed designsโ€”like Anleolife's galvanized steel and rust-resistant bedsโ€”are built to last up to 20 years, which means you're not just investing in this season's harvest. You're building a long-term growing infrastructure that rewards consistent soil-building practices year after year. The better your composting routine, the better your soil in year three, year seven, and year fifteen. Core Composting Methods and How to Apply Them to Raised Beds Three-Step Quick Start for Raised Bed Composting Success Step 1: Choose Your Composting Method Based on Space and Time Before anything else, assess your available space and how much time you can realistically commit each week. Hot composting requires a minimum pile size and weekly turningโ€”ideal if you have a backyard. Vermicomposting (worm bins) works beautifully in small spaces or garages. Bokashi fermentation is perfect for apartment dwellers or those with lots of kitchen scraps. Spend 15โ€“20 minutes evaluating your setup before investing in equipment. The right method makes all the difference in whether you stick with it. Step 2: Build Your Feedstock System Great compost starts with a steady, balanced supply of "greens" (nitrogen-rich materials like vegetable scraps, coffee grounds, fresh grass clippings) and "browns" (carbon-rich materials like dried leaves, cardboard, wood chips). The classic ratio is roughly 3 parts browns to 1 part greens by volume. Set up a small kitchen collection container and a designated outdoor storage area for browns. This two-stream collection habit makes it easy to maintain the carbon-to-nitrogen balance your pile needs to decompose efficiently and odor-free. Step 3: Integrate Finished Compost Into Your Beds Strategically Once your compost is dark, crumbly, and earthy-smelling, it's ready to use. For new beds or seasonal refreshes, work 2โ€“4 inches of finished compost into the top layer of your bed soil before planting. For mid-season top-dressing, apply a 1-inch layer around established plants as a slow-release amendment. For perennial herb beds and flower-focused raised beds, a light annual application maintains fertility without overloading with nitrogen. Timing mattersโ€”spring and fall applications capture the most benefit. Comparing the Top Advanced Composting Methods for Raised Bed Gardeners Every composting method has trade-offs. Here's a clear comparison to help you choose the best fit for your gardening style, space, and goals. Comparison Dimension Hot Composting Vermicomposting Bokashi Fermentation Space Required Mediumโ€“Large (outdoor pile or bin) Small (bin fits indoors/garage) Very Small (sealed bucket system) Time to Finished Compost 3โ€“8 weeks with active management 2โ€“3 months 2โ€“4 weeks (pre-ferment); then soil burial Best Feedstocks Yard waste, garden debris, kitchen scraps Fruit/vegetable scraps, paper, cardboard All kitchen waste including meat/dairy Skill Level Intermediate (requires monitoring) Beginner-friendly Beginner-friendly Nutrient Density High (broad microbial diversity) Very High (worm castings are exceptional) High (preserved via fermentation) Suitability for Raised Beds Excellent for seasonal bulk amendments Excellent for regular top-dressing Best used buried under bed soil or mixed in Cost to Start Lowโ€“Medium Lowโ€“Medium Low (buckets + bran culture) The right answer isn't always a single method. Many experienced raised bed gardeners run two systems simultaneouslyโ€”a hot pile for bulk yard waste and a worm bin for kitchen scrapsโ€”then blend the outputs for a truly comprehensive soil amendment. Deep Dive: How Each Method Works and Pro Tips to Maximize Output Hot Composting: Speed and Volume for Serious Raised Bed Growers Hot composting is the powerhouse method for gardeners who generate significant yard waste or maintain multiple large beds. When managed correctly, a hot pile reaches internal temperatures of 130โ€“160ยฐF, which kills weed seeds, pathogens, and accelerates decomposition dramatically. The key to a successful hot pile is the carbon-to-nitrogen ratio, aeration, and moisture. Your pile should feel like a wrung-out spongeโ€”moist but not dripping. Turn it every 3โ€“5 days to introduce oxygen and redistribute heat. Adding a compost accelerator inoculant or a shovelful of finished compost from a previous batch jumpstarts microbial activity and can shave weeks off processing time. For raised bed gardeners, hot composting is particularly valuable in the shoulder seasonsโ€”early spring and late fallโ€”when you're preparing beds for planting or putting them to rest. Generating a large batch of finished compost in late winter means you have an ample supply ready when the soil warms and planting season begins. Pro tip: Add wood chip mulch (a "brown") in generous quantities to your hot pile. When finished, this compost-chip blend makes an outstanding mulch layer for vegetable raised beds, suppressing weeds while slowly feeding the soil. Speaking of mulchโ€”for vegetable garden beds, the best mulch options include finished compost itself, straw, or untreated wood chips. All three regulate soil temperature, conserve moisture, and suppress competing weeds without adding chemicals to your growing space. Vermicomposting: The Premium Amendment for Any Raised Bed Size Worm castings are widely considered the single best compost product available for home gardens. They're teeming with beneficial microbes, contain plant-growth-promoting hormones, and deliver nutrients in a slow-release form that won't burn even delicate seedling roots. A standard worm bin can process a household's vegetable scraps efficiently and produce castings year-round. For urban micro-gardeners or anyone with limited outdoor space, vermicomposting is especially valuable because it works entirely indoors or in a covered garage space. Apply worm castings as a seed-starting mix amendment, a transplant hole boost, or a light top-dressing around fruiting vegetables and herbs. Even small quantitiesโ€”a quarter-cup per transplant holeโ€”deliver measurable results. If you're growing in compact raised beds optimized for raised garden bed sizing for herbs and flowers, worm castings are the perfect precision amendment: highly concentrated, gentle, and endlessly versatile. Bokashi Fermentation: The Urban Gardener's Closed-Loop Solution Bokashi is a Japanese fermentation technique that uses beneficial microorganisms (EM-1 culture mixed with wheat bran) to ferment all kitchen wasteโ€”including cooked food, meat, and dairyโ€”into a pre-compost material in as little as two weeks. The fermented output isn't ready to apply directly to soil; it needs to be buried in the ground or mixed into an outdoor compost pile for 2โ€“4 weeks to fully break down. For raised bed gardeners, the easiest integration method is a "compost trench" technique: dig a small trench along one edge of your raised bed, bury the bokashi material, cover with soil, and plant into that zone the following month. The resulting soil in that area becomes extraordinarily rich. Bokashi is particularly well-suited to apartment dwellers or anyone with minimal outdoor space who wants to divert all organic kitchen waste from landfills. The sealed bucket system produces no odor when maintained correctly, making it genuinely practical in small-space urban environments. Compost Tea: Amplifying Results for Mid-Season Soil Boosts Compost teaโ€”made by steeping finished compost in aerated water for 24โ€“48 hoursโ€”is an advanced technique that extracts and multiplies the beneficial microbes from your compost and delivers them in liquid form directly to plant roots and leaves. Applied as a soil drench every 2โ€“3 weeks during the growing season, compost tea can visibly improve plant vigor, increase resistance to disease, and accelerate growth in established raised beds. It's especially effective mid-season when your soil biology may be depleted by intensive cropping. Use an aquarium air pump and airstone to aerate the brew, add a small amount of unsulfured molasses as microbial food, and apply immediately after brewing while the microbes are still active and abundant. ALT: Mixing worm castings and hot compost for a nutrient-dense raised bed soil amendment that supercharges vegetable growth Advanced Strategies: Timing, Layering, and Synergistic Soil Systems Seasonal Composting Calendar for Raised Bed Gardeners Timing your compost applications strategically multiplies their impact. A seasonal approach that aligns composting inputs with your bed's biological cycles delivers far better results than random amendment. Spring: Apply 2โ€“3 inches of finished compost worked into the top 6 inches of bed soil before your first transplants go in. This is your most important application of the yearโ€”it recharges soil biology after winter dormancy and sets the nutritional foundation for the entire growing season. Summer: Use compost tea every two to three weeks as a soil drench. Apply a light ยฝ-inch layer of vermicompost around heavy-feeding crops like tomatoes, peppers, and squash midway through the season. Mulching with finished compost or straw retains soil moisture during peak heatโ€”a critical advantage for gardeners who want to water efficiently and reduce reliance on frequent hose use. Fall: After the final harvest, this is the ideal time to add a generous layer of partially finished compost or shredded leaves to your beds. Soil organisms will work through the winter, breaking down the material so it's fully integrated by spring. Fall is also the perfect moment to inoculate your beds with mycorrhizal fungi if you haven't already. Winter: Keep your compost system active even in colder months by insulating your pile with a layer of straw bales, or by moving your worm bin indoors to a temperature-stable location like a basement or heated garage. Layering Technique: The "Compost Lasagna" Method For gardeners building new raised beds or refreshing old ones, the layered composting approachโ€”sometimes called "lasagna composting" or sheet mulchingโ€”is exceptionally effective. Start with a layer of cardboard on the bed floor to suppress weeds, then alternate layers of browns (wood chips, dried leaves, shredded paper) and greens (kitchen scraps, fresh grass clippings, green garden waste). Top with a layer of finished compost and quality topsoil. Over one growing seasonโ€”or even faster in warm weatherโ€”these layers break down in place, creating a deep, rich, biologically active growing medium that requires minimal external inputs in subsequent years. This method works particularly well in taller raised beds, such as the extra-tall designs available in Anleolife's lineup, where the greater soil depth gives layered materials more room to decompose without interfering with root zones during the active growing season. Pairing Composting With the Right Raised Bed Setup The synergy between your composting practice and your raised bed infrastructure matters more than most gardeners realize. A well-built, durable raised bed that retains soil and maintains its structure season after season is what allows a long-term composting investment to compound. Anleolife's galvanized steel and rust-resistant raised garden beds are engineered for exactly this kind of long-term soil-building program. With a lifespan of up to 20 years, these beds give you the multi-decade time horizon that advanced composting truly rewards. A bed that degrades or warps after three or four seasons breaks the continuity of your soil-building work; a bed that holds firm for two decades lets your soil ecology deepen and mature in ways that produce increasingly exceptional results year after year. For gardeners curious about best budget raised beds under $200 for vegetables, Anleolife offers multiple size configurations at accessible price pointsโ€”from compact 4x2 options up to full-scale 8x4 and 12x3 layoutsโ€”making it possible to start small and expand your composting and growing system incrementally as your skills and confidence grow. When it comes to best garden ornaments for small spaces, don't overlook the raised bed itself as a design element. Anleolife's clean-lined metal beds serve double duty as both a functional growing space and a visually cohesive garden feature that complements trellises, pathway stones, and decorative planters. Common Misconceptions and Advanced Troubleshooting Misconception 1: More Compost Is Always Better Over-amending raised beds with compostโ€”especially nitrogen-rich vermicompost or immature compostโ€”can actually harm plants. Excess nitrogen produces lush, leafy growth at the expense of fruiting, and immature compost can temporarily tie up nitrogen as it finishes decomposing, starving plants of the nutrient in the short term. Stick to recommended application depths and always use fully finished, earthy-smelling compost before incorporating it into active growing beds. Misconception 2: Compost Replaces All Other Soil Inputs While compost is remarkably comprehensive, certain nutrientsโ€”particularly calcium, sulfur, and specific micronutrientsโ€”may still need targeted supplementation depending on what you're growing. Test your soil every one to two seasons using an affordable home soil test kit or through your county cooperative extension. Compost builds a strong baseline, but knowing your specific soil chemistry allows you to fine-tune inputs for maximum crop performance. Misconception 3: You Need a Large Yard to Compost Effectively This is perhaps the most persistent myth in home composting. Urban micro-gardeners have excellent options: indoor worm bins process kitchen scraps silently and odor-free in closets or under sinks. Bokashi systems handle virtually all food waste in sealed countertop buckets. Even a small tumbler composter on a balcony can process meaningful quantities of organic material. The method should fit your space, not the other way around. Managing Compost in Extreme Weather In hot, dry climatesโ€”common across California, Texas, and Floridaโ€”compost piles and worm bins require extra attention to moisture. Cover hot piles with burlap or a breathable tarp to retain moisture, and water your pile during dry spells. Worm bins may need to be moved to shadier, cooler spots in peak summer. In colder northern climates (New York, Illinois, Washington), insulate outdoor piles and plan your composting calendar around freeze-thaw cycles. Frequently Asked Questions FAQ Q1: How much compost should I add to a raised bed each season? For established raised beds, a top-dressing of 1โ€“2 inches of finished compost applied in spring and again in fall is generally sufficient to maintain excellent soil fertility. For new beds or those that have been growing heavy-feeding crops like tomatoes or corn, work in 3โ€“4 inches of compost mixed into the top 6โ€“8 inches of soil. Always use fully finished compost with a dark, crumbly texture and earthy smellโ€”immature compost can temporarily reduce nutrient availability for your plants. Q2: Is vermicomposting really better than regular composting for raised beds? Both methods produce excellent amendments, but worm castings are exceptionally concentrated in plant-available nutrients and beneficial microbes. For precision applicationsโ€”transplant hole amendments, seedling mixes, or top-dressing delicate herb and flower bedsโ€”worm castings are hard to beat. For bulk seasonal soil refreshes across large raised beds, hot composting produces more volume efficiently. Most experienced gardeners find the best results by combining both: use hot compost for volume and worm castings as a premium finishing amendment. Q3: How long does it take for compost to improve raised bed soil noticeably? You'll often see visible plant response improvements within the same growing season you begin consistent composting. However, the most dramatic long-term improvementsโ€”richer soil texture, superior moisture retention, reduced fertilizer needs, fewer pest and disease pressuresโ€”develop over two to four growing seasons of consistent amendment. This is one of the most compelling reasons to invest in durable raised bed infrastructure with a long lifespan: a bed built to last 20 years gives your composting program the time it needs to fully transform your soil. Summary Advanced composting is far more than a weekend projectโ€”it's a seasonal practice and a long-term philosophy that, when combined with the right raised bed infrastructure, produces compounding returns for every year you garden. Three core takeaways from this guide: Method selection matters. Hot composting, vermicomposting, and bokashi fermentation each excel in different scenarios. Match your composting method to your space, time availability, and primary feedstock to maximize consistency and output quality. Timing and integration are everything. Applying the right compost, in the right quantity, at the right time in your growing season is more valuable than simply adding more compost. Build a seasonal calendar and stick to it. Durable beds amplify the investment. A composting practice only truly pays off when it can build continuously in stable, long-lasting beds. Raised beds designed for a 20-year lifespan give your soil-building work the time horizon it deserves. Your next step is simple: choose one composting method from this guide, set it up this week, and commit to one full growing season of consistent practice. The difference in your soilโ€”and your harvestsโ€”will speak for itself. Upgrade Your Garden With Anleolife Anleolife is proud to support North American home gardeners with durable, thoughtfully designed raised garden bed systems built for exactly this kind of long-term soil-building journey. With a strategic warehouse network across California, Texas, Florida, New York, Illinois, and Washington, your order arrives within 3โ€“8 business daysโ€”so you can start building better soil without delay. Find Anleolife products on Amazon, Walmart, Home Depot, Lowe's, Wayfair, and directly at Anleolife.com, where you'll find consistent quality assurance and dedicated after-sales support across every channel. Anleolife's three core scenariosโ€”Planting (metal raised garden beds, soil systems), Raising (chicken coops, rabbit hutches), and Beautification (decorative accessories, pathway systems)โ€”cover everything from functionality to aesthetics, so you can build the garden life you've always envisioned, one season at a time. We understand that an ideal garden isn't built overnight. Our modular product designs allow flexible expansion based on your needsโ€”from your first raised bed to a fully integrated planting-and-raising ecosystem. We grow with you every step of the way. References Rodale Institute. "Compost and Soil Health Research".https://rodaleinstitute.org/ U.S. Environmental Protection Agency. "Composting at Home".https://www.epa.gov/recycle/composting-home University of California Agriculture and Natural Resources. "Composting Is Good for Your Garden and the Environment".https://ucanr.edu/ Cornell Cooperative Extension. "Compost Physics: Understanding the Science Behind Great Compost".https://compost.css.cornell.edu/ National Sustainable Agriculture Information Service (ATTRA). "Sustainable Soil Management".https://attra.ncat.org/ Note: Standards and research findings may be updated over time. Please check the latest official documents or consult professional advisors for current best practices. About Anleolife Anleolife is a leading outdoor garden solutions provider in North America, dedicated to offering a full-scenario product ecosystem for home gardening enthusiasts, covering planting, raising, and garden beautification. Since its founding, Anleolife has upheld its brand mission, "Made for Garden Life," continuously innovating products and optimizing services to help hundreds of thousands of users upgrade their gardens, reconnect with nature, and enjoy a better garden lifestyle. From first-time growers setting up a single compact bed to experienced gardeners building multi-bed ecosystems enriched by years of advanced composting, Anleolife is committed to being a trusted partner at every stage of your garden journey.
How to Budget for a Backyard Garden Expansion This Summer Without Overspending

How to Budget for a Backyard Garden Expansion This Summer Without Overspending

on May 13 2026
ALT: Budget-friendly backyard garden expansion with galvanized steel raised garden beds and summer planting layout Smart Summer Garden Planning: How to Budget for a Backyard Garden Expansion Without Overspending Key Conclusion: Expanding your backyard garden this summer doesn't have to break the bank. By prioritizing durable materials like galvanized steel planters, choosing modular systems that grow with your needs, and planning before you purchase, you can create a thriving garden ecosystem on a realistic budget. From selecting rot-resistant raised garden beds to adding decorative elements like a garden trellis, and choosing the right trimmer lines for low-maintenance upkeep, smart planning is the foundation of every cost-effective garden expansion. Summer is the season of ambition for home gardeners. The warm weather, longer days, and abundance of plants at local nurseries can make it tempting to buy everything in sight. But without a clear budget and a strategic plan, what starts as an exciting garden expansion can quickly turn into an overwhelming financial and logistical burden. The good news? With the right approach, you can significantly expand your backyard garden this summer while staying comfortably within your means. Whether you're adding your first raised bed, expanding an existing layout, or creating a full planting-and-raising ecosystem, this guide will walk you through every step of the planning and budgeting processโ€”practically, clearly, and without the overwhelm. Who This Guide Is For: Scope of Application โœ… Applicable Scenarios: Homeowners planning to add new raised garden beds, planters, or growing structures to an existing backyard space Urban micro-gardeners working with limited square footage and tight budgets who want to maximize yield and aesthetics Empty nesters or retirees looking to gradually expand their garden hobby in a structured, affordable way Eco-conscious families who want to invest in long-lasting, sustainable garden infrastructure rather than buying cheap products repeatedly โŒ Not Applicable/Cautions: Commercial landscaping or large-scale agricultural projects where professional-grade budgeting tools and contractors are required Renters without permission to make permanent outdoor modificationsโ€”always check your lease agreement before installing raised beds or structures Anyone expecting overnight results; garden expansion is a seasonal, iterative process that rewards patience and planning Why Garden Expansion Costs Spiral Out of Control (And How to Stop It) Every spring and summer, millions of American households decide it's finally time to "do something" with their backyards. According to the National Gardening Association, U.S. household spending on lawn and garden products consistently exceeds $40 billion annuallyโ€”and a significant portion of that spending is unplanned. The root cause of overspending is usually the same: people shop reactively rather than strategically. They walk into a home improvement store, get inspired by the display gardens, and start filling carts without a clear sense of priorities, quantities, or long-term costs. A decorative pot here, a bag of specialty soil there, a trellis that looked nice on the shelfโ€”before long, the budget has doubled and the garden still isn't functional. There's also the hidden cost of cheap materials. Wooden raised beds that rot within two or three seasons, plastic planters that crack under UV exposure, and flimsy trellises that collapse under the weight of climbing plants all seem like savings upfront but end up costing more over time. This is why material selection is one of the most financially important decisions you'll make during any garden expansion. The smartest approach combines upfront planning with long-term thinking. When you understand the full scope of what you want to buildโ€”and choose infrastructure designed to lastโ€”you naturally spend less over the lifetime of your garden. For example, galvanized steel raised garden beds from Anleolife are built to last up to 20 years, which means the cost per year of use is a fraction of what you'd spend replacing cheaper alternatives every few seasons. Market trends also support the shift toward durable, modular garden systems. The popularity of raised bed gardening has surged, particularly among health-conscious families who want to grow their own food, and retirees who want lower-maintenance alternatives to in-ground gardening. This demand has driven innovation in products that are both functional and beautifulโ€”exactly the kind of investment that pays dividends over many growing seasons. The Complete Framework for Budgeting Your Summer Garden Expansion Three-Step Quick Start for Garden Budget Planning Step 1: Audit Your Current Garden and Define Your Goals Before spending a single dollar, spend 30โ€“60 minutes walking your outdoor space and taking honest inventory. What do you already have? What is worn out or underperforming? What new functions do you want to addโ€”more food growing space, a dedicated herb zone, a decorative border, a chicken coop? Write down your top three priorities ranked by importance. This step alone eliminates the impulsive purchases that inflate most garden budgets. Step 2: Research Materials and Map Out Your Layout Once you know what you want, research the best materials for each element. For raised beds, focus on recommended materials for raised garden beds that won't rotโ€”galvanized steel and rust-resistant coated metals significantly outperform wood in longevity and maintenance requirements. Sketch a rough layout of your backyard to scale, assigning specific zones for planting, paths, and decorative elements. This gives you accurate quantity estimates so you're not buying too muchโ€”or too little. Step 3: Build a Line-Item Budget with a 15% Buffer Create a simple spreadsheet listing every item you'll need: beds, soil, plants, tools, accessories, and pest control. Assign a realistic cost to each based on your research. Then add a 15% contingency buffer for unexpected needsโ€”soil amendments, replacement seedlings, or accessories you didn't anticipate. This buffer prevents the panic spending that derails most garden budgets when reality doesn't perfectly match the plan. Comparing Your Main Raised Bed Material Options Choosing the right raised bed material is the single most impactful budget decision you'll make. Here's how the main options stack up: Comparison Dimension Galvanized Steel Untreated Wood Plastic/Composite Typical Lifespan Up to 20 years 3โ€“7 years 5โ€“10 years Rot/Rust Resistance Excellent (rust-resistant coating) Poor (prone to rot) Moderate Maintenance Required Very low High (annual sealing/replacement) Low to moderate Aesthetic Versatility Modern, clean, customizable Natural/rustic Limited styles Long-Term Cost Efficiency High (lower cost per year) Low (frequent replacement) Moderate Modular Expansion Yes (interlocking/stackable options) Limited Sometimes Safety for Food Growing Yes (food-safe coatings available) Depends on treatment Varies by brand The data above makes a compelling case for galvanized steel as the most cost-effective long-term choice. While the upfront cost may be slightly higher than basic wood or plastic alternatives, the dramatically longer lifespan and minimal maintenance needs mean you spend far less per growing season over the life of the bed. Detailed Planning: Allocating Your Budget Across Garden Zones Zone 1: The Planting Infrastructure (Your Biggest Investment) Your raised beds and containers are the foundation of your garden expansion, and they deserve the lion's share of your budget. This is not the place to cut corners, because a poor choice here will cost you more moneyโ€”and more frustrationโ€”over time. For families serious about backyard garden expansion, Anleolife's lineup of galvanized steel and rust-resistant raised garden beds offers a range of sizes to match virtually any space and ambition. Whether you're starting with a compact 4x4 ft configuration or scaling up to a generous 12x3 ft bed for dedicated vegetable rows, the modularity of these systems means you can expand year over year without starting from scratch. If you're new to raised bed gardening, consider beginning with one or two mid-sized beds and adding more as your confidence and budget allow. The modular raised garden bed approach from Anleolife is particularly smart for budget-conscious gardenersโ€”you invest incrementally rather than all at once, and each new addition integrates seamlessly with what you've already built. For gardeners dealing with mobility challenges, back pain, or simply preferring less bending, the extra-tall and waist-high options are worth budgeting for as a priority rather than an upgrade. The ergonomic benefit translates directly to more enjoyment and more time spent in the garden, which ultimately means a more productive and rewarding growing season. Zone 2: Soil Systems and Amendments Many first-time raised bed gardeners dramatically underestimate the cost of filling their beds with quality growing media. A standard raised bed requires a substantial volume of soil, and quality matters enormously for plant health and yield. A budget-conscious approach is to use the "lasagna method" or Mel's Mix approach: layer compostable materials (cardboard, leaves, kitchen scraps) at the base of deep beds to reduce the volume of premium soil needed at the top. This can cut your soil costs by 30โ€“50% without compromising growing performance. When budgeting for soil, calculate the cubic footage of each bed and price out your soil blend before purchasing beds. Knowing your soil cost upfront prevents sticker shock and allows you to sequence your expansion realistically. Zone 3: Pest Control and Plant Health Pest control is often an afterthought in garden budgetingโ€”until you lose a crop to aphids, caterpillars, or fungal disease. Planning for it upfront saves both crops and money. For the best organic insecticide approach for garden pests, neem oil is widely regarded as one of the most versatile and effective options. It controls a broad range of insects including aphids, whiteflies, and spider mites, while being safe for beneficial insects when applied correctly in the evening. Diatomaceous earth is another budget-friendly option for crawling pest control around the base of beds. For recommended pest control solutions for fruit trees, copper-based fungicide sprays combined with horticultural oil in early spring provide excellent control of common fungal diseases and overwintering insects. These are typically available at garden centers and represent a modest but important line item in your garden expansion budget. Budget approximately 5โ€“10% of your total garden expansion cost for pest management supplies to start the season prepared rather than reactive. Zone 4: Tools and Storage Every garden expansion requires the right toolsโ€”and the best garden tool storage solutions for small spaces ensure those tools stay organized, accessible, and protected from the elements. Rather than buying a full set of new tools, audit what you already own and identify genuine gaps. Most gardeners need far fewer tools than marketing would suggest. A quality trowel, hand pruner, hoe, and watering wand cover the vast majority of raised bed gardening tasks. For trimmer lines, invest in a durable option appropriate for your yard's grass and weed pressure. Keeping edges clean around your garden beds dramatically improves the overall appearance of the space without requiring professional landscaping services. For storage, wall-mounted tool organizers and weather-resistant garden sheds or deck boxes offer excellent small-space solutions. Look for options that can be anchored to a fence, garage wall, or shed exterior to keep your outdoor footprint minimal. Zone 5: Garden Beautification and Trellis Systems Beautification is where many gardeners overspend impulsively. The key is to plan decorative elements with the same intentionality as functional ones. A garden trellis is one of the best dual-purpose investments in any gardenโ€”it supports climbing plants like beans, cucumbers, peas, and flowering vines while adding strong visual structure to the space. Budget for at least one or two quality trellis panels if you plan to grow vertical crops, as vertical growing is one of the best strategies for maximizing yield per square foot. For best materials for outdoor garden decorations, weather-resistant metals, powder-coated steel, and UV-stabilized resin consistently outperform painted wood or untreated iron in longevity and maintenance demands. When choosing decorative elements like planters, edging, or pathway markers, look for materials that will hold up through multiple seasons without fading, cracking, or rusting. Anleolife's beautification categoryโ€”including decorative accessories and pathway systemsโ€”offers options that complement the clean aesthetic of their raised bed lineup, creating a cohesive garden look without requiring a professional designer. ALT: Backyard summer garden expansion featuring galvanized steel raised garden beds, a garden trellis for climbing plants, and decorative pathway systems for a cohesive outdoor design Advanced Budgeting Strategies: Getting More From Every Dollar Phased Expansion: The Most Powerful Budget Tool You're Not Using One of the most effective strategies for ambitious gardeners with real-world budgets is phased expansion. Rather than trying to build your dream garden in a single summer, plan a multi-year roadmap. Year one might focus on two raised beds and a quality soil system. Year two adds additional beds, a trellis, and a composting station. Year three introduces a chicken coop or rabbit hutch for integrated garden fertilization. This approach has a compounding benefit: each phase teaches you what works in your specific climate, soil, and lifestyle, so you avoid buying things that ultimately don't fit your actual gardening habits. Common Misconception: "Organic" Always Means "Expensive" Many eco-conscious gardeners assume that going organic dramatically increases their garden budget. In practice, the opposite is often true over the long term. Composting kitchen scraps eliminates the need for expensive synthetic fertilizers. Companion planting (like marigolds with tomatoes) reduces pest pressure naturally. Saving seeds from open-pollinated varieties cuts seed costs significantly year over year. The upfront investment in quality infrastructureโ€”like galvanized steel beds that last up to 20 yearsโ€”enables organic practices that become progressively cheaper as your garden ecosystem matures. Timing Your Purchases Strategically Garden supply retailers typically offer meaningful discounts at predictable times: end-of-season clearance (late summer), spring launch promotions (Februaryโ€“March), and major holidays like Memorial Day and Labor Day. Planning your expansion purchases around these windows can yield 15โ€“30% savings on soil, seeds, accessories, and sometimes even beds and structures. Anleolife products ship within 3โ€“8 business days from their strategically distributed U.S. warehouse network, which means you can take advantage of promotional timing without worrying about long lead times disrupting your planting schedule. Frequently Asked Questions FAQ Q1: How do I calculate how much soil I need for my raised garden beds? Calculate soil volume by multiplying the length ร— width ร— height of each bed (in feet) and dividing by 27 to convert to cubic yards. For deeper beds, consider filling the lower third with a drainage layer of logs, cardboard, or compost to reduce the volume of premium growing mix required. Most garden supply stores and bag labels list coverage volume, making it easy to estimate quantities once you know your cubic footage. Q2: Are galvanized steel raised garden beds safe for growing vegetables? Yes, modern galvanized steel raised beds are widely considered safe for growing edible plants. The zinc coating used in galvanization is present in trace amounts in most soils naturally and is actually an essential micronutrient for plants. Reputable manufacturers like Anleolife use food-safe materials and coatings. Research published by university agricultural extension services consistently supports the safety of galvanized steel for vegetable gardening applications. Q3: How much should I realistically budget for a starter backyard garden expansion this summer? A sensible starter budget for a meaningful backyard garden expansionโ€”including one or two quality raised beds, soil, basic tools, starter plants, and pest control suppliesโ€”typically falls in the range of a few hundred to a few thousand dollars depending on bed size and scope. The key is choosing durable infrastructure: a galvanized steel bed with a 20-year lifespan costs dramatically less per growing season than a wooden bed replaced every three to five years. Start focused, expand gradually, and let your results guide future investment. Summary Budgeting for a backyard garden expansion this summer is ultimately about making intentional decisions rather than impulsive ones. Three core principles stand out from everything covered in this guide: 1. Invest in durability from the start. The materials you choose for your raised beds, trellises, tools, and decorative elements determine not just how your garden looks this summer, but how much you'll spend maintaining and replacing things over the next decade. Galvanized steel raised garden beds with a 20-year lifespan represent the kind of infrastructure investment that pays for itself many times over. 2. Plan in phases, not all at once. A modular, phased approach to garden expansion allows you to learn, adapt, and invest strategically rather than overwhelmingly. Each season's experience informs smarter spending in the next. 3. Don't forget the ongoing costs. Soil, seeds, pest control, and tool maintenance are annual line items that must be factored into your total garden budget. Planning for these upfront prevents the budget creep that catches so many gardeners off guard. Your next step is simple: walk your backyard today, define your top three expansion priorities, and begin researching the materials and products that will serve those priorities for years to come. Start Your Expansion with Anleolife Nationwide U.S. warehouse network: Strategically located in California, Texas, Florida, New York, Illinois, and Washington to ensure delivery within 3โ€“8 business daysโ€”so your garden upgrade plans never have to wait. Multi-channel availability: Anleolife products are available on Amazon, Walmart, Home Depot, Lowe's, Wayfair, and directly at Anleolife.com, offering consistent quality assurance and responsive after-sales service wherever you prefer to shop. Three complete garden scenarios: Planting (metal raised garden beds, soil systems), Raising (chicken coops, rabbit hutches), and Beautification (decorative accessories, pathway systems)โ€”meeting your complete needs from functionality to aesthetics under one trusted brand. We understand that an ideal garden is not built overnight, but gradually improved over time. Anleolife's modular product design allows flexible expansion based on your needsโ€”from your first raised garden bed to a fully integrated planting-and-raising ecosystem. We grow with you every step of the way. References National Gardening Association. "Garden Market Statistics and Consumer Spending Data."https://garden.org/ U.S. Environmental Protection Agency. "Reducing Pesticide Risks in the Home Garden."https://www.epa.gov/safepestcontrol/lawn-and-garden University of California Agriculture and Natural Resources (UC ANR). "Raised Bed Gardening โ€” Soil, Irrigation, and Plant Health Guidance."https://ucanr.edu/ Penn State Extension. "Organic Pest Management in Home Gardens."https://extension.psu.edu/ USDA Agricultural Research Service. "Home Garden Planning and Soil Health Resources."https://www.ars.usda.gov/ Note: Standards and recommendations may be updated regularly. Please check the latest official documents or consult professional advisors for the most current guidance. About Anleolife Anleolife is a leading outdoor garden solutions provider in North America, dedicated to offering a full-scenario product ecosystem for home gardening enthusiasts, covering planting, raising, and garden beautification. Since its founding, we have upheld our brand mission, "Made for Garden Life," continuously innovating products and optimizing services to help hundreds of thousands of users upgrade their gardens, reconnect with nature, and enjoy a better garden lifestyle.