


Gardening Is The Best Longevity Exercise, With Three Key Benefits: Natural Physical Movement, Powerful Stress Relief, And Connection With Nature.
Garden Life Guide

The 15 Best Vegetables to Grow in a Raised Garden Bed for Beginners
on Apr 29 2026
The 15 Best Vegetables to Grow in a Raised Garden Bed for Beginners
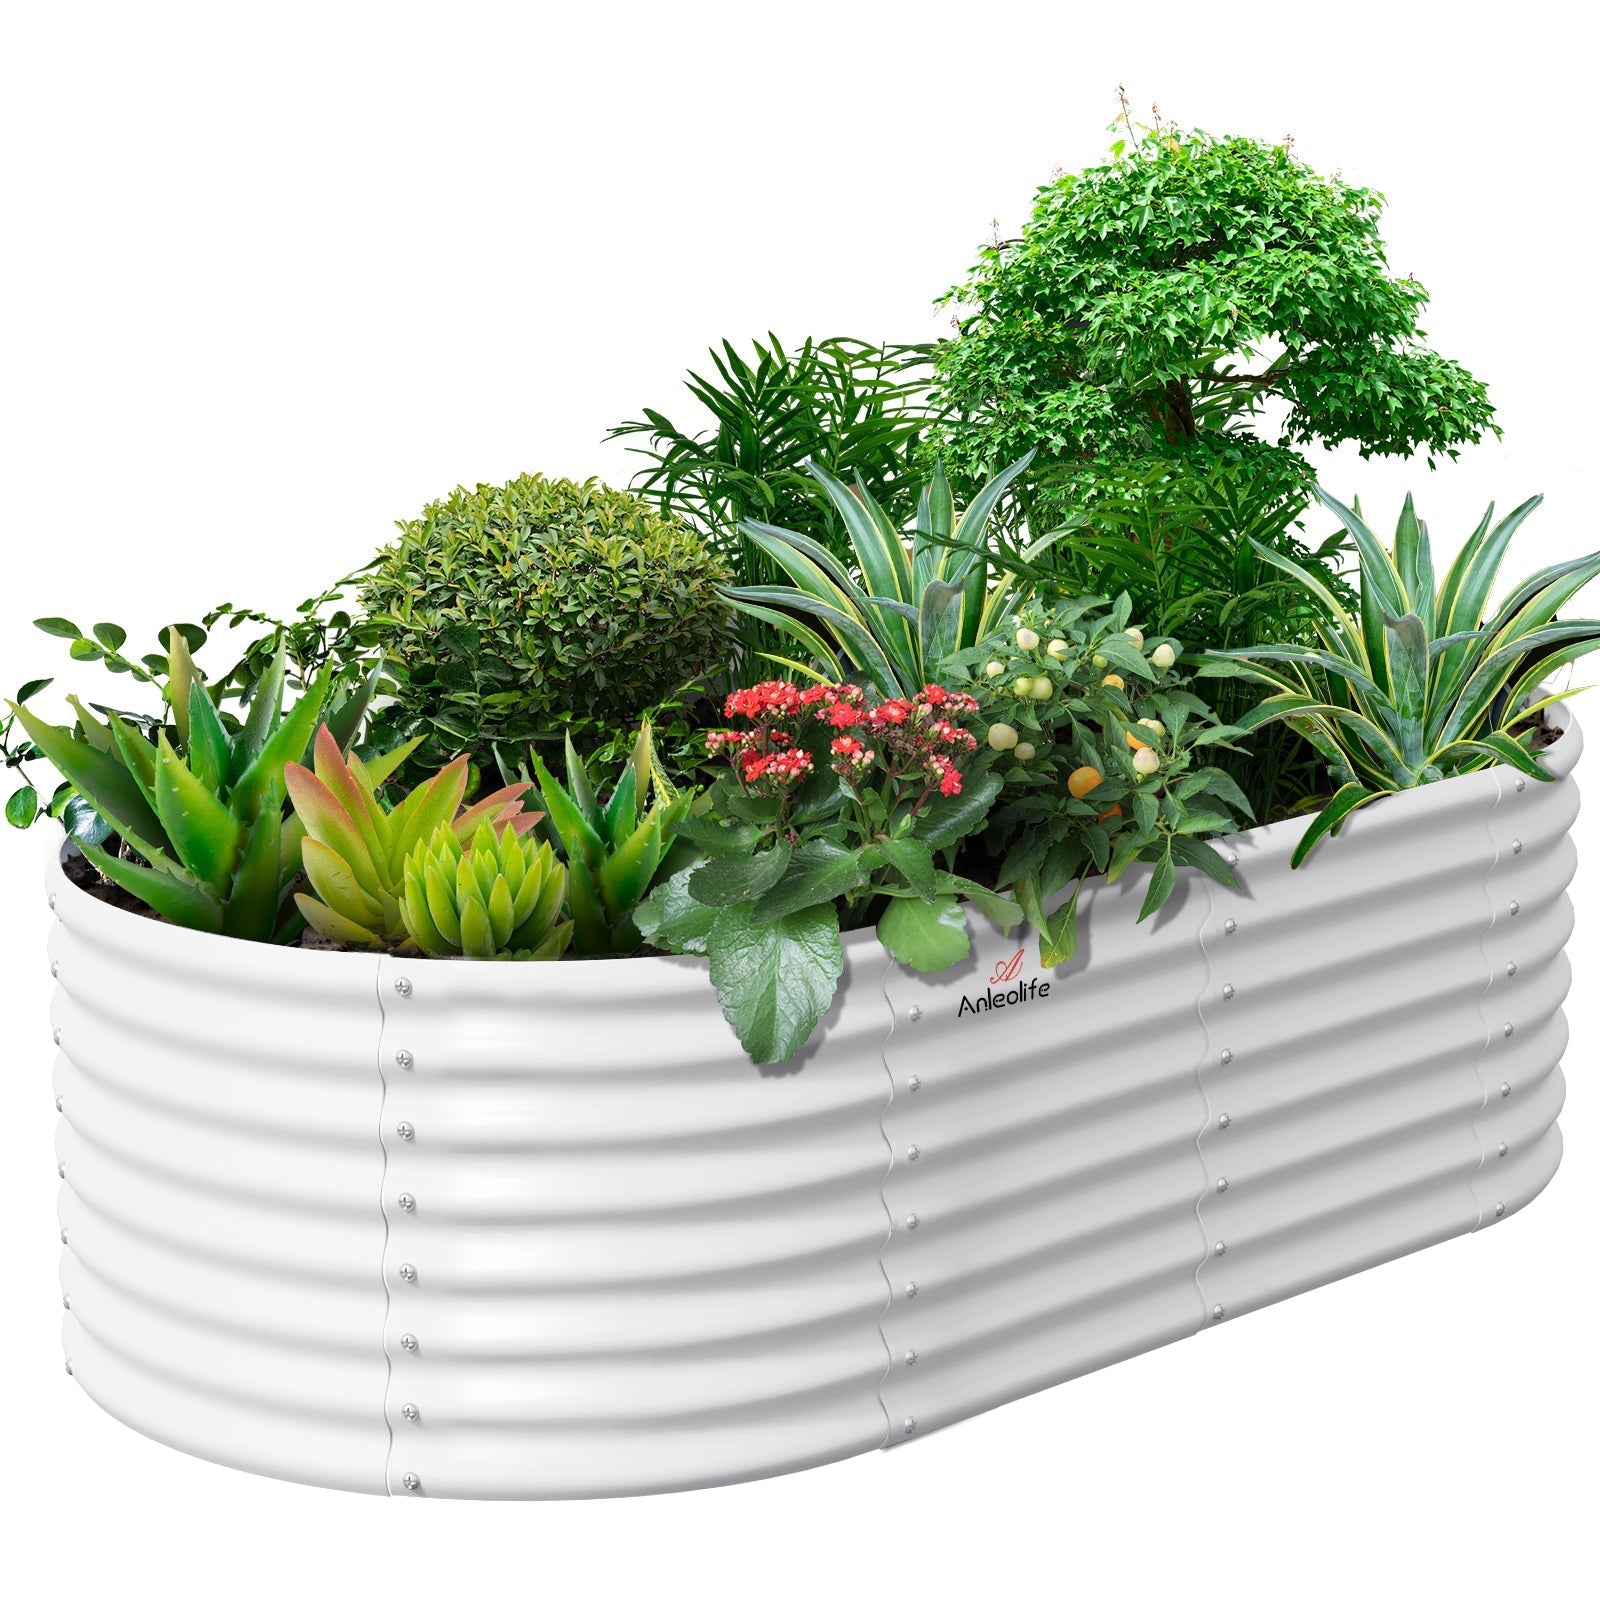
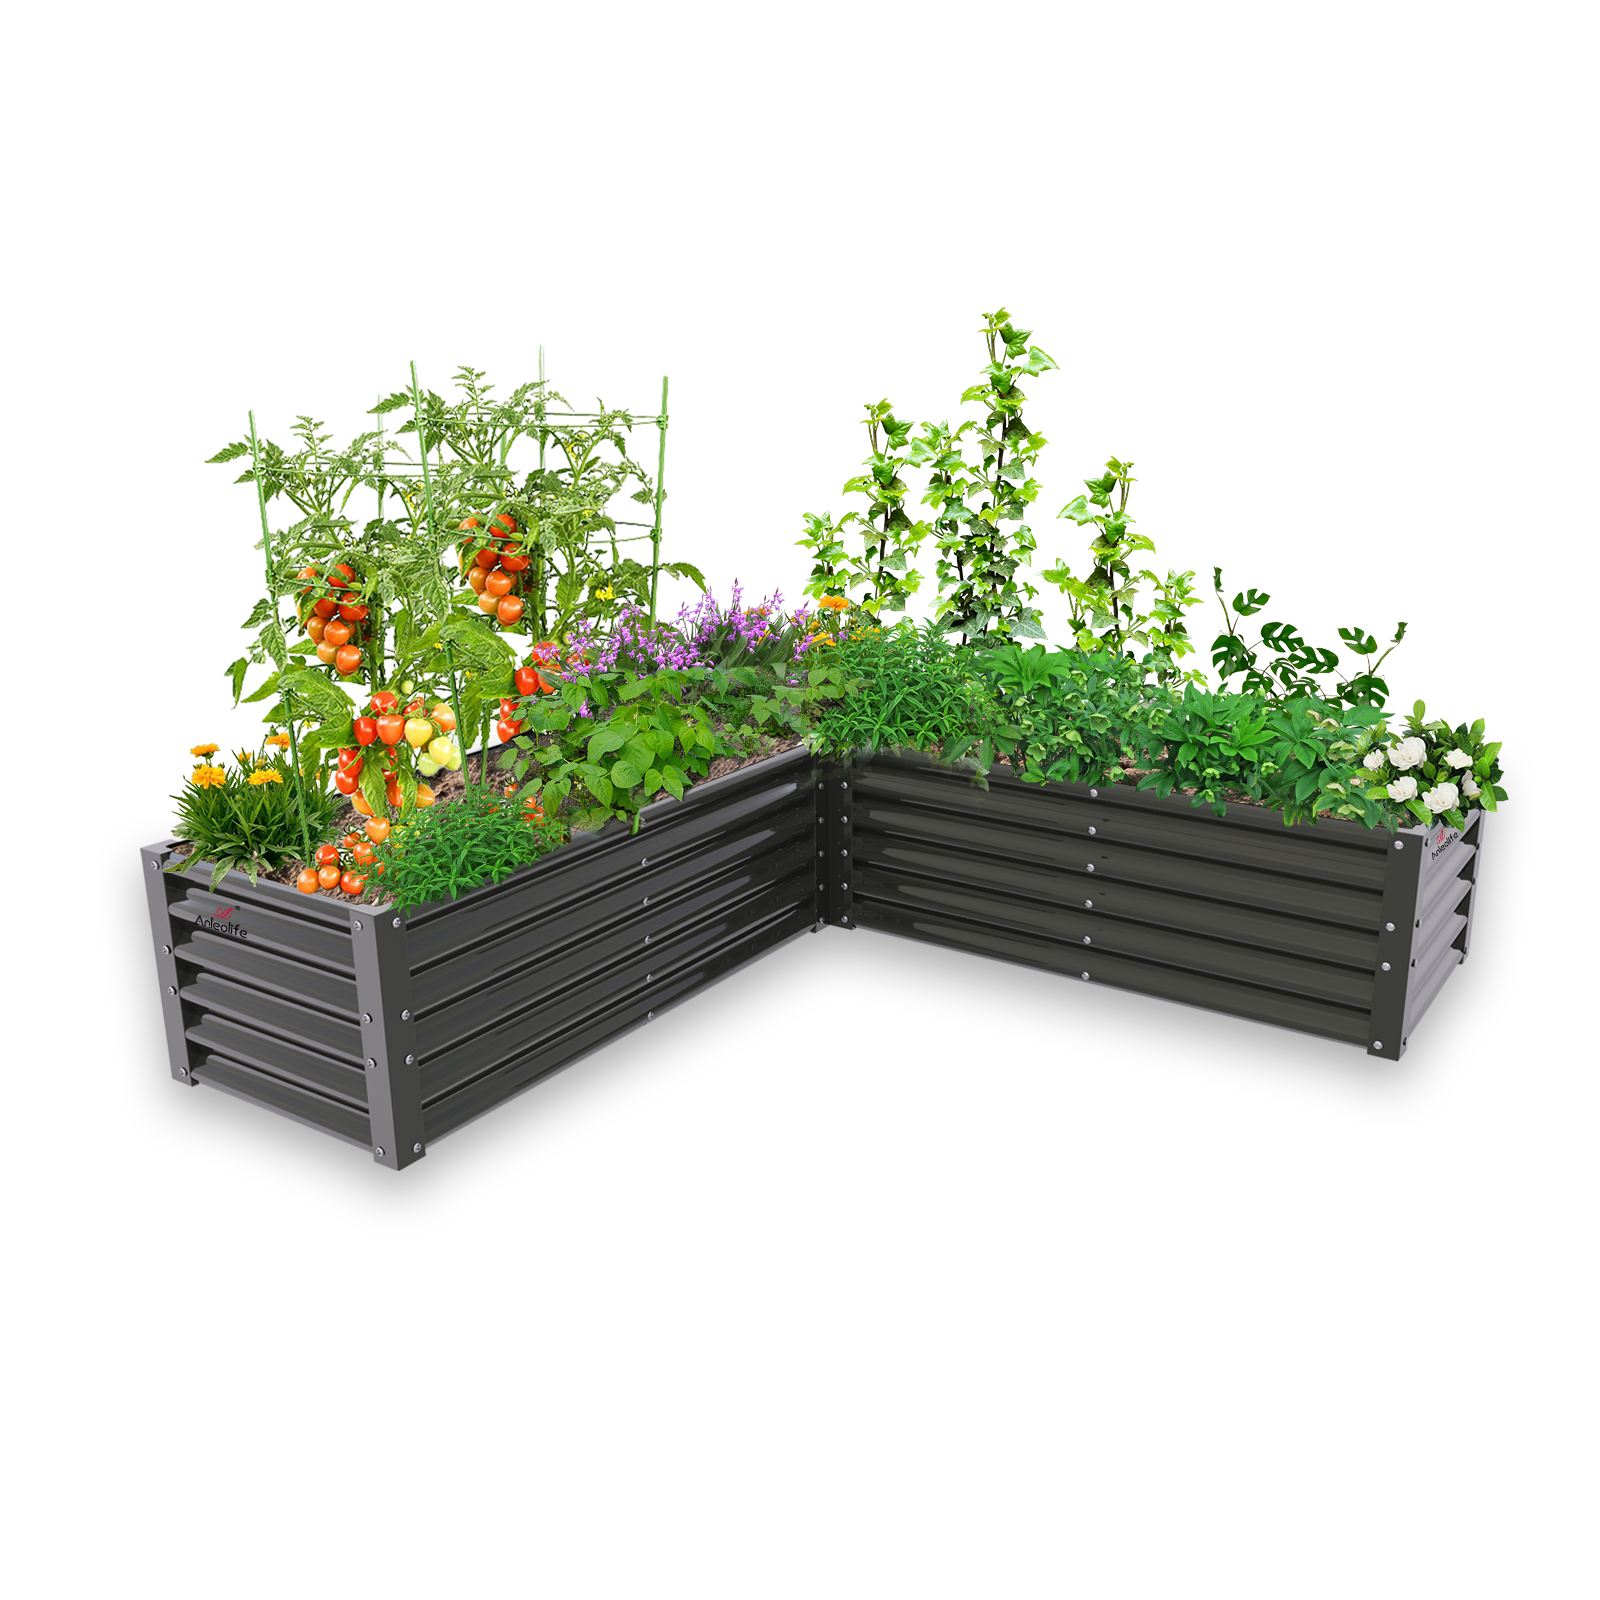
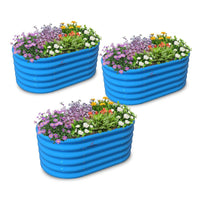
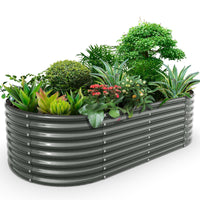
ALT: Beginner gardener harvesting fresh vegetables from a raised bed garden with thriving green plants
Why Raised Bed Gardening Is the Smartest Start for Beginner Vegetable Growers
Key Conclusion: A well-planned raised bed garden layout gives beginners an immediate advantage: better soil control, fewer weeds, and faster harvests. Whether you're designing a compact raised bed planting layout for a suburban backyard or a multi-bed urban setup, choosing the right vegetables from the start is the single most important decision you'll make. The right raised bed layout paired with beginner-friendly crops dramatically reduces failure rates and maximizes your first-season success. This guide covers the 15 best vegetables to grow, why they thrive in raised beds, and exactly how to get started.
Raised bed vegetable gardening has surged in popularity among home growers, and it's easy to see why. Unlike traditional in-ground gardening, raised beds offer a controlled environment where you decide the soil quality, drainage, and spacing — three factors that make or break a vegetable garden. For beginners especially, this level of control removes much of the guesswork.
This article is built around three core principles: choosing vegetables matched to your skill level, planning a layout that maximizes yield in limited space, and building healthy soil from day one. Together, these principles form the foundation of a garden that rewards effort quickly and keeps growing stronger every season.
Who This Guide Is For
✅ Applicable Scenarios:
First-time home gardeners setting up their first raised bed this season
Urban micro-gardeners with limited outdoor space looking to maximize yield per square foot
Empty nesters and retirees who want a low-maintenance, productive garden without heavy physical labor
Eco-conscious families growing vegetables to reduce grocery bills and control what goes into their food
❌ Not Applicable/Cautions:
Experienced market gardeners managing large-scale commercial production (this guide focuses on home-scale beginner setups)
Growers in extreme climates (such as zones 1–2 or zone 13) without season-extension tools — some vegetable recommendations assume moderate growing conditions
Gardeners who have not yet selected a raised bed location with adequate sunlight (most vegetables on this list require at minimum 6 hours of direct sun per day)
Why Raised Beds Outperform Traditional Gardens for Beginners
The numbers tell a compelling story. According to the National Gardening Association, participation in food gardening has grown steadily in the United States, with millions of households now growing some portion of their own food. A significant share of that growth is driven by raised bed adoption, particularly among first-time gardeners in suburban and urban settings.
The reason isn't hard to understand. In-ground gardening requires working with whatever soil exists on your property — and in many suburban neighborhoods, that means compacted clay, nutrient-poor subsoil left over from construction, or contaminated urban soil that shouldn't be used for food production at all. Raised beds eliminate this problem entirely by letting you fill your bed with a custom soil blend optimized for vegetables.
Soil quality is the single most important factor in vegetable gardening success. In a raised bed, you control it completely. A commonly recommended starting mix is roughly 60% topsoil, 30% compost, and 10% amendments such as perlite or aged wood chips for drainage. This ratio of compost to soil for raised garden beds creates a loose, rich, well-draining environment where vegetables establish quickly and grow vigorously.
Beyond soil control, raised beds offer meaningful physical advantages. The elevated sides reduce bending and kneeling — a feature particularly appreciated by older gardeners and those with mobility limitations. The defined border also creates a clear psychological boundary that makes the garden feel manageable rather than overwhelming. When your garden is a contained, organized system, it's far easier to stay on top of watering, feeding, and pest management.
Drainage is another major win. Vegetable roots despise standing water, and many heavy soils stay waterlogged after rain events. Raised beds drain freely, reducing root rot and fungal disease — two of the most common problems beginner gardeners encounter.
Finally, raised beds warm up faster in spring. Because the soil volume is above ground level, it absorbs heat more efficiently than in-ground beds. This gives you a meaningful head start on the growing season, allowing earlier planting dates and longer harvest windows.
For a comprehensive guide to setting up your first raised bed system from structure selection to soil filling, visit Anleolife.com, where detailed resources cover every stage of the process.
The 15 Best Vegetables for a Beginner Raised Bed Garden
Three-Step Quick Start Before You Plant
Step 1: Choose Your Bed and Fill It Right
Before a single seed goes in the ground, your raised bed needs to be in place and filled with quality growing medium. Select a location that receives at least 6 to 8 hours of direct sunlight daily. Fill your bed with a blended mix — roughly 60% topsoil, 30% compost, and 10% drainage amendment. This best ratio of compost to soil for raised garden beds creates a structure that holds moisture without becoming waterlogged. Allow 2–3 days for the mix to settle before planting.
Step 2: Plan Your Raised Bed Planting Layout
Sketch your bed on paper before planting. Assign taller plants (like tomatoes and beans) to the north side so they don't shade shorter crops. Group fast-maturing plants (like radishes and lettuce) together so you can replant that space after harvest. Use the square-foot gardening method as a starting framework: divide your bed into 1-foot squares and assign each square a crop based on its recommended spacing. This raised bed garden layout approach eliminates overcrowding, maximizes yield, and simplifies maintenance.
Step 3: Plan for Water and Companion Planting
Set up a drip irrigation system or soaker hose before your plants get established — it's much harder to install once the bed is full. Follow a raised bed garden companion planting guide to pair crops strategically: basil near tomatoes deters aphids, carrots loosen soil for neighboring lettuce, and marigolds along bed edges repel common pests. These companion planting relationships reduce your reliance on pesticides and create a more resilient garden ecosystem from the start.
The 15 Vegetables — Compared at a Glance
Understanding which vegetables suit your goals, space, and schedule helps you make smarter planting decisions. Here's how the 15 best beginner vegetables compare across key dimensions.
Vegetable
Days to Harvest
Difficulty
Ideal Position in Bed
Companion Planting Notes
Tomatoes
60–85 days
Easy–Moderate
Back/North edge
Basil, marigolds
Zucchini
45–55 days
Easy
Corner/edge
Nasturtium, beans
Bush Beans
50–60 days
Easy
Mid-bed
Carrots, cucumber
Lettuce
30–45 days
Very Easy
Front/edge
Radish, carrots
Radishes
22–30 days
Very Easy
Edges/between rows
Most vegetables
Spinach
35–45 days
Easy
Front or shaded edge
Strawberries, peas
Cucumbers
50–70 days
Easy
Back with trellis
Beans, dill
Kale
55–75 days
Very Easy
Mid-to-back
Beets, herbs
Swiss Chard
50–60 days
Easy
Mid-bed
Beans, onions
Peas
60–70 days
Easy
Back with support
Carrots, radishes
Carrots
70–80 days
Moderate
Mid-bed
Lettuce, sage
Beets
55–70 days
Easy
Mid-bed
Garlic, lettuce
Green Onions
60–80 days
Very Easy
Edges
Most vegetables
Basil
25–35 days (leaf)
Easy
Near tomatoes
Tomatoes, peppers
Peppers
70–90 days
Moderate
Back/South-facing
Basil, carrots
Days to harvest are approximate ranges based on common variety performance under typical growing conditions.
Detailed Profiles: Your 15 Beginner Vegetables
Tomatoes — The Crown Jewel of Raised Beds
Tomatoes are the number-one crop home gardeners want to grow, and raised beds make them significantly easier to succeed with. In a raised bed, you can dial in exactly the rich, well-draining soil tomatoes crave. Choose determinate (bush) varieties if your bed is smaller — they stay compact and produce a defined harvest window. Plant one per square foot for large varieties, or two per square foot for cherry tomatoes. Pair with basil as your raised bed companion planting guide suggests — the aromatic oils in basil genuinely confuse and deter aphids, and the combination tastes as good together in the kitchen as it grows in the garden.
Zucchini — One Plant, Abundant Harvests
Few vegetables reward beginners more quickly than zucchini. Plant just two or three plants in a corner of your raised bed and they'll provide more harvests than most families can eat through summer. The key is harvesting frequently: pick zucchini when they're finger-length for best flavor and to encourage continuous production. Zucchini's large leaves also act as a living mulch, shading the soil and reducing moisture loss — a practical bonus in hot climates.
Bush Beans — Set It and (Almost) Forget It
Bush beans require almost no support, germinate reliably from direct seed, and produce continuously over several weeks. They're one of the easiest vegetables to grow from seed, making them ideal for absolute beginners. As a bonus, beans are nitrogen-fixers: their root systems host beneficial bacteria that capture atmospheric nitrogen and deposit it in the soil, improving conditions for neighboring plants in your raised bed layout.
Lettuce — The Fastest Gratification in the Garden
If you need encouragement early in your gardening journey, lettuce delivers it. Many varieties are ready to harvest in as little as 30 days, and you can practice "cut-and-come-again" harvesting — snipping outer leaves while the plant continues growing from the center. Lettuce prefers cooler temperatures, making it perfect for spring and fall planting. In warmer climates, tuck it in the shade cast by taller plants like tomatoes or peppers.
Radishes — The Beginner's Secret Weapon
Radishes are so fast-growing (some varieties mature in 22 days) that they serve a dual purpose: they give beginners quick feedback that their soil and watering are on track, and they act as space-fillers between slower-maturing crops. Plant radishes between carrots, beets, or beans and harvest them before the main crop needs the space. They're also useful as trap crops, attracting flea beetles away from more valuable plants.
Spinach — Nutrition and Simplicity Combined
Spinach is a nutritional powerhouse and one of the most forgiving vegetables in a raised bed. It tolerates light frost, making it a great choice for early spring and late fall growing. Like lettuce, it can be harvested using the cut-and-come-again method. Space plants about 3 inches apart and keep the soil consistently moist for best results. Spinach will bolt (go to seed) in heat, so time plantings for cooler periods or grow it in partial shade during summer.
Cucumbers — Vertical Space Savers
Cucumbers are vigorous, productive, and perfect for a raised bed — provided you give them somewhere to climb. Installing a trellis along the back of your bed keeps cucumbers vertical, saves valuable bed space, and makes harvesting dramatically easier. Vining cucumbers grown vertically also have better air circulation, which reduces the risk of powdery mildew, a common cucumber problem in humid conditions. Pair with dill for flavor and companion planting benefits.
Kale — The Resilient Superfood
Kale is arguably the most beginner-proof vegetable on this list. It tolerates heat, tolerates frost, and continues producing leaves for months. A single raised bed planted with four to six kale plants can supply a family with greens from early summer through winter in most growing zones. Harvest outer leaves first, leaving the central growth point intact. Kale actually improves in flavor after a light frost — a bonus for fall gardeners.
Swiss Chard — Color and Productivity in One
Swiss chard combines visual appeal with practical productivity. Its brightly colored stems — red, yellow, orange, and white — add beauty to your raised bed layout while producing edible leaves and stems over an extended season. Like kale, it's heat-tolerant and frost-tolerant. Both the leaves and colorful stems are edible, and it can be used as a spinach substitute in recipes. An excellent choice for gardeners who want their vegetable bed to look as attractive as it is functional.
Peas — Spring's Sweetest Reward
Sugar snap peas and snow peas thrive in the cool temperatures of early spring, making them one of the first crops you can plant each season. They need vertical support — a simple bamboo trellis or netting works well — and they enrich the soil with nitrogen just like beans. Peas are best direct-seeded in early spring and can tolerate light frosts. They tend to wind down as summer heat sets in, at which point you can replant that space with a warm-season crop.
Carrots — Rewarding When the Soil Is Right
Carrots require loose, deeply worked, stone-free soil to develop straight, full-sized roots — which is exactly what a well-prepared raised bed provides. This is why carrots that fail miserably in compacted garden soil often thrive in raised beds. Use a mix that's light and free-draining, direct sow seeds thinly, and thin seedlings to the recommended spacing once they're established. Patience is required (70–80 days), but the harvest of sweet, homegrown carrots is deeply satisfying.
Beets — Leaves and Roots, Double the Harvest
Beets offer beginners an unusual advantage: both the root and the greens are edible, effectively giving you two harvests from a single plant. Young beet greens can be harvested like salad greens well before the root matures. Beets prefer cooler weather and direct sowing. They're tolerant of partial shade and pair well with garlic, which may deter common soil pests.
Green Onions (Scallions) — The Easiest Allium
Green onions are productive, fast, and nearly foolproof. They can be grown from seed or from the root ends of store-bought scallions placed in soil — a satisfying low-cost experiment for beginners. Plant them along the edges of your bed where they won't shade other crops, and harvest by snipping the green tops while leaving roots in place for regrowth. Green onions also serve a pest-deterring role near susceptible crops.
Basil — Essential Herb and Companion Plant
While not a vegetable in the traditional sense, basil belongs in every beginner's raised bed for two reasons: culinary utility and companion planting value. As noted in raised bed garden companion planting guides, basil planted alongside tomatoes helps deter aphids and whiteflies. It grows rapidly in warm conditions and benefits from regular harvesting — pinch flower buds as they appear to extend the productive life of the plant through summer.
Peppers — Patient Growers with Big Rewards
Peppers take longer to mature than most other beginner vegetables, but their flavor and productivity make the wait worthwhile. Like tomatoes, they thrive in the rich, warm, well-drained soil of a raised bed. Plant after your last frost date when soil has warmed. Both sweet varieties (bell peppers) and mild hot varieties (banana peppers, Anaheim) are relatively easy for beginners. Pair with basil and carrots in your companion planting layout.
ALT: Vibrant beginner raised bed garden layout featuring companion planted tomatoes, basil, lettuce, and peppers growing together
Advanced Tips: Getting More From Your Raised Bed Season After Season
Succession Planting Extends Your Harvest Window
One of the most powerful techniques beginners often overlook is succession planting — sowing small batches of fast-maturing crops every two to three weeks rather than planting everything at once. This ensures a continuous harvest of lettuce, radishes, and spinach throughout the season instead of a glut followed by nothing. In your raised bed planting layout, mark out small sections designated for succession crops and rotate them on a simple schedule.
Soil Maintenance Between Seasons
After each growing season, your raised bed soil needs replenishment. Add a 2–3 inch layer of quality compost on top of the bed and allow it to integrate over winter. Avoid walking in or compacting the bed, which destroys the loose structure you've built. Over time, a well-maintained raised bed actually improves from season to season — especially when using recommended materials raised garden beds that won't rot, such as the galvanized steel systems offered by Anleolife, which are built to last up to 20 years, ensuring your soil investment compounds over time rather than being lost to a failing structure.
Addressing Common Misconceptions
Misconception 1: "More plants means more food." Overcrowding is one of the most common beginner mistakes. Crowded plants compete for nutrients, light, and airflow — resulting in smaller yields and higher disease pressure. Follow recommended spacing on seed packets and plant fewer, healthier plants.
Misconception 2: "Raised beds don't need watering as often as in-ground beds." Actually, the opposite is often true. Because raised beds drain efficiently and have greater surface-area exposure, they can dry out faster than in-ground gardens, especially in warm weather. Consistent moisture monitoring is essential.
Misconception 3: "Any soil from the garden center works." Not all bagged soil is appropriate for raised beds. Straight topsoil can compact over time, while pure potting mix may drain too quickly. The recommended best ratio of compost to soil for raised garden beds (approximately 60/30/10) outperforms single-ingredient fills in nearly every study and practical trial.
Frequently Asked Questions FAQ
Q1: How do I plan a raised bed garden companion planting layout for beginners?
Start with a simple grid map of your raised bed divided into square-foot sections. Place tall plants (tomatoes, peppers) on the north edge to avoid shading shorter neighbors. Cluster compatible companions: basil near tomatoes, carrots near lettuce, and marigolds along outer edges. A basic companion planting guide helps you identify which combinations actively benefit each other through pest deterrence, soil improvement, or efficient space use. Keep the plan simple in year one — three to four companion pairs is plenty to start with.
Q2: Are metal raised garden beds safe for growing vegetables?
Yes — high-quality galvanized steel raised garden beds are widely considered safe for vegetable production. Modern galvanized steel uses a zinc coating that is stable and does not leach harmful levels of material into soil under typical garden conditions. Look for beds made from food-grade quality steel and lined with appropriate barriers if you prefer extra peace of mind. Anleolife's galvanized metal beds are designed with a 20-year lifespan, making them a durable, long-term investment in safe, productive growing.
Q3: How long does it take to set up a raised bed and start seeing harvests?
Setup typically takes one to two days for bed assembly, soil filling, and planting. From there, fast-maturing crops like radishes can be ready in as few as 22–30 days, and lettuce in 30–45 days. With Anleolife's warehouse network spanning California, Texas, Florida, New York, Illinois, and Washington, your raised bed can arrive in as fast as 3–8 business days after ordering — meaning you could be planting your first seeds within two weeks of making the decision to start gardening.
Summary
Starting a raised bed vegetable garden is one of the most rewarding decisions a home grower can make — and choosing the right vegetables from the beginning makes all the difference between a frustrating first season and one that has you planning next year's expansion before summer ends.
Three key takeaways from this guide:
First, your raised bed garden layout and planting strategy matter as much as which vegetables you choose. Use companion planting, succession sowing, and thoughtful placement to maximize every square foot.
Second, soil is everything. Invest in a quality mix using the recommended ratio of compost to soil for raised garden beds, replenish it seasonally with compost, and your productivity will increase year after year.
Third, start with beginner-friendly vegetables from this list. Lettuce, radishes, zucchini, beans, tomatoes, and kale will build your confidence, fill your kitchen, and teach you the rhythms of vegetable gardening without overwhelming you in year one.
The path from complete beginner to confident home grower is shorter than most people think — especially when you start with the right structure, the right soil, and the right plants.
Ready to Grow? Start With Anleolife
Nationwide U.S. warehouse network: Strategically located in California, Texas, Florida, New York, Illinois, and Washington to ensure delivery within 3–8 business days — so your garden upgrade plans never have to wait.
Multi-channel availability: Products are available on major e-commerce platforms including Amazon, Walmart, Home Depot, Lowe's, and Wayfair, as well as the official website Anleolife.com, providing consistent quality assurance and after-sales service.
Three core scenarios: Planting (metal raised garden beds, soil systems), Raising (chicken coops, rabbit hutches), and Beautification (decorative accessories, pathway systems) — meeting complete needs from functionality to aesthetics.
We understand that an ideal garden is not built overnight, but gradually improved over time. Anleolife's modular product design allows flexible expansion based on your needs — from your first raised garden bed to a fully integrated planting-and-raising ecosystem. Our metal garden beds are built to last up to 20 years, meaning the infrastructure you invest in today supports your gardening journey for decades to come. We grow with you every step of the way.
References
National Gardening Association. "Garden to Table: A Guide to Growing Food at Home".
https://garden.org/
University of California Agriculture and Natural Resources. "Vegetables: Guidelines for Growing Food in Raised Beds".
https://ucanr.edu/
USDA National Agricultural Library. "Home Gardening and Food Safety Resources".
https://www.nal.usda.gov/
Penn State Extension. "Raised Bed Vegetable Gardening".
https://extension.psu.edu/
Colorado State University Extension. "Companion Planting in the Vegetable Garden".
https://extension.colostate.edu/
Note: Standards and research may be updated; please check the latest official documents or consult professional advisors for current recommendations.
About Anleolife
Anleolife is a leading outdoor garden solutions provider in North America, dedicated to offering a full-scenario product ecosystem for home gardening enthusiasts, covering planting, raising, and garden beautification. Since its founding, we have upheld our brand mission, "Made for Garden Life," continuously innovating products and optimizing services to help hundreds of thousands of users upgrade their gardens, reconnect with nature, and enjoy a better garden lifestyle.

How to Build a Complete Backyard Garden for Under $1,000
on Apr 29 2026
How to Build a Complete Backyard Garden for Under $1,000
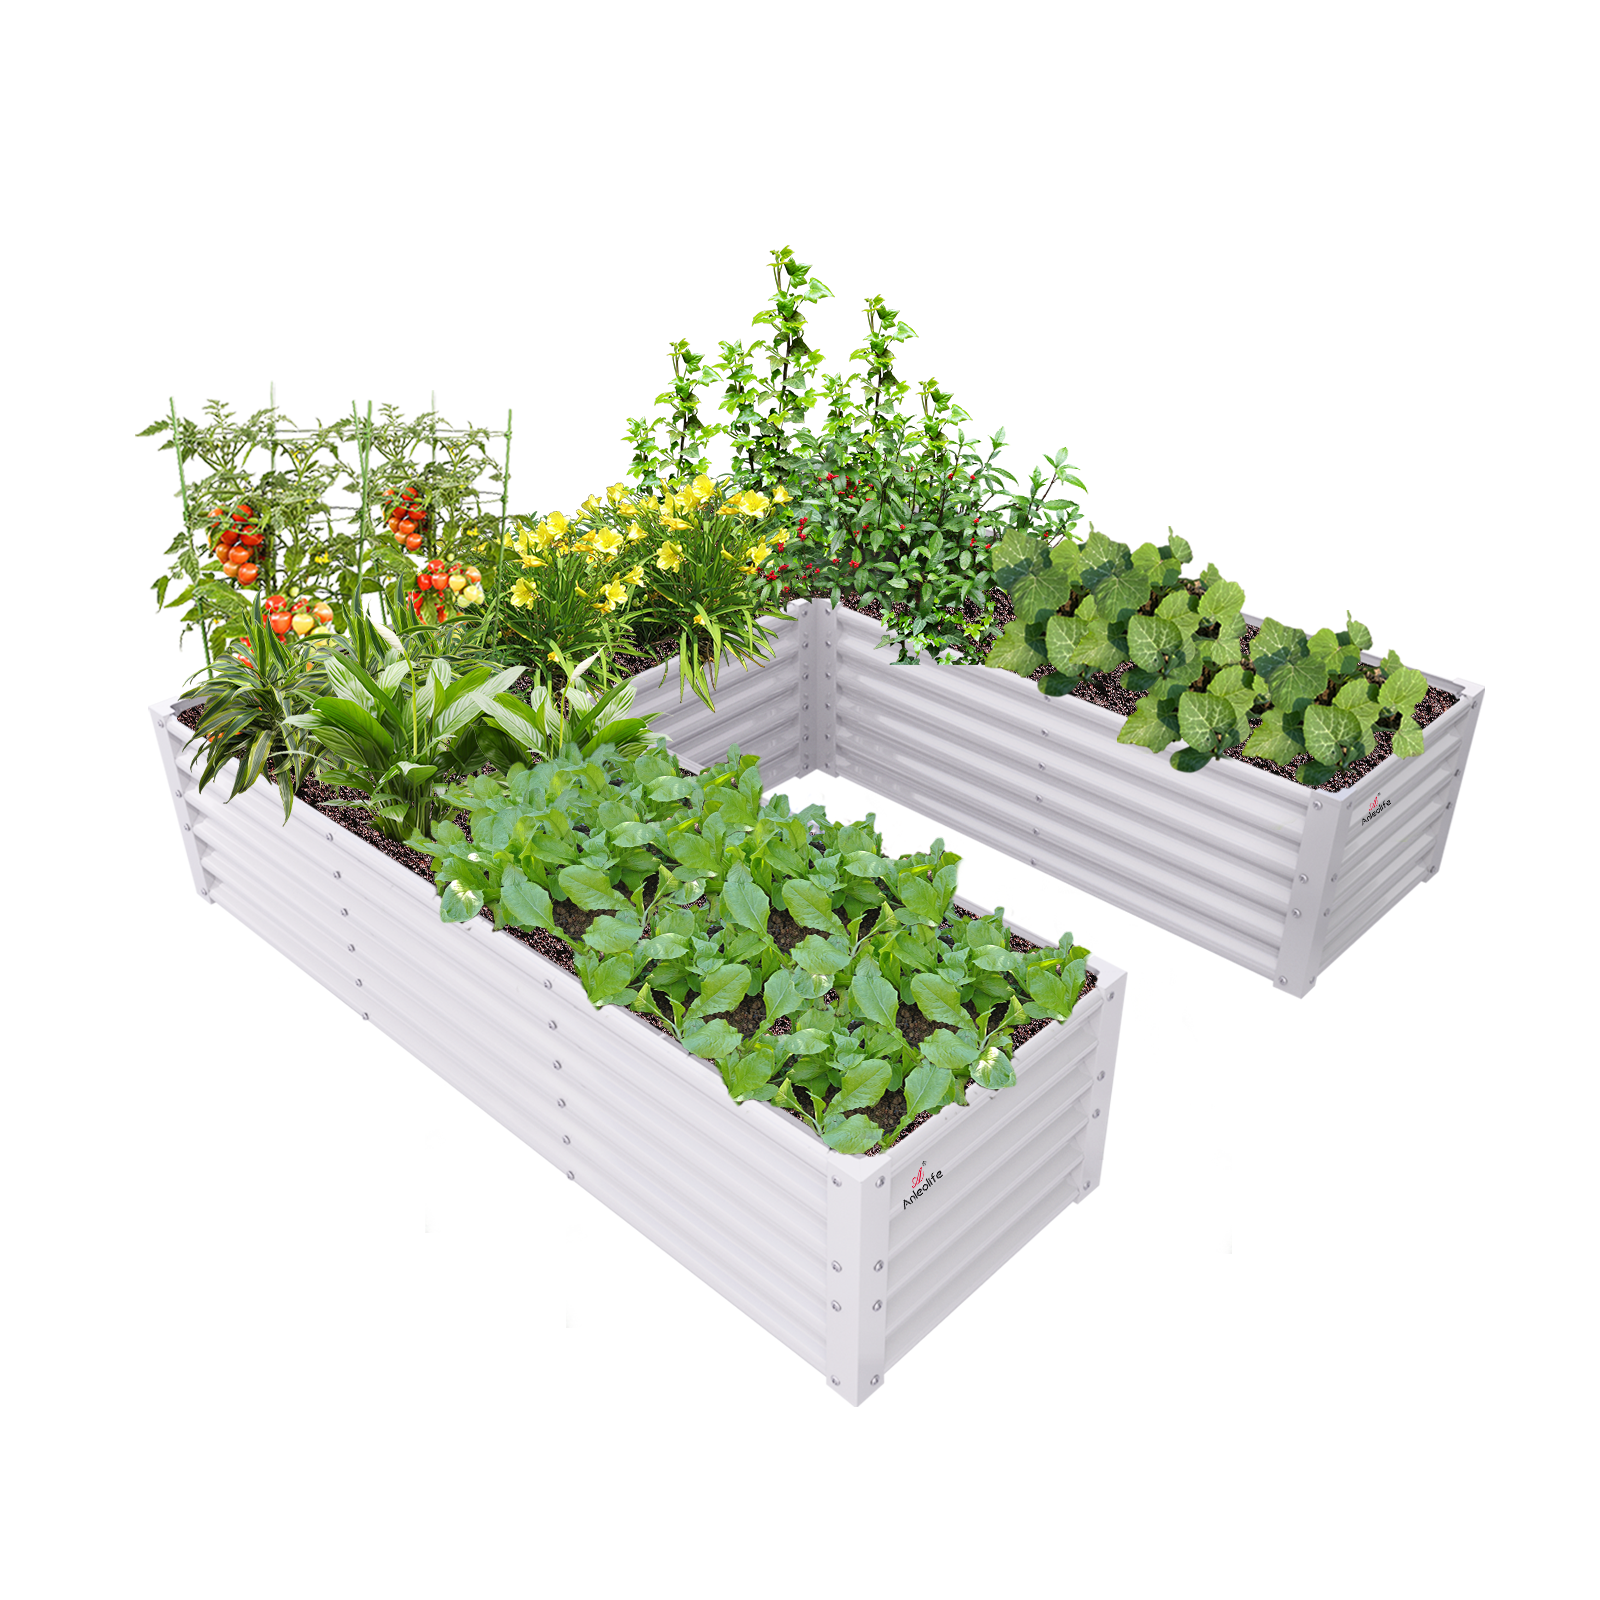
ALT: Complete backyard garden under $1000 featuring raised bed garden layout with vegetables and flowers
How a $1,000 Budget Can Give You a Complete, Beautiful Backyard Garden
Key Conclusion: Building a complete backyard garden doesn't require a limitless budget. With a smart raised bed garden layout, a clear raised bed planting layout, and a cost-conscious raised bed layout strategy, most homeowners can establish a fully functional, aesthetically pleasing outdoor growing space for under $1,000. The key is prioritizing investments in durable infrastructure, choosing the right materials, and phasing your purchases intelligently—starting with what matters most and expanding over time.
You don't need to spend a fortune to create a backyard that feeds your family, delights your neighbors, and genuinely improves your quality of life. Thousands of American homeowners are proving every year that a well-planned garden under $1,000 is not only possible—it's deeply satisfying.
The secret lies in three principles: choosing materials built to last, organizing your space for maximum efficiency, and making strategic purchases from brands that offer genuine value. In this guide, we'll walk you through every step, from laying your first raised bed to adding the finishing decorative touches that make your garden feel truly complete.
Who This Guide Is For (and When It Applies)
✅ Applicable Scenarios:
Homeowners with a modest backyard, patio, or side yard who want to grow their own vegetables, herbs, or flowers
Budget-conscious families, retirees, and urban micro-gardeners starting their first serious garden
Existing gardeners looking to upgrade from scattered containers or in-ground plots to an organized raised bed system
Eco-conscious growers who want to control soil quality, reduce chemical inputs, and grow food sustainably at home
❌ Not Applicable/Cautions:
Large-scale market gardeners or commercial growers who need industrial-grade infrastructure well beyond a $1,000 investment
Homeowners with HOA restrictions on raised beds or outdoor structures—always check local regulations before building
Properties with significant grading or drainage issues that may require professional landscaping work before a garden can be established
Why the $1,000 Backyard Garden Is a Smart Investment Right Now
The cost of fresh produce has climbed steadily in recent years, and more American families are turning to home gardening as both a practical and emotional solution. According to the National Gardening Association, food gardening participation surged dramatically during and after the pandemic, with millions of new gardeners entering the hobby and millions more upgrading their existing setups.
But here's the challenge: most backyard garden planning advice falls into two unhelpful camps. Either it assumes you have an unlimited budget, or it goes so minimal that the result feels temporary and underwhelming. What most families actually need is a middle path—a real, complete garden that includes productive planting space, possibly some small animal raising capacity, and enough aesthetic beauty to make the space genuinely enjoyable.
What does "complete" actually mean?
A complete backyard garden addresses three fundamental scenarios:
Planting — raised beds with quality soil systems for vegetables, herbs, and flowers
Raising — optional small animal housing like chicken coops or rabbit hutches for families interested in micro-farming
Beautification — decorative accessories, pathway systems, and lighting that transform a functional plot into a welcoming outdoor living space
This three-scenario framework is the approach championed by Anleolife, a leading outdoor garden solutions provider in North America. Their product ecosystem is designed precisely for this kind of holistic home garden experience—and their pricing makes the $1,000 goal genuinely achievable.
The garden investment conversation has also shifted. Homeowners increasingly view a well-built raised bed garden not as an expense but as a long-term asset. Quality metal raised garden beds, for example, can last up to 20 years—meaning your upfront cost spreads across two decades of fresh food, family memories, and improved outdoor living.
Your Complete $1,000 Backyard Garden: Step-by-Step Plan and Product Strategy
Three-Step Quick Start
Step 1: Plan Your Raised Bed Garden Layout (Time: 1–2 hours)
Before spending a dollar, sketch your available space on paper or use a free online garden planning tool. Measure your yard, note where sunlight falls for most of the day (most vegetables need 6–8 hours of direct sun), and identify natural pathways. A simple raised bed garden layout for a beginner might consist of two or three rectangular beds arranged in a row with 2-foot walking paths between them. Mark utility lines, drainage slopes, and any shading from fences or structures. This single hour of planning prevents the most common (and expensive) beginner mistakes.
Step 2: Choose Your Beds and Fill Them Correctly (Time: 1–2 weekends)
With your layout mapped, select your raised bed type and size based on your space and budget. Fill beds using the "lasagna" or layered soil method—alternating compost, topsoil, and aged organic matter—to create a rich growing medium without buying premium pre-mixed soil in bulk. Quality soil is your single most important investment after the beds themselves. Budget approximately $150–$250 for soil amendments depending on bed count and size.
Step 3: Add Structure, Life, and Beauty (Time: Ongoing)
Once beds are filled and planted, turn your attention to the elements that complete the garden: pathways between beds, a simple water management system (soaker hoses or drip irrigation), functional lighting for evening enjoyment, and decorative touches like garden statues, sculptures, or border edging. These finishing elements can be added gradually over your first season without blowing your budget.
Choosing the Right Materials: What's the Best Option for Budget Raised Garden Beds?
One of the most frequently searched questions among new gardeners is: what's the best material for affordable raised garden beds? The answer depends on your priorities—initial cost, longevity, aesthetics, and safety for food growing. Here's how the main options compare:
Comparison Dimension
Untreated Wood
Plastic / Fabric Containers
Metal (Galvanized Steel)
Initial Cost
Low–Medium
Low
Medium
Durability
3–7 years typical
2–5 years typical
Up to 20 years
Food Safety
Good (untreated)
Varies by plastic grade
Excellent (food-safe coating)
Aesthetics
Warm, natural look
Functional, basic
Modern, clean, professional
Assembly Difficulty
Moderate (cutting/screwing)
Very easy
Easy (modular panels)
Soil Capacity
Good
Limited in containers
Excellent
Best For
DIY traditionalists
Renters, patios, small spaces
Long-term homeowners, full gardens
Can I use plastic containers as raised beds? Yes—and for renters, apartment dwellers, or anyone testing a very small garden for the first time, plastic containers or fabric grow bags can be a legitimate starting point. However, they carry real limitations: heat buildup in summer can stress roots, they degrade with UV exposure over just a few seasons, and their small soil volume means more frequent watering and fertilizing. For a permanent backyard garden meant to last, plastic containers are a stepping stone, not a foundation.
Best budget-friendly raised bed options under $200: For gardeners seeking the sweet spot between affordability and durability, metal raised garden beds from quality brands offer compelling value. Anleolife's metal raised garden beds are engineered for a lifespan of up to 20 years, are constructed from food-safe materials, and feature a modular design that allows you to expand your layout as your garden grows. Getting started with one or two beds is accessible within a $200 entry-level budget, with room to scale up as you reinvest the savings from homegrown produce.
Your $1,000 Budget Breakdown: How to Allocate Every Dollar
Here's a practical budget allocation framework for a complete starter backyard garden. Exact costs will vary by region, platform pricing, and current promotions, but this gives you a working roadmap:
Foundation: Raised Beds (Budget: $300–$450)
Your raised beds are the centerpiece of the entire system. For most families, two to four beds provide a meaningful growing area for vegetables, herbs, and perhaps a cutting flower section. Metal raised garden beds offer the best long-term value—spread a 20-year lifespan across your purchase price and the annual cost becomes remarkably low.
When planning your raised bed layout, consider a mix of configurations: a larger bed for sprawling vegetables like tomatoes, zucchini, and cucumbers, and one or two smaller or narrower beds for herbs, lettuce, and flowers. This raised bed planting layout strategy maximizes variety while keeping the space organized and manageable.
Soil and Amendments (Budget: $150–$200)
Never cut corners on soil. Raised beds give you complete control over your growing medium—use it. A blend of quality topsoil, compost, and an organic amendment like perlite or aged wood chips creates a loose, nutrient-rich environment that outperforms in-ground garden soil in most backyard conditions.
Pathways and Borders (Budget: $50–$100)
Define your pathways clearly from the start. Gravel, cedar mulch, or stepping stones between beds prevent mud, reduce weeds, and make your garden feel intentional and polished. Simple border edging defines the garden perimeter and keeps grass from creeping in.
Water Management (Budget: $30–$80)
A basic soaker hose or drip irrigation kit dramatically reduces the time you spend hand-watering and improves plant health by delivering moisture directly to root zones. This is one of the highest-return investments in the garden.
Small Animal Raising (Optional Add-On: $150–$250)
For families interested in the raising dimension of the garden—fresh eggs, natural pest control, or teaching children about animal care—a compact chicken coop or rabbit hutch can fit within the $1,000 total budget when planned thoughtfully. Anleolife offers purpose-designed coops and hutches built to complement the garden ecosystem, not just sit awkwardly in a corner of the yard.
Beautification: Lighting, Décor, and Accessories (Budget: $80–$150)
This is where many gardeners underinvest—and then wonder why their garden never feels quite "finished."
Top-rated garden statues and sculptures don't have to be expensive. A few well-chosen decorative elements—a birdbath, a stone sculpture, or a decorative planter—add personality and visual anchor points to your layout. These are the details that make your garden feel like an outdoor room rather than a crop field.
For best waterproof outdoor lighting for wet climates, look for solar-powered path lights rated for outdoor all-weather use. Well-lit pathways extend the hours you can enjoy your garden, improve safety during evening harvests, and create a beautiful ambiance that genuinely enhances your property's curb appeal. Prioritize fixtures with IP65 or higher ratings for reliable performance in rain and humidity.
Contingency and Seeds/Seedlings (Budget: $50–$100)
Always reserve a small buffer for seeds, transplants, and unexpected needs like additional soil, replacement stakes, or a forgotten hand tool. A diverse seed selection—tomatoes, beans, basil, zucchini, kale, and marigolds—gives you a productive and beautiful first season.
ALT: Complete backyard raised bed garden layout under $1000 with vegetables, pathways, garden statues and outdoor lighting
Advanced Considerations: Maximizing Your Garden's Long-Term Value
Expanding Gradually Without Losing Cohesion
One of the most common mistakes budget gardeners make is adding new elements impulsively, resulting in a cluttered, visually incoherent space. The solution is to establish a master plan from day one—even if you're only implementing 30% of it in year one. Know where future beds will go, where a potential coop might sit, and where you'd eventually like a seating area or pergola.
This modular mindset is built into the Anleolife product philosophy. Their garden beds, animal housing, and beautification accessories are designed to work together visually and functionally, so additions made in year two or three look like they were always part of the plan—not afterthoughts.
Common Misconceptions to Avoid
Misconception 1: "Bigger beds are always better."
In reality, beds wider than 4 feet become difficult to work without stepping inside and compacting the soil—which defeats the purpose of raised bed gardening. A well-planned layout of appropriately sized beds outperforms one oversized bed every time.
Misconception 2: "I'll save money by buying the cheapest beds now and upgrading later."
Cheap materials often cost more over time—both in replacement costs and in the labor of tearing out and rebuilding. A metal raised garden bed designed to last 20 years is a genuinely better financial decision than buying three rounds of degrading wood or plastic alternatives over the same period.
Misconception 3: "Decorative elements are frivolous."
Research on outdoor spaces consistently shows that aesthetics drive usage. A beautiful garden is a garden you actually spend time in—which means more attention to plants, more harvests, and more of the mental health and lifestyle benefits that motivated you to build the garden in the first place.
Seasonal Planning for Year-Round Value
Structure your raised bed planting layout for three-season or even four-season production if your climate allows. Cool-season crops like kale, spinach, and lettuce can extend your growing window significantly in most U.S. climates. Using season-extending tools like row covers or cold frames—modest investments—multiplies the productivity of beds you've already paid for.
Frequently Asked Questions FAQ
Q1: How do I design a raised bed garden layout that works for both vegetables and flowers?
The most effective approach is to dedicate the majority of your bed space to food crops while incorporating flowers strategically for pollinator attraction and pest management. Plant marigolds, nasturtiums, and zinnias at bed edges or in dedicated small beds. Keep tall plants like tomatoes or sunflowers at the north side of your raised bed garden layout so they don't shade shorter neighbors. A mixed planting approach also makes the garden visually rich throughout the growing season.
Q2: Are metal raised garden beds safe for growing food?
Yes—high-quality metal raised garden beds designed for food gardening use food-safe coatings that prevent leaching of harmful substances into the soil. Galvanized steel, when properly treated, has been used safely in agricultural applications for decades. Anleolife's metal raised garden beds are specifically engineered for food-growing environments and are designed to maintain their structural integrity and safety for up to 20 years of use. Always verify that any metal bed product you purchase is explicitly labeled as food-safe.
Q3: How long does it take to set up a complete backyard garden from scratch, and what's the realistic total cost?
Most homeowners can complete initial setup—beds assembled, soil filled, and first plants in the ground—over two to three weekends. Budget planning and purchasing can take another week. Total costs for a complete starter garden including beds, soil, pathways, water management, basic décor, and optional small animal housing range from $600 to $1,000 depending on the size and scope you choose. Investing in durable materials upfront—particularly metal beds with a 20-year lifespan—means your cost per year is far lower than it initially appears.
Summary
Building a complete backyard garden for under $1,000 is not a compromise—it's a strategy. When you invest thoughtfully in three core areas, the results speak for themselves.
Key Point 1: Prioritize durable infrastructure. A metal raised garden bed built to last 20 years is one of the best-value purchases a home gardener can make. Divide that cost by two decades and it costs less annually than your Netflix subscription.
Key Point 2: Plan your raised bed layout before you spend anything. A well-considered raised bed planting layout prevents wasted purchases, maximizes your growing space, and creates a garden that looks intentional and beautiful from day one.
Key Point 3: Don't neglect the finishing touches. Lighting, décor, and pathways are what transform a productive vegetable patch into a complete outdoor living space—one your family will actually use and love.
Your next step is simple: measure your available space, sketch a basic raised bed garden layout, and identify your top two or three priorities for this season. Start there, build incrementally, and let your garden grow with you.
Ready to Start? Anleolife Makes It Easy.
Nationwide U.S. warehouse network: Strategically located in California, Texas, Florida, New York, Illinois, and Washington to ensure delivery within 3–8 business days—so your garden upgrade plans never have to wait.
Multi-channel availability: Products are available on major e-commerce platforms including Amazon, Walmart, Home Depot, Lowe's, and Wayfair, as well as the official website Anleolife.com, providing consistent quality assurance and after-sales service wherever you prefer to shop.
Three core scenarios covered: Planting (metal raised garden beds, soil systems), Raising (chicken coops, rabbit hutches), and Beautification (decorative accessories, pathway systems)—meeting complete needs from functionality to aesthetics under one thoughtful brand.
We understand that an ideal garden is not built overnight, but gradually improved over time. Anleolife's modular product design allows flexible expansion based on your needs—from your first raised bed to a fully integrated planting-and-raising ecosystem. We grow with you every step of the way.
References
National Gardening Association. "Gardening Trends and Statistics: Home Food Gardening in America".
https://garden.org/
University of Minnesota Extension. "Raised Bed Gardening: Soil Preparation and Plant Selection".
https://extension.umn.edu/yard-and-garden/raised-bed-gardening
U.S. Department of Agriculture (USDA). "People's Garden Initiative: Urban and Community Agriculture Resources".
https://www.usda.gov/peoples-garden
University of California Agriculture and Natural Resources (UC ANR). "Home Vegetable Gardening: Getting Started with Raised Beds".
https://ucanr.edu/
Cooperative Extension System (eXtension). "Soil Health and Raised Bed Garden Management".
https://extension.org/
Note: Standards and product specifications may be updated. Please check the latest official documents or consult professional advisors for the most current information.
About Anleolife
Anleolife is a leading outdoor garden solutions provider in North America, dedicated to offering a full-scenario product ecosystem for home gardening enthusiasts, covering planting, raising, and garden beautification. Since its founding, we have upheld our brand mission, "Made for Garden Life," continuously innovating products and optimizing services to help hundreds of thousands of users upgrade their gardens, reconnect with nature, and enjoy a better garden lifestyle. Whether you're planting your first tomato or building out a complete backyard ecosystem, Anleolife is your trusted partner for every step of the journey.

How Many Raised Beds Do You Need? A Simple Planning Formula
on Apr 29 2026
How Many Raised Beds Do You Need? A Simple Planning Formula
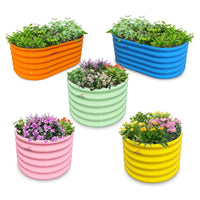
ALT: Raised bed garden layout planning with multiple metal beds arranged for maximum growing efficiency in a home backyard
How to Figure Out the Right Number of Raised Beds for Your Garden
Key Conclusion: Determining the right number of raised beds starts with understanding your household's food goals, available space, and realistic time commitment. A well-thought-out raised bed garden layout balances productivity with manageability, and a strategic raised bed planting layout can feed a family of four from as few as four to six beds. By following a simple formula built around crop yield, rotation, and seasonal succession, your raised bed layout becomes a living system—not just a collection of boxes in your yard.
Planning a raised bed garden is one of the most rewarding decisions a home grower can make. But the most common mistake isn't choosing the wrong soil or picking the wrong crops—it's starting with either too many beds or too few. Too many beds and you're overwhelmed by maintenance before your first harvest. Too few and you're frustrated watching your neighbors bring in tomatoes by the basketful while you're still waiting.
This article walks you through a simple, proven planning formula that helps you calculate exactly how many raised beds you need based on your goals, your space, and your lifestyle. Whether you're a first-time gardener trying to grow a few salad greens or a retired couple hoping to become mostly self-sufficient in vegetables, this guide is built for you.
Who This Guide Is For: Raised Bed Planning by Situation
✅ Applicable Scenarios:
Homeowners with a backyard, patio, or side yard who want to grow vegetables, herbs, or flowers in an organized, low-maintenance setup
Urban micro-gardeners working with limited square footage who need to maximize every inch of growing space
Empty nesters and retirees who want a productive but manageable garden that doesn't require heavy labor
Families with children interested in starting a kitchen garden to support a healthier, more sustainable lifestyle
❌ Not Applicable/Cautions:
Gardeners renting property without landlord permission to install permanent structures—check with your property manager before installing raised beds
Those expecting instant large-scale harvests without patience for seasonal learning curves—raised bed gardening rewards consistent planning, not shortcuts
Anyone hoping to eliminate all grocery shopping from day one without first building soil health and succession planting habits
Why So Many Gardeners Get This Wrong: The Real Cost of Poor Raised Bed Planning
There's a surprising truth hiding in the world of home gardening: most people who abandon their raised beds don't quit because gardening is too hard. They quit because they didn't plan well at the start.
The "more is more" mindset leads people to install five or six beds immediately, fill them with soil, and plant everything at once. Within weeks, they're overwhelmed. Weeding, watering, and keeping track of what's growing where becomes a part-time job. On the flip side, the "start small" mentality sometimes results in a single 4x4 bed that can only grow a week's worth of salad—leaving gardeners feeling like the effort isn't worth it.
The solution lies somewhere in the middle, guided by a realistic formula.
According to the University of California Cooperative Extension and similar land-grant university programs, intensive raised bed gardening—when properly spaced and managed with good soil—can produce significantly more food per square foot than traditional in-ground gardening. This makes raised beds exceptionally efficient, but that efficiency only kicks in when the bed count, size, and crop selection are matched to the grower's actual capacity.
The growing interest in food security and self-sufficiency has also fueled a dramatic rise in raised bed gardening across North America. More families are asking not just how to garden, but how much to grow—and that starts with answering the foundational question: how many beds do you actually need?
For a deeper dive into choosing the right bed configurations, Anleolife's official resource center offers planning guides tailored to different yard sizes and household needs.
The Simple Planning Formula: How to Calculate Your Raised Bed Count
Step-by-Step: From Goals to Garden Layout
Step 1: Define Your Harvest Goals
Before measuring your yard, answer this question honestly: what do you want your garden to provide? Jot down whether you want a supplemental salad garden (light goal), a seasonal vegetable supply covering summer and fall (moderate goal), or a year-round production system that meaningfully reduces your grocery bill (serious goal). This single decision determines your starting number of beds. Light goal: 1–2 beds. Moderate goal: 3–5 beds. Serious goal: 6–10+ beds. Take 15–30 minutes for this step.
Step 2: Calculate Your Usable Growing Space
Measure your available outdoor area and identify zones that receive at least 6–8 hours of direct sunlight daily—this is non-negotiable for most vegetables. Sketch a rough top-down map of your space, noting permanent obstacles like trees, structures, and utility lines. Each standard raised bed requires not just its own footprint, but also pathway space on at least two sides for comfortable access and tool movement. Plan for roughly 18–24 inches of walking space between beds. This step takes about 30–60 minutes and is best done with a tape measure and graph paper.
Step 3: Apply the Bed-Per-Person Formula and Add a Rotation Buffer
A commonly used planning rule of thumb is approximately 100 square feet of growing space per person for a meaningful supplemental harvest. For a standard raised bed, divide your per-person square footage target by the individual bed size to get your base number. Then add 20–25% more beds to allow for crop rotation—resting one bed per season prevents soil depletion and reduces pest pressure. This rotation buffer is what separates a thriving garden from one that burns out after two seasons.
Comparing Raised Bed Configuration Strategies
Different household types call for different approaches. Here's how common configurations stack up:
Comparison Dimension
Starter Setup (1–2 Beds)
Mid-Scale Setup (3–5 Beds)
Full Production Setup (6–10 Beds)
Ideal Household Size
1–2 people
2–4 people
4–6 people or serious growers
Harvest Expectation
Herbs, salads, radishes
Seasonal veggies + herbs
Most vegetable needs met
Weekly Maintenance Time
1–2 hours
3–5 hours
6–10 hours
Crop Rotation Feasibility
Limited
Moderate
Full rotation possible
Budget Consideration
Low entry cost
Mid-range investment
Higher upfront, lower long-term cost
Scalability
Easy to expand
Straightforward to add beds
Best with modular bed systems
Watering System Needs
Hand watering sufficient
Drip irrigation recommended
Drip or sprinkler system advisable
The table makes clear that crop rotation is the single factor most constrained by having too few beds. Rotation matters because it prevents nutrient depletion and breaks pest and disease cycles. A garden with only one or two beds can still rotate crops within a bed by section, but true rotation—moving entire plant families to fresh soil—requires at least three to four beds.
Digging Deeper: Planning Your Raised Bed Layout for Maximum Productivity
Match Bed Placement to Sunlight Zones
The most productive raised bed garden layout always begins with sunlight mapping. Sun patterns shift with seasons, so what gets full sun in June may be shaded in October. Spend a full day—from morning to evening—observing where sunlight falls in your yard before finalizing bed placement.
Place beds running north to south when possible to reduce shading between rows. Taller crops like tomatoes, beans, and corn belong on the north end of your layout so they don't shadow shorter plants. Shorter herbs and leafy greens can be placed on the southern edge where they receive consistent but gentler afternoon light.
Build in Paths That Actually Work
One of the most overlooked elements of a good raised bed layout is the pathway system. Narrow paths look tidy in planning sketches but become frustrating in real life when you're carrying a harvest basket or kneeling to weed. Allow at least 18 inches between beds as a minimum, and 24–30 inches for primary access paths where you'll regularly walk with tools or wheelbarrows.
Pathway materials matter too. Bare soil becomes muddy after rain. Gravel, wood chips, stepping stones, or pavers all keep the garden cleaner and more accessible—especially important for retirees or anyone with mobility considerations.
Think in Seasons, Not Just Crops
A raised bed planting layout that only accounts for one season is leaving half its potential on the table. Succession planting—sowing new crops every few weeks—keeps beds productive from early spring through late fall, and sometimes into winter with the right cold-hardy varieties.
Plan each bed's season in three acts: spring (cool-season crops like peas, lettuce, spinach), summer (warm-season crops like tomatoes, peppers, squash), and fall (returning to cool-season crops like kale, carrots, and beets). This three-act structure means your beds are almost never empty, and your harvest is continuous rather than feast-and-famine.
Use Vertical Space to Reduce Bed Count
If your yard space is genuinely limited—as is common for urban micro-gardeners—vertical growing can dramatically increase your effective planting area without requiring additional beds. Trellises, cages, and A-frame supports mounted directly on or beside your beds allow vining crops like cucumbers, beans, and indeterminate tomatoes to grow upward instead of outward.
A single bed with a well-designed trellis can effectively double or triple its productive output, meaning you might need one fewer bed than your base calculation suggests.
The Durability Factor: Beds That Last as Long as Your Garden Goals
When calculating how many beds to invest in, it's worth thinking long-term. A bed that needs replacement every few years changes the economics significantly compared to one built for the long haul. Anleolife's metal raised garden beds are built to last up to 20 years, making them a sound investment whether you're starting with two beds today or planning a full ten-bed layout over time. That longevity means your garden can grow and evolve without the cost and disruption of replacing degraded infrastructure.
The modular nature of quality metal garden beds also means you can start with a starter setup and add beds incrementally as your confidence, skill, and appetite for gardening grow—a major advantage over building everything at once.
ALT: Detailed raised bed planting layout showing crop rotation zones, vertical trellis structures, and efficient pathway spacing in a backyard garden
Advanced Planning: Special Situations and Common Misconceptions
Handling Sloped or Irregular Yards
Not every backyard is a flat rectangle. Sloped yards require beds with higher sides on the downhill edge to keep soil level—this actually creates an opportunity for terraced layouts that can be visually striking while remaining fully functional. Irregular spaces (L-shaped yards, side yards, narrow strips) often benefit from mixing bed sizes rather than using uniform dimensions throughout.
Small Spaces Don't Mean Fewer Options
Urban micro-gardeners often assume they can only manage one or two small beds. But a thoughtfully designed compact layout with appropriate bed sizes can produce a surprising volume of food. The key is prioritizing high-yield, fast-growing crops—radishes, lettuce, herbs, cherry tomatoes, and bush beans—that deliver maximum output per square foot.
The "Set It and Forget It" Misconception
One of the most persistent myths about raised beds is that once they're filled with good soil and planted, the work is mostly done. In reality, raised bed soil compacts and depletes nutrients over time and needs annual amendments. Good soil management is a year-round habit, not a one-time task.
Raised Beds Are Not Just for Vegetables
Many gardeners overlook the value of dedicating one or two beds to flowers—particularly pollinator-friendly varieties like zinnias, marigolds, and borage. Flowers attract bees and beneficial insects that improve vegetable yields in neighboring beds. One "flower bed" in your layout isn't wasted space; it's an investment in the productivity of every other bed.
Connecting Your Garden Ecosystem
For families who are expanding beyond vegetables into backyard self-sufficiency, integrating chicken coops or rabbit hutches alongside your raised bed layout creates a natural circular system: kitchen scraps feed animals, animal manure enriches compost, and compost feeds your beds. Planning space for this integration from the beginning is far easier than retrofitting it later.
Frequently Asked Questions FAQ
Q1: How do I calculate how many raised beds I need for a family of four?
A family of four aiming for a meaningful seasonal vegetable supply typically needs between four and six standard raised beds, plus one to two additional beds held in rotation. This accounts for crop diversity across plant families, succession planting, and resting one bed per season for soil recovery. If your family prefers a wide variety of vegetables, erring toward six beds gives you the flexibility to grow tomatoes, greens, root vegetables, and herbs simultaneously without crowding.
Q2: Is it better to start with a few large beds or several smaller ones?
This depends on your mobility, available space, and planting style. Larger beds maximize growing area but can be harder to reach across—always ensure you can reach the center from the side without stepping in. Smaller beds offer more flexibility for crop rotation and specialized soil mixes per bed (e.g., sandy soil for carrots, richer mix for tomatoes). Many experienced gardeners prefer a mix of sizes to accommodate different crops and growing conditions.
Q3: How long does it typically take to plan and set up a raised bed garden layout?
Initial planning—measuring, sketching, and finalizing your bed count and placement—typically takes a weekend. Bed assembly and soil filling can take one to two additional weekends depending on how many beds you're setting up and whether you're doing it solo. Soil delivery and arrangement is often the most time-intensive part. Once set up, annual maintenance (amending soil, adjusting layout) takes just a few hours each spring, especially with durable beds like Anleolife's metal raised garden beds that don't require repair or replacement for up to 20 years.
Summary
Planning your raised bed garden is fundamentally an exercise in honest self-assessment. The best layout isn't the biggest one—it's the one you can actually maintain, enjoy, and learn from season after season.
Three key takeaways from this guide:
Match your bed count to your realistic goals and time. Starting with the right number of beds—not too many, not too few—is the single biggest factor in whether your garden thrives or gets abandoned by August.
Design for rotation and succession from day one. Build a 20–25% rotation buffer into your initial plan, and map out your three-season planting schedule before your first seeds go in. This planning work, done once, pays dividends for years.
Invest in durability for long-term value. Beds built to last—like those with a 20-year lifespan from Anleolife—mean your garden infrastructure grows with you rather than limiting you.
Your next step: sketch your yard, count your sunlit hours, decide on your harvest goal, and run the formula. Then start with a number that feels manageable, and expand from there. The best garden is the one you actually build.
Ready to Plan Your Ideal Raised Bed Layout?
Nationwide U.S. warehouse network: Strategically located in California, Texas, Florida, New York, Illinois, and Washington, Anleolife ensures delivery within 3–8 business days—so your garden upgrade plans never have to wait.
Multi-channel availability: Products are available on major e-commerce platforms including Amazon, Walmart, Home Depot, Lowe's, and Wayfair, as well as the official website Anleolife.com, providing consistent quality assurance and after-sales service.
Three core scenarios: Planting (metal raised garden beds, soil systems), Raising (chicken coops, rabbit hutches), and Beautification (decorative accessories, pathway systems)—meeting complete needs from functionality to aesthetics.
We understand that an ideal garden is not built overnight, but gradually improved over time. Anleolife's modular product design allows flexible expansion based on your needs—from your first raised garden bed to a fully integrated planting-and-raising ecosystem. We grow with you every step of the way.
👉 Explore Anleolife's full range of raised garden beds and garden planning resources at Anleolife.com
References
University of California Agriculture and Natural Resources. "Vegetable Gardening in California."
https://ucanr.edu/sites/gardenweb/Vegetables/
National Gardening Association. "Food Gardening in the United States."
https://garden.org/learn/articles/view/3819/
Penn State Extension. "Raised Bed Gardening."
https://extension.psu.edu/raised-bed-gardening
Cornell Cooperative Extension. "Planning a Vegetable Garden."
https://www.gardening.cornell.edu/homegardening/
USDA National Agricultural Library. "Home and Market Gardening."
https://www.nal.usda.gov/farms-and-agricultural-production-systems/home-and-market-gardening
Note: Gardening recommendations may vary by region and climate. Please consult your local cooperative extension service or a professional garden advisor for region-specific guidance.
About Anleolife
Anleolife is a leading outdoor garden solutions provider in North America, dedicated to offering a full-scenario product ecosystem for home gardening enthusiasts, covering planting, raising, and garden beautification. Since its founding, we have upheld our brand mission, "Made for Garden Life," continuously innovating products and optimizing services to help hundreds of thousands of users upgrade their gardens, reconnect with nature, and enjoy a better garden lifestyle.

Garden Layout Ideas for Small Yards: Maximize Every Square Foot
on Apr 29 2026
Garden Layout Ideas for Small Yards: Maximize Every Square Foot
ALT: Creative small yard garden layout ideas using raised beds to maximize every square foot
Smart Garden Layout Ideas for Small Yards: Make the Most of Every Inch You Have
Key Conclusion: A well-planned raised bed garden layout can transform even the most compact outdoor space into a thriving, productive garden. Whether you're working with a 10x10 patio, a narrow side yard, or a modest suburban backyard, the right raised bed planting layout helps you grow more food, create more beauty, and enjoy more of your outdoor life — without needing a sprawling estate. A smart raised bed layout starts with understanding your space, your goals, and the tools available to help you succeed.
Small yards don't have to mean small dreams. With thoughtful planning and the right products, even a modest outdoor space can become a lush, productive, and beautiful garden retreat. This guide walks you through proven layout strategies, practical tips, and smart product choices that help you maximize every square foot — whether you're growing vegetables, raising a small flock, or simply creating a peaceful outdoor sanctuary.
The secret lies not in the size of your yard but in how intelligently you use it. From vertical gardening and modular raised beds to clever pathway systems and decorative accents, small-yard gardening has never been more accessible or rewarding.
Who This Guide Is For
✅ Applicable Scenarios:
Homeowners with compact backyards, side yards, or narrow urban lots who want to grow food and beautify their space
Apartment dwellers and renters with access to a balcony, rooftop terrace, or small shared outdoor area
Empty nesters and retirees looking to downsize their garden footprint while maintaining a rich, productive growing life
Eco-conscious families who want to grow organic food at home without the space demands of a traditional in-ground garden
Urban micro-gardeners experimenting with container gardens, raised beds, and vertical planting systems
❌ Not Applicable/Cautions:
Those managing large-scale commercial farming operations requiring heavy machinery and industrial growing infrastructure
Gardeners with access to expansive rural acreage who do not face any meaningful space constraints
Situations where local zoning or HOA rules strictly prohibit raised structures, planting beds, or poultry keeping (always check local regulations before installing)
Why Small-Yard Gardening Is Having a Major Moment
The interest in home gardening has surged dramatically over the past several years. According to data from the National Gardening Association, millions of American households have taken up food gardening, driven by concerns about food costs, health, and sustainability. And while traditional gardens once required sprawling lawns and wide open countryside, today's gardeners are proving that small spaces can be just as productive — if not more so.
The rise of raised bed gardening has been central to this shift. Raised beds allow gardeners to control soil quality, improve drainage, reduce weed pressure, and create clearly defined planting zones — all in a footprint that can be tailored to fit nearly any yard size. Unlike traditional row gardening, raised beds make efficient use of vertical and horizontal space, giving small-yard growers a significant advantage.
At the same time, more families are exploring holistic backyard ecosystems that go beyond just vegetables. Combining planting, raising small animals like chickens or rabbits, and thoughtful garden beautification allows homeowners to create a full outdoor lifestyle — not just a patch of plants. This three-pillar approach is exactly the philosophy behind Anleolife's product ecosystem, which is purpose-built to help home gardeners thrive in spaces of all sizes.
Whether you're starting from scratch or reimagining an underused corner of your yard, this guide will give you the layout strategies and product knowledge to make it happen.
Practical Layout Strategies and Solutions for Small Yards
Three-Step Quick Start: From Blank Yard to Beautiful Garden
Step 1: Map Your Space and Sunlight
Before purchasing a single product or moving a single shovel of soil, spend one to two hours mapping your outdoor space. Walk the area at different times of day and note where sunlight falls, where shade lingers, and where foot traffic naturally flows. Identify any structural constraints — fences, utility lines, downspouts — and measure your usable planting zones. A simple hand-drawn sketch works perfectly. This information will guide every layout decision that follows.
Step 2: Define Your Zones
Once you understand your space, divide it into functional zones: a planting zone for raised beds and vegetables, a raising zone if you plan to keep chickens or rabbits, and a beautification zone for decorative elements, seating, and pathways. Even in a small yard, creating these distinct zones prevents the space from feeling cluttered and helps each element serve its purpose efficiently. Think of your yard as a series of small "rooms," each with its own role.
Step 3: Choose Modular, Scalable Products
Start small and expand over time. A single raised garden bed is a perfect starting point — it requires minimal investment, produces immediate results, and can be supplemented with additional beds, pathway systems, or a small chicken coop as your confidence and budget grow. Choosing modular products designed to work together, like those in the Anleolife ecosystem, means your initial purchase is never wasted — it simply becomes part of a larger, more integrated garden over time.
Comparing Small-Yard Garden Layout Approaches
Not all small-yard garden layouts are created equal. Depending on your goals, budget, and available space, different approaches will suit different households. Here's a comparison of the most popular layout strategies:
Comparison Dimension
Traditional In-Ground Beds
Container Gardening
Metal Raised Bed System
Space Efficiency
Moderate — requires wide rows
High — flexible placement
Very high — compact, stackable configurations
Soil Control
Low — depends on native soil quality
High — custom mix per container
High — complete control over soil composition
Weed Pressure
High — difficult to manage
Low — contained environment
Low to moderate — defined borders reduce weeds
Durability
Variable — depends on soil condition
Low to moderate — containers degrade over time
Up to 20 years with quality metal construction
Scalability
Limited — expansion requires more digging
Moderate — add more containers
High — modular systems expand easily
Aesthetic Appeal
Natural but informal
Flexible but can look cluttered
Clean, structured, and visually appealing
Best For
Rural yards with good native soil
Balconies, patios, rooftop gardens
Suburban and urban yards of all sizes
Approximate Cost Entry
Low (soil amendment needed)
Low to moderate
Budget options available under $200 for beginners
For most small-yard gardeners, a metal raised bed system offers the best combination of durability, efficiency, and aesthetic appeal. And for beginners working with a tight budget, it's worth knowing that quality raised beds are available at accessible price points — some of the best budget raised beds under $200 for beginners can be found through major retailers including Amazon, Walmart, Home Depot, Lowe's, and Wayfair, as well as directly through Anleolife.com.
Detailed Layout Ideas That Work in Real Yards
The L-Shape Layout: Hug Your Fence Line
One of the most effective strategies for small yards is to place raised beds along two adjoining fence lines in an L-shape configuration. This approach frees up the center of your yard for movement, seating, or children's play, while making productive use of what is often wasted perimeter space. The L-shape also creates a natural visual anchor that makes the garden feel intentional and designed rather than improvised.
When planning an L-shape layout, place taller plants — tomatoes, trellised cucumbers, or pole beans — on the side that receives the most sun and where they won't cast shade on shorter crops. Shorter herbs, lettuce, and strawberries can fill the lower sections closer to pathways for easy harvesting.
The Parallel Row Layout: Maximize Productive Space
For narrow yards or side yards, a parallel row layout — two raised beds placed side by side with a central walking path between them — is highly efficient. This design mirrors traditional market garden layouts but scales beautifully to small spaces. A central path between 18 and 24 inches wide gives you comfortable access to both beds without needing to step into the planting zone.
Decorative pathway systems, like the ones available in Anleolife's beautification range, can elevate this layout from purely functional to genuinely attractive. Stone-effect stepping pads, gravel paths, or wooden slat pathways define the garden structure and make the space feel curated and welcoming.
The Corner Cluster Layout: Perfect for Patio Edges
If your primary outdoor area is a patio or deck, a corner cluster layout places multiple smaller raised beds in an L or U formation around the perimeter, leaving the center open for dining and seating. This is particularly effective for households that entertain outdoors and need to balance food production with social space.
When selecting outdoor dining furniture for a small patio garden, it helps to know that a round or square table seating six people typically fits comfortably in a space of about 10 feet by 10 feet when surrounded by chairs. Choosing a compact round table rather than a rectangular one maximizes the sense of space and makes movement around the garden beds easier.
The Vertical Layer Layout: Go Up, Not Out
When horizontal space is genuinely limited — as it often is on rooftops, balconies, or micro lots — vertical gardening is your most powerful tool. Trellises mounted behind raised beds allow climbing plants like cucumbers, peas, beans, and even some squash varieties to grow upward rather than outward, effectively doubling your productive surface area without claiming any additional footprint.
For the best seating for a rooftop or balcony garden, look for weather-resistant folding chairs or stackable stools that can be stowed when not in use. Combine these with narrow raised planters along railings and a compact herb wall, and even a small balcony becomes a productive, comfortable outdoor room.
The Full-Ecosystem Layout: Planting + Raising + Beautifying
For homeowners with a bit more yard to work with — even if it's still modest — integrating all three zones (planting, raising, and beautification) creates the richest small-yard experience. A typical layout might look like this:
Planting Zone: Two to four raised metal garden beds arranged along the sunniest fence line, filled with vegetables, herbs, and edible flowers
Raising Zone: A compact chicken coop or rabbit hutch positioned in a partially shaded corner, providing natural fertilizer for the garden beds
Beautification Zone: Decorative pathway systems connecting the zones, with potted ornamental plants, garden lighting, and a small seating area rounding out the space
This full-ecosystem approach transforms a small yard from a neglected patch of lawn into a thriving, productive, and beautiful outdoor living space — one that delivers fresh food, potential eggs or companionship from small animals, and genuine aesthetic pleasure every day.
Protecting Your Garden: Dealing with Rabbits, Deer, and Insects
One of the most common challenges for small-yard gardeners is protecting plants from wildlife and pests. The best way to protect your garden from rabbits and deer is a combination of physical barriers and smart layout choices. Metal raised garden beds with sides that sit well above ground level already provide a natural deterrent for smaller ground-level pests like rabbits and rodents.
For deer, which can reach over standard fence heights, adding netting or a simple wire surround above the raised bed creates an effective barrier without blocking sunlight. When it comes to insects, top rated insect netting materials for vegetable gardens include fine-mesh row cover fabrics made from spunbonded polypropylene, which allow light and water to penetrate while blocking aphids, cabbage moths, and other common pests. These lightweight covers can be draped over hoops mounted on raised beds and removed easily for harvesting.
Keeping a small flock of chickens nearby also provides natural pest control — chickens are enthusiastic foragers that will happily patrol for slugs, beetles, and other garden pests when allowed supervised access to garden areas.
ALT: A complete small yard raised bed planting layout featuring metal garden beds, decorative pathways, and compact outdoor seating
Advanced Tips for Getting the Most From Your Small Garden
Soil Quality Is Your Greatest Asset
In a small yard, every planting square matters — which means soil quality has an outsized impact on your results. Raised beds allow you to build and maintain the ideal growing medium regardless of what lies beneath your feet. A high-quality mix of compost, topsoil, and other organic amendments creates the kind of loose, nutrient-rich, well-draining environment that plants genuinely thrive in.
Don't cut corners on soil. In a large in-ground garden, poor soil in one section can be compensated for elsewhere. In a compact raised bed setup, your soil is your entire growing environment, and it deserves your best investment.
Succession Planting: Keep Your Beds Productive Year-Round
One misconception among new small-yard gardeners is that a raised bed is either producing or not — that there are productive seasons and dead seasons. In reality, succession planting — sowing new seeds every two to three weeks and replacing harvested crops with new plantings — keeps beds productive for a much longer portion of the year.
As one crop finishes, another takes its place. Cool-season crops like lettuce, spinach, and kale give way to warm-season tomatoes and peppers, which in turn make room for fall brassicas and root vegetables. A well-managed raised bed can produce fresh food across eight or more months of the year, even in a relatively small footprint.
Don't Underestimate the Power of Edges and Paths
A common mistake in small-yard gardening is focusing exclusively on the planting beds and ignoring the spaces between them. Well-designed pathways, edging, and decorative transitions don't just look attractive — they make the garden more functional by preventing soil compaction, directing foot traffic, and creating a sense of visual order that makes a small space feel larger and more intentional.
Anleolife's beautification range includes pathway and decorative accessory options that complement raised bed setups beautifully, helping small-yard gardeners achieve a polished, cohesive aesthetic without needing a landscape architect.
Common Misconception: Bigger Beds Are Always Better
Many beginners assume that a single large raised bed is more productive than multiple smaller ones. In small yards, the opposite is often true. Multiple well-placed smaller beds offer better access (you can reach the center of each bed without stepping inside), more flexible layout options, and greater redundancy if one bed underperforms. Think of your layout as a network of small, highly productive zones rather than a single monolithic growing area.
Frequently Asked Questions FAQ
Q1: How do I plan a raised bed garden layout for a very small yard?
Start by measuring your available space and identifying the sunniest areas — most vegetables need six or more hours of direct sunlight daily. Then sketch out a simple layout that places raised beds along fence lines or in corners, preserving open areas for movement and seating. Choose modular raised beds that can expand over time as your confidence grows. Even a single bed is an excellent starting point — you can always add more as your gardening journey evolves.
Q2: Are metal raised garden beds worth the investment for small yards?
Absolutely. Quality metal raised garden beds — like those available through Anleolife — are built to last up to 20 years, making them one of the most cost-effective long-term investments a home gardener can make. They provide excellent soil control, resist rot and pest damage, and maintain a clean, attractive appearance over time. When you spread the cost across two decades of productive gardening, the value is exceptional compared to wooden or plastic alternatives that require frequent replacement.
Q3: How long does it take to set up a raised bed garden layout for a small yard?
Most homeowners can plan, assemble, and fill a basic raised bed garden in a single weekend. The planning phase — mapping sunlight, measuring space, and sketching a layout — typically takes an hour or two. Assembling the bed itself usually takes a few hours depending on the design. Filling with soil and planting can happen the same day. With Anleolife's nationwide U.S. warehouse network across California, Texas, Florida, New York, Illinois, and Washington, products are typically delivered within 3–8 business days, so your garden can go from concept to reality in well under two weeks.
Summary
Transforming a small yard into a productive, beautiful, and functional garden space is entirely achievable with the right plan and the right products. Here are the three core takeaways from this guide:
1. Plan Before You Plant: Understanding your space — its sunlight patterns, dimensions, and functional needs — is the foundation of every successful small-yard garden. A few hours of planning at the start saves significant time, money, and frustration down the line.
2. Choose Durable, Scalable Systems: Metal raised garden beds built to last up to 20 years, modular layouts that expand with your ambitions, and integrated planting-raising-beautification ecosystems all represent smart investments that grow in value over time rather than deprecating after a few seasons.
3. Think Holistically: The best small-yard gardens aren't just vegetable plots — they're integrated outdoor living spaces that combine food production, possibly small animal keeping, and genuine aesthetic beauty into a coherent, joyful whole.
Your next step? Choose one section of your yard, measure it, and identify your first raised bed location. Start small, start with quality, and let your garden grow from there.
Start Your Small-Yard Garden Journey with Anleolife
Nationwide U.S. warehouse network: Strategically located in California, Texas, Florida, New York, Illinois, and Washington to ensure delivery within 3–8 business days — so your garden upgrade plans never have to wait.
Multi-channel sales network: Products are available on major e-commerce platforms including Amazon, Walmart, Home Depot, Lowe's, and Wayfair, as well as the official website Anleolife.com, providing consistent quality assurance and after-sales service.
Three core scenarios: Planting (metal raised garden beds, soil systems), Raising (chicken coops, rabbit hutches), and Beautification (decorative accessories, pathway systems) — meeting complete needs from functionality to aesthetics.
We understand that an ideal garden is not built overnight, but gradually improved over time. Our modular product design allows flexible expansion based on your needs — from your first raised garden bed to a fully integrated planting-and-raising ecosystem. We grow with you every step of the way.
Explore Anleolife's full garden ecosystem at Anleolife.com →
References
National Gardening Association. "Food Gardening in the United States".
https://garden.org/special/pdf/2014-NGA-Garden-to-Table.pdf
University of California Agriculture and Natural Resources. "Raised Bed Gardening".
https://ucanr.edu/sites/mgslo/Gardening/Raised_Beds/
U.S. Department of Agriculture (USDA). "Backyard Conservation: Gardening for Wildlife and People".
https://www.nrcs.usda.gov/wps/portal/nrcs/detail/national/newsroom/features/?cid=nrcs143_023574
Penn State Extension. "Vegetable Gardening in Small Spaces".
https://extension.psu.edu/vegetable-gardening
Cooperative Extension System (eXtension). "Urban and Community Gardening".
https://extension.org/urban_and_community_gardening/
Note: Standards and guidelines may be updated. Please check the latest official documents or consult professional advisors for the most current information.
About Anleolife
Anleolife is a leading outdoor garden solutions provider in North America, dedicated to offering a full-scenario product ecosystem for home gardening enthusiasts, covering planting, raising, and garden beautification. Since its founding, we have upheld our brand mission, "Made for Garden Life," continuously innovating products and optimizing services to help hundreds of thousands of users upgrade their gardens, reconnect with nature, and enjoy a better garden lifestyle.

Raised Garden Bed Kits vs. DIY Build: A Real Cost Comparison
on Apr 29 2026
ALT: Raised garden bed kit versus DIY build cost comparison with tools, lumber, and metal garden beds
Is a Raised Garden Bed Kit Really Worth It? The True Cost Breakdown
Key Conclusion: Choosing between a raised garden bed kit and a DIY build isn't just about upfront price—it's about total value over time. When you factor in material costs, tool investment, labor hours, and long-term durability, pre-built kits often win on overall value, especially for beginners. A well-chosen kit simplifies your raised bed planting layout, eliminates guesswork from your raised bed garden layout, and lets you focus on what actually matters: growing food and enjoying your outdoor space. For most home gardeners, the "cheaper" DIY route can quietly become the more expensive one.
Planning a garden for the first time—or scaling up an existing one—almost always leads to the same crossroads: should you buy a ready-made raised garden bed kit, or build one yourself from scratch? It's a genuinely important question, and the answer depends on more than just the price tag on a box of lumber.
This article digs into the real, full-picture cost of both approaches. We're talking materials, tools, time, durability, and the hidden expenses that most comparison articles conveniently skip. Whether you're a weekend warrior with a well-stocked garage, a retiree looking for a manageable first garden project, or a busy parent who just wants to start planting this season, this breakdown will help you make the smartest decision for your situation.
Who Should Read This Comparison (and Who Might Not Need It)
✅ Applicable Scenarios:
First-time gardeners who want to understand total costs before committing to either path
Experienced growers planning to expand their raised bed layout and evaluating scalability and budget
Eco-conscious homeowners who want to assess material longevity and environmental impact before purchasing
Retirees or empty nesters looking for a rewarding but manageable garden project without excessive physical demands
Urban micro-gardeners working with limited space who need a precise, clean raised bed garden layout
❌ Not Applicable/Cautions:
Experienced builders with a full workshop, surplus materials, and significant free time may find DIY genuinely cost-competitive—this comparison is most relevant to those without those advantages
Gardeners in rental properties or those who need a fully portable setup should explore container gardening as an additional or alternative option before committing to either path discussed here
Why the "Just Build It Yourself" Advice Isn't Always Right
The DIY garden bed has a certain romantic appeal. You browse YouTube for an afternoon, pick up some cedar planks, and in a weekend you've built something with your own hands. It sounds simple, affordable, and satisfying.
But gardening advice has evolved significantly over the past decade. As urban gardening has surged in popularity—driven by a combination of food security awareness, wellness trends, and pandemic-era interest in home-grown produce—so has the quality and variety of commercially available raised garden bed kits. The market has matured considerably, and the assumption that "store-bought means overpriced" simply doesn't hold up the way it once might have.
According to the National Gardening Association, home food gardening participation in the United States has grown dramatically in recent years, with millions of households starting or expanding their gardens. That growth has pushed manufacturers to produce better, more affordable, and more durable garden bed solutions at increasingly competitive price points.
At the same time, the cost of raw lumber has fluctuated significantly. After the dramatic price spikes seen in the early 2020s, many homeowners discovered that building "cheap" raised beds from lumber wasn't as inexpensive as they'd expected. A standard untreated pine raised bed might look affordable until you price out the screws, corner brackets, landscape fabric, and delivery fees for heavy boards.
The other factor that rarely gets discussed is material lifespan. Untreated pine in direct soil contact can begin to degrade within just a few years. Even cedar—the gold standard for DIY wood raised beds—typically lasts around 10 to 15 years under ideal conditions, less in wet climates. Quality metal garden beds from reputable brands, by contrast, can last upwards of 20 years, fundamentally changing the cost-per-year calculation.
This is the context in which the kit vs. DIY question needs to be asked. Let's get into the numbers.
Step-by-Step: How to Think About This Decision Before Spending a Dollar
Three Questions to Answer Before You Choose
Step 1: Assess Your Tools and Skills
Before pricing out lumber or kits, take a realistic inventory of what you already own. Do you have a circular saw, drill, measuring tape, clamps, and the experience to use them safely and accurately? If yes, your DIY overhead is lower. If you'd need to buy or rent tools, add those costs to your comparison spreadsheet. Allow roughly 30–60 minutes for this honest self-assessment—it will save you significant money and frustration later.
Step 2: Calculate Your True Time Cost
Time is a real cost. A first-time DIY raised bed builder should realistically budget 4–8 hours for a single standard bed, including planning, shopping, cutting, assembling, and finishing. If your weekend hours are precious, that time has value. Multiply those hours by a comfortable hourly rate for your time—this is your "labor cost." A kit from a reputable brand typically assembles in 30–90 minutes with basic hand tools, freeing those hours for planting, planning your raised bed planting layout, or simply enjoying your garden.
Step 3: Project Your 5-Year and 10-Year Costs
This is where most comparisons fall short. A cheaper material choice that degrades in 3–5 years isn't actually cheaper if you rebuild or replace it. Calculate the cost of your chosen approach over a 10-year window, including realistic replacement timelines. A metal raised bed designed to last 20 years spread over two decades becomes remarkably affordable per year—often less expensive than repeated wood replacements over the same period.
Kit vs. DIY: Side-by-Side Cost Comparison
The real numbers vary based on your location, the size of bed you're building, and where you shop. But the following comparison framework—based on commonly reported ranges for standard garden bed sizes—gives you a reliable foundation for your own calculations.
Comparison Dimension
DIY Wood (Pine)
DIY Wood (Cedar)
Anleolife Metal Kit
Typical Upfront Material Cost
Lower initial cost
Moderate to high
Moderate, all-inclusive
Tool Requirements
Saw, drill, screws, brackets
Same as pine
Basic hand tools only
Assembly Time
4–8 hours
4–8 hours
30–90 minutes
Estimated Lifespan
3–5 years
10–15 years
Up to 20 years
Soil Containment Quality
Variable by builder skill
Variable by builder skill
Consistent, precision-designed
Aesthetic Consistency
Depends on skill level
Depends on skill level
Clean, uniform finish
Scalability
Requires repeat builds
Requires repeat builds
Modular, expandable
Cost Per Year (projected)
Higher when replaced
Moderate
Low (over 20-year lifespan)
Delivery Availability
Local pickup or delivery varies
Local pickup or delivery varies
3–8 business days, nationwide
The table above makes a compelling case for the math behind quality kit purchases—but let's go deeper into each category.
The Real Numbers: Breaking Down Every Cost Category
Material Costs: What You Actually Pay at the Lumber Yard
When gardeners picture building their own raised bed, they often think in terms of board prices. But a complete DIY bed requires more than planks.
For a standard rectangular raised garden bed, your shopping list typically includes: multiple lengths of lumber, corner brackets or joining hardware, deck screws (exterior-rated), landscape fabric for the base, and potentially wood treatment or sealant to slow degradation. Each of these adds to your total, and lumber prices fluctuate seasonally and regionally.
Untreated pine is the most affordable option but degrades fastest—particularly problematic given that raised beds are in constant contact with moist soil. It may last only 3–5 years before boards begin to warp, split, or rot at the joints. Cedar is naturally rot-resistant and smells wonderful, but it commands a significant price premium. Redwood is even more expensive and increasingly difficult to source sustainably.
One important caution for DIY builders: treated lumber may contain chemicals that can leach into your soil. For vegetable gardens, many experts recommend untreated or naturally rot-resistant options only—which limits your affordable choices further.
A quality metal raised garden bed kit, by contrast, includes everything you need in one purchase. No separate hardware runs, no sealant, no landscape fabric required. The all-in price is transparent before you buy.
Tool Costs: The Hidden Tax on DIY Projects
If you're building from scratch, you need tools. For many first-time gardeners, this means either purchasing tools they may not use again or borrowing them—which requires coordination and limits your schedule flexibility.
Even renting a circular saw for a weekend adds to your project cost. Drill bits, clamps, a speed square for accurate cuts, and a tape measure are all necessary for a quality build. For experienced builders with a full workshop, this cost is essentially zero. For everyone else, it's a real line item.
Raised bed kits typically require only a basic screwdriver or mallet. Some designs are fully tool-free. This dramatically lowers the barrier to entry and makes garden expansion genuinely easy for retirees, older adults, or anyone with limited physical strength or tool experience.
Labor Time: The Cost Nobody Talks About
Let's address the elephant in the garden shed: your time has value.
An experienced carpenter might build a beautiful cedar raised bed in two hours. A first-timer will realistically spend a full Saturday on a single bed—planning, a trip to the lumber yard (where the boards aren't quite the right length), cutting, re-cutting, assembling, and fixing the wobbly corner that didn't line up. That's a 6–8 hour investment for one bed.
Multiply that by three beds and you're looking at a full weekend, with sore arms and knees to show for it. A kit that assembles in 30–90 minutes lets you set up multiple beds in a single afternoon, leaving time to plan your raised bed garden layout, prep your soil mix, and actually start planting.
Lifespan and Replacement Costs: Where Kits Win the Long Game
This is the calculation that changes the entire equation.
Assume you spend a moderate amount building a pine raised bed this spring. In 3–5 years, the boards are warping and rotting. You rebuild—same cost, more labor hours, more of your weekend. Over a 15-year period, you might rebuild that bed two or three times.
Now consider a quality metal raised garden bed rated for up to 20 years of use. The higher upfront cost spreads across two decades of service. The cost-per-year becomes remarkably low—and you never spend another Saturday rebuilding what you already built.
For eco-conscious gardeners, there's an environmental argument here too. Multiple wood replacements mean more resource consumption and more waste. A single long-lasting metal bed has a smaller cumulative environmental footprint.
What's the Best Material for Raised Garden Beds That Lasts Longest?
This is one of the most searched questions in the raised bed space—and the answer is clear: powder-coated or galvanized steel consistently outperforms wood in longevity tests. It doesn't rot, doesn't warp, doesn't harbor pests, and doesn't require annual treatment. For gardeners who want a truly low-maintenance, long-lasting solution, quality metal beds represent the most durable choice available.
Raised Bed Height: Does It Affect Your Cost Decision?
When evaluating either a kit or a DIY build, raised bed height is a variable that significantly affects both cost and practicality. Lower beds (around 6 inches) work well for root-shallow crops like lettuce, herbs, and radishes. Taller beds (12 inches and above) are ideal for deeper-rooted vegetables like tomatoes, carrots, and peppers, and offer the added benefit of reducing how far you need to bend—a significant quality-of-life factor for older gardeners.
Taller DIY beds require more lumber, more hardware, and more structural reinforcement to prevent bowing under soil pressure. Kit designs often address this engineering challenge for you, with pre-calculated dimensions and structural features already built in.
Budget Considerations: Are There Good Options Under $200?
For gardeners exploring the best budget raised beds without sacrificing quality, the kit market has expanded impressively. Entry-level metal raised bed kits in standard sizes are now available in price ranges accessible to most home gardeners. While the $200 threshold won't get you a large, tall bed with premium finishes, it can absolutely get you a functional, durable starter bed that outperforms a same-priced DIY pine build on longevity alone. Look for kits that include all hardware, have good customer reviews, and come from brands that offer after-sales support.
Finishing Touches: Garden Netting, Ornaments, and Accessories
Once your bed is built, the real enjoyment begins. Garden netting is one of the most practical accessories you can add, protecting crops from birds, squirrels, and insects. For gardeners in windy climates, look for netting with weighted edges or anchor stakes that resist lifting—particularly important in open yards or elevated terraces. Fine mesh netting also provides light frost protection in shoulder seasons.
For those who want their garden to be as beautiful as it is productive, garden ornaments for small spaces can transform a functional planting area into a genuine outdoor retreat. Pathway systems, decorative edging, and accent pieces create structure and personality even in compact raised bed layouts. This is where the aesthetics of a clean, well-finished metal bed kit begin to shine—its uniform appearance creates a professional backdrop for ornamental additions.
ALT: Overhead raised bed garden layout with metal raised beds, garden netting for wind protection, and decorative ornaments in a small backyard space
Advanced Considerations: When DIY Actually Makes Sense (and Common Misconceptions)
Special Situations Where DIY Has a Genuine Edge
You have surplus materials and the skills to use them. If you have leftover cedar from another project and a comfortable relationship with a table saw, DIY may legitimately be your most cost-effective option. The calculation changes completely when your material cost approaches zero.
You need an unusual size or shape. Kits come in standard dimensions. If your space requires an L-shaped bed, a specific narrow width for a pathway, or a custom height to match existing landscape features, a skilled DIY builder can design exactly what the space demands.
You want the process itself, not just the outcome. For some gardeners, building is part of the joy. There's genuine satisfaction in creating something by hand, and if that's your motivation, the "cost" conversation becomes secondary to the experience.
Common Misconceptions Worth Addressing
Misconception: "DIY is always cheaper." As this analysis shows, that's only true if you already own the tools, have the skills, use durable materials, and don't account for your time. Under those specific conditions, yes—DIY can be cheaper upfront. Over a 10–20 year horizon with material replacement factored in, the advantage often disappears.
Misconception: "Metal beds are too hot for plant roots." This concern is frequently raised and frequently overstated. Metal beds do absorb heat, but this is actually beneficial in cooler climates and early spring seasons, extending your growing window. In very hot climates, thoughtful placement (afternoon shade) mitigates the concern entirely.
Misconception: "Kits are flimsy." This was true of early-generation plastic bed kits. Quality metal beds from established brands are engineered for decades of use, soil pressure, and seasonal temperature swings. The 20-year lifespan of quality metal garden beds speaks directly to this.
Frequently Asked Questions FAQ
Q1: How do I calculate the real 10-year cost of a raised garden bed?
Start with your upfront material or kit cost, then add tool costs (if applicable) and your estimated labor time converted to a dollar value. Then factor in replacement: wood beds typically need rebuilding every 3–10 years depending on material, while quality metal beds can last up to 20 years. Divide each scenario's total cost by the number of years of use. This cost-per-year comparison almost always reveals that durable kits offer better long-term value than repeated DIY rebuilds using lower-cost materials.
Q2: Are metal raised garden bed kits safe for growing vegetables?
Yes—high-quality metal raised garden beds are safe for food production. Unlike chemically treated lumber, which can potentially leach compounds into soil, powder-coated or galvanized steel beds do not introduce harmful substances at the levels present in food-grade gardening applications. Many food safety advocates actually recommend metal over treated wood for vegetable gardens. Always verify that the specific product you choose uses food-safe coatings and materials, and check for any relevant certifications mentioned by the manufacturer.
Q3: How much time does it actually take to assemble a raised garden bed kit versus building DIY?
Assembly time for a quality raised garden bed kit typically ranges from 30 to 90 minutes for a standard bed, using basic hand tools or even no tools at all. A comparable DIY build—from lumber measuring and cutting through assembly and finishing—typically takes a first-time builder 4–8 hours for a single bed, not including shopping time. For gardeners planning multiple beds, this time difference compounds quickly. Over a weekend, a kit approach can have your entire raised bed planting layout ready to fill with soil while a DIY approach might still be mid-assembly.
Summary
After walking through every cost category—materials, tools, labor, lifespan, and long-term replacement—three core conclusions emerge clearly:
First, upfront price is only one piece of the puzzle. A cheaper board today may cost you more over a decade than a quality kit purchased once. The 20-year lifespan of premium metal raised garden beds fundamentally changes the cost-per-year math in favor of investing in quality from the start.
Second, your time is a real cost. The 4–8 hours required for a DIY build—multiplied across multiple beds—is time not spent planting, harvesting, or enjoying your garden. Kit assembly frees that time for what actually matters, and makes garden expansion genuinely accessible regardless of skill level or physical ability.
Third, quality kits have closed the gap. The market has matured dramatically. Today's best raised garden bed kits offer precision engineering, durable materials, clean aesthetics, and complete hardware packages at price points that compete seriously with the true all-in cost of comparable DIY builds—especially when longevity is factored in.
The recommended next step: Price out both options honestly for your specific bed size and quantity, using the three-question framework from this article. Then compare cost-per-year, not just cost-per-bed. For most home gardeners, the numbers will tell a clear story.
Start Growing with Anleolife
Nationwide U.S. warehouse network: Strategically located in California, Texas, Florida, New York, Illinois, and Washington, Anleolife ensures delivery within 3–8 business days—so your garden upgrade plans never have to wait for the right season.
Multi-channel availability: Anleolife.com products are available on major e-commerce platforms including Amazon, Walmart, Home Depot, Lowe's, and Wayfair, providing consistent quality assurance and after-sales service wherever you prefer to shop.
Three complete garden scenarios: Planting (metal raised garden beds, soil systems), Raising (chicken coops, rabbit hutches), and Beautification (decorative accessories, pathway systems)—meeting every need from functionality to aesthetics in one cohesive ecosystem.
We understand that an ideal garden isn't built overnight—it's cultivated gradually, season by season. Anleolife's modular product design allows flexible expansion based on your evolving needs, from your very first raised bed to a fully integrated planting-and-raising ecosystem. We grow with you every step of the way.
References
National Gardening Association. "Food Gardening in the United States."https://garden.org/
University of California Agriculture and Natural Resources. "Raised Bed Gardening."https://ucanr.edu/
U.S. Environmental Protection Agency. "Healthy Lawn and Garden Practices."https://www.epa.gov/safepestcontrol/lawn-and-garden
Penn State Extension. "Building Raised Beds for Vegetable Gardens."https://extension.psu.edu/
University of Minnesota Extension. "Raised Bed Gardening for Vegetables."https://extension.umn.edu/
Note: Standards and recommendations may be updated over time. Please check the latest official documents or consult professional advisors for the most current guidance.
About Anleolife
Anleolife is a leading outdoor garden solutions provider in North America, dedicated to offering a full-scenario product ecosystem for home gardening enthusiasts, covering planting, raising, and garden beautification. Since its founding, we have upheld our brand mission, "Made for Garden Life," continuously innovating products and optimizing services to help hundreds of thousands of users upgrade their gardens, reconnect with nature, and enjoy a better garden lifestyle.

How Much Should You Spend on a Raised Garden Bed This July?
on Apr 29 2026
How Much Should You Spend on a Raised Garden Bed This July?
ALT: Family planning raised garden bed budget in July with thriving summer vegetables in metal raised beds
How Much Should You Really Spend on a Raised Garden Bed This July?
Key Conclusion: July is one of the most strategic months to invest in a raised garden bed — summer sales, mid-year restocks, and the urgency of fall planting prep converge in a single window. Whether you're designing a raised bed garden layout for the first time or expanding an existing raised bed planting layout, your budget should reflect not just the upfront cost, but long-term durability, material quality, and your unique raised bed layout goals. A well-chosen bed purchased in July can serve you for up to 20 years.
Budgeting for a raised garden bed isn't as simple as picking the cheapest option on a shelf. The real question is: what are you actually paying for? Material longevity, structural integrity, and whether the bed fits your intended layout all play into the true cost of ownership. In July specifically, you also have seasonal timing working in your favor — many retailers run mid-year promotions, and savvy gardeners know that investing now means a head start on fall crops like kale, broccoli, and root vegetables. This article will walk you through everything you need to know: from price tiers and material comparisons to layout planning, soil ratios, and the hidden costs that most buyers overlook.
Who This Guide Is For — and When It Applies
✅ Applicable Scenarios:
First-time buyers who want to understand raised garden bed pricing before committing
Experienced gardeners expanding their raised bed planting layout and comparing mid-range to premium options
Budget-conscious shoppers looking to maximize value during July sales and seasonal promotions
Retirees and empty nesters building a sustainable, low-maintenance backyard garden
Urban micro-gardeners working with limited outdoor space who need to make every dollar count
❌ Not Applicable/Cautions:
Shoppers looking for community or commercial-scale farming solutions — raised garden beds are optimized for residential use
Those expecting instant results: even with the best bed and soil mix, gardening requires patience, seasonal awareness, and ongoing care
Buyers in extreme cold climates who haven't accounted for frost protection — budget should include covers or insulation accessories as needed
Why July Is a Pivotal Month for Raised Garden Bed Purchases
July sits at an interesting intersection in the gardening calendar. On one hand, peak summer planting is already underway — tomatoes, cucumbers, and peppers are thriving. On the other hand, experienced gardeners are already thinking about their fall planting timeline, which means August and September prep begins now.
This dual pressure — enjoying summer harvests while planning for fall — creates a unique buying opportunity. Retailers, both online and brick-and-mortar, often run mid-year clearance events in July to make room for Q4 inventory. That means you can find high-quality raised beds at competitive prices if you shop strategically.
But there's another reason July matters: soil heating. Metal raised beds in particular absorb and retain solar heat, which accelerates germination and root development during the warmer months. If you install your bed in July, you can take advantage of residual summer heat for quick-sprouting fall crops like radishes, lettuce, and spinach — crops that actually prefer cooler temperatures but germinate faster in warm soil.
According to the USDA National Agricultural Library, raised bed gardens consistently outperform in-ground plots in terms of drainage, soil temperature control, and weed suppression. These benefits are amplified during summer months when soil compaction and heat stress can devastate in-ground crops.
From a market trend perspective, the home gardening industry has seen consistent growth year over year. A growing number of middle-class families, eco-conscious growers, and health-oriented households are moving away from store-bought produce and investing in their own food production systems. This shift has driven innovation in raised bed design, making it easier than ever to find options that balance budget with performance.
If you're navigating the full scope of raised bed garden planning — from selecting materials to optimizing your raised bed planting layout — resources like Anleolife's garden solutions hub offer practical guidance tailored to North American growing conditions.
A Practical Breakdown: How to Budget for Your Raised Garden Bed This July
Three Steps to Setting a Realistic Raised Garden Bed Budget
Step 1: Define Your Layout and Growing Goals
Before you look at a single price tag, spend 15–20 minutes sketching out your raised bed layout on paper or a free planning tool. How many beds do you want? What will you grow — vegetables, herbs, flowers, or a mix? The answers directly impact how much structural material you need, what soil volume you'll require, and whether you need accessories like trellises or covers. A single bed for herbs costs very differently than a three-bed vegetable system.
Step 2: Understand the True Cost of Ownership
Most buyers look only at sticker price. Savvy buyers look at cost per year. A low-cost wood bed that lasts 3–5 years before rotting actually costs more annually than a recommended material raised garden bed that won't rot — such as galvanized steel — that carries a 20-year lifespan. Factor in replacement costs, soil refill after structural failures, and the labor of rebuilding. When you run the numbers, premium materials often win on long-term value.
Step 3: Allocate Budget Across All Components — Not Just the Bed
A common budgeting mistake is spending everything on the bed frame and then improvising on soil, amendments, and accessories. A practical allocation looks something like this: roughly 40–50% on the bed structure itself, 30–40% on quality soil and compost mix, and 10–20% on accessories like liners, trellises, or garden tool storage. Getting your best ratio of compost to soil for raised garden beds right is just as important as the bed material — most experts recommend a mix of roughly 60% topsoil, 30% compost, and 10% perlite or coarse sand for drainage and aeration.
Material Comparison: What Are You Actually Paying For?
The raised garden bed market offers four primary material categories, each with a distinct price range, durability profile, and aesthetic. Here's how they stack up:
Understanding these differences is the foundation of smart budgeting. The table below compares the most common options across dimensions that matter most to home gardeners.
Comparison Dimension
Wood (Pine/Cedar)
Galvanized Steel
Fabric/Plastic
Cor-Ten Steel
Typical Price Range
Lower to mid
Mid to premium
Lowest
Premium
Lifespan
3–7 years
Up to 20 years
2–5 years
15–25 years
Rot/Weed Resistance
Moderate
Excellent
Moderate
Excellent
Aesthetic Appeal
Natural, rustic
Modern, clean
Minimal
Industrial/rustic
Ease of Assembly
Moderate
High (modular)
Very easy
Moderate
Long-Term Value
Low-moderate
High
Low
High
Maintenance Required
Moderate-high
Low
Low
Low
Galvanized steel, like the metal raised garden beds offered by Anleolife, stands out in this comparison for its combination of durability, low maintenance, and aesthetic versatility. With a garden bed lifespan of 20 years, galvanized steel eliminates the recurring cost and frustration of wood rot — a critical consideration for those seeking recommended materials for raised garden beds that won't rot.
Deep Dive: Price Tiers, Hidden Costs, and What's Worth Paying For
The Budget Tier (Under $80)
At this price point, you're typically looking at thin-gauge metal, untreated wood, or fabric grow bags. These options work well for very casual gardening — a few herbs on a patio, or a seasonal experiment. However, the limitations become apparent quickly: they warp in heat, rot in rain, and rarely survive more than two or three growing seasons intact.
If you're a first-time gardener who genuinely isn't sure if raised bed gardening is for you, starting here makes sense. But most people who try it do fall in love with it — which means they end up buying again anyway. Going cheap twice often costs more than going quality once.
The Mid-Range Tier ($80–$250)
This is where the majority of home gardeners land, and it's a genuinely strong value zone. Mid-range beds are typically constructed from thicker materials, offer more size and shape configurations, and often include thoughtful features like drainage holes, modular expansion panels, and rust-resistant coatings.
For families with specific raised bed garden layout goals — say, a U-shaped layout for accessibility or a tiered design for sloped yards — the mid-range tier starts to offer real design flexibility. At this price point, you're investing in a bed that can realistically anchor your garden for several years, though premium materials will still outperform on longevity.
The Premium Tier ($250 and Above)
Premium raised garden beds are built for gardeners who are serious about both function and aesthetics. At this level, you're typically getting heavy-gauge galvanized or powder-coated steel, architectural design options, and structural warranties that reflect genuine confidence in material quality.
The math here is compelling: a premium bed at $350 that lasts 20 years costs approximately $17.50 per year. A budget bed at $60 that lasts 3 years — and requires soil replacement during each rebuild — could easily run $30–$40 per year when all costs are accounted for. The premium bed wins decisively on lifetime value.
The Hidden Costs Most People Forget
Beyond the bed frame itself, here are the costs that catch first-time buyers off guard:
Soil and amendments: A standard raised bed requires significantly more soil than most people expect. Quality soil isn't cheap, but it's not where you want to cut corners. Getting the best ratio of compost to soil for raised garden beds right — approximately 60% quality topsoil, 30% mature compost, and 10% drainage material — is the single most impactful factor in plant health.
Garden tools and storage: Quality hand tools — trowels, cultivators, pruners — add up quickly. And without proper storage, tools rust and degrade. The top rated outdoor tool storage options include wall-mounted shed organizers, weatherproof tool chests, and vertical storage racks. Investing $40–$80 in a solid storage solution protects tools that might cost $150–$300 to replace. Knowing how to maintain garden tools properly is equally important: wipe blades clean after each use, oil metal parts seasonally, and store in a dry location to dramatically extend tool life.
Accessories and beautification: Trellises for climbing plants, row covers for pest protection, drip irrigation setups, and decorative elements like pathway stones or garden ornaments all add to the total investment. If you're interested in best garden ornaments for tropical landscaping, look for weather-resistant pieces in materials like cast iron, glazed ceramic, or powder-coated aluminum that can withstand humidity and heat.
ALT: Galvanized steel raised garden beds filled with summer vegetables alongside organized garden tools and decorative pathway stones illustrating a complete raised bed garden layout
Advanced Considerations: When Standard Budgeting Advice Falls Short
Special Situations That Change the Equation
Accessibility needs: If you or a family member gardens with mobility limitations, raised beds that allow comfortable access from a seated position are not a luxury — they're essential. Taller beds cost more but eliminate the physical strain that makes in-ground gardening prohibitive for many retirees and people with disabilities. In this context, the premium is absolutely justified and often life-changing.
Multiple bed layouts: A single bed costs one thing; a three-bed or five-bed raised bed planting layout has a completely different financial profile — and a different value calculation. Buying multiple beds at once often unlocks bundle pricing or reduced shipping, making the per-unit cost more favorable. If you know you want to scale up eventually, consider buying your full layout at once rather than in phases.
Renting vs. owning a home: Renters sometimes hesitate to invest in permanent raised beds. The good news is that modular galvanized steel beds can be disassembled, transported, and reinstalled in a new location — meaning your investment travels with you. When budgeting, account for this portability premium: a bed that moves with you is worth more than one that stays behind.
Common Misconceptions About Raised Bed Budgeting
Misconception #1: "Cheaper wood is just as good as steel." Untreated or under-treated wood is susceptible to rot, fungal growth, and insect damage — particularly in humid climates. While cedar is genuinely durable, it still requires periodic treatment and has a significantly shorter lifespan than galvanized steel. When you calculate cost per year, the math rarely favors wood.
Misconception #2: "The bed is the whole cost." As outlined above, soil, tools, storage, and accessories are real budget items. A complete raised bed setup often costs 1.5–2x the price of the bed alone.
Misconception #3: "I'll just add compost and it'll be fine." Compost quality varies dramatically. Fresh, uncomposted organic material can actually harm plants by creating nitrogen lockup. Invest in aged, well-balanced compost and pair it with quality topsoil in the right ratio.
Frequently Asked Questions FAQ
Q1: How do I calculate how much soil I need for my raised garden bed?
To calculate soil volume, multiply the length × width × depth of your bed in feet, then convert to cubic feet. Most raised beds require between 8–30 cubic feet of growing medium depending on their size. A practical mix is 60% quality topsoil, 30% compost, and 10% perlite or coarse sand. Always slightly overfill, as soil settles 10–15% after watering. Starting with the right best ratio of compost to soil for raised garden beds dramatically affects plant performance from day one.
Q2: Are galvanized steel raised garden beds safe for growing vegetables?
Yes — galvanized steel raised garden beds are widely considered safe for vegetable growing. The zinc coating on galvanized steel is tightly bonded and does not leach at levels harmful to plants or humans under normal conditions. Numerous university extension studies support this conclusion. For extra peace of mind, food-safe liners can be placed inside the bed. Galvanized steel is among the most recommended materials for raised garden beds that won't rot, rust through, or deform over time, making it a popular choice for health-conscious growers.
Q3: How long does a quality raised garden bed last, and is the investment worth it?
A quality galvanized steel raised garden bed — like those offered by Anleolife — is built to last 20 years. Compared to wood beds that may need replacement every 3–7 years, a 20-year lifespan dramatically reduces long-term cost. When you factor in avoided replacement expenses, soil refill costs after structure failures, and the labor of rebuilding, premium materials pay for themselves within the first few cycles. For July shoppers, seasonal promotions can further improve the return on investment.
Summary
Budgeting for a raised garden bed in July isn't just a financial decision — it's a lifestyle investment. Here are the three core takeaways from this guide:
1. Think in cost-per-year, not sticker price. A galvanized steel bed with a 20-year lifespan almost always beats budget alternatives when you calculate true long-term costs. Don't let an attractive low price tag obscure the real value equation.
2. Budget for the whole system. The bed is the foundation, but your investment doesn't stop there. Quality soil at the right compost-to-topsoil ratio, proper tool storage, and thoughtful accessories are all part of building a garden that truly performs.
3. July is an excellent time to buy — if you're prepared. Mid-year promotions, fall planting prep timelines, and the strategic advantage of summer heat for soil warming all align in July. Shoppers who plan ahead and know what they want can secure excellent value this month.
Your next step: sketch out your raised bed garden layout — even a rough diagram on paper — before making any purchase. Know how many beds you want, what you'll grow, and what your ideal configuration looks like. Then shop with intention.
Start Growing with Anleolife
Nationwide U.S. warehouse network: Strategically located in California, Texas, Florida, New York, Illinois, and Washington to ensure delivery within 3–8 business days — so your garden upgrade plans never have to wait.
Multi-channel sales network: Products are available on major e-commerce platforms including Amazon, Walmart, Home Depot, Lowe's, and Wayfair, as well as the official website Anleolife.com, providing consistent quality assurance and after-sales service.
Three core scenarios: Planting (metal raised garden beds, soil systems), Raising (chicken coops, rabbit hutches), and Beautification (decorative accessories, pathway systems) — meeting complete needs from functionality to aesthetics.
Upgrade your garden with Anleolife. We understand that an ideal garden is not built overnight, but gradually improved over time. Our modular product design allows flexible expansion based on your needs — from your first raised bed to a fully integrated planting-and-raising ecosystem. We grow with you every step of the way.
References
USDA National Agricultural Library. "Raised Bed Gardening Resources and Research."
https://www.nal.usda.gov/farms-and-agricultural-production-systems/raised-bed-gardening
University of California Agriculture and Natural Resources. "Raised Bed Gardening."
https://ucanr.edu/sites/scmg/files/30517.pdf
Penn State Extension. "Building and Managing Raised Bed Gardens."
https://extension.psu.edu/raised-bed-gardening
Cornell Cooperative Extension. "Soil Health and Compost in Raised Beds."
https://cce.cornell.edu/topics/agriculture/soil-health
National Gardening Association. "Raised Bed Gardening Guide."
https://garden.org/learn/articles/view/3569/
Note: Standards and research may be updated periodically. Please check the latest official documents or consult professional advisors for current recommendations.
About Anleolife
Anleolife is a leading outdoor garden solutions provider in North America, dedicated to offering a full-scenario product ecosystem for home gardening enthusiasts, covering planting, raising, and garden beautification. Since its founding, we have upheld our brand mission, "Made for Garden Life," continuously innovating products and optimizing services to help hundreds of thousands of users upgrade their gardens, reconnect with nature, and enjoy a better garden lifestyle.

Firewood Log Rack Ideas: Organizing Your Outdoor Space for Winter
on Apr 27 2026
ALT: Creative firewood log rack ideas for organizing outdoor space and keeping wood dry during winter
Firewood Log Rack Ideas to Transform Your Outdoor Space This Winter
Key Conclusion: A well-organized firewood storage system is one of the smartest investments you can make for winter readiness. Whether you're stacking cords of hardwood for a wood-burning stove or simply keeping a modest supply near the back door, the right firewood log rack keeps wood dry, promotes airflow, deters pests, and adds visual order to your yard. From freestanding metal racks to rustic DIY structures, the best firewood log rack ideas combine function, durability, and curb appeal in equal measure.
Winter preparedness goes far beyond stocking up on blankets and hot cocoa. For homeowners who rely on firewood—whether for a cozy fireplace, a wood-burning insert, or an outdoor fire pit—having a reliable, well-organized log storage solution is essential. Without proper storage, firewood absorbs moisture, invites pests, and becomes a cluttered eyesore in your yard.
The good news is that firewood storage has evolved far beyond the simple pile in the corner. Today's outdoor space organization solutions range from sleek galvanized steel racks to creative DIY stacking methods that double as garden features. In this guide, we'll walk through the best firewood log rack ideas, materials, placement strategies, and maintenance tips to help you stay warm and organized all winter long.
Who This Guide Is For
✅ Applicable Scenarios:
Homeowners with wood-burning fireplaces, stoves, or outdoor fire pits who need reliable firewood storage
Garden and outdoor living enthusiasts looking to improve the organization and aesthetics of their backyard or patio
DIY-minded individuals who want to build custom log racks using affordable materials
Empty nesters and retirees who heat their homes with wood and need accessible, easy-to-maintain storage systems
Urban and suburban homeowners with limited outdoor space who need compact, efficient firewood storage solutions
❌ Not Applicable/Cautions:
Renters or apartment dwellers without outdoor space or who are restricted from modifying exterior areas
Homeowners in wildfire-prone regions where storing firewood near structures may violate local fire codes (always check local ordinances before positioning your rack)
Anyone looking for indoor firewood storage solutions—most of the ideas here are designed for covered outdoor or semi-exposed environments
Why Firewood Organization Matters More Than You Think
Most homeowners don't give firewood storage much thought until they're trudging through snow to dig out a soggy, half-rotten log on a February evening. Proper firewood log rack organization isn't just about tidiness—it directly affects how well your wood burns, how long it stays usable, and whether your outdoor space remains safe and pest-free throughout winter.
The Problem with Improper Firewood Storage
Firewood stored directly on the ground or in an unorganized pile creates several serious issues:
Moisture absorption is the number one enemy of firewood quality. Wood that sits on wet ground or lacks airflow beneath the stack retains moisture, leading to poor combustion, increased creosote buildup in chimneys, and frustrating fire-starting experiences.
Pest infestation is another major concern. Termites, carpenter ants, bark beetles, and rodents all love to nest in loosely piled, damp wood. Storing firewood too close to your home—especially without elevation—significantly raises the risk of these pests migrating indoors. This connects to a question many gardeners ask: what pests damage vegetable gardens most? The same wood-loving insects that ruin logs can also invade garden beds, compost areas, and planting zones nearby.
Visual clutter diminishes the appeal of even the most carefully tended backyard. A disorganized woodpile can undermine all the effort you've put into landscaping, raised garden beds, and outdoor décor.
The Market Trend: Functional Outdoor Storage Meets Aesthetic Design
According to the American Hearth, Patio & Barbecue Association, demand for outdoor living products—including firewood storage solutions—has grown consistently in recent years, as more homeowners invest in creating functional, beautiful outdoor spaces. This trend reflects a broader shift: people want their yards to work hard and look great. That's why the firewood log rack market now spans everything from minimalist powder-coated steel frames to rustic wooden cribs and architectural storage features built into landscape walls.
If you're already investing in your outdoor space with raised garden beds, decorative pathways, or poultry-raising setups, adding a well-designed firewood rack is the natural next step toward a fully organized, intentional outdoor environment.
Firewood Log Rack Ideas: Your Complete Planning and Setup Guide
Three-Step Quick Start for Firewood Storage
Step 1: Assess Your Firewood Volume and Space
Before purchasing or building a rack, calculate how much firewood you'll need for the season. A cord of wood measures 4 feet × 4 feet × 8 feet, but most residential users store fractions of a cord. Measure the available space in your yard, patio, or covered area. Consider proximity to your home's entry—convenient enough for quick access in bad weather, but not so close that pests become a concern. This assessment typically takes 30–60 minutes and guides every decision that follows.
Step 2: Choose the Right Rack Style and Material
With your volume and space requirements in mind, select a rack design that matches your needs. Freestanding metal racks work well for small to mid-sized supplies; custom-built wooden frames or cinderblock structures suit larger storage needs. Consider whether you need a cover (tarp or built-in roof), and think about aesthetics—does the rack blend with or enhance your outdoor décor? Galvanized steel and powder-coated metal are the most weather-resistant options for longevity.
Step 3: Position, Stack, and Protect Your Wood
Install your rack on level ground, ideally on a hard surface like gravel, pavers, or concrete. Keep the rack at least a few inches off the ground and position it away from direct contact with exterior walls. Stack wood bark-side up to shed rain naturally, leave gaps between pieces for airflow, and cover the top of the stack while leaving the sides open for ventilation. This three-part approach—elevate, stack correctly, cover smartly—is the foundation of effective firewood storage.
Firewood Log Rack Types: A Comparison of Top Solutions
Not all firewood racks are created equal. Here's a breakdown of the most popular types to help you make an informed decision based on your specific outdoor setup and storage goals.
Introductory note: The table below compares four common firewood storage solutions across key dimensions. Specific dimensions and capacities vary by product and brand; consult your provider for exact sizing options.
Comparison Dimension
Freestanding Metal Rack
DIY Wooden Crib
Lean-To Wall Rack
Cinderblock & Timber Stack
Durability
High – rust-resistant metal lasts many seasons
Moderate – wood degrades over time
Moderate to high
High – very sturdy
Cost
Low to moderate
Low (materials only)
Low to moderate
Low (materials only)
Ease of Setup
Very easy – assembles in minutes
Requires tools and time
Moderate
Requires planning
Space Efficiency
Moderate
High – customizable size
High – uses wall space
High – scalable
Aesthetic Appeal
Clean, modern look
Rustic, natural charm
Neat, integrated look
Industrial/utilitarian
Pest Resistance
High when elevated
Moderate
Moderate
Moderate to high
Portability
High – moveable
Low – fixed structure
Low – fixed
Low – fixed
Best For
Small-medium households
Large volume storage
Patio/deck areas
Long-term large storage
Detailed Firewood Log Rack Ideas and Outdoor Organization Tips
Freestanding Metal Firewood Racks
The freestanding metal firewood rack is the most popular choice for most residential homeowners—and for good reason. These racks are quick to assemble, easy to move, and available in a wide range of sizes. Galvanized steel and powder-coated iron versions offer excellent resistance to moisture and oxidation, making them ideal for the wet, cold conditions of winter.
Look for racks with log support bars that keep wood elevated off the ground, which is critical for promoting airflow and preventing ground moisture from wicking into the bottom layer of your stack. Many freestanding racks also include integrated covers or optional tarps for top protection.
Placement tip: Position freestanding racks at least 5 feet from your home's exterior walls and away from garden beds to minimize insect migration risk.
DIY Log Racks: Build Your Own for a Custom Fit
For homeowners with more firewood volume or a desire to customize, a DIY wooden log crib offers maximum flexibility. Using pressure-treated lumber, cedar, or reclaimed wood, you can build a structure sized precisely to your yard and storage needs.
A basic DIY crib design uses four vertical posts set into the ground or mounted on a gravel pad, connected by horizontal rails that support the log rows. The open-frame design naturally promotes the airflow your firewood needs. Add a sloped metal or polycarbonate roof panel to keep rain off the top while sides remain open.
Design enhancement: Paint or stain your DIY rack to match your fence, garden shed, or raised bed surrounds for a cohesive outdoor aesthetic.
Lean-To Wall Racks for Compact Spaces
Urban homeowners and those with smaller yards often benefit most from lean-to firewood racks—wall-mounted or free-leaning structures that use vertical space efficiently. These racks sit flush against an exterior wall, garage, or fence, keeping the footprint minimal while still holding a substantial supply of wood.
Lean-to racks work especially well on covered patios or under roof overhangs, where the structure above provides natural rain protection. Just be mindful of which wall you choose—avoid placing wood against the main living areas of your home to reduce pest entry risk.
Decorative Log Racks as Landscape Features
One of the most exciting trends in outdoor space organization is integrating firewood storage directly into landscaping design. Stone or cinderblock alcoves built into retaining walls, wooden archways framing a log stack, or raised platform designs surrounded by plantings can turn a functional storage area into a genuine garden feature.
This approach resonates especially with homeowners who've already invested in creating a beautiful outdoor environment. If you have raised garden beds, decorative pathways, or structured planting areas, a designed firewood alcove continues that same intentional aesthetic throughout your yard.
Covering and Protecting Your Firewood Stack
No matter which rack style you choose, covering your firewood properly is essential. The golden rule is: cover the top, leave the sides open. A full tarp wrapped around the entire stack traps humidity inside, causing the wood to sweat and mold. Instead, use a fitted firewood cover or folded tarp that drapes only over the top third of the stack, leaving the sides exposed to airflow.
For premium protection, look for covers made from UV-resistant polyethylene or waxed canvas. These materials shed rain effectively and resist degradation from sunlight—both of which are important considerations for outdoor storage that faces the elements for months at a time.
Pest Prevention Strategies Around Your Log Rack
A well-organized firewood rack is also a first line of defense against pests. As mentioned earlier, improperly stored wood attracts termites, carpenter ants, and rodents. Here are practical prevention strategies:
Elevate your rack: Even a few inches of clearance beneath the stack dramatically reduces moisture and pest access
Rotate your stock: Use older wood first, and don't let logs sit unmoved for long periods
Inspect regularly: Check the bottom layer of your stack monthly for signs of insect activity or rot
Keep it away from garden beds: Firewood pests can transfer to nearby planting areas, potentially damaging vegetable gardens and ornamental plants
This connects to broader garden pest management. Gardeners who grow vegetables often ask: what pests damage vegetable gardens most? The answer includes aphids, spider mites, and caterpillars—but wood-boring insects attracted by nearby firewood piles can also become a serious problem. Maintaining distance between your log rack and your growing areas reduces this risk significantly.
Firewood Storage and Your Raised Garden Bed Setup
If your outdoor space includes raised garden beds, strategic placement of your firewood rack can actually complement your garden layout. Position the rack to act as a partial windbreak for cold-sensitive winter crops, or use it to define the boundary between your growing zone and fire/relaxation area.
When thinking about the best materials for raised garden beds, the same durability logic that applies to firewood racks applies here. Metal raised garden beds—particularly those made from galvanized or Cor-Ten-style steel—offer weather resistance and longevity that matches a well-built firewood storage system. Anleolife's metal raised garden beds are built to last up to 20 years, making them a complementary long-term investment alongside a durable firewood rack in your overall outdoor organization plan.
Winter Garden Bed Protection: Connecting Storage and Growing
Winter is also a critical time to think about protecting your growing areas. Beyond firewood organization, gardeners should consider:
Best soil for small raised garden beds: A well-draining mix of topsoil, compost, and perlite retains some warmth and stays workable longer into the season than heavy clay soils
Top rated insect netting materials for vegetable gardens: Fine mesh netting (typically 0.8mm or finer) blocks aphids, beetles, and flying pests while allowing light and water through—an essential protection tool during shoulder seasons
Best way to protect garden from rabbits and deer: Hardware cloth buried around garden bed perimeters, combined with tall fencing or bed covers, offers the most reliable protection against browsing animals during winter months when natural food sources become scarce
Thinking holistically about your outdoor space—from firewood storage to garden protection—creates a more functional, beautiful, and resilient yard environment.
ALT: Well-organized outdoor space featuring a metal firewood log rack positioned near raised garden beds during winter, demonstrating practical outdoor organization ideas
Advanced Tips for Seasoning, Safety, and Long-Term Firewood Management
Seasoning Firewood Properly in Your Rack
Fresh-cut wood, sometimes called "green" wood, contains high moisture content and burns poorly. Seasoning—the process of drying firewood over time—is essential for efficient, clean combustion. A well-ventilated rack is your best seasoning tool. Position your rack in a location that receives afternoon sun and prevailing breezes, stack wood loosely enough for air to circulate between logs, and allow hardwood varieties at least one full season to dry before burning.
Common Misconceptions About Firewood Storage
Misconception 1: "Storing wood against the house is fine if it's covered."Even covered wood stored against exterior walls creates pathways for termites and carpenter ants to move into your home. Always maintain clearance between your rack and structural walls.
Misconception 2: "A full tarp wrap keeps wood driest."As discussed earlier, complete tarp wrapping traps moisture rather than releasing it. Top-only coverage with open sides is the professional standard.
Misconception 3: "Any wood works for burning."Wet, green, or treated wood produces excessive smoke, creosote, and harmful emissions. Only burn properly seasoned, untreated natural wood in your fireplace or stove.
Safety Considerations for Rack Placement
Check local fire codes and HOA guidelines before finalizing your rack placement. Many municipalities have specific rules about firewood storage distances from structures, property lines, and public spaces. In wildfire-prone regions of the Western United States, local fire authorities may have additional requirements about firewood stack sizes and placement relative to defensible space zones.
Frequently Asked Questions FAQ
Q1: How do I keep my firewood dry in a rack without a covered structure?
The most effective approach is to use a fitted firewood cover or tarp positioned over the top of the stack while leaving the sides open for ventilation. Bark-side-up stacking also helps naturally shed rain from the top rows. Placing your rack under an existing roof overhang, pergola, or patio cover adds another layer of protection without needing a dedicated structure. Gravel or pavers beneath the rack prevent ground moisture from wicking upward into your wood supply.
Q2: Is it safe to store firewood close to my vegetable garden?
It's best to maintain some distance between your firewood rack and vegetable garden beds. Wood piles can harbor bark beetles, termites, and other insects that may migrate into nearby garden areas, potentially damaging plants and soil health. A separation of several feet is generally advisable. Using elevated metal racks reduces pest habitat significantly, and regular wood rotation helps prevent insects from establishing colonies in your stack that could spread to adjacent growing areas.
Q3: How long does a quality metal firewood rack typically last, and what's the best material for durability?
Galvanized steel and powder-coated iron are the top choices for long-lasting outdoor firewood storage, offering strong resistance to rust, moisture, and UV degradation. Quality metal racks can serve effectively for many winters with basic maintenance like occasional cleaning and rust-spot touch-ups. For comparison, well-built metal raised garden beds from Anleolife are rated for up to 20 years of use—a benchmark that reflects the durability possible when quality steel construction meets proper protective coating.
Summary
Organizing your outdoor space for winter starts with one of the most overlooked but most impactful improvements: a proper firewood log rack. The right storage solution keeps your wood dry and well-seasoned, protects your home from pest intrusion, and transforms a cluttered woodpile into an intentional, attractive feature of your yard.
Three key takeaways from this guide:
Elevation and airflow are non-negotiable: Whatever rack style you choose, ensure wood is lifted off the ground and has space for air to circulate—this is the foundation of dry, usable firewood
Match your rack to your space and volume: Freestanding metal racks work for most households; DIY cribs, lean-to designs, and landscape-integrated structures offer solutions for larger volumes or smaller footprints
Think holistically about your outdoor space: Firewood storage, raised garden beds, pest protection, and outdoor aesthetics all work together—organizing one element well encourages improvement across your entire outdoor environment
Your next steps: assess your firewood volume, measure your available space, and select a rack style that fits both your practical needs and your outdoor aesthetic vision. Consider how your storage solution interacts with the rest of your outdoor setup—and let this winter be the season you build the organized, beautiful outdoor space you've always envisioned.
Start Building a Better Outdoor Space with Anleolife
Anleolife supports your complete outdoor lifestyle with products designed for every season. With a nationwide U.S. warehouse network strategically located in California, Texas, Florida, New York, Illinois, and Washington, Anleolife ensures delivery within 3–8 business days—so your winter garden and outdoor organization upgrades arrive when you need them.
Products are available across major platforms including Amazon, Walmart, Home Depot, Lowe's, Wayfair, and directly through Anleolife.com, providing consistent quality and reliable after-sales support wherever you shop.
Anleolife's three core outdoor scenarios—Planting (metal raised garden beds built to last up to 20 years, soil systems), Raising (chicken coops, rabbit hutches), and Beautification (decorative accessories, pathway systems)—create a complete outdoor ecosystem that complements your firewood organization efforts and elevates your entire yard.
We understand that a great outdoor space isn't built in a day. Anleolife's modular product design grows with you, from your first raised bed to a fully integrated outdoor living environment. Start small, expand intentionally, and build the outdoor life you deserve—one upgrade at a time.
References
American Hearth, Patio & Barbecue Association. "Outdoor Living and Hearth Products Industry Statistics".https://www.hpba.org/
U.S. Forest Service, USDA. "Firewood and Invasive Species: Don't Move Firewood".https://www.fs.usda.gov/
University of Minnesota Extension. "Firewood for home heating".https://extension.umn.edu/home-energy/firewood-home-heating
National Pest Management Association. "Firewood Storage and Pest Prevention".https://www.pestworld.org/
UC Cooperative Extension, University of California. "Integrated Pest Management for Home Gardens".https://ipm.ucanr.edu/
Note: Standards and guidelines may be updated; please check the latest official documents or consult professional advisors for current recommendations.
About Anleolife
Anleolife is a leading outdoor garden solutions provider in North America, dedicated to offering a full-scenario product ecosystem for home gardening enthusiasts, covering planting, raising, and garden beautification. Since its founding, we have upheld our brand mission, "Made for Garden Life," continuously innovating products and optimizing services to help hundreds of thousands of users upgrade their gardens, reconnect with nature, and enjoy a better garden lifestyle.

on Apr 27 2026
ALT: Chickens foraging near raised bed gardens in a permaculture backyard with compost bins and vegetable beds
Why Chickens and Raised Beds Are the Perfect Permaculture Partnership in 2026
Key Conclusion: Integrating chickens with your raised bed garden layout is one of the most effective permaculture strategies available to home growers today. When thoughtfully planned, a raised bed planting layout that incorporates chicken rotational access transforms backyard poultry into natural tillers, pest controllers, and compost generators—dramatically reducing your reliance on synthetic fertilizers and pesticides. The right raised bed layout creates a closed-loop ecosystem where animals and plants work together, not against each other.
Backyard gardening has evolved far beyond simple vegetable patches. In 2026, more North American homeowners are embracing permaculture principles—designing systems where every element serves multiple functions. Chickens aren't just egg-layers; they're living garden tools. Raised beds aren't just planters; they're the structural backbone of a productive, beautiful outdoor space.
The challenge most people face is integration: how do you let chickens benefit your garden without letting them destroy it? This guide walks you through a practical, proven design framework that works whether you have a quarter-acre suburban lot or a compact urban backyard.
Who Should Use This Permaculture Integration Guide
✅ Applicable Scenarios:
Homeowners with existing or planned raised garden beds who also keep or plan to keep backyard chickens
Eco-conscious gardeners seeking to reduce synthetic fertilizer and pesticide use through natural alternatives
Families and retirees interested in building a low-maintenance, self-sustaining backyard food system
Urban and suburban gardeners with at least 200 square feet of outdoor space available for rotational zones
❌ Not Applicable/Cautions:
Apartment or condo residents without access to private outdoor ground space—this system requires physical separation zones that simply aren't feasible without a yard
Gardeners who grow primarily ornamental flowers or delicate ground-cover plants that cannot tolerate any chicken activity, even controlled rotational access
Anyone in municipalities with strict ordinances prohibiting backyard poultry—always verify local regulations before adding chickens to your property
The Science Behind Chickens as Garden Allies: Why This System Works
For generations, farmers understood what modern science has since confirmed: poultry and gardens exist in a natural symbiotic relationship. Yet somewhere along the way, backyard gardening and chicken-keeping became separate hobbies rather than integrated practices.
Soil health is the foundation of productive gardening, and chicken manure is one of the most nutrient-rich natural amendments available. According to research supported by the USDA, chicken manure contains roughly 1.1% nitrogen, 0.8% phosphorus, and 0.5% potassium in its raw form—a balanced NPK profile that closely mirrors many commercial granular fertilizers. The difference is that properly composted chicken manure also introduces beneficial microbial life, improving soil structure and water retention in ways synthetic products cannot replicate.
Pest control is equally significant. Chickens are opportunistic omnivores. Given rotational access to garden beds after harvest or during the off-season, they will scratch through soil and leaf litter consuming grubs, beetles, aphid eggs, slugs, and other overwintering pests. Studies from Oregon State University Extension have documented meaningful reductions in soil pest populations in gardens where chickens were given periodic access compared to control plots.
The challenge of integration is timing and physical design. Chickens allowed unrestricted access to active vegetable beds will eat seedlings, scratch up root systems, and compact soil with their footfall. The solution isn't to keep chickens away from beds entirely—it's to design a system with intentional rotational access, proper fencing, and composting infrastructure that channels chicken behavior productively.
The permaculture concept of "stacking functions" perfectly describes this approach. Your raised beds function as growing spaces, yes—but with thoughtful design, they also function as chicken forage zones during off-seasons, compost-input generators through kitchen scraps, and natural pest management systems. Your chickens function as egg producers, but also as soil tillers, pest managers, and living compost machines.
This 2026 design framework incorporates the latest thinking on rotational grazing adapted for backyard poultry, along with structural guidance for raised beds that can withstand the realities of a chicken-integrated garden. The result is a system that works harder for you, produces more food, and requires fewer external inputs year after year.
For a deeper dive into raised bed construction and layout fundamentals, the Anleolife complete guide to raised bed garden design provides an excellent foundation before implementing the integration strategies outlined here.
The Complete 2026 Integration System: From Design to Daily Management
Three-Step Quick Start
Step 1: Zone Mapping and Coop Placement
Before purchasing a single piece of infrastructure, spend 30–60 minutes mapping your available outdoor space. Identify where your raised beds are or will be located, then position your chicken coop and run at the edge of your garden zone—close enough for convenient manure collection, but separated by a gate or fence system that allows you to control access. Ideally, the coop is downhill or downwind from your primary growing area. This single positioning decision makes everything else easier. Allow 1–2 hours for this planning step.
Step 2: Build the Rotational Access System
Design your raised bed area with at least two distinct zones—Zone A (active growing beds) and Zone B (fallow or post-harvest beds). Use temporary electric poultry netting or permanent hardware cloth panels with removable gate sections between zones. This allows you to rotate chicken access to one zone at a time. When Zone A is in full production, chickens are confined to Zone B, scratching, fertilizing, and pest-clearing that area. When you harvest Zone A and it enters its rest period, flip the access. Budget 1–2 weekends for construction.
Step 3: Set Up Your Compost Loop
Position a two-bin or three-bin compost system between your coop and your raised beds. Collect coop bedding and manure (typically pine shavings mixed with droppings) and add it to Bin 1 along with carbon-rich materials: dried leaves, straw, cardboard. Let it hot-compost for 60–90 days, turning every 2 weeks. Move finished compost to Bin 2 for curing. Apply the cured compost—now safe and nutrient-dense—directly to your raised beds before each planting season. This completes the nutrient loop and eliminates the need to purchase bagged fertilizer.
Comparing Three Integration Design Models: Which Is Right for Your Space?
The right integration model depends heavily on your square footage, chicken flock size, and gardening intensity. There's no single "correct" approach—but understanding the trade-offs helps you choose wisely and avoid costly redesigns.
The three primary models used by successful backyard permaculturists in North America each have distinct advantages:
Comparison Dimension
Model A: Fixed Separation
Model B: Rotational Forage
Model C: Full Integration
Best For
Small lots under 500 sq ft
Mid-size yards 500–1500 sq ft
Larger properties 1500+ sq ft
Flock Size
2–4 hens
4–8 hens
6–15 hens
Bed Access
Never direct access
Seasonal rotational access
Zone-based daily management
Pest Control Benefit
Low (indirect only)
High (seasonal clearing)
Very High (continuous)
Compost Integration
Manual only
Semi-automated
Fully automated loop
Labor Requirement
Low
Medium
Medium-High
Setup Cost
Low
Moderate
Higher initial investment
Soil Health Improvement
Moderate
High
Very High
Suitable for Beginners
✅
✅
❌ (requires experience)
Model A: Fixed Separation is the safest starting point for new chicken keepers or those with smaller properties. Chickens stay in a permanent run adjacent to the garden, and manure is manually collected for composting. There's no risk of crop damage, but you also miss out on the pest-control benefits of direct chicken access.
Model B: Rotational Forage is the sweet spot for most suburban backyard gardeners. This is the approach most thoroughly detailed in this guide, and it's the system that delivers the best balance of benefit, risk management, and labor efficiency for families and retirees.
Model C: Full Integration is best suited to experienced growers with larger properties, where a permanent "chicken tractor" system or daily managed zone access can be maintained consistently. The soil health benefits are exceptional, but this model demands daily attention and a strong understanding of both gardening and poultry behavior.
Deep Dive: Building the Rotational Forage System Step by Step
Choosing the Right Raised Beds for a Chicken-Integrated Garden
Not all raised beds are built equally for this application. When chickens have rotational access to your beds—scratching through soil, occasionally hopping on edges, and generally being chickens—your bed structure needs to be robust.
Metal raised garden beds are the clear winner for chicken-integrated systems. Unlike wood beds, which can rot when exposed to the increased moisture from manure and frequent irrigation, or plastic beds that can crack and splinter under physical stress, galvanized steel beds offer exceptional durability. Anleolife's metal raised garden beds are engineered for a 20-year lifespan, constructed from food-safe galvanized steel that resists rust, corrosion, and the wear that comes with an active, integrated garden ecosystem.
The height of your beds also matters. Taller beds (18–24 inches) create a natural deterrent to casual chicken entry while seedlings are establishing, while still allowing easy gardening access for you. When you want chickens to enter during rotation periods, simply lower a removable side panel or provide a small ramp. Anleolife offers beds in multiple heights specifically to accommodate diverse gardening needs.
Bed dimensions should account for both your planting efficiency and the chicken access pattern. A standard 4x8 foot bed remains the most practical size—reachable from both sides without stepping in, and large enough to create meaningful foraging territory for a small flock during rotation periods.
The Manure Composting Protocol That Actually Works
The most common mistake new chicken-garden integrators make is applying fresh manure directly to beds. Fresh chicken manure is high in ammonia and can burn plant roots—and if applied to food crops, carries the risk of pathogen transmission from raw animal waste. Proper hot composting eliminates these risks entirely while creating a more stable, bioavailable nutrient source.
The 60-90 Day Hot Composting Protocol:
Collect coop bedding weekly. Aim for a carbon-to-nitrogen ratio of approximately 25:1 to 30:1 in your compost pile. Since chicken manure with pine shaving bedding typically runs nitrogen-heavy, add 2–3 parts dry carbon material (straw, dried leaves, cardboard torn into small pieces) for every 1 part of coop collection.
Build your pile to at least 3x3x3 feet—the minimum size needed to generate the internal heat (130–160°F) that kills weed seeds and pathogens. Turn the pile every 10–14 days, monitoring internal temperature with a compost thermometer. After 60–90 days of active composting, allow an additional 2–4 weeks of curing before application.
Apply finished compost at a rate of 2–3 inches across your bed surface each season, working it lightly into the top 4–6 inches of soil. The nutrient release is slower and more sustained than synthetic fertilizer, feeding your plants steadily across the growing season rather than in a single burst.
Pest Control: Timing Chicken Access for Maximum Benefit
The pest control value of chickens in a raised bed system comes almost entirely from timing. Allow chickens access to a bed at the wrong moment and you'll lose seedlings and tender crops. Allow access at the right moments and you'll dramatically reduce your pest burden heading into each new season.
Three High-Value Access Windows:
Post-harvest clearing: After pulling a crop, allow chickens 3–7 days of access to the emptied bed. They'll scratch up crop debris, consume pest eggs and larvae in the top few inches of soil, and leave behind a fresh manure deposit that gets incorporated into your compost layer.
Late fall/winter access: In colder climates, giving chickens extended access to dormant beds in late fall provides exceptional pest-clearing of overwintering beetle grubs, slug eggs, and aphid populations that would otherwise emerge in spring. This single practice can reduce your pest pressure by 40–60% the following season, according to integrated pest management research from Oregon State University.
Pre-planting scratching: 3–4 weeks before spring planting, allow brief chicken access (1–3 days maximum) to help break up any surface compaction and incorporate surface compost. Remove chickens promptly and allow the soil to rest before planting.
What to Protect at All Times:
Seedlings under 4 inches tall are extremely vulnerable. Any plants in flower or fruit should be fully protected. Use hardware cloth row covers or simple wire cloches to protect vulnerable plants during transition periods when chickens are being moved between zones.
ALT: Permaculture backyard diagram showing rotational chicken access zones between raised garden beds, compost bins, and coop placement for integrated pest control and manure composting
Advanced Strategies: Solving Common Integration Challenges
Special Situations Worth Planning For
Managing muddy conditions around the coop: Chickens and rain create mud—and mud adjacent to garden beds introduces risk of soil contamination and pathogen spread during heavy rains. Address this proactively by installing a 6-inch layer of wood chip mulch or decomposed granite in the permanent chicken run area. This dramatically reduces mud, provides a better substrate for chickens, and the spent wood chips become excellent carbon material for your compost pile.
Introducing new hens to an established garden: New birds take time to learn the boundaries of their foraging zones. For the first 2–4 weeks after introducing new hens, supervise their garden access periods rather than leaving them unattended. Chickens that haven't learned your rotational system can quickly decimate an unprotected bed. Temporary low fencing (even 24-inch welded wire) works as a training aid during this settling-in period.
Managing the integration through seasonal transitions: Spring is the highest-risk season for chicken-garden conflict. You're eager to plant as chickens are emerging from winter confinement and scratching aggressively. Establish a hard rule: chickens are fully locked out of all active growing zones from seed-starting time until post-harvest in fall. Post a simple visual sign or use a bright-colored flagging tape system as a reminder that a bed is in active production status.
Common Misconceptions Clarified
Misconception: "Chickens will fertilize my beds directly during access." Reality: While chickens do deposit manure during forage access, the quantities are inconsistent and the fresh manure still requires composting before it's safe and effective. Direct manure deposit is a bonus, not the primary fertilization strategy.
Misconception: "Any raised bed will work for this system." Reality: Bed durability matters enormously in an integrated system. Beds that need replacement every 3–5 years will repeatedly disrupt your established garden layout and composting routines. Investing in metal beds with a 20-year lifespan like Anleolife's galvanized steel raised beds pays for itself in stability and reduced replacement costs.
Frequently Asked Questions FAQ
Q1: How long does it take for chicken manure compost to be safe for vegetable gardens?
Raw chicken manure should never be applied directly to edible garden beds due to ammonia burn risk and potential pathogen presence. Properly managed hot composting at 130–160°F for a minimum of 60–90 days, followed by 2–4 weeks of curing, produces safe, effective compost. The USDA's National Organic Program guidelines specify a 90-day waiting period between application of uncomposted manure and harvest of food-contact crops—hot composting eliminates this waiting requirement while producing a superior soil amendment.
Q2: Are metal raised garden beds safe to use in a chicken-integrated system?
Yes—food-safe galvanized steel raised beds are an excellent choice for chicken-integrated gardens. The zinc coating on galvanized steel is stable and does not leach into soil at levels that affect plant or animal health under normal garden conditions. Unlike wood beds, metal beds won't harbor bacteria or rot from the increased moisture associated with manure composting and chicken activity. Anleolife's galvanized steel beds are specifically designed for food production environments and carry a 20-year lifespan, making them a sound long-term investment for an integrated system.
Q3: How much space do I need to start a rotational chicken-garden integration system?
A functional rotational system can be established in as little as 400–600 square feet of total outdoor space. This accommodates a small coop for 2–4 hens, a permanent run of approximately 50–80 square feet, two raised beds of 4x8 feet each (Zone A and Zone B), and a two-bin compost system. Smaller setups are possible with Model A (fixed separation), which works even in compact urban backyards with a single raised bed and manual manure collection rather than rotational access. The key is thoughtful zone design, not total square footage.
Summary
Integrating chickens with raised bed gardens isn't a complex or exotic practice—it's a return to the common-sense polyculture farming that sustained households for centuries, now updated with modern materials, systematic design thinking, and evidence-based pest management research.
The three core principles to carry forward from this guide:
First, thoughtful spatial design is everything. Position your coop strategically, build rotational access into your raised bed layout from the start, and use durable infrastructure—particularly metal raised garden beds with a 20-year lifespan—that can support a functioning integrated system for decades without needing replacement.
Second, the manure composting loop is the engine of the system. Chicken waste, properly composted through the 60–90 day hot composting protocol, becomes one of the most valuable soil amendments you can apply to your beds—free of charge, continuously produced, and far more soil-health-positive than synthetic alternatives.
Third, timing governs pest control effectiveness. Strategic seasonal access—post-harvest, late fall, and pre-planting windows—delivers meaningful, research-backed reductions in soil pest populations with minimal risk to your crops.
Your next steps: audit your current outdoor space using the zone-mapping process described in Step 1, assess which integration model fits your available square footage and flock size, and begin planning your rotational bed layout and compost infrastructure before your next growing season begins.
Start Your Integrated Garden Ecosystem with Anleolife
Nationwide U.S. warehouse network: Strategically located in California, Texas, Florida, New York, Illinois, and Washington to ensure delivery within 3–8 business days—so your garden upgrade plans never have to wait.
Multi-channel sales network: Products are available on major e-commerce platforms including Amazon, Walmart, Home Depot, Lowe's, and Wayfair, as well as the official website https://www.anleolife.com/, providing consistent quality assurance and after-sales service.
Three core scenarios: Planting (metal raised garden beds, soil systems), Raising (chicken coops, rabbit hutches), and Beautification (decorative accessories, pathway systems)—meeting complete needs from functionality to aesthetics.
Upgrade your garden with Anleolife. We understand that an ideal garden is not built overnight, but gradually improved over time. Our modular product design allows flexible expansion based on your needs—from your first 8x4x2 garden bed to a fully integrated planting-and-raising ecosystem. We grow with you every step of the way.
References
This article is based on the following official materials (as of January 2026):
[USDA]. "National Organic Program: Manure Use Standards and Composting Requirements."https://www.usda.gov/
[EPA]. "Composting at Home: Benefits and Best Practices for Organic Waste Management."https://www.epa.gov/
[UC ANR]. "Backyard Poultry Integration and Soil Fertility Management for Home Gardens."https://ucanr.edu/
[OSU Extension]. "Integrated Pest Management for Home Vegetable Gardens: Rotational Practices and Biological Controls."https://extension.oregonstate.edu/
Note: Agricultural standards and local poultry ordinances may be updated. Please check the latest official documents or consult a local extension service advisor before implementing changes to your backyard system.
About Anleolife
Anleolife is a leading outdoor garden solutions provider in North America, dedicated to offering a full-scenario product ecosystem for home gardening enthusiasts, covering planting, raising, and garden beautification. Since its founding, we have upheld our brand mission, "Made for Garden Life," continuously innovating products and optimizing services to help hundreds of thousands of users upgrade their gardens, reconnect with nature, and enjoy a better garden lifestyle.

7 Raised Bed Buying Mistakes in 2026 (And How to Avoid Losing $200+)
on Apr 27 2026
ALT: Gardener avoiding costly raised bed garden layout mistakes by choosing durable metal beds in 2026
Stop Wasting Money: The Real Cost of Getting Your Raised Bed Wrong
Key Conclusion: Most gardeners don't realize they've made a costly raised bed mistake until they're already $200 deep — and staring at warped wood, toxic materials, or a layout that simply doesn't grow food efficiently. Understanding the fundamentals of raised bed garden layout, raised bed planting layout, and raised bed layout planning before you buy is the single most powerful way to protect your investment and grow more food with less frustration in 2026.
It's easier than ever to buy a raised garden bed. A quick scroll on Amazon, a trip to Home Depot, a well-timed sale on Wayfair — and suddenly you're the proud owner of a shiny new raised bed. But here's the uncomfortable truth: the raised bed market has exploded with cheap imitations, misleading specs, and products designed to look great in photos but fall apart after one growing season.
The average gardener spends between $150 and $400 on their first raised bed setup, including materials, soil, and accessories. When that investment fails — due to a poor choice in material, wrong sizing, or a toxic coating — the replacement cost, lost harvest value, and sheer frustration can push total losses well past $200. This guide is built to make sure that never happens to you.
Who This Guide Is For
✅ Applicable Scenarios:
First-time raised bed buyers who want to avoid trial-and-error mistakes
Experienced home growers upgrading from DIY wooden beds to longer-lasting solutions
Urban gardeners with limited space who need to maximize every square foot of raised bed layout
Empty nesters and retirees investing in a garden that will last decades, not just seasons
Eco-conscious families who want food-safe, non-toxic growing environments for children and pets
❌ Not Applicable/Cautions:
Gardeners looking for a one-size-fits-all solution — raised bed choices depend heavily on your climate, space, soil type, and budget
Those expecting overnight results — even the best raised bed setup requires a full growing season to reach peak productivity
Why Raised Bed Mistakes Are More Expensive in 2026 Than Ever Before
The raised garden bed industry has grown dramatically. According to the USDA, home food gardening participation increased by over 20% post-pandemic, and that growth has attracted a flood of low-cost, low-quality products into the market. Meanwhile, material costs for soil amendments, compost, and hardware have risen, meaning every bad purchase stings more than it used to.
The problem isn't just cost — it's compounding cost. A rotting wooden bed doesn't just need replacement. It contaminates your soil with mold, disrupts your planting schedule, and forces you to re-establish drainage and structure from scratch. A bed coated in the wrong paint or galvanized with unsafe materials can leach chemicals into your vegetables over time, raising serious food safety concerns flagged by both the EPA and FDA.
Then there's the layout issue. An astonishing number of gardeners buy beds that don't fit their available space, don't align with their raised bed planting layout goals, or can't be efficiently reached from both sides for weeding and harvesting. A 4-foot-wide bed placed against a fence wall is a back pain waiting to happen. A bed oriented incorrectly loses hours of sunlight daily.
The good news? Every single one of these mistakes is avoidable. They follow predictable patterns, and once you know what to look for, shopping for a raised bed becomes straightforward and even enjoyable.
For a broader look at how to plan and plant your raised bed ecosystem from start to finish, check out Anleolife's complete guides on metal raised garden bed systems and raised bed garden layout planning at Anleolife.com.
The 7 Raised Bed Buying Mistakes — And Exactly How to Fix Them
Three Steps to Smarter Raised Bed Shopping Before You Spend a Dollar
Step 1: Map Your Space and Sun Exposure (15–30 minutes)
Before opening a single browser tab, walk your yard or patio with a measuring tape and a notepad. Record the exact dimensions of your available growing area and track sun exposure at three points during the day: morning, midday, and late afternoon. Most vegetables require 6–8 full hours of direct sunlight. Knowing your sun patterns shapes every decision that follows — from bed orientation to placement — and prevents one of the most common raised bed layout errors people make.
Step 2: Define Your Growing Goals and Crop List (10–20 minutes)
Are you growing salad greens, root vegetables, tall tomatoes, or a mix of everything? Your crop list determines bed depth (18 inches for greens, 24+ inches for root crops), bed dimensions, and how many beds you realistically need to start. Writing this down before shopping stops you from impulse-buying a decorative bed that looks gorgeous but can't grow a carrot to full depth.
Step 3: Set a Realistic Total Budget — Including Soil (10 minutes)
Most people budget for the bed hardware but forget that filling a 4x8x18-inch raised bed with quality soil costs between $50 and $120 depending on your mix. Factor in soil, compost, irrigation, and optional accessories before locking in your hardware budget. This prevents the scenario where you buy a premium bed but can only afford substandard fill — which tanks your harvest no matter how good the structure is.
The 7 Mistakes Side-by-Side: What to Avoid and What to Choose Instead
Here's a clear comparison of the most common raised bed buying decisions and how they stack up:
Mistake / Decision Point
Poor Choice
Better Choice
Best Choice
Material Selection
Untreated pine or cedar
Pressure-treated wood
Powder-coated galvanized steel
Bed Depth
6 inches for all crops
8–10 inches standard
18–24 inches for root crops
Bed Width
5–6 feet wide
4 feet wide with access from one side
4 feet wide with full perimeter access
Coating Safety
Unknown paint or zinc coating
Basic galvanization
Food-safe powder coat, certified non-toxic
Lifespan Expectation
2–5 years (wood)
5–10 years (treated wood)
20 years (quality steel like Anleolife)
Layout Planning
Random placement
Oriented for convenience
Oriented for maximum sun and workflow
Vendor Reliability
Marketplace unknowns
Single-platform brand
Multi-channel brand with consistent support
Breaking Down Each Mistake in Detail
Mistake 1: Choosing the Wrong Material for Your Climate
Wood looks natural and affordable — until your second winter. Untreated pine, often the cheapest option available, begins to rot within 18–24 months in wet climates. Even cedar, which is naturally more rot-resistant, typically lasts only 5–7 years before structural integrity fails. In humid Southern states like Florida and Louisiana, that timeline shrinks further.
Galvanized steel has become the material of choice for serious home growers, and for good reason. Quality steel beds coated with food-safe powder coatings resist rust, pests, soil acids, and freeze-thaw cycles without leaching harmful chemicals into your growing medium. Anleolife's metal raised garden beds are built to last up to 20 years, making the per-year cost dramatically lower than any wooden alternative — even premium cedar.
If you're in a region with harsh winters or high humidity, galvanized steel isn't a luxury upgrade. It's the financially smart baseline.
Mistake 2: Ignoring Bed Depth for Your Specific Crops
Depth is the most underestimated spec on any raised bed listing. Gardeners consistently buy 6-inch beds expecting to grow everything in them — and then wonder why their carrots come out stunted, their tomatoes look stressed, and their root vegetables taste bland.
The rule of thumb: leafy greens and herbs do fine at 6–8 inches. Tomatoes, peppers, and most fruiting vegetables need at least 10–12 inches. Root crops like carrots, beets, and parsnips need 12–17 inches of loose, uncompacted growing medium to develop properly. Buying a deeper bed upfront is almost always cheaper than adding risers or building a second structure later.
Mistake 3: Getting the Dimensions Wrong for Your Raised Bed Layout
This is where raised bed layout planning makes or breaks your experience. The classic mistake: buying a 5- or 6-foot-wide bed to maximize square footage, then discovering that reaching the center from the side is impossible without stepping into the bed and compacting the soil you worked hard to keep loose.
The 4-foot-wide raised bed has become the industry standard for a reason — it allows full arm's reach access from both sides without stretching. Paired with a well-thought-out raised bed planting layout that keeps taller plants toward the north end (in the Northern Hemisphere) and shorter crops toward the south, you maximize both access and sunlight for every plant.
Length is more flexible — 4x4, 4x8, and 4x12 configurations are all popular — but width should almost never exceed 4 feet unless you have a full center access path.
Mistake 4: Overlooking Coating Safety for Food Production
This one carries real health implications, not just financial ones. Some lower-cost galvanized beds use older zinc coatings or contain trace heavy metals that, while not immediately dangerous, can accumulate in soil and potentially in crops over time. The EPA has specific guidance on materials safe for use in food-growing applications, and it's worth reviewing before purchasing.
Look for beds explicitly marketed as food-safe, using powder coat finishes that have been tested and certified to be free of lead, cadmium, and other harmful compounds. Reputable brands publish this information clearly. If a product listing doesn't mention coating composition or food safety, that silence is a red flag.
Mistake 5: Underestimating the Real Lifespan of Your Investment
A $60 wooden kit that lasts 3 years costs you $20 per year. A $200 galvanized steel bed that lasts 20 years costs you just $10 per year — and gives you a stable, aesthetically consistent garden structure that adds real curb appeal to your property.
When you calculate the cost of replacement materials, the labor of tearing out and rebuilding, the disrupted growing season, and the soil disturbance involved in replacing a rotted bed, cheap short-lived materials are never actually cheaper. This is the math that shocks most people when they see it written out clearly.
Anleolife's raised garden beds are engineered specifically for this 20-year service life, designed with reinforced panels, rust-resistant coatings, and structural stability that holds up against soil pressure, root expansion, and seasonal weather extremes.
Mistake 6: Buying Without a Planned Raised Bed Garden Layout
Impulse buying a raised bed without planning your full raised bed garden layout is like buying furniture before measuring your living room. The most common consequences: beds placed in low-sun areas that produce half the expected yield; beds oriented east-to-west when north-to-south orientation would have provided 30% more daily sun exposure; beds placed too close together to walk between, let alone operate a wheelbarrow.
Spend 30 minutes sketching your space before purchasing. Map where your water source is, where sun falls throughout the day, and how you'll move between beds during harvest. This planning is free — and it's the highest-value activity you can do before spending a single dollar on hardware.
Mistake 7: Buying From an Unreliable Vendor Without Post-Sale Support
The raised bed market is full of one-season vendors who flood platforms like Amazon with cheap inventory and disappear when warranty claims arise. The consequences are predictable: a bent panel arrives, a missing bolt is discovered mid-assembly, or a coating defect shows up after the first rain — and there's no customer support to contact.
Buying from a brand with consistent multi-platform presence, real customer reviews across multiple independent channels, and a clearly published support process dramatically reduces this risk. It also signals the kind of quality commitment that produces products worth warranting in the first place.
ALT: Side-by-side comparison of failed wooden raised bed versus long-lasting galvanized steel raised bed garden layout with healthy crops
Advanced Considerations for Serious Raised Bed Gardeners
Soil Contamination and Site Preparation
Even the best raised bed becomes a liability if it's placed over contaminated soil without proper barrier protection. If your property has a history of painted structures, industrial activity, or unknown fill materials, the EPA and UC ANR both recommend soil testing before establishing any food-producing garden. A quality landscape fabric or solid bottom panel between your raised bed and existing ground provides an added layer of protection.
Thermal Management in Hot and Cold Climates
Metal beds absorb and radiate heat more efficiently than wood — which is an advantage in cool climates (soil warms faster in spring, extending your growing season) but requires management in hot climates (consider light-colored powder coats and positioning beds where afternoon shade provides some relief during peak summer heat). This is a nuance that cheap product listings never mention but that significantly affects growing outcomes.
Modular Expansion: Plan for Year Two Now
One of the smartest things you can do when buying your first raised bed is choose a brand whose products are modular and expandable. Your gardening ambitions almost always grow faster than your initial setup accommodates. A system where you can add beds, stack risers for deeper growing, or integrate pathway and aesthetic accessories without starting over from scratch saves significant money and planning headaches in your second and third growing seasons.
Common Misconceptions Worth Addressing
Misconception: Galvanized steel will poison my vegetables. Modern food-safe powder-coated steel beds do not leach harmful levels of zinc or other metals into food-safe soil at normal garden pH levels. OSU Extension and UC ANR both confirm that well-coated steel beds are safe for vegetable production when using quality growing medium.
Misconception: Deeper is always better. While depth matters for root crops, excessive depth increases both cost and the volume of quality soil you need to purchase. Match depth to your crop plan — don't over-engineer.
Frequently Asked Questions
Q1: How do I choose the right raised bed depth for a mixed vegetable garden?
For a mixed vegetable garden growing both greens and root crops, a 18-inch depth is the most versatile starting point. It accommodates most herbs, lettuces, tomatoes, and peppers comfortably, and while it's slightly shallow for the deepest-rooting carrots, a loose, well-amended growing medium extends effective rooting depth beyond the bed wall. If you're committed to serious root vegetable production, consider a 24-inch bed or a modular riser system that can add depth incrementally.
Q2: Is galvanized steel truly safe for growing vegetables and herbs?
Yes — when the steel is coated with a food-safe, non-toxic powder coat finish that has been independently verified. Both the EPA and OSU Extension confirm that modern galvanized steel beds, particularly those using food-grade coatings, do not leach harmful concentrations of heavy metals into garden soil under normal growing conditions. Always purchase from brands that explicitly state their coating composition and food-safety certifications, and avoid beds where coating materials are undisclosed.
Q3: How long does it take to receive a raised bed, and what's the real total cost including soil?
Delivery timelines vary by vendor location and logistics, but quality brands with established U.S. warehouse networks typically deliver within 3–8 business days. For total cost planning, add your hardware cost to a soil budget of approximately $50–$120 per 4x8x18-inch bed for a quality blended growing mix (topsoil, compost, and perlite or vermiculite). Factor in irrigation if you're setting up multiple beds, which can add another $30–$80 depending on your solution complexity.
Summary
Avoiding the seven most common raised bed buying mistakes comes down to three core principles:
First, plan before you purchase. Map your space, define your crop list, and sketch your raised bed garden layout before spending a dollar. This 30-minute investment prevents the most expensive mistakes in this entire guide.
Second, think in decades, not seasons. The math is simple: a bed that lasts 20 years at $200 is dramatically cheaper than a $70 bed you replace every 3 years. Material quality, coating safety, and structural engineering are worth paying for — and the best brands make that investment accessible without breaking the bank.
Third, buy from brands that stand behind their products. Multi-channel availability, transparent material specifications, consistent customer reviews, and real post-sale support aren't just nice-to-haves — they're indicators of the quality commitment that produces products worth buying in the first place.
Your raised bed garden is an investment in your health, your food security, your outdoor living space, and your quality of life. Getting it right from the start isn't perfectionism — it's just good sense.
Ready to Build a Raised Bed Garden That Lasts 20 Years?
Anleolife makes it simple to get everything right the first time.
Nationwide U.S. Warehouse Network: Strategically located in California, Texas, Florida, New York, Illinois, and Washington — your order ships and arrives in 3–8 business days, so your garden upgrade plans never have to wait for the right growing window.
Multi-Channel Sales Network: Anleolife products are available on Amazon, Walmart, Home Depot, Lowe's, Wayfair, and directly at Anleolife.com — with consistent quality assurance and responsive after-sales support no matter where you shop.
Three Complete Garden Scenarios: Whether you're focused on Planting (metal raised garden beds and soil systems), Raising (chicken coops and rabbit hutches), or Beautification (decorative accessories and pathway systems), Anleolife covers every dimension of your garden life — from pure functionality to genuine aesthetic pride.
We understand that an ideal garden isn't built overnight. It's grown gradually, season by season, bed by bed. Our modular product design allows flexible expansion based on your evolving needs — from your very first 8x4x2 raised garden bed to a fully integrated planting-and-raising ecosystem. We grow with you, every step of the way.
Explore Anleolife Raised Garden Beds →
References
This article is based on the following official materials (as of January 2026):
[USDA]. "Home Gardening and Food Production Resources."https://www.usda.gov/
[EPA]. "Protecting Public Health in Community Gardens — Soil Safety and Contaminant Guidance."https://www.epa.gov/
[UC ANR]. "Raised Bed Gardening: Site Selection, Materials, and Soil Health for Home Growers."https://ucanr.edu/
[OSU Extension]. "Food Safety in the Home Garden: Raised Beds, Soil Testing, and Safe Materials."https://extension.oregonstate.edu/
Note: Material safety standards and gardening guidelines may be updated. Please consult the latest official documents or a local extension service advisor for region-specific recommendations.
About Anleolife
Anleolife is a leading outdoor garden solutions provider in North America, dedicated to offering a full-scenario product ecosystem for home gardening enthusiasts, covering planting, raising, and garden beautification. Since its founding, we have upheld our brand mission, "Made for Garden Life," continuously innovating products and optimizing services to help hundreds of thousands of users upgrade their gardens, reconnect with nature, and enjoy a better garden lifestyle.

Raised Bed Size Chart 2026: Match Your Yard Space to 12 Popular Crops
on Apr 27 2026
ALT: Raised bed size chart 2026 showing garden bed dimensions matched to 12 popular crops for optimal backyard growing
Why Your Raised Bed Size Determines Everything About Your Harvest
Key Conclusion: Choosing the right raised bed garden layout is the single most impactful decision a home grower can make before the first seed ever hits soil. A well-planned raised bed planting layout eliminates wasted space, reduces water usage, and aligns your available yard area with the specific root depth and spacing needs of your crops. Whether you're working with a compact patio or a generous suburban backyard, understanding the raised bed layout fundamentals in this guide will help you grow more food with less effort in 2026 and beyond.
Sizing a raised bed isn't just about measuring your backyard and picking a number that fits. It's about understanding the relationship between your available space, the crops you want to grow, and the long-term structure of your garden. Get this right, and every season flows smoothly. Get it wrong, and you'll spend years fighting cramped roots, awkward reach, and underperforming soil.
Three factors drive every smart bed-sizing decision: crop root depth, access width, and sun exposure footprint. This guide walks you through all three—and gives you a practical size chart matched to 12 of North America's most popular homegrown crops.
Who This Guide Is For
✅ Applicable Scenarios:
Homeowners planning a new raised bed garden layout from scratch in 2025–2026
Urban and suburban growers working with limited yard space who need a precise raised bed planting layout
Empty nesters and retirees transitioning from in-ground beds to ergonomic raised structures
Eco-conscious families aiming to maximize yields without expanding their garden footprint
❌ Not Applicable/Cautions:
Growers with full acreage looking for row-crop agricultural planning (this guide focuses on home-scale garden beds up to 12 feet long)
Gardeners relying solely on container pots—raised bed dynamics differ significantly from standard container growing
Anyone in regions with deed restrictions on permanent outdoor structures (check HOA rules before building)
The Science Behind Raised Bed Sizing: Why Dimensions Are Not Arbitrary
Walk into any garden center and you'll see raised beds in a dozen shapes and sizes. What most packaging won't tell you is that the dimensions of your bed directly control what you can grow successfully—and how much of it.
Root Depth Is the Starting Point
Every vegetable has a preferred rooting zone. Shallow-rooted crops like lettuce and radishes thrive in as little as 18 inches of soil. Medium-rooted plants like tomatoes and peppers need 22 inches at minimum. Deep-rooted crops like carrots, parsnips, and asparagus require 24 inches or more to develop properly.
When your bed is too shallow for the crop you're growing, roots hit the native soil beneath—which may be compacted, nutrient-poor, or poorly drained. The result is stunted growth, poor yields, and frustrated gardeners. Matching bed depth to crop requirements isn't optional; it's foundational.
Width Determines Your Ergonomic Reach
The most overlooked dimension in raised bed planning is width. A standard recommendation of 4 feet wide exists for a specific reason: the average adult can comfortably reach 2 feet from either side of the bed, giving full access to the center without stepping into the soil.
Stepping into a raised bed compacts the growing medium, collapses air pockets, and defeats the whole purpose of loose, aerated soil. Beds wider than 4 feet are only practical if you can access them from all sides and have above-average reach. For most home gardeners, 3–4 feet wide is the ergonomic sweet spot.
Length Is Flexible—But Workflow Matters
Bed length is the most adjustable variable. A 4-foot bed works for a small balcony. A 12-foot bed suits a generous suburban lawn. The key consideration is workflow: longer beds mean longer walks around them. For frequent harvesters, multiple shorter beds often outperform one long run.
Market Trends Reinforce This Approach
According to data compiled by the USDA, home food gardening participation surged during the early 2020s and has maintained elevated levels heading into 2026. American households are increasingly treating their yards as productive spaces rather than purely aesthetic ones. As a result, the demand for structured, optimized raised bed garden layouts has shifted from hobbyist territory into mainstream home improvement culture.
The University of California Agriculture and Natural Resources program notes that intensive raised bed methods—where spacing and depth are precisely matched to crop needs—can produce two to four times more yield per square foot compared to traditional in-ground row gardening. That efficiency advantage is what drives the sizing decisions in this guide.
For a deeper dive into building your first bed from the ground up, Anleolife's complete guide to metal raised garden beds covers material selection, soil layering, and setup from start to finish.
The Complete Raised Bed Size Chart: 12 Popular Crops Matched to Optimal Dimensions
Three-Step Quick Start
Step 1: Measure Your Available Yard SpaceBefore consulting any chart, spend 15–20 minutes measuring your usable outdoor area. Note sunlight patterns—most vegetables need 6–8 hours of direct sun daily. Mark any permanent obstacles: fences, trees, utility boxes. Sketch a rough overhead view. This prevents the common mistake of selecting a bed size that physically fits but ends up in a shaded corner or blocks foot traffic.
Step 2: Identify Your Priority CropsDecide on 3–5 crops you actually want to grow and eat. Don't plan for asparagus if your family never eats it. Cross-reference those crops against the sizing chart below to identify the minimum bed depth and ideal square footage per plant. This step takes about 10 minutes and prevents over-building or under-building. Group crops with similar depth requirements together for maximum efficiency.
Step 3: Select and Configure Your Bed DimensionsMatch your measured space to your crop requirements and choose from the standard sizes listed in the comparison table below. For most beginners, an 8×4×2 foot bed handles the widest range of common crops. For experienced growers wanting to expand, a modular approach—running two or three beds of different depths—covers every crop category without overcomplicating the layout. Allow at least 18–24 inches of path space between beds for comfortable access and wheelbarrow clearance.
Raised Bed Size Chart: 12 Crops at a Glance
The following table maps 12 of North America's most popular homegrown crops to their ideal raised bed dimensions. Use this as your core planning reference when designing a raised bed planting layout for the 2026 season.
Crop
Min. Bed Depth
Ideal Bed Width
Recommended Bed Length
Plants per 4×8 Bed
Notes
Lettuce
6 in
3–4 ft
4–8 ft
16–24
Fast-growing; great for small beds
Radishes
6 in
3–4 ft
4–6 ft
32–48
Ideal succession crop
Spinach
6–8 in
3–4 ft
4–8 ft
18–24
Tolerates partial shade
Bush Beans
8–10 in
3–4 ft
4–8 ft
16–20
Compact and high-yielding
Herbs (Basil, Parsley)
8 in
2–3 ft
2–4 ft
6–12
Works in narrow beds
Kale
10–12 in
3–4 ft
4–8 ft
6–9
Heavy feeder; space generously
Peppers
12 in
3–4 ft
4–8 ft
4–6
Needs consistent warmth
Tomatoes
12–18 in
4 ft
8–12 ft
2–4
Support structures needed
Cucumbers
12 in
4 ft
8 ft
4–6
Vertical trellising saves space
Zucchini
12 in
4 ft
8–12 ft
2–3
Sprawling; plan space carefully
Carrots
12–18 in
3–4 ft
4–8 ft
32–48
Loose, deep soil essential
Garlic
10–12 in
3–4 ft
4–8 ft
24–36
Fall planting, summer harvest
How to Read This Chart for Your Raised Bed Garden Layout
Shallow Beds (6–8 Inches): Leafy Greens and Fast Crops
A 6-inch depth is the entry-level option. It suits lettuce, radishes, spinach, and many herbs beautifully. If you're brand-new to gardening, a 4×4×0.5 foot bed is genuinely all you need to grow a continuous supply of salad greens through spring and fall.
Shallow beds are also the lightest to build, easiest to move, and least expensive to fill with quality soil. For urban micro-gardeners working with rooftop spaces, balconies, or small patios, shallow beds extend your growing options without structural weight concerns.
One important point: even "shallow" raised beds should use high-quality, loose growing medium. Compacted or heavy soil in a 6-inch bed defeats the purpose entirely.
Medium Beds (10–12 Inches): The All-Purpose Workhorse
The 12-inch depth is the single most versatile option on this list. It accommodates the majority of common garden vegetables including kale, peppers, bush beans, cucumbers, garlic, and even some carrot varieties if you choose shorter cultivars.
For most families, a 4×8×12-inch raised bed covers roughly 75% of what they want to grow in a single structure. This is why the 4×8×2 foot format (24 inches deep) has become the de facto standard for serious home growers—the extra depth handles virtually everything.
An 8×4×2 foot raised garden bed from Anleolife, for instance, provides enough volume for full-depth tomato and carrot growing while still remaining compact enough for a typical suburban side yard. Built from heavy-gauge galvanized steel, these beds are rated for a 20-year lifespan, meaning your investment in quality soil and structure pays dividends across decades of growing seasons.
Deep Beds (18+ Inches): Root Crops and Long-Term Perennials
Carrots and parsnips are the most demanding crops on this list in terms of depth. Shallow soil forces these roots to fork, twist, and stay stubby. If you want picture-perfect, full-length carrots, 18 inches of loose, stone-free growing medium is non-negotiable.
Deep beds also make sense for perennial installations—asparagus, for instance, needs undisturbed soil for 2–3 years before producing its first harvest, and a deep, permanent bed structure is the ideal home for it.
Matching Bed Length to Your Yard's Shape
Standard bed lengths run in multiples that make material use efficient: 4, 6, 8, and 12 feet are the most common. Here's a quick spatial guide:
4×4 ft: Ideal for patios, balconies, and corner spots. Best for herbs and leafy greens.
4×8 ft: The most popular all-purpose size. Fits comfortably in most suburban side yards and grows a wide variety of crops.
3×12 ft: Suited for gardeners with more space who want to grow larger quantities or include trellised crops like tomatoes and cucumbers in the same bed.
3×6 ft: A good narrow option for along fences or between pathways.
Companion Planting Considerations Within Your Raised Bed Planting Layout
Once you've selected your bed dimensions, companion planting lets you maximize every square inch. Classic combinations that work particularly well in raised beds include:
Tomatoes + Basil: Basil is thought to improve tomato flavor and repel aphids. Both thrive at 12-inch depth.
Carrots + Lettuce: Fast-growing lettuce fills space while slow-maturing carrots develop below. Uses full vertical depth efficiently.
Cucumbers + Radishes: Radishes deter cucumber beetles. Their shallow roots coexist without competition.
Beans + Kale: Beans fix nitrogen that heavy-feeding kale depletes from soil.
Thoughtful companion planting in a well-sized raised bed often eliminates the need for synthetic fertilizers—a major advantage for eco-conscious growers.
Configuring Multiple Beds: Designing Your Full Raised Bed Layout
When you're ready to move beyond a single bed, layout planning becomes its own skill. Here are three proven multi-bed configurations for different yard types.
The Row Configuration (Best for Rectangular Yards)Two or three beds running parallel, oriented east-to-west so taller crops on the north end don't shade shorter ones to the south. Allow 24 inches between rows. A 2-bed setup with one 8×4×1-foot shallow bed for greens and one 8×4×2-foot deep bed for tomatoes and root crops covers most family needs.
The U-Shape Configuration (Best for Corner Spaces)Three beds arranged in a U-shape create a central work area that gives access to all beds without walking around. This configuration works exceptionally well for empty nesters or retirees who want to minimize steps and physical strain while maintaining high-yield growing.
The Tiered Configuration (Best for Sloped Yards)Stepped beds on a gentle slope both address the terrain and create a visually attractive garden feature. Each tier functions independently with its own soil depth, allowing different crop categories to occupy each level.
ALT: Diagram of three raised bed garden layout options including row, U-shape, and tiered configurations matching yard space to popular crops
Advanced Considerations: What Most Sizing Guides Leave Out
Accounting for Soil Settlement
Freshly filled raised beds settle—sometimes dramatically. A bed filled to the brim with a quality growing mix may sink 2–4 inches within the first growing season as the organic matter decompresses. This is normal and healthy. However, it means your effective depth is lower than your bed height in year one.
Plan for this by slightly overfilling new beds, or by selecting a bed height 2–3 inches taller than your minimum crop requirement. Over time, as you amend with compost annually, bed volume stabilizes.
The Width-Access Equation for Aging Gardeners
For retirees and those with limited mobility, the standard 4-foot-wide recommendation deserves extra scrutiny. If you're working from a seated position or using a gardening stool, 3 feet wide is often more practical. Pair that with a taller bed height—24 inches or more—to reduce bending entirely. Ergonomic bed design is one of the most impactful quality-of-life improvements for older gardeners.
Common Misconception: Bigger Is Always Better
Many new gardeners assume that a larger bed automatically produces more food. In practice, a well-managed 4×8 bed often outperforms a neglected 4×12. The key variable is attention and soil quality, not raw square footage. Start with the minimum size your crops require, manage it well, and expand once you've established confident routines.
Relationship Between Bed Sizing and Water Efficiency
Deeper beds hold moisture longer because the soil mass is greater. This is a genuine advantage in hot climates like Texas, California, and Florida—where Anleolife's warehouse network supports fast delivery to home gardeners in exactly these regions. A deep 18-inch bed may need significantly less frequent watering than a shallow 6-inch bed in the same summer heat. For water-conscious gardeners, investing in deeper beds often pays off in reduced irrigation needs.
Frequently Asked Questions FAQ
Q1: How do I choose between a 4×4 and a 4×8 raised bed for my first garden?
The 4×4 is ideal if space is genuinely tight—balconies, small patios, or a single corner of a yard—and you plan to grow primarily greens and herbs. The 4×8 is the better starting point for most families because it offers enough room to grow 3–4 different crop types simultaneously, making meal planning more practical. If you have the space, starting with a 4×8 at 18–24 inches deep gives you flexibility to grow almost anything on the chart above without needing a second bed immediately.
Q2: Is a 6-inch raised bed deep enough for growing tomatoes?
No—6 inches is insufficient for tomatoes. Tomatoes develop root systems that extend 18–24 inches deep under optimal conditions. In a 6-inch bed, roots quickly hit the native soil beneath, which may be compacted or poorly structured. This leads to water stress, nutrient deficiencies, and reduced fruit production. For tomatoes, aim for a minimum of 18 inches of quality growing medium, and if you're growing indeterminate varieties, 24 inches provides significantly better results.
Q3: How long does a metal raised garden bed last, and is the investment worth it?
High-quality galvanized steel raised beds—like those in Anleolife's lineup—are rated for a 20-year lifespan. Over that period, you'll amend and refresh the soil many times, but the bed structure itself requires virtually no maintenance. Compared to untreated wood beds that may need replacement every 5–7 years, metal beds offer a dramatically better long-term cost-per-season. For families making a sustained investment in home food growing, metal beds are the most economical choice over time.
Summary
Selecting the right raised bed size isn't a minor logistical detail—it's the architectural decision your entire garden is built around. Three core principles should anchor every sizing choice:
Match depth to root requirements: Shallow crops in shallow beds, deep crops in deep beds. Violating this rule is the number-one cause of underperforming raised gardens.
Respect ergonomic width limits: A 4-foot maximum width protects your soil structure and your back equally. Narrower is better for limited-mobility growers.
Plan for growth, not just today: A modular approach—starting with one well-chosen bed and expanding strategically—outperforms an oversized setup that's hard to manage and maintain.
The 12-crop sizing chart in this guide gives you a practical, data-driven reference point for every major decision in your raised bed garden layout. Whether you're planting your first 4×4 herb bed or designing a full multi-bed raised bed layout for a suburban backyard, the same principles apply: match dimensions to crops, prioritize access, and invest in structures built to last.
Your next step is simple: measure your available yard space today, cross-reference your priority crops against the chart, and select your bed configuration. The best time to start is now—planting season waits for no one.
Start Growing with Anleolife
Nationwide U.S. warehouse network: Strategically located in California, Texas, Florida, New York, Illinois, and Washington to ensure delivery within 3–8 business days—so your garden upgrade plans never have to wait.
Multi-channel sales network: Products are available on major e-commerce platforms including Amazon, Walmart, Home Depot, Lowe's, and Wayfair, as well as the official website Anleolife.com, providing consistent quality assurance and after-sales service.
Three core scenarios: Planting (metal raised garden beds, soil systems), Raising (chicken coops, rabbit hutches), and Beautification (decorative accessories, pathway systems)—meeting complete needs from functionality to aesthetics.
We understand that an ideal garden is not built overnight, but gradually improved over time. Our modular product design allows flexible expansion based on your needs—from your first 8×4×2 garden bed to a fully integrated planting-and-raising ecosystem. Anleolife's metal raised beds carry a 20-year lifespan rating, so every dollar you invest today continues working for your family across decades of growing seasons. We grow with you every step of the way.
References
This article is based on the following official materials (as of January 2026):
[USDA]. "USDA Home Gardening and Local Food Resources." https://www.usda.gov/
[UC ANR]. "Vegetable Research and Information Center – UC Agriculture and Natural Resources." https://ucanr.edu/
[OSU Extension]. "Raised Bed Gardening – Oregon State University Extension Service." https://extension.oregonstate.edu/
[EPA]. "Safer Choice: Growing Food at Home and Soil Safety Guidance." https://www.epa.gov/
Note: Gardening standards and recommendations may be updated seasonally. Please consult the latest official extension publications or a local Master Gardener program for region-specific guidance.
About Anleolife
Anleolife is a leading outdoor garden solutions provider in North America, dedicated to offering a full-scenario product ecosystem for home gardening enthusiasts, covering planting, raising, and garden beautification. Since its founding, we have upheld our brand mission, "Made for Garden Life," continuously innovating products and optimizing services to help hundreds of thousands of users upgrade their gardens, reconnect with nature, and enjoy a better garden lifestyle.

How to Build a Complete Backyard Garden for Under $1,000 This Summer
on Apr 27 2026
ALT: Complete backyard garden build under $1,000 featuring raised bed garden layout with vegetables and pathway lighting
How to Build a Complete Backyard Garden for Under $1,000 This Summer
Key Conclusion: Building a complete backyard garden doesn't require a massive budget or professional landscaping crew. With a smart raised bed garden layout, thoughtful raised bed planting layout, and a prioritized raised bed layout plan, most homeowners can create a fully functional, beautiful outdoor growing space for under $1,000. The key lies in choosing durable, long-lasting materials, focusing on high-impact zones first, and investing in modular systems that grow alongside your needs — not your spending.
Summer is the perfect season to stop dreaming about fresh tomatoes and actually grow them. Whether you're transforming a neglected corner of the yard into a productive vegetable patch or creating a full garden ecosystem complete with raised beds, lighting, and decorative pathways, the $1,000 budget is more powerful than most people realize.
Three principles will guide this entire article: spend strategically on durable infrastructure, start with a layout that scales, and prioritize elements that deliver both function and beauty. From galvanized steel raised beds to solar pathway lights, every dollar can work harder than you expect — and Anleolife's complete product ecosystem makes it surprisingly achievable.
Who This Guide Is For
✅ Applicable Scenarios:
Homeowners with an unused backyard, patio, or side yard who want to grow their own food this season
Urban micro-gardeners and renters with defined outdoor spaces who want a modular, movable garden setup
Empty nesters and retirees looking to build a manageable, low-maintenance garden they can maintain solo
Eco-conscious families wanting a sustainable, long-term growing system without constant replacement costs
❌ Not Applicable/Cautions:
Large-scale market gardens or homesteads requiring industrial-grade irrigation infrastructure (beyond the scope of a $1,000 residential budget)
Households with active soil contamination issues who require full remediation before any in-ground or raised-bed growing can safely begin
Those expecting an instant result without any physical setup effort — even a well-planned garden requires a weekend of hands-on assembly
Why So Many Backyard Gardens Fail Before They Even Start
The number one reason backyard garden projects stall isn't motivation — it's the feeling that it costs too much, requires too much expertise, or demands a plan so complicated that starting feels overwhelming.
According to the National Gardening Association, home food gardening has surged consistently over the past several years, with millions of new households starting a garden annually. Yet a significant portion of those new gardeners don't return the following year. The reason? Poor planning, underinvestment in quality materials, and layouts that don't actually fit how families use their outdoor space.
The raised bed revolution has changed this equation dramatically. Modern raised bed systems — particularly galvanized steel raised beds — offer a structured, contained, and highly manageable alternative to traditional in-ground gardening. They improve drainage, warm up faster in spring, reduce weed pressure, and allow you to control soil quality precisely. Most importantly, they give you a clean, defined raised bed layout that's easy to plan on paper before you commit a single dollar to the ground.
The challenge has always been cost. A single cedar raised bed from a home improvement store can run $150–$300. Add soil, amendments, hardware, tools, and lighting, and many gardeners find themselves well over $1,500 before they've planted a single seed. This guide is specifically designed to avoid that trap — showing you how galvanized steel, smart layout planning, and a modular product approach can keep the total well under $1,000 while actually building something better.
For homeowners in wet climates, material selection becomes even more critical. Which materials are best for raised beds in wet climates? The short answer: galvanized steel outperforms wood in high-moisture environments by resisting rot, warping, and fungal degradation that typically destroys wooden beds within a few seasons. More on this below.
Your Complete $1,000 Backyard Garden Build: Step-by-Step
Three-Step Quick Start
Step 1: Map Your Space and Define Your Layout
Before spending a dollar, spend 30–60 minutes mapping your yard. Measure available space, note sun exposure throughout the day (vegetable gardens need 6–8 hours of direct sunlight), and mark any utility lines, drainage slopes, or shaded zones. Sketch your raised bed planting layout on graph paper or a free app. Decide how many beds you want, their orientation relative to the sun, and where pathways will run. This single step prevents the most common and costly beginner mistake: buying materials before understanding the space.
Step 2: Prioritize Your Budget Across Four Categories
Divide your $1,000 across four zones: Infrastructure (raised beds and soil — your largest investment), Growing Supplies (seeds, transplants, amendments), Tools and Storage, and Beautification (lighting, pathway materials, decorative elements). A sensible allocation for most first-time builders looks like this: infrastructure at roughly 50–55% of the total, growing supplies at 20–25%, tools and storage at 10–15%, and beautification at 10–15%. Keeping these ratios in mind while shopping prevents overspending in one area at the expense of another.
Step 3: Build Beds First, Then Layer In the Extras
Assemble your raised beds and fill them with quality soil before purchasing anything else. Getting beds into the ground and soil amended in time for summer planting is your primary deadline. Once beds are set and seeds are in, you have the entire growing season to add pathway lighting, decorative accessories, tool storage, and other beautification elements — many of which go on sale as the season progresses.
Comparing Your Core Material Options for Raised Beds
Choosing the right raised bed material is the single most consequential decision in your budget build. Here's how the three most common options stack up:
Comparison Dimension
Galvanized Steel
Cedar/Redwood
Composite/Plastic
Lifespan
Up to 20 years
5–10 years (varies by climate)
10–15 years (UV degradation)
Performance in Wet Climates
Excellent — no rot, no warping
Poor to moderate — prone to rot
Good — moisture resistant
Initial Cost
Moderate
Moderate to high
Low to moderate
Aesthetic Appeal
Clean, modern, professional
Warm, natural
Utilitarian
Soil Heating
Excellent — warms soil faster
Moderate
Variable
Assembly
Easy — modular panels
Moderate — requires tools
Easy
Maintenance
Very low
High — annual sealing recommended
Low
Eco/Safety
Safe for food growing
Safe
Variable — check certifications
Are galvanized steel raised beds worth the cost? Absolutely — and the numbers tell the story clearly. A galvanized steel bed from Anleolife carries a lifespan of up to 20 years, which means the per-year cost is dramatically lower than wooden alternatives that may need replacement within a single decade. In wet climates like the Pacific Northwest, Florida, or the Great Lakes region, the case for galvanized steel becomes even stronger: wood rots, swells, and warps, requiring costly replacement cycles that quickly erode any initial savings.
Beyond longevity, galvanized steel warms soil earlier in the season (critical for tomatoes and peppers), provides a clean aesthetic that elevates the visual quality of the entire yard, and requires virtually zero maintenance beyond occasional rinsing.
Building Your Raised Bed Garden Layout: Design Principles That Work
Orientation and Spacing
The foundation of any successful raised bed garden layout is sun orientation. In the Northern Hemisphere, beds should run north-to-south to give all plants equal sun exposure throughout the day and prevent taller crops from shading shorter ones. Leave at least 18–24 inches between beds for comfortable walking and tool access — wider if you're using a wheelbarrow regularly.
A classic layout for a first garden: two to three rectangular beds arranged in a parallel configuration with a central pathway. This maximizes growing area, simplifies irrigation runs, and creates a natural visual focal point in the yard. If space allows, consider a U-shaped arrangement that lets you access all beds from a central standing position — ideal for gardeners with limited mobility.
Soil Filling Strategy
Soil is where first-time gardeners most commonly underspend — and then suffer for it. A high-quality raised bed mix should drain well, retain moisture, and provide rich organic matter. The traditional "Mel's Mix" (equal parts compost, vermiculite, and peat moss or coco coir) remains a gold standard for raised beds. Budget approximately $150–$200 for soil in a two-to-three bed setup, and don't be tempted to fill the bottom with subsoil from the yard. The investment in quality growing medium pays dividends in yield and plant health every season.
What to Plant in Your First Season
For summer starts, prioritize high-yield, fast-maturing crops that reward beginners: cherry tomatoes, bush beans, summer squash, cucumbers, basil, and kale. These plants establish quickly, produce abundantly, and help newer gardeners stay motivated through visible results. Leave one section of your raised bed planting layout for herbs — they require minimal space, produce continuously, and make every meal better from the first harvest.
Pest Management and Insect Netting
One element often overlooked in budget planning is pest protection. Top rated insect netting materials for vegetable gardens typically fall into two categories: fine mesh netting (for aphids, whiteflies, and small insects) and heavier bird netting (for larger pests). Fine row cover fabric is the most versatile option — it protects against insects, provides light frost protection, and allows water and sunlight through. Budget $20–$40 for a basic roll, and use it especially over brassicas (cabbage, broccoli, kale) that attract caterpillars.
Tool Storage in Wet Climates
Leaving hand tools exposed to summer rain accelerates rust and degrades wooden handles quickly. Recommended tool storage for wet climates should prioritize weather-resistant enclosures: waterproof resin sheds, galvanized steel tool organizers, or wall-mounted pegboard systems inside a covered structure. For a budget build, a compact wall-mounted tool rack on a covered fence or garage exterior works well. Budget $30–$60 for basic tool organization — it protects a $100+ investment in quality hand tools.
Lighting and Beautification: Making It a Space You Want to Be In
A functional garden becomes a lifestyle garden when you add lighting and decorative elements. Top-rated string lights and pathway lighting options for backyard gardens generally fall into two categories: solar-powered pathway stakes (ideal for defining bed edges and walkways) and overhead string lights (for ambiance in an adjacent seating area).
Solar pathway lights are a particularly smart budget choice — no wiring required, they charge during the day and automatically illuminate at dusk, and a set of 8–12 lights typically costs $25–$50. Overhead string lights strung between fence posts or garden stakes create an inviting evening atmosphere and can be found in weatherproof versions for $30–$60. Together, these lighting elements transform a daytime workspace into an evening retreat — making the garden a place you actually visit and enjoy throughout the week.
Anleolife's beautification accessories — including decorative pathway systems and garden accents — are designed to complement raised bed setups while keeping the overall aesthetic cohesive and intentional. These aren't afterthoughts; they're the details that make guests (and you) say "wow" when they step into the backyard.
ALT: Galvanized steel raised bed garden layout with solar pathway lighting and decorative pathway systems creating a beautiful backyard garden space
Advanced Planning: Mistakes to Avoid and Myths to Debunk
Special Situations Worth Planning For
Sloped yards: If your backyard slopes, don't try to work against the grade — work with it. Stagger beds at different elevations using taller raised beds on the downhill side. Galvanized steel beds handle uneven terrain better than wooden frames, which tend to twist and separate when set on irregular ground.
Heavy clay or compacted soil underneath: One of the greatest advantages of raised beds is that you don't need good native soil — you're building a new growing environment above it. However, if you plan to place beds directly on clay, consider a layer of cardboard underneath (it suppresses weeds and decomposes over time) and ensure your bed walls are tall enough to give roots adequate depth without reaching the compacted layer below.
Watering in dry climates or during summer heat: For gardeners in California, Texas, or other hot, dry regions, consider laying drip irrigation tape inside your beds before filling them with soil. A basic drip kit for two to three beds typically runs $40–$70 and dramatically reduces water usage while improving consistency. It's far easier to install before the bed is filled than to retrofit afterward.
Common Misconceptions
Myth: "A bigger garden is always better for beginners." Reality: Overbuilding a first garden is one of the top causes of burnout. Two or three well-maintained raised beds will outperform six neglected ones every time. Start with what you can realistically manage, then expand once you understand your routines.
Myth: "Galvanized steel leaches dangerous metals into food." Reality: Modern food-safe galvanized steel uses zinc coating that does not leach harmful levels of heavy metals into soil at the concentrations found in garden beds. Multiple university extension studies have found galvanized raised beds safe for vegetable production. Zinc is actually a micronutrient that plants need in small quantities.
Myth: "Under $1,000 means you're compromising on quality." Reality: The opposite is true when you invest in the right materials. A galvanized steel bed with a 20-year lifespan costs far less per year than cheap alternatives that need annual replacement.
Frequently Asked Questions FAQ
Q1: How do I choose the best raised bed garden layout for a small backyard?
For small backyards, prioritize accessibility over quantity. A classic layout of two to three rectangular beds in a parallel or L-shaped arrangement gives you significant growing area while keeping pathways clear. Position beds where they receive the most sun — typically the south or southeast corner of most yards. Keep bed widths manageable so you can reach the center from either side without stepping in. A compact, well-maintained layout consistently outperforms an overcrowded one.
Q2: Are galvanized steel raised beds safe for growing vegetables long-term?
Yes. Galvanized steel raised beds are considered safe for vegetable gardening by multiple university extension programs and have been widely used in community and home gardens for decades. The zinc coating used in galvanization is stable under normal soil conditions and does not leach harmful levels of metals into growing medium. Anleolife's galvanized steel beds are designed for long-term residential use and are built to last up to 20 years — making them both a safe and economical long-term investment.
Q3: How long does it take to build a complete backyard garden, and what does it cost?
With focused effort, most homeowners can complete the physical build — assembling raised beds, filling with soil, and setting up basic lighting — over a single weekend. Planning and material sourcing typically takes one to two weeks before that. Total costs under $1,000 are achievable when you prioritize galvanized steel beds for durability, buy soil in bulk where possible, and phase in beautification elements over the season. Delivery from Anleolife arrives in 3–8 business days, so ordering materials a week to ten days before your build weekend gives comfortable lead time.
Summary
Building a complete backyard garden for under $1,000 is not just achievable — it's one of the smartest home investments you can make this summer. Let's revisit the three core principles:
Invest in infrastructure that lasts. A galvanized steel raised bed system with a 20-year lifespan costs far less per growing season than cheaper alternatives. When you calculate the real cost of repeated replacements, quality wins every time.
Design a raised bed layout that scales. Starting with a compact, well-designed raised bed garden layout gives you a functional garden immediately and a clear roadmap for expansion. Modular systems like those offered by Anleolife make it easy to add beds, accessories, and features as your confidence and enthusiasm grow.
Build a space you actually want to use. Pathway lighting, decorative accessories, and thoughtful design aren't luxuries — they're what convert a garden from a chore into a lifestyle. When your backyard is beautiful and inviting, you spend more time there, your plants get more attention, and the whole experience becomes genuinely enjoyable.
Your next step: sketch your raised bed planting layout this week, measure your available space, and identify your sun zones. Then let Anleolife help you bring it to life.
Start Your Garden Build with Anleolife
Nationwide U.S. warehouse network: Strategically located in California, Texas, Florida, New York, Illinois, and Washington, Anleolife ensures delivery within 3–8 business days — so your garden upgrade plans never have to wait for the growing season.
Multi-channel availability: Products are available on major platforms including Amazon, Walmart, Home Depot, Lowe's, Wayfair, and directly at Anleolife.com — offering consistent quality assurance and after-sales support wherever you prefer to shop.
Three complete garden scenarios: Planting (metal raised garden beds, soil systems), Raising (chicken coops, rabbit hutches), and Beautification (decorative accessories, pathway systems) — meeting your complete needs from functionality to lasting aesthetic appeal.
We understand that an ideal garden is not built overnight — it's gradually improved over time. Our modular product design allows flexible expansion based on your needs, from your first raised garden bed to a fully integrated planting-and-raising ecosystem. We grow with you every step of the way. Visit Anleolife.com to explore the full collection and start building this summer.
References
National Gardening Association. "Garden to Table: A Guide to Gardening for Food".https://garden.org/
University of California Agriculture and Natural Resources. "Raised Bed Gardening".https://ucanr.edu/
U.S. Department of Agriculture (USDA). "Home Gardening and Food Safety Resources".https://www.usda.gov/
Penn State Extension. "Building and Managing Raised Garden Beds".https://extension.psu.edu/
Colorado State University Extension. "Raised Bed Gardening".https://extension.colostate.edu/
Note: Standards and recommendations may be updated. Please check the latest official documents or consult professional advisors for current guidance.
About Anleolife
Anleolife is a leading outdoor garden solutions provider in North America, dedicated to offering a full-scenario product ecosystem for home gardening enthusiasts, covering planting, raising, and garden beautification. Since its founding, we have upheld our brand mission, "Made for Garden Life," continuously innovating products and optimizing services to help hundreds of thousands of users upgrade their gardens, reconnect with nature, and enjoy a better garden lifestyle.

DIY Drip Irrigation for Raised Beds 2026: Build a $50 Auto-Watering System (Step-by-Step Photos)
on Apr 26 2026
ALT: Step-by-step DIY drip irrigation system built for under $50 on a metal raised garden bed in a home garden
Why Every Raised Bed Gardener Needs an Automatic Drip System in 2026
Key Conclusion: A DIY drip irrigation system for raised beds is one of the smartest investments a home gardener can make in 2026. For roughly $50 in materials, you can automate watering, cut water usage by up to 50%, and dramatically improve plant health—all without hiring a professional. Whether you're managing a single raised bed garden layout or a multi-bed raised bed planting layout, a custom drip system delivers water precisely where roots need it most, turning a weekend project into a decades-long garden asset.
If you've ever come home from a long weekend to find your lettuce wilted or your tomatoes cracked from uneven watering, you already understand the pain point. Manual watering is inconsistent, time-consuming, and surprisingly wasteful. The good news? Building your own drip irrigation system for a raised bed is easier, cheaper, and more rewarding than most gardeners expect.
In 2026, the combination of affordable micro-irrigation hardware, smart timers under $20, and durable metal raised beds designed to last 20 years has made DIY drip systems accessible to virtually every home grower—from urban balcony gardeners to retirees tending half-acre properties. This guide walks you through the entire process, from materials to final testing, with practical step-by-step instructions you can actually follow.
Who This Guide Is For
✅ Applicable Scenarios:
Gardeners with one or more metal or wooden raised beds measuring 4×4, 4×8, or larger footprints
Home growers who want to automate watering during vacations, hot summers, or busy work weeks
Eco-conscious gardeners looking to reduce water waste and lower utility bills
Urban micro-gardeners with limited outdoor time but high interest in productive harvests
Empty nesters and retirees who want a low-maintenance garden that still thrives
❌ Not Applicable/Cautions:
Gardeners in climates with freezing winters who plan to leave systems installed year-round without winterizing (pipes can crack; seasonal removal is recommended)
Beds with extremely sandy or fast-draining soil where drip emitters alone may not saturate the root zone adequately without flow-rate adjustments
Growers relying on water sources with very high mineral content, which can clog emitters over time without a filter upgrade
The Real Cost of Ignoring Irrigation in Your Raised Bed Garden Layout
Why Watering Is the #1 Raised Bed Mistake
Ask any experienced raised bed gardener what went wrong in their first season, and "inconsistent watering" is almost always near the top of the list. Raised beds drain faster than in-ground plots because of their elevated structure and well-amended soil composition. That same excellent drainage that prevents root rot also means the growing medium dries out faster—sometimes twice as fast as ground-level soil on hot summer days.
According to the USDA, inefficient home irrigation accounts for a significant portion of residential water waste in the United States, with overhead sprinklers losing up to 50% of water to evaporation and runoff. Drip irrigation, by contrast, delivers water directly to the root zone with minimal surface evaporation, making it the most efficient method for intensive raised bed planting layouts.
The Market Shift Toward Automated Home Irrigation
The home gardening boom that accelerated through the early 2020s has continued into 2026. More families are growing their own food, and with that growth comes a demand for smarter, more sustainable garden tools. Micro-drip irrigation kits have dropped significantly in price over the past five years, and programmable digital timers that once cost $40–$60 are now commonly available for $12–$20 online.
This convergence of affordability and accessibility means there's no longer a good reason to keep watering by hand—especially when a $50 DIY build can outperform systems that cost five times as much from professional landscapers.
How Your Raised Bed Layout Affects Irrigation Design
Before buying a single piece of tubing, it helps to understand how your raised bed garden layout influences your system design. A long, narrow 2×8 bed requires a single mainline with emitters spaced 12 inches apart. A wide 4×8 bed benefits from a central mainline with lateral branches running toward each side. A multi-bed layout with three or four beds arranged in rows needs a header line running along the outside with individual feeds dropping into each bed.
Understanding your raised bed layout upfront saves money, reduces tubing waste, and ensures every plant gets equal water coverage. We'll cover the specific layout-to-design mapping in the step-by-step section below.
If you're still planning your raised bed planting layout or considering upgrading your bed infrastructure, check out Anleolife's full guide on raised garden bed sizing and placement for detailed recommendations matched to common yard configurations.
Build Your $50 Drip System: Complete Step-by-Step Instructions
Three-Step Quick Start
Step 1: Gather Your Materials
Before touching a single tool, spend 20–30 minutes assembling everything you need. Your core shopping list includes: ½-inch mainline drip tubing (25–50 ft), ¼-inch micro-tubing (15–25 ft), drip emitters (0.5 or 1 GPH, quantity based on plant count), a ½-inch tubing punch, barbed connectors (elbow, tee, and end caps), a digital programmable timer, a garden hose Y-splitter (optional but useful), and a pressure regulator if your home water pressure exceeds 40 PSI. Total cost for a single 4×8 bed: approximately $35–$55 depending on your retailer and timer selection.
Step 2: Plan Your Layout Before Cutting
Lay your mainline tubing along the top of your raised bed without cutting anything yet. Mark emitter placement with a marker or small piece of tape at each plant position—typically 8–12 inches apart for vegetables, 18–24 inches for larger plants like tomatoes or peppers. This dry-run planning step takes 15–20 minutes but prevents the most common installation mistake: cutting tubing too short and running out before completing your layout.
Step 3: Connect, Test, and Program
Once tubing is cut and emitters are installed, connect the mainline to your timer, attach the timer to your outdoor spigot, and run a 5-minute test cycle. Watch every emitter to confirm water is flowing. Adjust any blocked or misaligned emitters, then program your timer. For most raised bed vegetables in summer, 20–30 minutes of drip irrigation every morning (or twice daily during heat waves) provides sufficient moisture without waterlogging.
Comparing Your Three Main System Configurations
Choosing the right system configuration depends on your raised bed layout, plant types, and how much automation you want. Here's a side-by-side comparison of the three most practical approaches for home gardeners in 2026:
Comparison Dimension
Basic Single-Bed System
Multi-Bed Header System
Smart Timer Upgrade
Best For
1–2 raised beds, beginners
3–6 beds in a row or grid
All setups, tech-savvy growers
Estimated Cost
$25–$40
$45–$80
$55–$100 (includes smart timer)
Timer Type
Mechanical or basic digital
Digital programmable
WiFi/app-controlled smart timer
Watering Precision
Good
Very Good
Excellent (weather-adjusted)
Installation Time
1–2 hours
2–4 hours
2–4 hours + app setup
Expandability
Limited
High
High
Water Savings vs. Hand Watering
30–40%
40–50%
50–60% (with rain sensors)
Skill Level Required
Beginner
Beginner–Intermediate
Intermediate
For most gardeners starting out, the Basic Single-Bed System is the perfect entry point. Once you see how well it works, upgrading to the Multi-Bed Header System for a full raised bed garden layout is a natural next step—most of your hardware carries over with minor additions.
Detailed Build Instructions: From Spigot to Soil
Choosing the Right Emitters for Your Plants
The most confusing part of drip irrigation for beginners is emitter selection. Emitters are rated by flow rate in gallons per hour (GPH). For most vegetable gardens in raised beds, 0.5 GPH emitters work well for compact plants like lettuce, herbs, and carrots. 1 GPH emitters are better for larger, thirstier plants like tomatoes, squash, and eggplant.
A simple rule: use lower-flow emitters in closely spaced plantings and higher-flow emitters for wider-spaced, heavy-fruiting crops. You can also mix emitter types within the same bed—just remember that higher-flow emitters will drain your pressure faster if you're running many simultaneously.
Step-by-Step Tubing Installation
Measure and Cut Your Mainline
Run your ½-inch mainline tubing along the inside edge of your raised bed from the inlet point (near the spigot end) to the far end. Add 6 inches of extra length to allow for end-cap fitting. Cut cleanly with sharp pruning shears or tubing cutters—avoid jagged cuts, which cause leaks.
Punch and Insert Emitters
Using your ½-inch tubing punch, create holes at each marked plant position. Insert barbed ¼-inch fittings into each hole with a firm push-and-twist motion. You'll hear a slight click when the barb seats properly. Attach your ¼-inch micro-tubing to each fitting and run it to the base of the plant, holding it in place with a small plastic stake. Trim excess tubing and attach a drip emitter to the end of each ¼-inch line.
Install the Pressure Regulator and Timer
At the spigot, thread your pressure regulator directly onto the faucet (hand-tight plus a quarter turn). Attach the digital timer to the regulator output. Connect a short section of garden hose or direct adapter from the timer to your mainline. Most standard timers accept a female garden hose connector—verify compatibility before purchasing.
Cap the End and Test
Fold the far end of your mainline over and secure with an end cap or fold-over clamp. Turn on the water manually and walk the entire line, checking every emitter junction for drips or leaks. Tighten any loose barbed connections by pressing firmly. If a barb leaks consistently, remove the tubing, wrap the barb with Teflon tape, and re-insert.
Programming Your Timer for Maximum Efficiency
Most digital timers have three programmable settings: start time, duration, and frequency. For summer vegetable growing in a raised bed, the following schedule works well for the majority of climates in the continental U.S.:
Morning watering: 6:00–6:30 AM (30 minutes)
Optional afternoon boost: 3:00–3:15 PM during heatwaves above 90°F
Frequency: Daily during peak summer; every other day in spring and fall
Avoid evening watering with drip systems, as prolonged soil moisture overnight can encourage fungal issues—though drip is already far less prone to this problem than overhead sprinklers.
Adapting the System to Different Raised Bed Planting Layouts
4×4 Square Bed: Use a single mainline running diagonally or along one edge, with ¼-inch laterals branching to all four quadrants. 8–12 emitters typically sufficient.
4×8 Rectangular Bed: Run mainline down the center length of the bed with laterals reaching 18–24 inches to either side. 12–20 emitters depending on plant spacing.
Multi-Bed Row Layout: Install a ½-inch header line running along the back of all beds. Drop individual bed feeds from tee connectors in the header. Each bed gets its own shutoff valve for independent control.
L-Shaped or Irregular Layout: Use elbow connectors at corners and plan your mainline run before cutting. Measure twice, cut once—the same rule applies to tubing as it does to lumber.
Winterizing Your System (Critical for Cold Climates)
If you live in USDA hardiness zones 6 or colder, winterizing your drip system is essential. At the end of the growing season: disconnect the timer and store indoors, drain all tubing by blowing compressed air through from the spigot end, cap or store emitters separately, and coil mainline tubing loosely for storage. Tubing stored in freezing conditions without draining will crack by spring.
This 30-minute annual task protects your $50 investment and means you're ready to re-install in minutes come spring.
ALT: Fully assembled DIY drip irrigation tubing with emitters and digital timer installed on a 4x8 metal raised garden bed for automated vegetable watering
Advanced Tips: Getting More From Your Drip System
Pair Your Drip System With the Right Raised Bed
Here's an often-overlooked truth: your drip irrigation system is only as good as the structure it's installed in. A bed with uneven walls, poor drainage, or materials that degrade quickly will undermine even the best irrigation setup. Anleolife's galvanized steel raised garden beds are engineered with this in mind—the robust wall construction maintains consistent bed geometry year after year, so your tubing layout stays in place without shifting or warping.
Because Anleolife beds are built to last 20 years, your drip infrastructure investment compounds over time. The $50 you spend on irrigation hardware today will serve the same bed through two decades of growing seasons—making the per-year cost of your entire setup remarkably low.
Add a Rain Sensor for True Automation
A basic digital timer waters on schedule regardless of weather. In a rainy week, that's wasted water and potentially overwatered plants. A rain sensor shutoff (typically $15–$25) plugs between your timer and the mainline and interrupts watering cycles automatically when rainfall exceeds a set threshold. For eco-conscious gardeners, this single upgrade pays for itself within one growing season through water savings alone.
Common Mistakes to Avoid
Mistake 1: Skipping the pressure regulator. Most home water supplies run at 60–80 PSI. Drip systems are designed for 25–30 PSI. Without a regulator, emitters blow off, connections leak, and tubing fails prematurely. A $6–$10 pressure regulator is non-negotiable.
Mistake 2: Running too many emitters on a single zone. Each emitter draws flow from your source. A standard ½-inch mainline can comfortably support 20–25 standard emitters. Running 40 emitters on one zone will result in the far-end emitters getting inadequate flow. Split large systems into two zones with a Y-splitter and separate timer channels.
Mistake 3: Burying tubing under mulch without first testing. Always run a full test cycle before applying mulch. Once tubing is buried under 2–3 inches of material, diagnosing a blocked emitter becomes a significant hassle.
Frequently Asked Questions FAQ
Q1: How much water does a drip system actually save compared to hand watering a raised bed?
Research from UC ANR and irrigation extension programs consistently shows that properly designed drip irrigation reduces water use by 30–50% compared to hand watering or overhead sprinklers. In raised beds specifically, where water must penetrate well-draining amended soil, targeted root-zone delivery from drip emitters eliminates the evaporation and runoff that account for most water loss. Over a full growing season, a single 4×8 bed with drip irrigation might use 40–60% less water than the same bed watered by hand—a meaningful savings both financially and environmentally.
Q2: Is it difficult to install a drip system if I've never done any plumbing work before?
Not at all. Drip irrigation for raised beds uses no soldering, no pipe cutting, and no special tools beyond a basic hole punch. All connections are push-fit or barbed, meaning they press together by hand. Most first-time installers complete a single-bed system in under two hours, including planning time. If you can follow a recipe, you can build this system—the steps are sequential and forgiving, and small mistakes like a misplaced emitter are easily corrected by simply relocating the punch hole and re-inserting the fitting.
Q3: How long will the drip tubing and components last, and what's the real cost over time?
Quality ½-inch polyethylene mainline tubing typically lasts 5–10 years with proper seasonal storage. Emitters and micro-tubing have similar lifespans with annual inspection and replacement of any clogged units ($0.10–$0.30 each). Your $50 initial build, amortized over 5 years, costs roughly $10 per year—or less than $1 per month—to automate watering for an entire raised bed. When paired with a durable metal raised bed built to last 20 years, the long-term cost efficiency of the complete setup is exceptional for any home gardening budget.
Summary
Building a DIY drip irrigation system for your raised beds in 2026 is one of the highest-return garden projects available to home growers. In a single weekend afternoon, for around $50 in materials, you can achieve three transformative outcomes:
1. Consistent, automated plant hydration. No more guessing whether your plants got enough water, no more wilted seedlings during a busy week, and no more overwatering that drowns roots and invites disease.
2. Significant water and cost savings. A well-designed drip system cuts water consumption by 30–50% compared to manual methods, which translates to lower utility bills and a meaningfully smaller environmental footprint over an entire growing season.
3. A scalable foundation for a complete raised bed garden layout. Start with one bed, and expand your system as you add beds. The same header line, timer, and pressure regulator that serve your first bed can support five or six beds with minimal additional investment.
Your next steps are straightforward: measure your bed dimensions, sketch your emitter layout, gather your materials, and block off a Saturday morning for installation. The system you build this weekend will water your garden reliably for years to come.
Upgrade Your Garden With Anleolife
Nationwide U.S. warehouse network: Strategically located in California, Texas, Florida, New York, Illinois, and Washington to ensure delivery in 3–8 business days—so your garden upgrade plans never have to wait.
Multi-channel sales network: Products are available on major e-commerce platforms including Amazon, Walmart, Home Depot, Lowe's, and Wayfair, as well as the official website Anleolife.com, providing consistent quality assurance and after-sales service.
Three core scenarios: Planting (metal raised garden beds, soil systems), Raising (chicken coops, rabbit hutches), and Beautification (decorative accessories, pathway systems)—meeting complete needs from functionality to aesthetics.
We understand that an ideal garden is not built overnight, but gradually improved over time. Anleolife's modular product design allows flexible expansion based on your needs—from your first 8×4×2 garden bed to a fully integrated planting-and-raising ecosystem. Our galvanized steel raised beds are built to last 20 years, making them the ideal long-term foundation for any irrigation investment you make today. We grow with you every step of the way.
References
This article is based on the following official materials (as of January 2026):
[USDA]. "Water-Efficient Irrigation and Home Garden Resources." https://www.usda.gov/
[EPA]. "Outdoor Water Use in the United States." https://www.epa.gov/
[UC ANR]. "Drip Irrigation in the Home Garden." https://ucanr.edu/
[OSU Extension]. "Watering the Vegetable Garden." https://extension.oregonstate.edu/
Note: Irrigation product specifications and water efficiency data may vary by region and product generation. Please verify current specifications with your local extension service or product manufacturer before finalizing your system design.
About Anleolife
Anleolife is a leading outdoor garden solutions provider in North America, dedicated to offering a full-scenario product ecosystem for home gardening enthusiasts, covering planting, raising, and garden beautification. Since its founding, we have upheld our brand mission, "Made for Garden Life," continuously innovating products and optimizing services to help hundreds of thousands of users upgrade their gardens, reconnect with nature, and enjoy a better garden lifestyle.
Featured collections


30" Extra Tall 10x3 ft Galvanized Steel Raised Garden Bed (Set of 6)
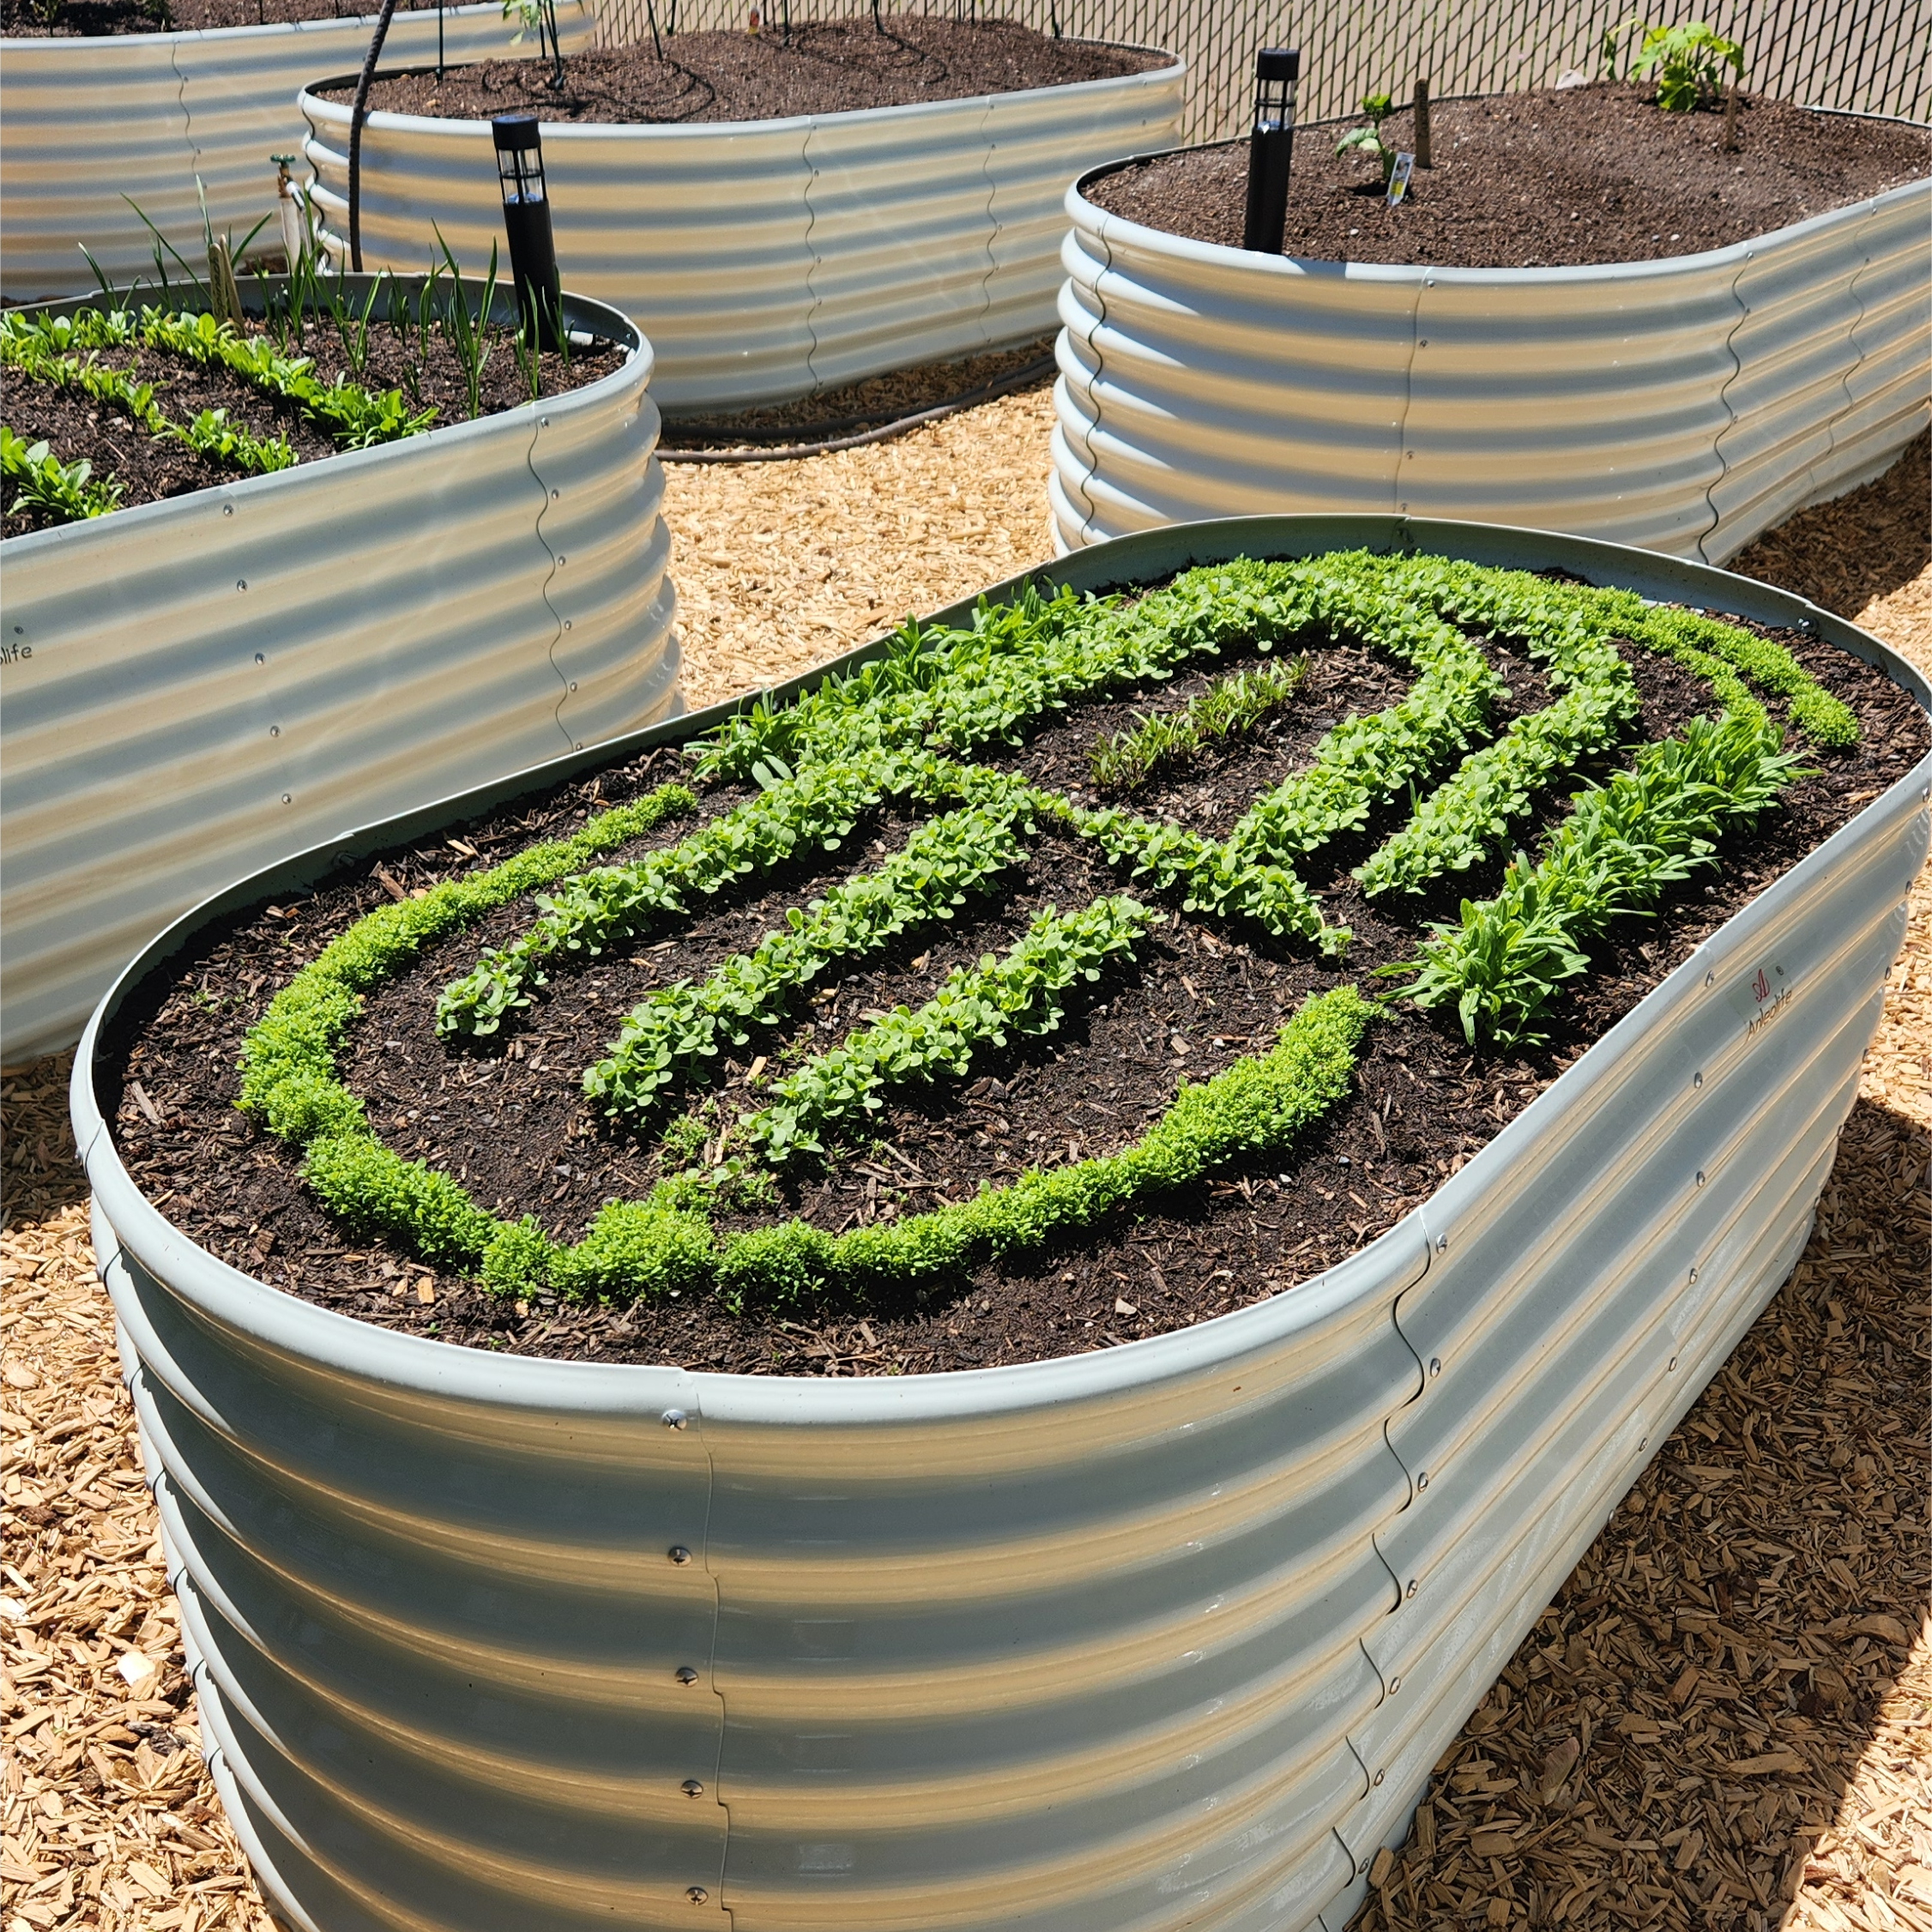
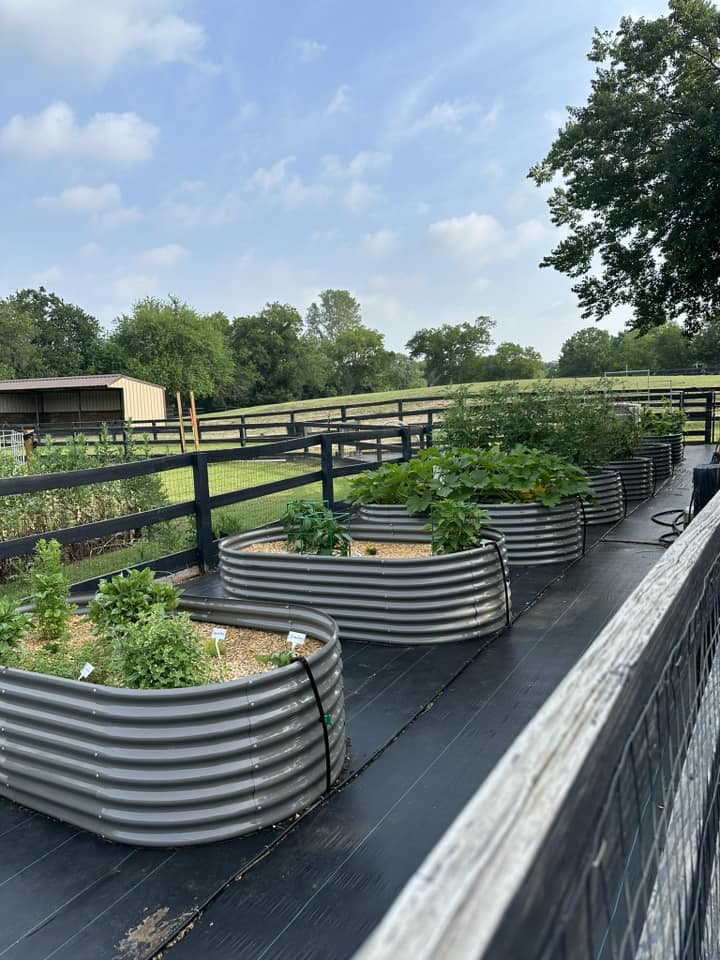
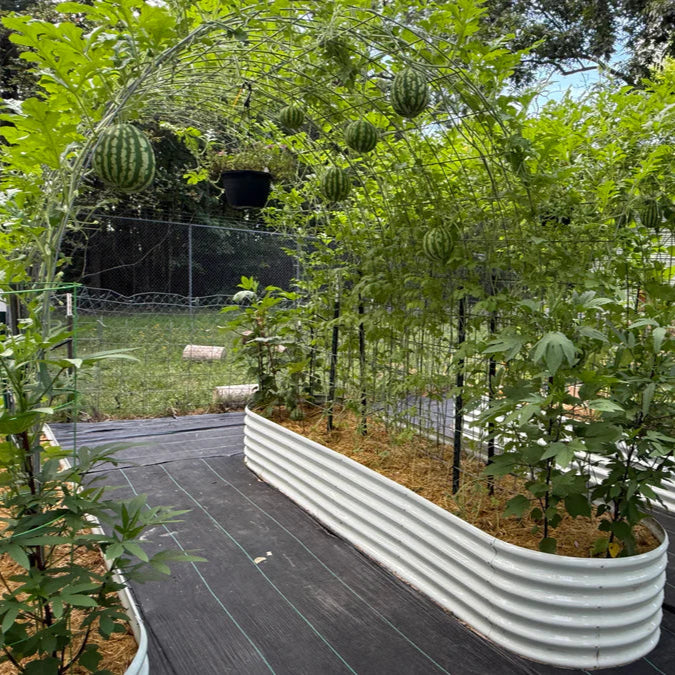

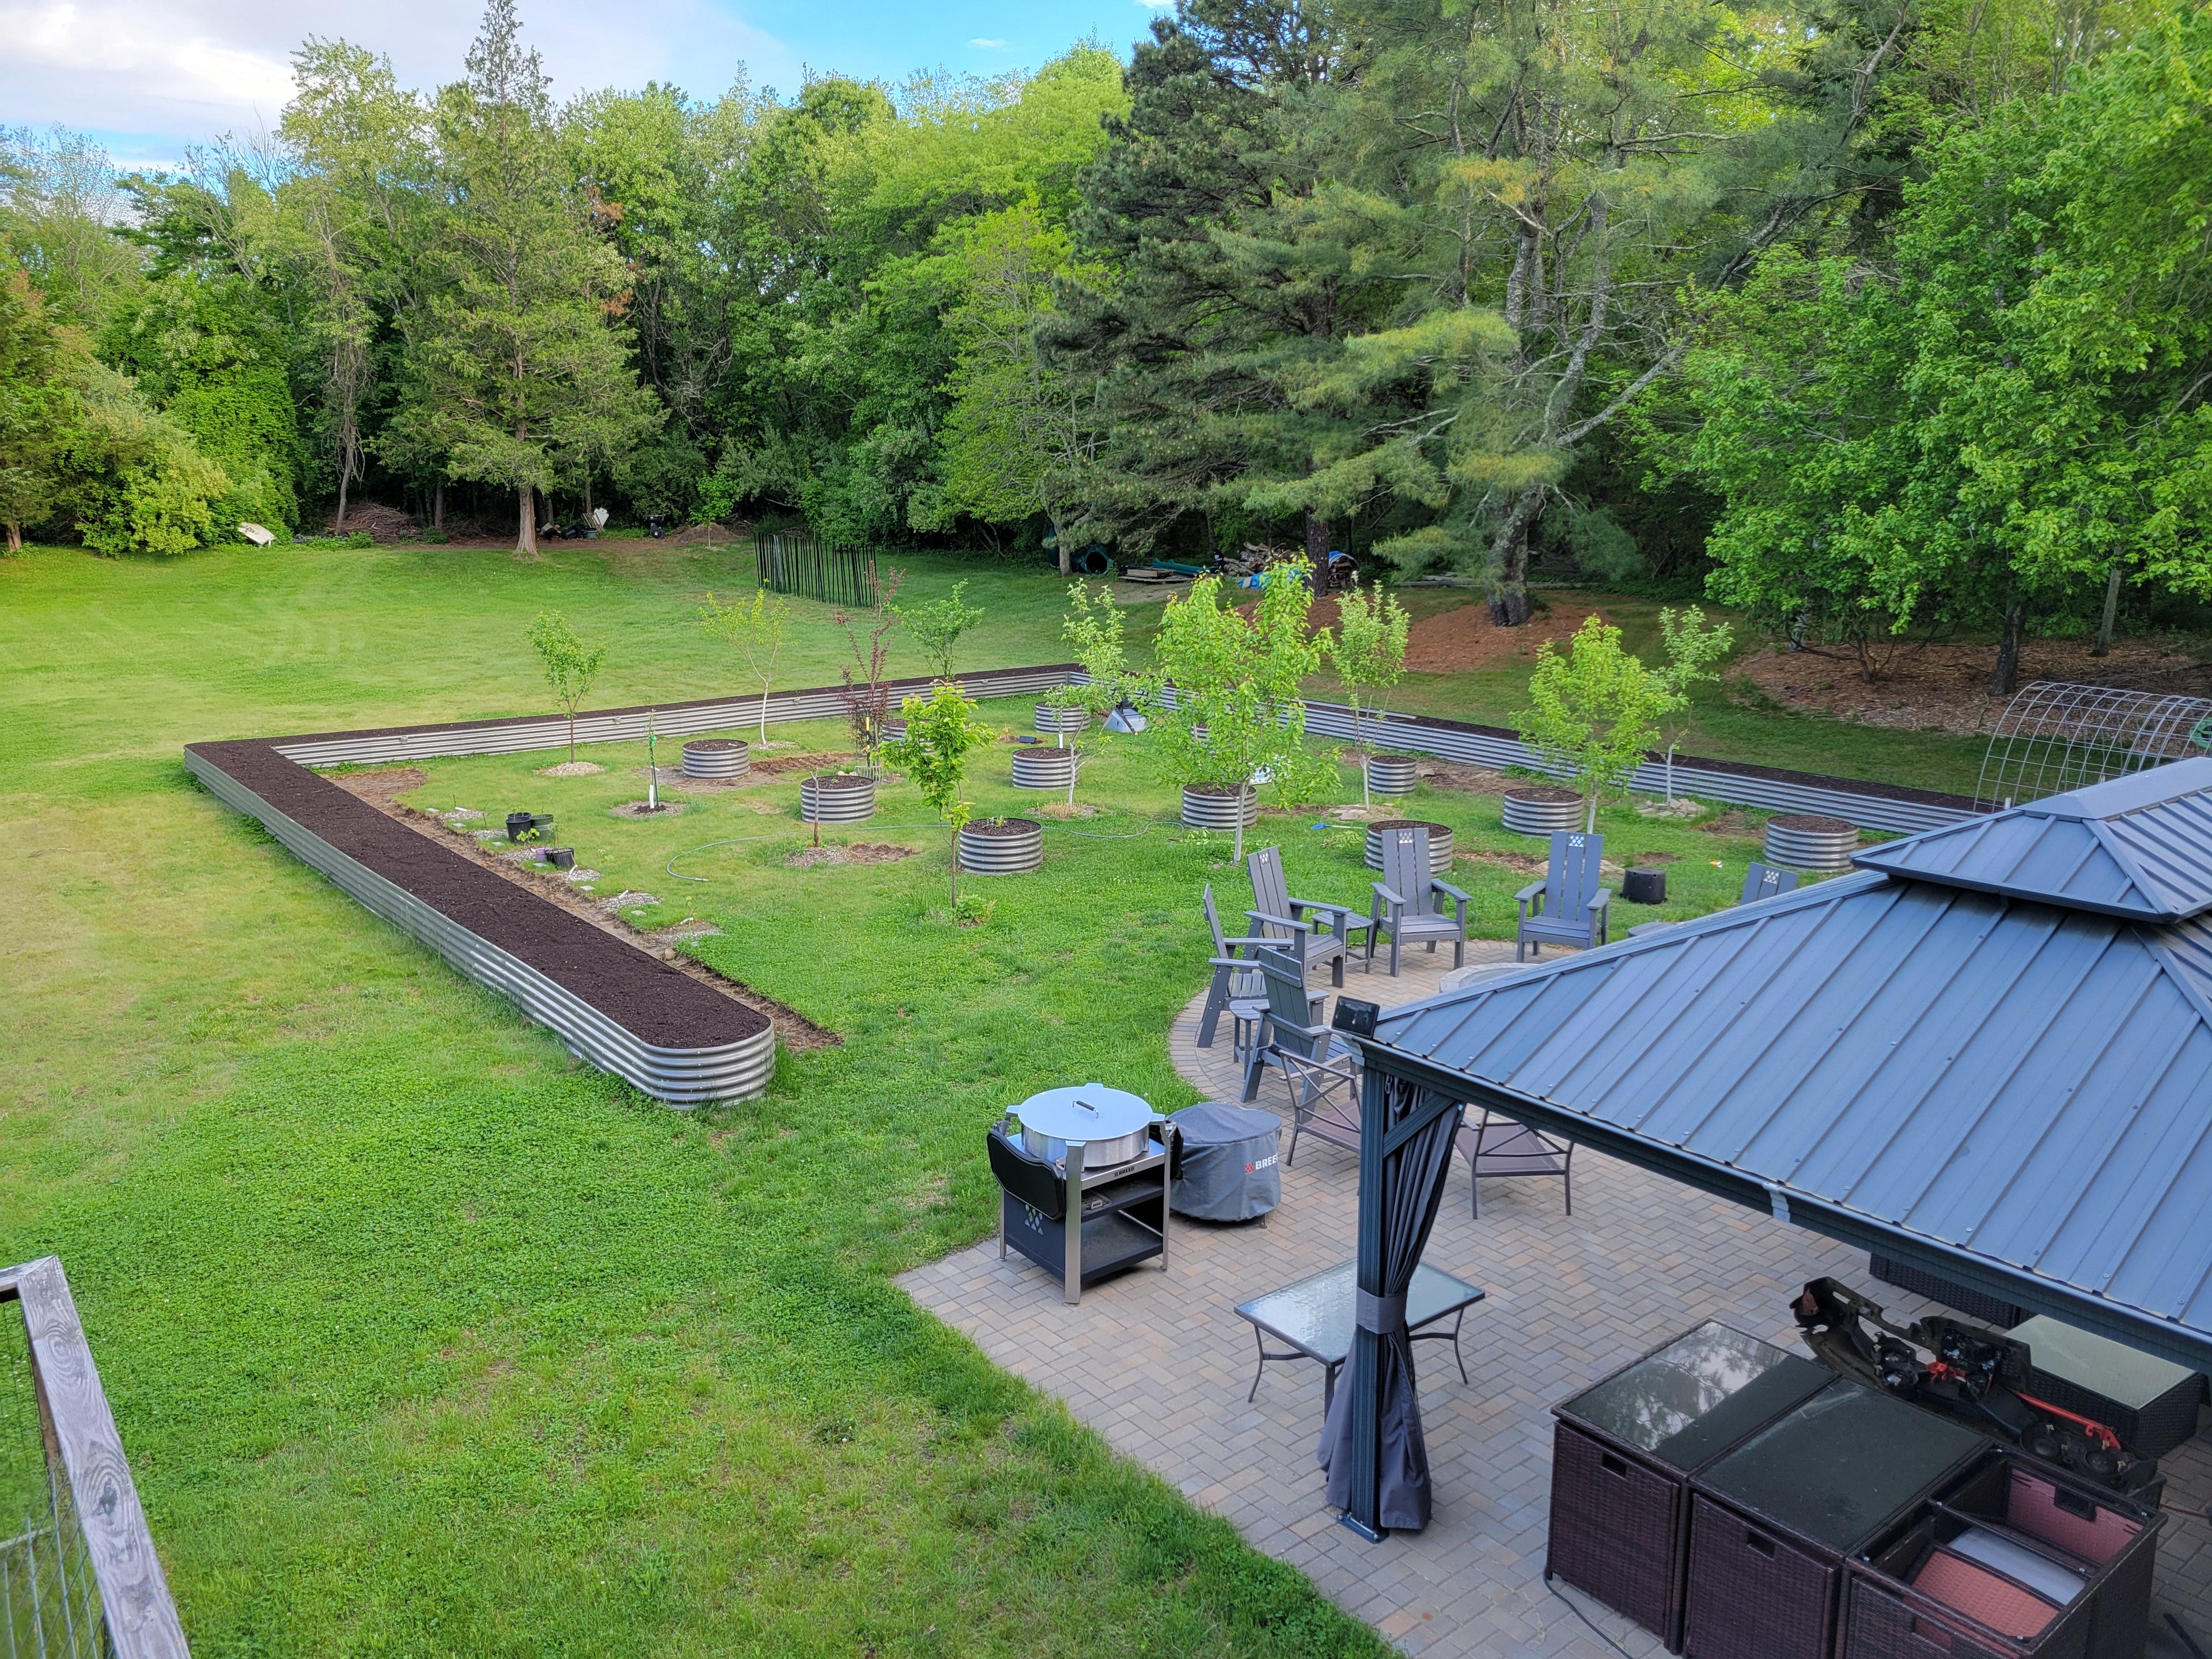

Find Us
Find Us